

Are you struggling to add a sprinkle of joy to your crochet projects? Let’s face it: the usual patterns can sometimes feel a bit… mundane. But fear not, fellow crochet enthusiasts! As an expert in hook and yarn, I’ve found the perfect solution to this all-too-common problem. It’s time to dive into the whimsical world of critter crochet!

In this post, I’m thrilled to share my top picks for 27 adorable Critter Crochet Patterns, a great way to spice up your crafting routine. These patterns are the best way to bring a personal touch to your creations, whether a snuggly bunny or a quirky octopus.
The most significant advantage of these patterns is that they’re suitable for crocheters at all skill levels – from the absolute beginners to the seasoned pros.
Each pattern is one of the easiest ways to embark on a delightful crochet journey, ensuring your finished product is not just a piece of craft but a piece of heart.
So, grab your crochet hooks, and let’s get started on this exciting adventure! Remember, the best thing you can do for your crochet portfolio is keep it fun and engaging; these critter patterns are just the ticket!
What Is Amigurumi?
Amigurumi is a delightful Japanese art form that combines crochet and knitting to create small, stuffed yarn creatures. ‘Amigurumi’ is derived from Japanese terms: ‘ami’, meaning crocheted or knitted, and ‘nuigurumi’, meaning stuffed doll.
This craft is characterized by its whimsical and endearing aesthetic, often resulting in adorable animals, fantastical creatures, or inanimate objects with cute faces.
Amigurumi appeals to children and adults, offering a charming and personalized touch to handmade toys or decorative items. Its popularity has grown globally, making it a beloved hobby for crafters and collectors.
What Are The Various Critters We Can Crochet?
The crochet world offers a diverse range of critters you can create, limited only by your imagination! Here are some popular options:
- Animals: Common favorites include dogs, cats, rabbits, bears, foxes, and elephants. These can range from realistic to cartoonishly cute.
- Aquatic Creatures: Think of adorable octopuses, jellyfish, whales, or mythical creatures like mermaids.
- Birds: From common garden birds like robins and sparrows to exotic parrots and flamingos.
- Insects and Bugs: Butterflies, bees, ladybugs, and even whimsical caterpillars.
- Dinosaurs: Perfect for those who love prehistoric creatures, including T-Rex, triceratops, and brontosaurus.
- Fantasy Creatures: Dragons, unicorns, fairies, and other mythical beings.
- Seasonal Characters: Think of pumpkins for Halloween, bunnies for Easter, or reindeer for Christmas.
- Food Items: Amigurumi isn’t limited to living creatures; crocheting food items like fruits, vegetables, or cupcakes can be fun.
- Miniature Versions of Everyday Objects: Cars, houses, or even tiny crochet versions of crochet hooks and yarn!
- Character Replicas: Characters from popular culture, movies, or cartoons, customized as crochet figures.
RELATED: 25 Delightful Crochet Jellyfish Patterns For Sea Lovers
Various Stitches To Crochet Critters
Creating crochet critters involves using a variety of stitches, each contributing to the texture, shape, and overall appearance of the finished project. Here’s a list of common stitches used in crocheting critters, along with a brief explanation of each:
- Chain Stitch (ch): This is the most basic crochet stitch and is often used to begin patterns. It forms the foundation row for other stitches.
- Slip stitch (sl st): Used to join stitches together without adding height, and it’s perfect for finishing edges or creating flat seams in amigurumi.
- Single crochet (sc): A fundamental stitch in amigurumi, single crochet is compact and tight, making it ideal for the dense fabric needed in stuffed animals.
- Half Double crochet (hdc): This stitch is slightly taller than a single crochet and creates a bit more stretch and flexibility, which is helpful for slightly looser parts of critters.
- Double Crochet (DC): Double crochet is taller and creates a looser fabric. It’s not commonly used in amigurumi but can be helpful for more drape parts.
- Treble Crochet (tr): Even taller than double crochet, treble crochet is used infrequently in amigurumi but can be helpful for larger projects or parts that require a more open texture.
- Increase (inc): This involves making two stitches into the same stitch from the previous row, which helps shape the critter by expanding the fabric.
- Decrease (dec): The opposite of an increase, a decrease combines two stitches into one, used to taper or shape parts of the critter.
- Magic Ring (or Magic Circle): A technique to start amigurumi projects, creating a tight, closed center. It is ideal for starting spherical shapes like heads or bodies.
- Loop Stitch: This creates a looped texture on the fabric, great for adding furry or hair-like elements to critters.
- Bobble Stitch: This stitch creates raised, textured bumps on the fabric’s surface, adding interest and tactile elements to your critter.
The Ideal Size For Critters
Regarding crocheting critters, size can vary widely depending on the project’s purpose, preference, and design. Here’s a breakdown of various sizes and what makes an ideal size for crochet critters:
Mini or Tiny Size (1-3 inches): These are often used for keychains, charms, or ornaments. They’re quick to make but can be fiddly due to their small size, requiring fine yarn and a small hook.
Small size (4-6 inches): This size is excellent for small plush toys or desk decorations. They’re still relatively quick to make but allow for more detail than tiny critters.
Medium size (7-12 inches): A popular choice for stuffed animals, these critters are large enough to be cuddly and showcase detailed work but not so large as to be unwieldy or time-consuming.
Large size (13-18 inches): These are ideal for more giant plush toys or statement pieces. They require more yarn and time but can significantly impact as gifts or decorative items.
Extra Large Size (Over 18 inches): These are less common due to the required amount of yarn and time. They’re often used for special projects or oversized toys.
The Ideal Size for Critters
- The ideal size for crochet critters generally falls within the small to medium range (4-12 inches). This size bracket is versatile, making the critters large enough to be appreciated and cuddled but not so large that they become unwieldy or overly time-consuming to complete.
- Small to medium-sized critters are ideal for gifting, especially for children, as they are the perfect size for small hands to hold and play with.
- This size range also allows for a good balance between detail and manageability. You can include enough detail to make each critter unique without the project becoming too intricate or challenging.
Essential Tools And Materials
Crocheting critters, or amigurumi, require essential tools and materials to start. Here’s a comprehensive list:
- Yarn: Medium-weight yarn (worsted weight) is typically used for amigurumi. Cotton yarn is popular due to its smooth texture and firmness, which helps define stitches and shapes. However, acrylic yarn is also a common choice due to its affordability and wide range of colors.
- Crochet Hooks: The hook size often depends on the yarn being used. For amigurumi, smaller hooks than recommended for the yarn are often used to create tight stitches that prevent stuffing from showing through. Sizes ranging from 2.5 mm to 4 mm are standard.
- Stuffing: Polyester fiberfill is the standard stuffing material for amigurumi, as it’s lightweight, washable, and easy to work with. It helps give shape and firmness to the crochet critters.
- Stitch Markers: These are essential for marking the beginning of round or specific stitches in amigurumi, often worked in continuous rounds.
- Yarn Needle: A large-eye blunt needle is necessary for sewing parts together and weaving in ends. The eye needs to be large enough to thread yarn.
- Scissors: A sharp pair of scissors is crucial for cutting yarn and trimming finished pieces.
- Safety Eyes and Noses: These plastic accessories add life to amigurumi critters. They come in various sizes and are easily attached. However, embroidered eyes and noses are safer if the critter is for a small child.
- Embroidery Floss: This adds details like facial features or decorative elements.
- Ruler or Measuring Tape: Useful for measuring parts of your critter to ensure symmetry and proper sizing.
- Pattern: A written amigurumi pattern or guide, especially for beginners, must provide step-by-step instructions for creating the critter.
- Fabric Glue or a Hot Glue Gun can securely attach non-sewable elements.
- Felt: For additional decorative elements or features that can be cut from felt, sewn, or glued.
Glossary Of Crochet Stitches And Techniques
Here’s a glossary of common crochet stitches and techniques that you’ll frequently encounter, especially when creating crochet critters or engaging in various crochet projects:
- Chain (ch): The foundation of most crochet projects, a chain is a series of loop stitches that begins with a slip knot.
- Slip stitch (sl st): Used to join stitches together without adding height, ideal for finishing edges or working in rounds.
- Single crochet (sc): A basic crochet stitch that’s compact and tight, forming a dense fabric.
- Half Double crochet (hdc): A stitch taller than a single crochet but shorter than a double crochet, creating a somewhat tighter fabric.
- Double Crochet (DC): A standard crochet stitch twice the height of a single crochet, known for its versatility and speed.
- Treble Crochet (tr): A tall stitch that is three times the height of a single crochet, used for creating a more open and airy fabric.
- Increase (inc): A method to add stitches and widen the fabric, often used in shaping.
- Decrease (dec): A technique to reduce the number of stitches, useful for shaping by tapering the fabric.
- Magic Ring or Magic Circle: A technique to start projects in the round, creating a tight center circle, especially useful for amigurumi.
- Yarn Over (yo): Wrapping the yarn over the crochet hook is fundamental to most crochet stitches.
- Front Loop (FL) and Back Loop (BL): Refers to the two loops at the top of a stitch. Working into one or the other can create ribbing or texture.
- Fasten Off: Finish off a piece by cutting the yarn and pulling the end through the last loop.
- Gauge: The number of stitches and rows per inch is vital for ensuring the project size is correct.
- Bobble Stitch: A puffy, textured stitch made by working multiple double crochets into the same stitch and then joining them together at the top.
- Cluster Stitch: Similar to a bobble, the stitches are only partially completed before joining.
- Popcorn Stitch: This is made by working several stitches into the same space, removing the hook, and pulling the last loop through the first stitch, creating a “popcorn” effect.
- Loop Stitch: Creates loops of yarn on the fabric for a furry or textured effect.
- Picot: A small loop, often used as a decorative edging, made by chaining a few stitches and then slip stitching back into the first of those chains.
- Blocking: The process of wetting or steaming a finished crochet piece, then shaping it to size and letting it dry to set the stitches and improve the appearance.
Understand Crochet Stitches & Techniques
As an avid crocheter, understanding crochet stitches and techniques is like learning a new language. First, I familiarize myself with basic stitches – chain, slip stitch, single, double, and treble crochets. I practice these until they feel natural. Reading patterns is crucial,
so I learned the standard abbreviations like ch (chain), sc (single crochet), and dc (double crochet). I also pay attention to techniques like increasing, decreasing, and working in rounds, which are essential for shaping. Watching tutorials helps me visualize complex stitches.
Most importantly, I keep practicing. With each project, my understanding deepens, turning complex patterns into enjoyable challenges. Patience and practice are key!
RELATED: 25 Delightful Crochet Jellyfish Patterns For Sea Lovers
Which Yarn Is Best For Crochet Critters?
As a crochet enthusiast passionate about creating critters, I’ve experimented with various types of yarn to find what works best. Here’s my take on different yarns for crochet critters:
- Cotton Yarn: My go-to for critters. It’s durable, holds shape well, and is perfect for creating detailed stitches. Cotton is excellent for amigurumi because it doesn’t stretch too much and gives a smooth finish, making the critters look neat and well-defined.
- Acrylic Yarn: A popular choice due to its affordability and wide range of colors. It’s softer than cotton and easy to work with, though it can be a bit stretchier. For larger critters or those that need a softer, cuddlier feel, acrylic yarn is ideal.
- Wool Yarn: Wool can be fantastic for critters who need extra warmth and snugness. However, wool is more elastic and can be a bit challenging to maintain the shape of the critter. It’s great for experienced crocheters who can control the tension well.
- Blend Yarns: These combine fibers like cotton-acrylic or wool-acrylic. They often bring the best of both worlds – durability from cotton or wool and softness from acrylic. Blending yarns is versatile, especially for a specific texture or finish.
- Super Bulky Yarn: Super bulky yarn is a fun choice for making giant critters. It works up quickly and results in large, huggable toys. However, it’s less suitable for small, detailed work.
How Much Yarn Do I Need To Crochet Critters?
As someone who frequently crochets critters, I’ve learned that the amount of yarn needed varies greatly depending on the project’s size and thickness. I typically use less than a skein of medium-weight yarn for tiny critters, like those around 4 to 6 inches tall. A standard skein of 100 grams is usually enough to make a couple of small critters or one medium-sized one, about 7 to 12 inches tall.
When using bulkier yarn for larger critters, the amount increases. A large critter could easily require two or more skeins, especially over 12 inches. I always make sure to have a bit extra than I think I need to account for any mistakes or adjustments.
I recommend starting with smaller projects for beginners to understand how much yarn you use. Keeping track of the yarn used in past projects also helps estimate future needs. Remember, yarn usage can also vary with crochet style – some people crochet more tightly or loosely, impacting the overall yarn consumption.
Is It Beginner Friendly?
From my experience, crocheting critters can be beginner-friendly, but it does depend on the pattern complexity and the beginner’s comfort with basic crochet stitches.
Starting with simple patterns that use basic stitches like single crochet, increases, and decreases is vital. Amigurumi, the art of crocheting small stuffed creatures, typically involves working in rounds, which can be a new concept for beginners.
However, with patience and practice, it becomes manageable. I suggest beginners start with more prominent, simpler critters, as they’re more forgiving of mistakes. Even beginners can find joy and success in creating their crochet critters with some practice.
How To Crochet A Beginner-Friendly Baby Bird Critter?
Skill Level: Beginner
Materials
- Medium-weight yarn in your choice of colors (for body and beak)
- Crochet hook (size 3.5mm – 4.5mm)
- Polyester fiberfill for stuffing
- Safety eyes (6mm or the size of your choice)
- Yarn needle
- Scissors
- Stitch marker (optional, but helpful for keeping track of rounds)
Instructions
Body (in the primary color)
- Start with a magic ring.
- Round 1: 6 single crochet (sc) in the magic ring (6 stitches).
- Round 2: 2 sc in each stitch around (12).
- Round 3: [1 sc, 2 sc in next stitch] Repeat around (18).
- Round 4-6: Sc in each stitch around (18).
- Insert safety eyes between Rounds 4 and 5, about 4 stitches apart.
- Start stuffing the body; continue to stuff as you go.
- Round 7: [1 sc, decrease] Repeat around (12).
- Round 8: Decrease around (6).
- Fasten off, leaving a long tail. Finish stuffing, then use the tail to close the opening. Weave in the end.
Beak (in beak color)
- Chain 4.
- Starting from the second chain from the hook, 1 sc, then a half double crochet (dc) in the next, and sc in the last chain.
- Fasten off, leaving a long tail for sewing.
Assembly
- Sew the beak onto the face, just below the eyes.
- Use a yarn needle to weave in any loose ends.
Optional Details
- Add wings or tail feathers by creating small ovals or triangles and sewing them onto the body.
- Embroider additional details like eyebrows or a smile.
27 Critter Crochet Patterns
1. Arthur The Frog
It is a realistic yet simplistic frog toy, perfect for children and adults alike. This pattern suits intermediate stitchers with basic crocheting knowledge and experience. The finished toy measures approximately 23 cm tall, but this size can vary depending on the type of yarn you use and what size hook you choose.

Suggested Yarn: Lion Brand Vanna's Choice
Difficulty Level: Intermediate
Yarn Weight: Medium (4)
Crochet Hook: 4.0 mm (G)
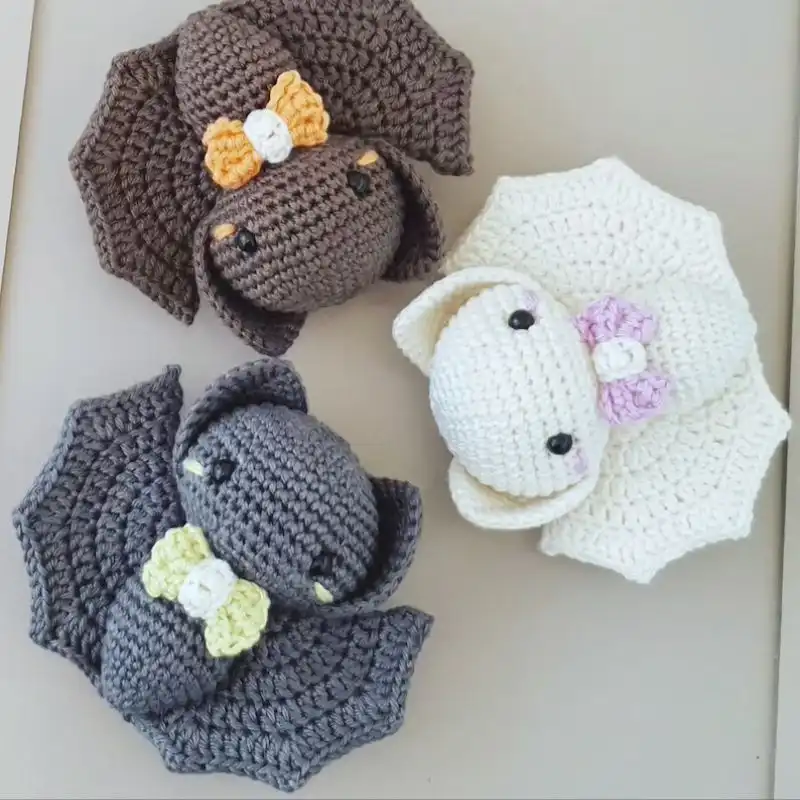
2. Bat Amigurumi
Knitted with 4ply cotton fabric and a 2.25mm hook, these amigurumi bats stand slightly over 3 inches tall. They make lovely décor for Halloween – or any other time of year! They’re just the right size for small hands to enjoy. Or perhaps you just want your own swarm of adorable bat babies!
You can crochet these bats with just about any fabric and needle size, albeit yours may come out bigger and demand multiple safety eyes. This crocheting pattern is appropriate for intermediate to advanced beginners.
Suggested Yarn: Red Heart Super Saver
Difficulty Level: Intermediate
Yarn Weight: Worsted
Crochet Hook: 4.0 mm (G)
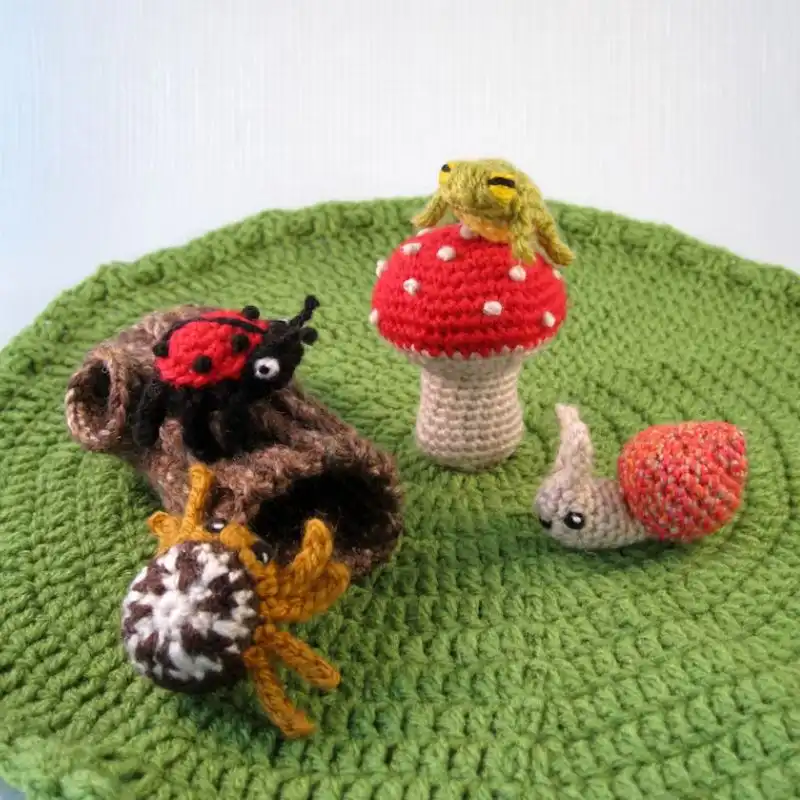
3. Mini Pets – Snails, Bugs and Frogs
You may crochet a variety of little creatures — spiders, insects, frogs, and snails – tiny, measuring between 1.5″ and 2.5″ in length, and they’re easy to make with little stitching.
They’re ideal for goody bags or other little gifts and selling at school or church fairs. You may simply make keychains, pendants, or fridge magnets out of them. You may also manufacture sets of various colored creatures (especially frogs and beetles) and use them as game tokens.
Suggested Yarn: Bernat Blanket Yarn
Difficulty Level: Beginner
Yarn Weight: Super Bulky
Crochet Hook: 6.0 mm (J)
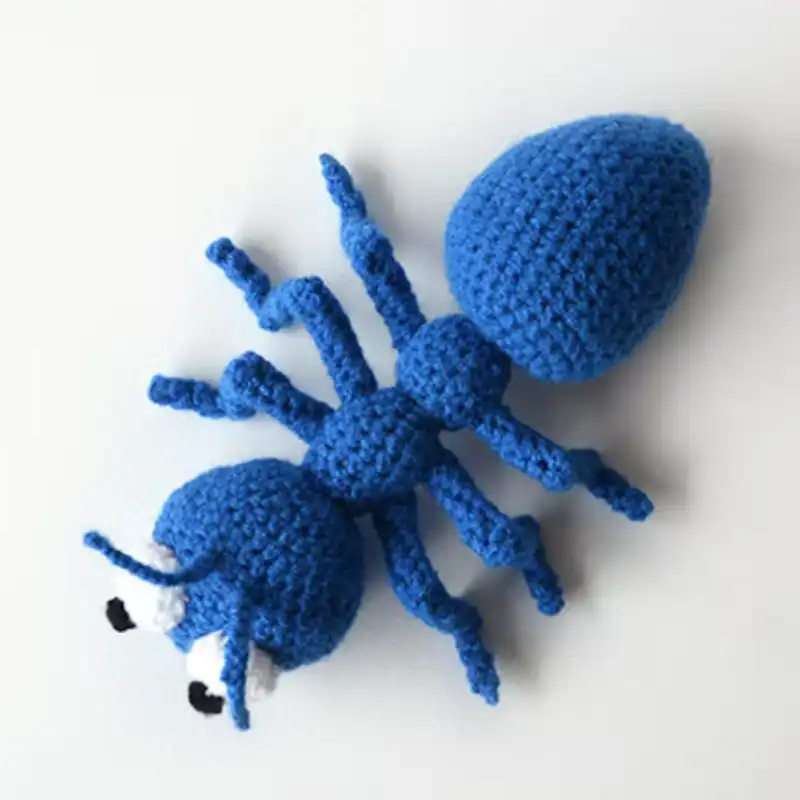
4. Ant Crochet Pattern
Take a look at this gorgeous ant! You can build your insect friend with this clear and simple crochet pattern. Andy has got to be the giant ant you’ve seen before! And he’s adorably adorable. This ain’t will measure approximately 20cm/8″ in length when constructed with a 4.0mm crochet needle.
Suggested Yarn: Caron Simply Soft
Difficulty Level: Beginner
Yarn Weight: Medium (4)
Crochet Hook: 4.0 mm (G)
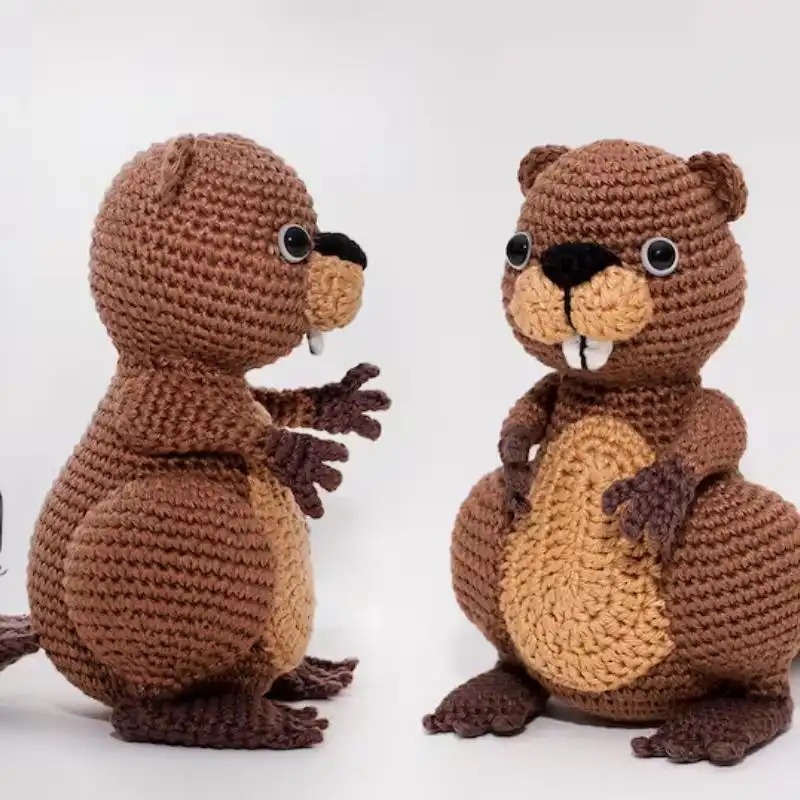
5. Barkley The Beaver Crochet Pattern
Barkley The Beaver Crochet Pattern invites crafters into the enchanting world of woodland creatures. With detailed instructions and charming design, this pattern allows crochet enthusiasts to bring Barkley to life with their own hands. From his fluffy tail to his adorable buckteeth, Barkley promises hours of crafting joy and cuddly companionship.
Suggested Yarn: Red Heart Super Saver
Difficulty Level: Intermediate
Yarn Weight: Worsted
Crochet Hook: 5.0 mm (H)
6. Crochet Rat & Cockroach
This pattern is only suitable for some advanced users as it requires complex stitching. So, you’ll need some knowledge and crochet experience to make it. The finished toy measures approximately 6 x 4 x 4 cm. This is one of the top-rated patterns on Etsy right now, so you know you are in good hands!
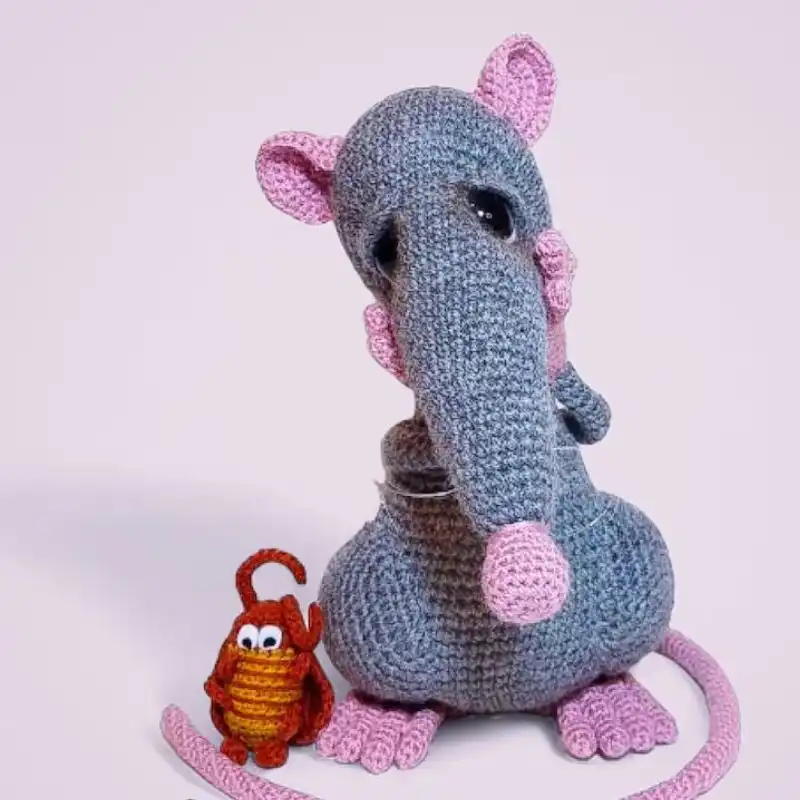
Suggested Yarn: Lion Brand Vanna's Choice
Difficulty Level: Intermediate
Yarn Weight: Medium (4)
Crochet Hook: 4.0 mm (G)
7. Carl The Chameleon
If you’re a fan of reptiles, then this may be the perfect crochet pattern for you! Make your chameleon plush toy that looks just like the real thing. It will look excellent perched upon houseplants in the home or as a cuddle buddy for children. The finished toy will measure approximately 20 cm tall, and you will need some essential experience and knowledge of crochet to complete this pattern. Happy stitching!
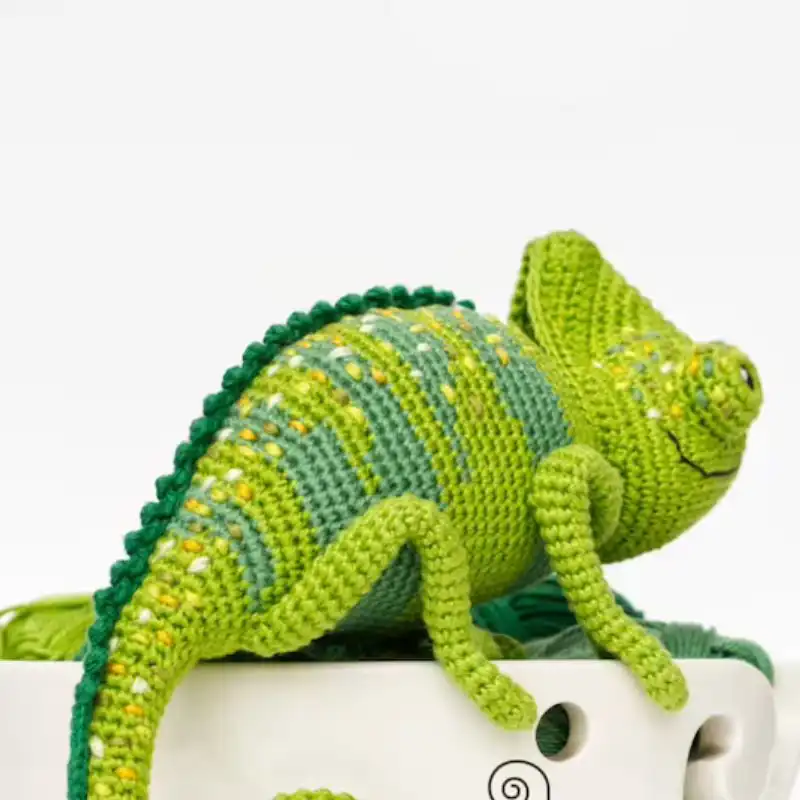
Suggested Yarn: Red Heart Super Saver
Difficulty Level: Intermediate
Yarn Weight: Worsted
Crochet Hook: 5.0 mm (H)
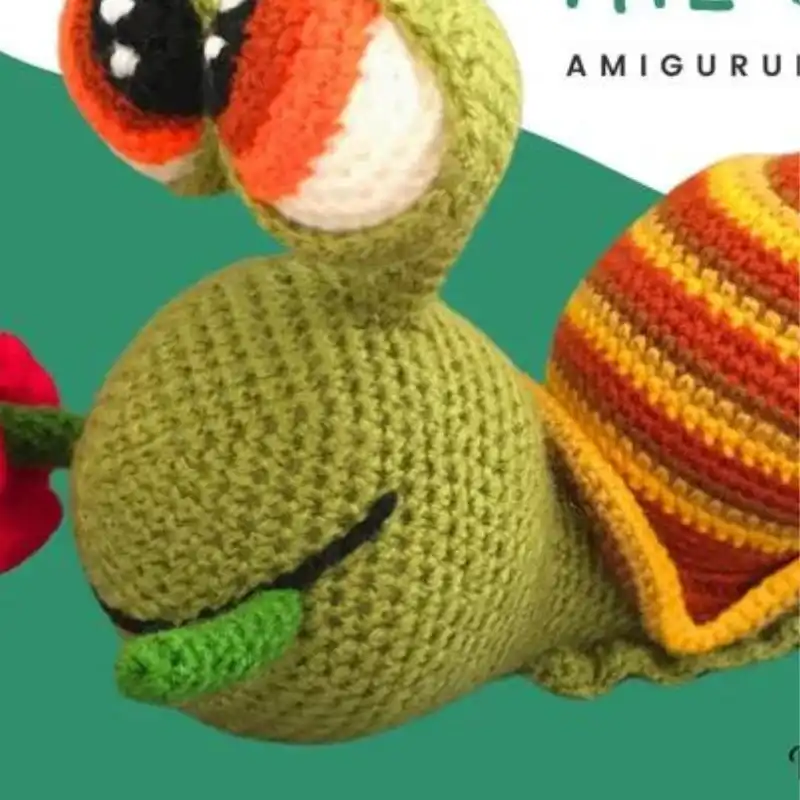
8. Edward The Snail
Edward The Snail crochet pattern introduces crafters to a whimsical world of amigurumi. With meticulous instructions and endearing design, this pattern guides crocheters through creating their very own Edward, complete with his spiral shell and gentle demeanor. Perfect for adding a touch of charm to any crochet collection, Edward promises to delight all who encounter him.
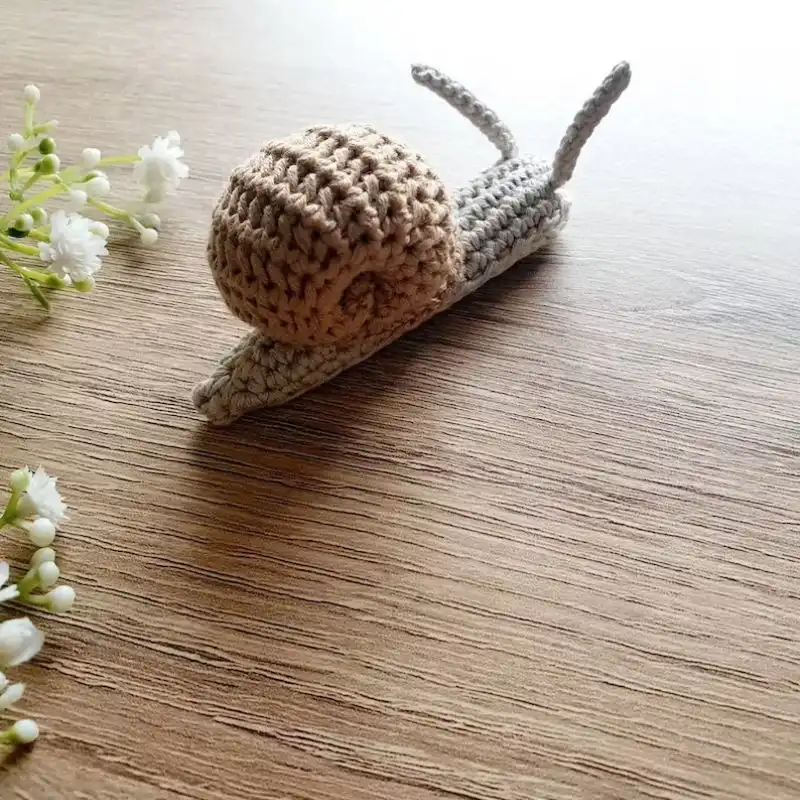
Suggested Yarn: Lion Brand Vanna's Choice
Difficulty Level: Intermediate
Yarn Weight: Medium (4)
Crochet Hook: 3.5 mm (E)
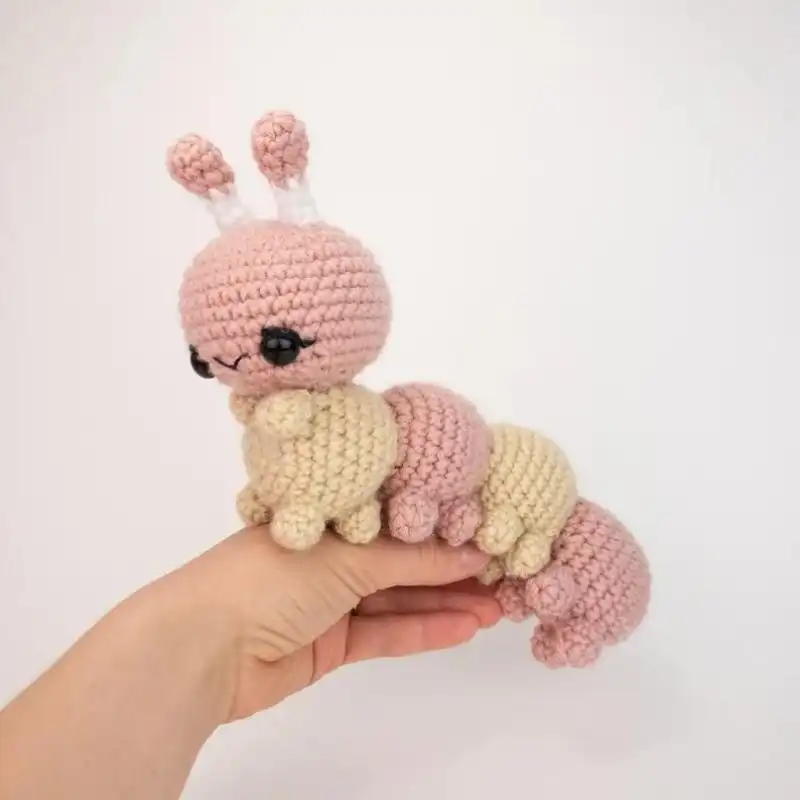
9. Maggot The Odd Love Bug
Maggot The Odd Love Bug crochet pattern invites crafters into a whimsical world where bugs become beloved companions. This pattern guides crocheters through creating their very own Maggot, complete with quirky features and endearing charm. Perfect for those seeking a unique and delightful crochet project, Maggot promises to capture hearts and spread smiles wherever he goes.
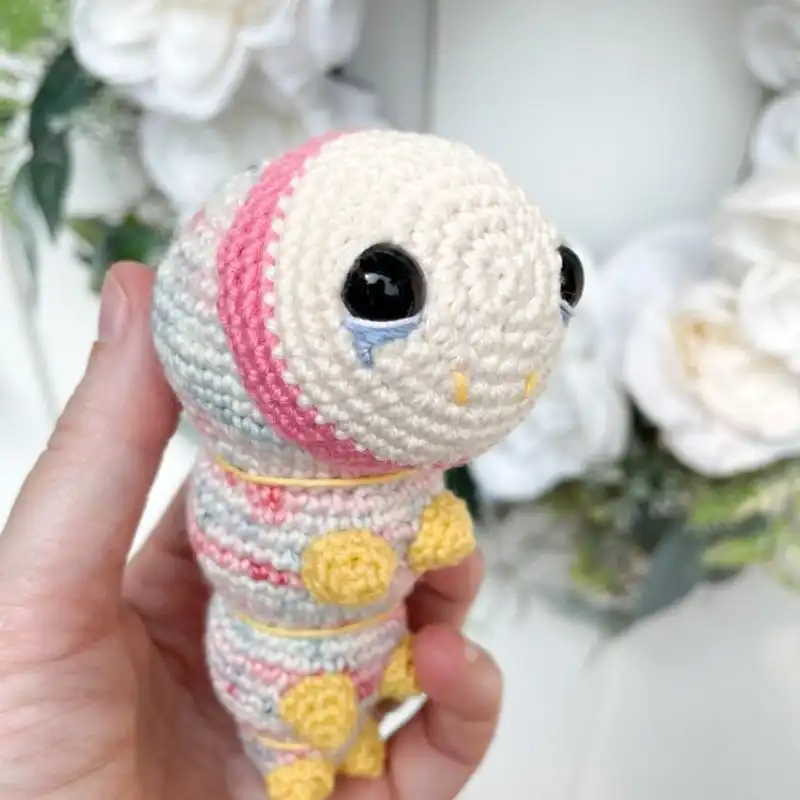
Suggested Yarn: Bernat Blanket Yarn
Difficulty Level: Beginner
Yarn Weight: Super Bulky
Crochet Hook: 9.0 mm (M/N)
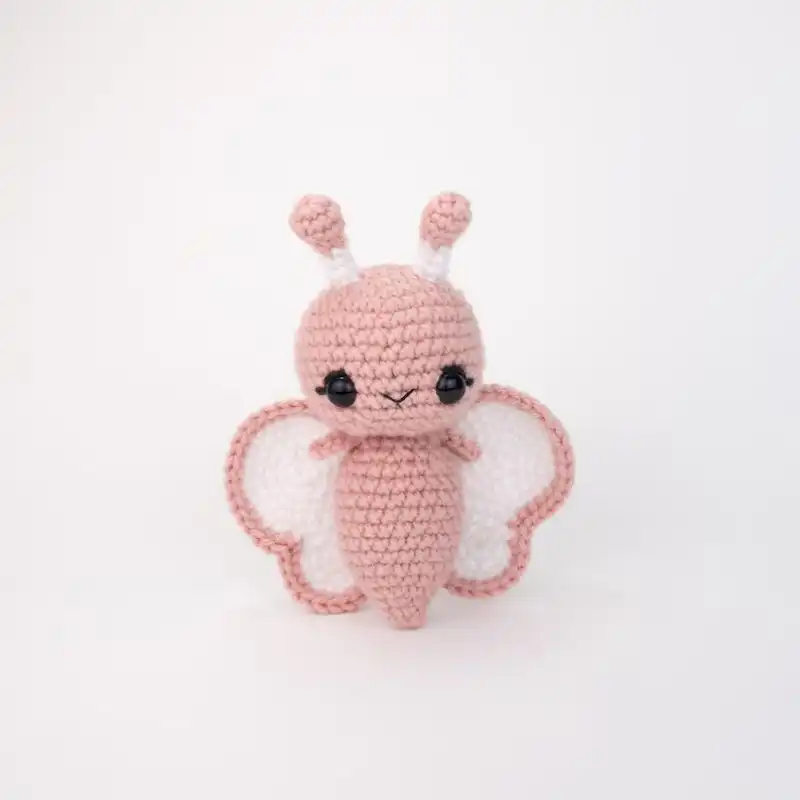
10. Belle the Butterfly Pattern
In just a few hours, you can make your little butterfly! The finished butterfly will be approximately 6.5 inches (16.5 cm) tall. Because this is an electronic file, there is no shipping price. Your design will be immediately downloaded from Etsy once your money clears.
Suggested Yarn: Red Heart Super Saver
Difficulty Level: Intermediate
Yarn Weight: Worsted
Crochet Hook: 4.0 mm (G)
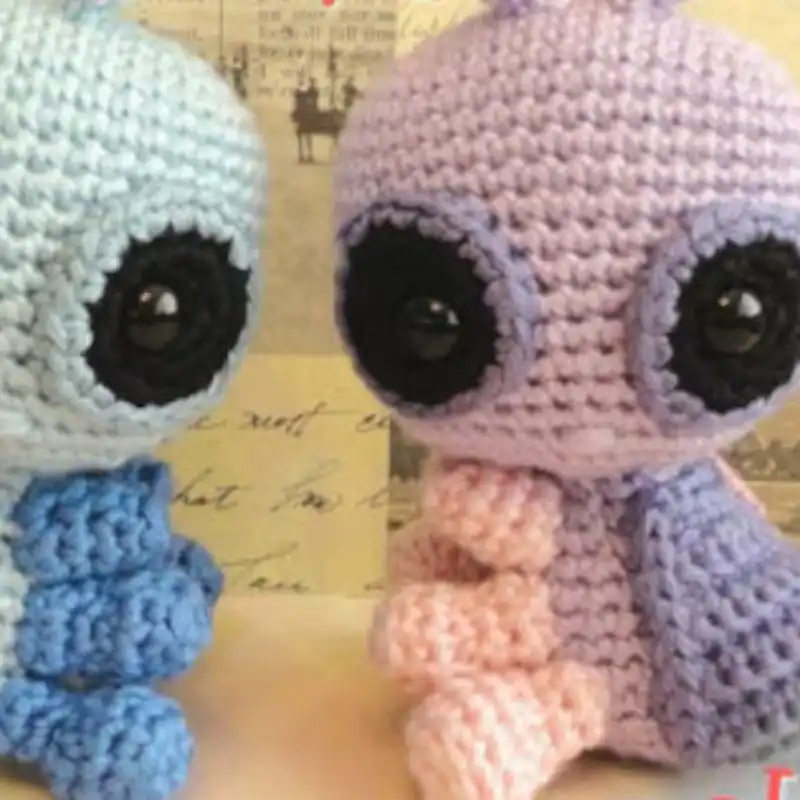
11. Lovebug Crochet Pattern
This pattern has all the instructions to make your love bug plush toy! We think this design looks great if you like using pastel-colored thread and would look great in any baby’s nursery or as a child’s cuddle companion. This pattern requires basic crochet knowledge, so it won’t suit you if you’re a complete newbie.
Suggested Yarn: Lion Brand Vanna's Choice
Difficulty Level: Beginner
Yarn Weight: Medium (4)
Crochet Hook: 4.0 mm (G)
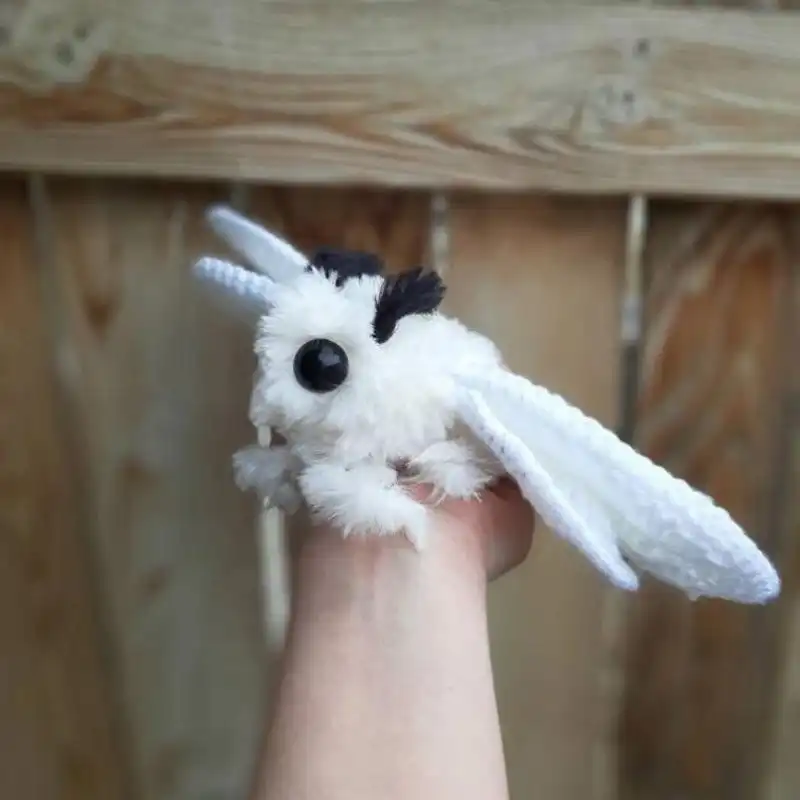
12. Poodle Moth Crochet Pattern
Wire wrapped along the wings will look nicest. Every set of wings has only 5 rows in total. The wingspan has a length of 11 inches, based on the weight of 4 yarns used. A wing span of around 9.5 inches can be achieved with a thin weight of 4 yarn. Your moth’s abdomen will be around 5 inches long.
Suggested Yarn: Caron Simply Soft
Difficulty Level: Intermediate
Yarn Weight: Medium (4)
Crochet Hook: 5.0 mm (H)
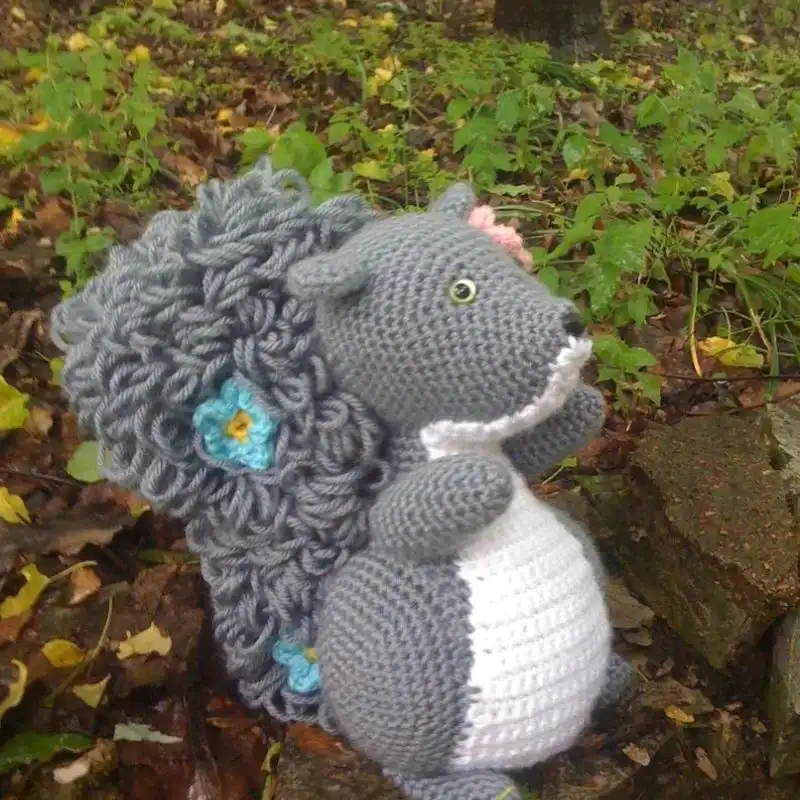
13. Taffy The Squirrel
It is one rat you won’t consider a pest. Enjoy the looping tail and shower her with as many flowers as possible. The finished item is roughly 12″ tall. The template is appropriate for an advanced beginner. There is indeed a substantial loop stitch segment.
Suggested Yarn: Red Heart Super Saver
Difficulty Level: Intermediate
Yarn Weight: Worsted
Crochet Hook: 5.0 mm (H)
14. Caity The Caterpillar
Caity The Caterpillar crochet pattern welcomes crafters to the enchanting world of insects turned cuddly companions. This pattern guides crocheters through creating their very own Caity, complete with colorful segments and a friendly expression. Perfect for adding a touch of whimsy to any crochet collection, Caity promises to bring joy and laughter to all who encounter her.
Suggested Yarn: Lion Brand Vanna's Choice
Difficulty Level: Beginner
Yarn Weight: Medium (4)
Crochet Hook: 4.0 mm (G)
15. Isopod Amigurumi
How adorable is this realistic isopod crochet pattern? It is the perfect crochet pattern if you love creepy crawlies and critters! You will need basic crochet knowledge and skills to make this toy, and the final product will measure approximately 18 x 5 x 8 cm.
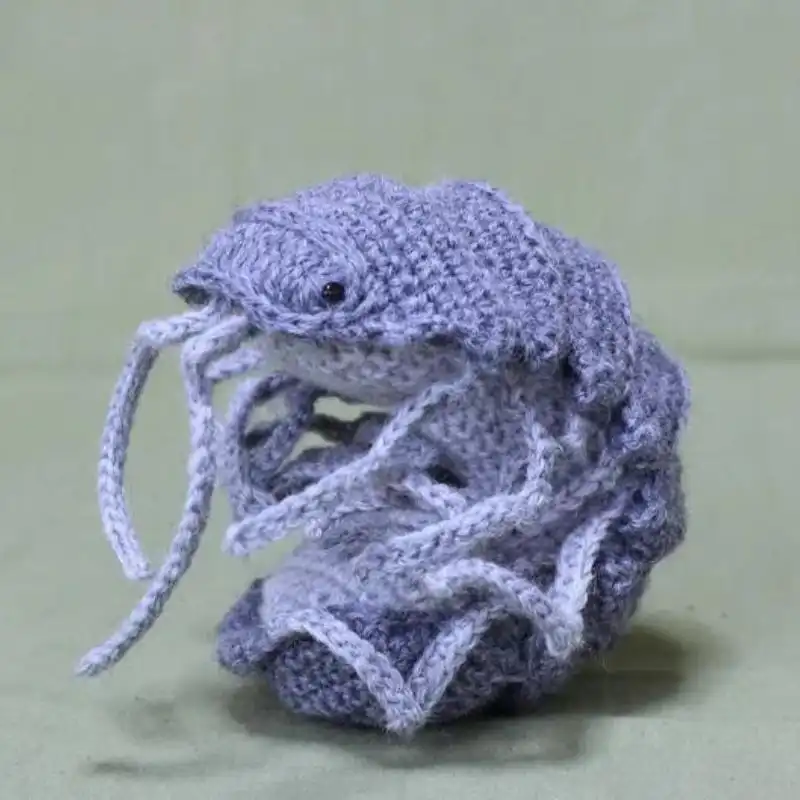
Suggested Yarn: Bernat Blanket Yarn
Difficulty Level: Intermediate
Yarn Weight: Super Bulky
Crochet Hook: 6.0 mm (J)
16. Snail And Flower Winkle Animal Bug Insect Doll Toy
Melvin The Snail Amigurumi crocheting template is included in this amigurumi pattern. This pattern guides crocheters through creating a delightful toy featuring a snail nestled among vibrant flowers. Perfect for imaginative play or decorative display, this pattern promises to bring a touch of magic to any crochet collection.
Suggested Yarn: Caron Simply Soft
Difficulty Level: Beginner
Yarn Weight: Medium (4)
Crochet Hook: 4.0 mm (G)
17. Jesse The Jumping Spider
If you’re not afraid of spiders, then Jesse, the jumping spider, is your perfect fluffy companion! Follow the instructions to make your own tiny jumping spider toy, which makes an ideal children’s toy or can be transformed into a keychain or pendant. This simple design is crocheted and combines all the pieces to construct this spider, which may have either short or long legs!
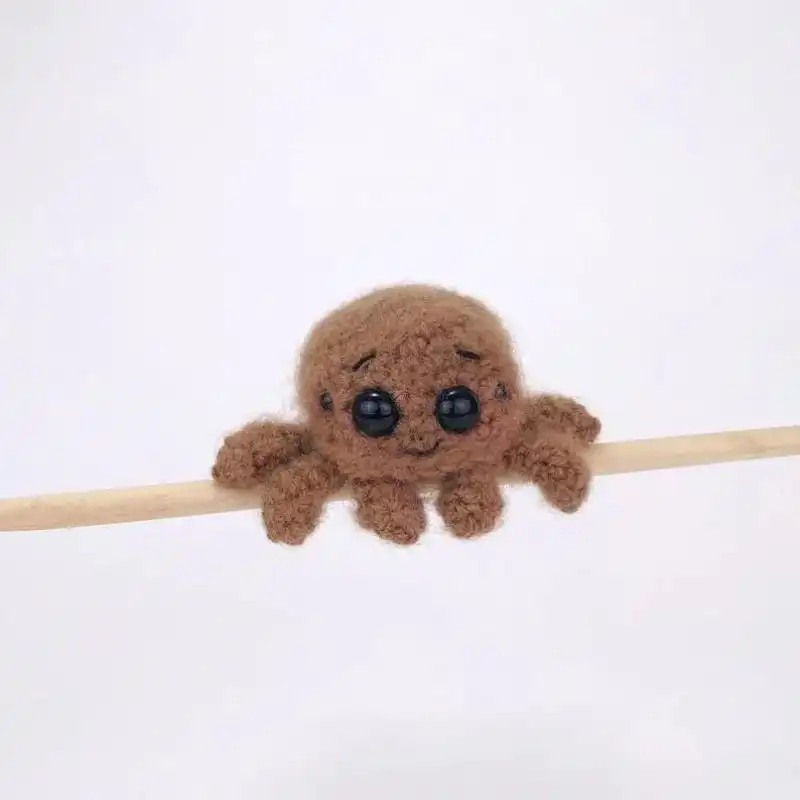
Suggested Yarn: Red Heart Super Saver
Difficulty Level: Intermediate
Yarn Weight: Worsted
Crochet Hook: 4.0 mm (G)
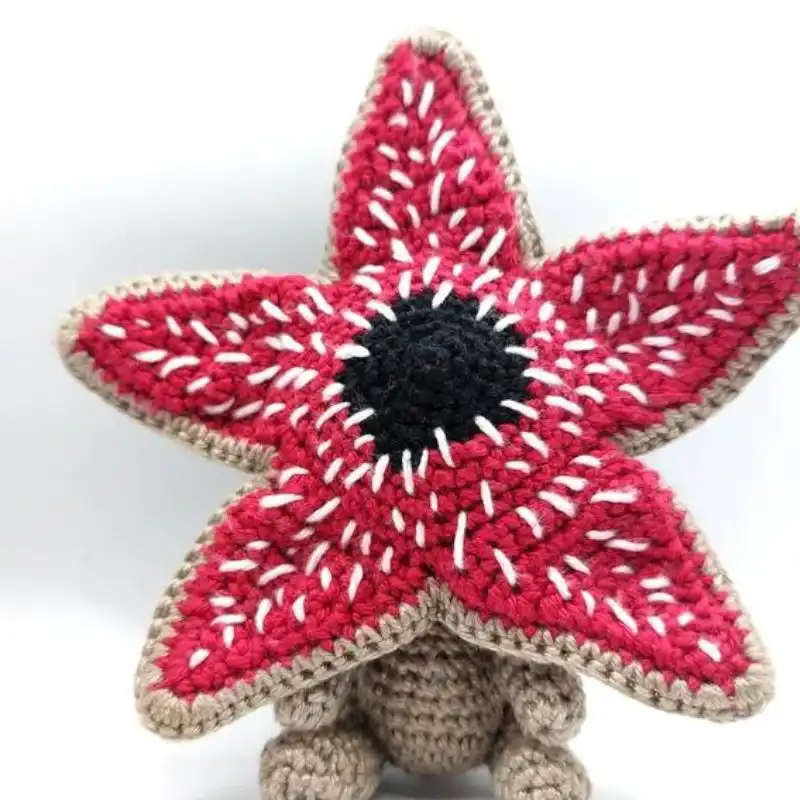
18. Demodog
Dive into the supernatural with the Demodog Amigurumi crochet pattern. Craft your very own demo dog from the popular TV series, capturing the eerie and intriguing essence of the creature. This amigurumi project allows you to bring a touch of the Upside Down into your crochet collection, creating a unique and attention-grabbing critter.

Suggested Yarn: Acrylic Worsted
Difficulty Level: Intermediate
Yarn Weight: Medium
Crochet Hook: 4.0 mm
19. Moth Sprite
Illuminate your amigurumi collection with the enchanting Moth Sprite crochet pattern. This whimsical critter design captures the delicate beauty of a moth, allowing you to create a mystical and captivating creature. Craft the Moth Sprite for a touch of ethereal charm in your handmade projects.
Suggested Yarn: Scheepjes Catona
Difficulty Level: Intermediate
Yarn Weight: Fingering (1)
Crochet Hook: 3.0 mm (D)
20. Pine Sprite
Embrace the magic of the forest with the Pine Sprite crochet pattern. This delightful critter design features a woodland sprite with pine-inspired details, creating a whimsical and nature-inspired amigurumi. Craft the Pine Sprite to bring a touch of woodland enchantment to your crochet creations.
Suggested Yarn: Red Heart Super Saver
Difficulty Level: Beginner
Yarn Weight: Worsted
Crochet Hook: 4.0 mm (G)
21. Bitty Belly Critters
Explore cuteness in miniature with the Bitty Belly Critters crochet pattern. This collection offers patterns for tiny critters with adorable bellies, making them irresistibly charming. From tiny turtles to petite pandas, these bitty-belly critters are perfect for quick and delightful amigurumi projects.
Suggested Yarn: Bernat Blanket Yarn
Difficulty Level: Beginner
Yarn Weight: Super Bulky
Crochet Hook: 6.0 mm (J)
22. Octopi, the little octopus
Dive into the ocean of creativity with the Octopi the Little Octopus crochet pattern. This amigurumi design features a cute and huggable octopus, perfect for sea creature enthusiasts and lovers of whimsical critters. Craft Octopi for a delightful addition to your underwater-themed crochet projects.
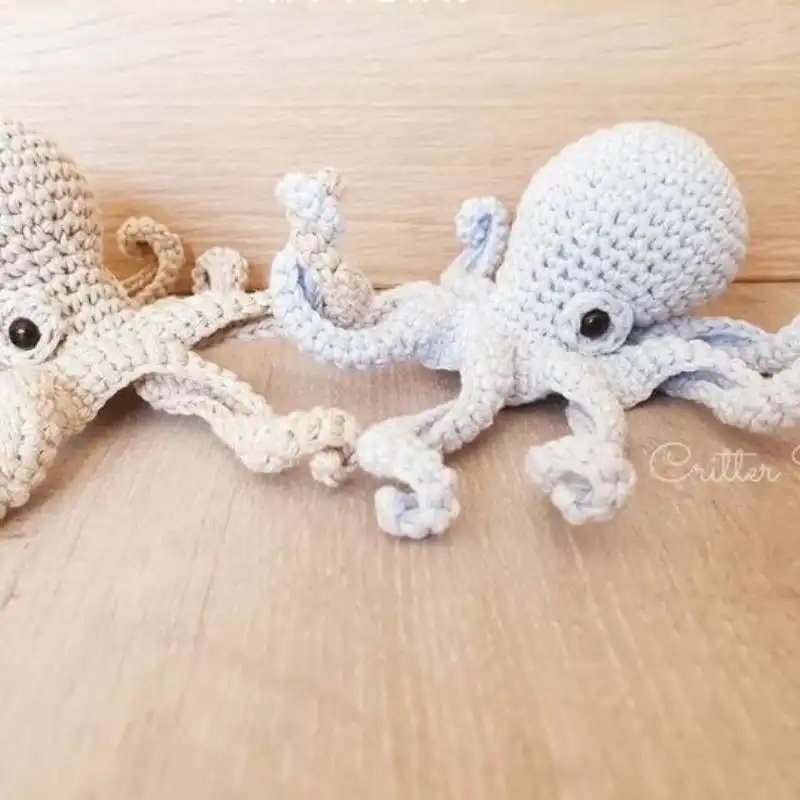
Suggested Yarn: Lion Brand Vanna's Choice
Difficulty Level: Intermediate
Yarn Weight: Medium (4)
Crochet Hook: 4.0 mm (G)
23. No, Sew Baby Birds
Simplify your crafting experience with the No Sew Baby Birds crochet pattern. This design eliminates the need for sewing, offering a seamless and easy approach to creating adorable baby birds. Craft these charming critters for a quick and joyful addition to your amigurumi collection.
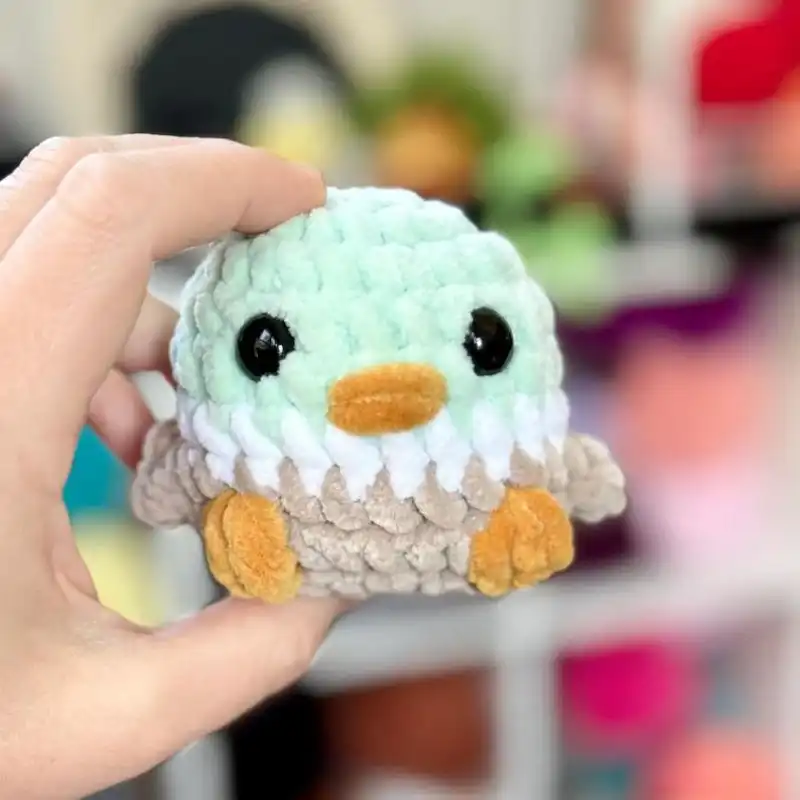
Suggested Yarn: Red Heart Super Saver
Difficulty Level: Beginner
Yarn Weight: Worsted
Crochet Hook: 4.0 mm (G)
24. Amariki The Kiwi
Bring a touch of New Zealand to your amigurumi with the Amariki Kiwi crochet pattern. This charming critter design features a kiwi bird with endearing details and personality. Craft Amariki to showcase the uniqueness of kiwis in your handmade projects.
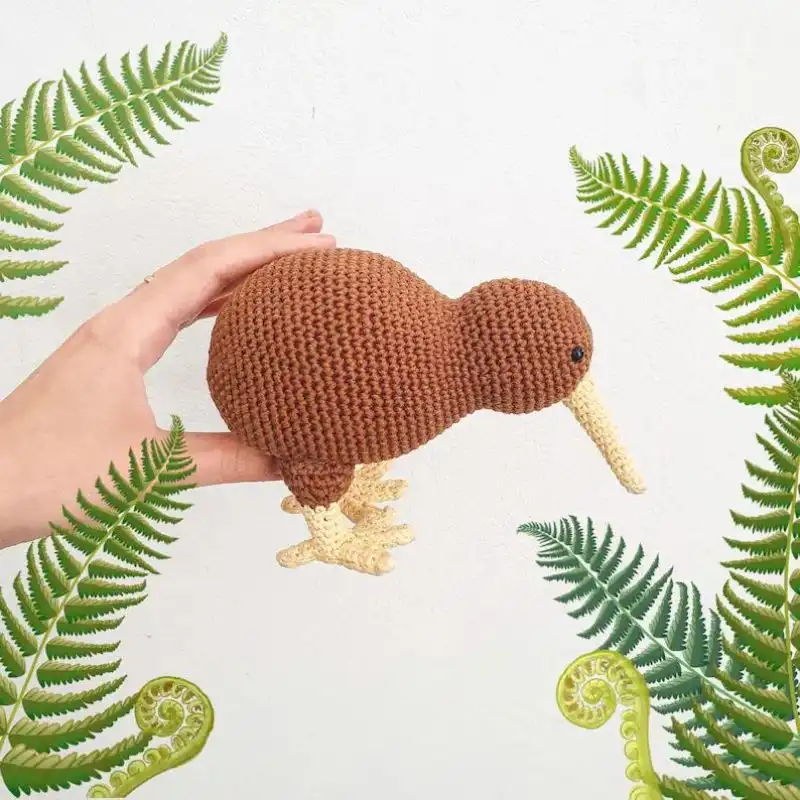
Suggested Yarn: Caron Simply Soft
Difficulty Level: Intermediate
Yarn Weight: Medium (4)
Crochet Hook: 5.0 mm (H)
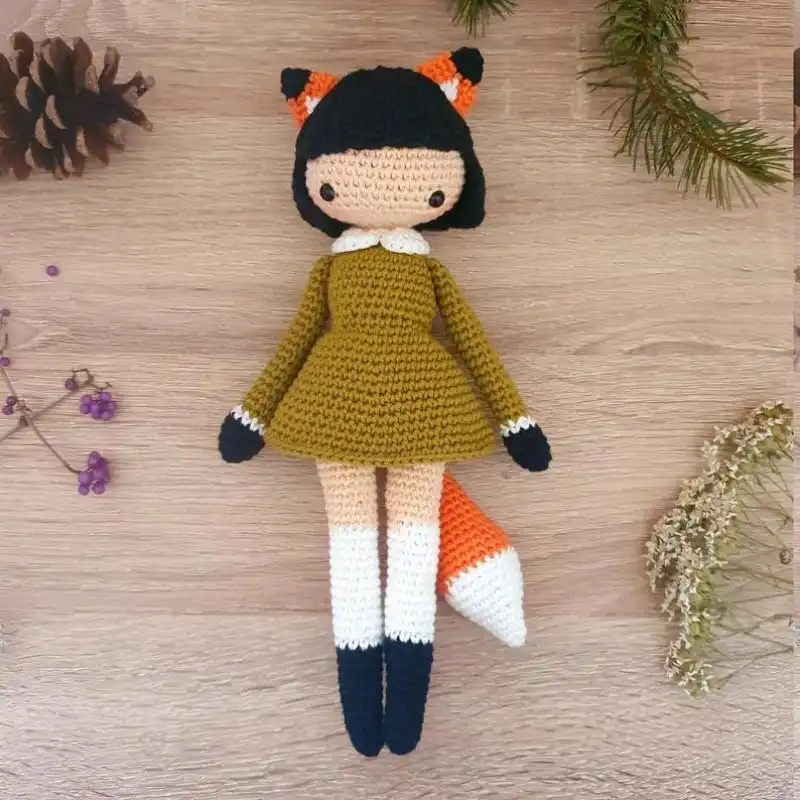
25. Sophie the Fox Doll
Enter the world of enchantment with the Sophie the Fox Doll crochet pattern. This versatile design allows you to create a fox doll with a charming and whimsical appearance. Craft Sophie to add a touch of fantasy and personality to your amigurumi collection.
Suggested Yarn: Lion Brand Vanna's Choice
Difficulty Level: Intermediate
Yarn Weight: Medium (4)
Crochet Hook: 4.0 mm (G)
26. Demodog and Lil’ Xeno Duo
Unleash a duo of otherworldly critters with the Demodog and Lil’ Xeno Duo crochet pattern. This unique combination features the eerie demodog alongside a tiny xenomorph-inspired creature. Craft this duo for a captivating and imaginative addition to your amigurumi menagerie.
Suggested Yarn: Red Heart Super Saver
Difficulty Level: Intermediate
Yarn Weight: Worsted
Crochet Hook: 4.0 mm (G)
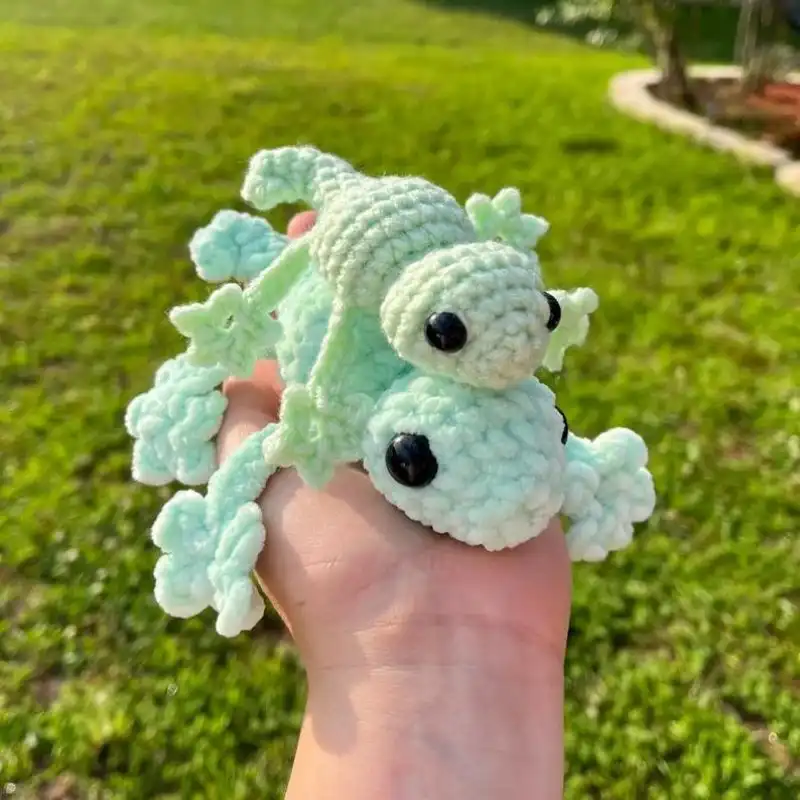
27. Twinkletoes the Tiny Gecko
Explore the world of reptilian cuteness with Twinkletoes’ Tiny Gecko crochet pattern. This amigurumi design captures the charm of a tiny gecko with a playful and endearing personality. Craft Twinkletoes for a delightful and whimsical addition to your critter-filled crochet projects.
Suggested Yarn: Bernat Blanket Yarn
Difficulty Level: Beginner
Yarn Weight: Super Bulky
Crochet Hook: 6.0 mm (J)
Do’s & Don’ts To Crochet A Safe Critter
Creating crochet critters for babies requires special attention to safety and durability. Here are some essential do’s and don’ts:
Do’s
- Use Safe Materials: Choose soft, washable, and hypoallergenic yarn. Avoid wool if there’s a risk of allergies.
- Secure Stitching: Ensure all stitches are tight and secure. It prevents tiny fingers from pulling them apart or creating holes where stuffing can escape.
- Soft Stuffing: Use quality, non-toxic stuffing that’s safe for babies. Stuff firmly but not too tightly, as babies might prefer a softer, more squeezable toy.
- Embroidered Features: Instead of using plastic eyes or noses, embroider facial features to eliminate choking hazards.
- Washable: Make sure the critter can be easily washed. Babies often drool or chew on toys, so cleanliness is crucial.
- Test for Durability: Gently tug on any appendages or parts to ensure they are securely attached.
- Size Appropriately: Avoid making critters with small parts (like tiny limbs or accessories) that could be a choking risk. The critter should be large enough not to be a swallowing hazard.
Don’ts
- Avoid Small, Detachable Parts: Do not use beads, buttons, or anything that can be easily detached and pose a choking hazard.
- Steer Clear of Harmful Chemicals: Avoid yarns treated with chemicals or dyes that may be harmful if ingested.
- Don’t Use Stiff Yarn: Avoid yarn that is too stiff or scratchy, as it can be uncomfortable for babies’ delicate skin.
- Don’t Overstuff: Overstuffing can make the critter too firm for a baby to enjoy. It can also strain the stitches, creating gaps.
- Avoid Complicated Designs: Complex designs with many appendages or accessories can be more easily pulled apart and pose a risk.
- Don’t Ignore Laundering Instructions: Always consider how the critter will be cleaned. Some materials might not hold up well in a washing machine.
- Remember to Inspect Regularly: Regularly check the critter for wear and tear or loose parts.
Tips & Tricks To Avoid Crochet Mistakes
Crocheting critters is a delightful project but comes with unique challenges. Here are some tips and tricks to avoid common mistakes and ensure your crochet critters turn out perfectly:
- Consistent Tension: Maintaining even tension throughout is crucial. Uneven tension can lead to irregularities in shape and size; if you’re a beginner, practice on simpler projects first to develop a consistent tension.
- Counting Stitches: Always count your stitches in each round. Amigurumi patterns are precise, and a single missed or extra stitch can throw off the entire pattern.
- Using Stitch Markers: When working in continuous rounds, it’s easy to lose track of where one round ends and the next begins. Use a stitch marker to mark the beginning of each round.
- Choosing the Right Hook Size: The stuffing might show through if your stitches are too loose. Try using a smaller hook size than you usually use for the yarn weight to create tighter stitches.
- Reading Patterns Carefully: Before starting, read through the pattern to understand it fully. Look up any unfamiliar stitches or techniques.
- Firm Stuffing: Stuff your critter firmly to give it a good shape and avoid lumpy appearances. However, be careful not to overstuff, as this can stretch the stitches.
- Neat Increases and Decreases: In amigurumi, increases and decreases can be visible. Make them as neat as possible. The invisible decrease technique is a great trick for a smoother look.
- Sewing Pieces Together: Take time when attaching different parts of your critter. Use pins to position them before sewing to ensure they’re in the right place.
- Choosing the Right Yarn: Not all yarns are suitable for critters. Smooth, durable yarns that don’t split easily are ideal.
- Blocking Pieces: For parts that need to be flat or have a specific shape, consider blocking them before assembly.
- Regular Breaks: Taking breaks is essential, especially for long projects, to avoid strain on your hands and maintain a consistent work quality.
- Practice Embroidery: If your critter has embroidered features, practice on a separate piece of fabric first.
- Keeping Notes: If you’re altering a pattern or making several critters, keep notes of any changes you make for consistency.
- Testing Safety Features: If the critter is for a child, ensure all parts are secure and there are no choking hazards.
- Patience and Enjoyment: Finally, remember that crocheting should be enjoyable. Be patient with yourself, especially if you’re a beginner. Each critter you make will improve your skills.
How To Block The Crochet Critters?
Blocking is an essential finishing step in crochet, especially for critters, as it helps to give them the right shape and can make stitching pieces together easier. Here’s how to block your crochet critters effectively:
Materials Needed
- Blocking board or foam mat
- Rust-proof pins
- Spray bottle with water or a steam iron
- Towel (if using spray bottle method)
Step-by-Step Instructions
Prepare the Surface: Lay out your blocking board or foam mat. If you don’t have one, you can use any flat, water-resistant surface, like a large towel.
Lay Out the Pieces: Before wetting or steaming, lay the crochet pieces in their desired shape and size on the blocking board. For critters, this usually means flattening the individual pieces to make them more even and symmetrical.
Pin the Pieces:
- Secure each piece to the blocking board with rust-proof pins.
- Pin around the edges, stretching the piece slightly to achieve the correct shape and size.
- Be careful not to overstretch.
Wet or Steam the Pieces
- Wet Blocking: Use a spray bottle to mist the pieces with water until damp but not soaking. Alternatively, you can dampen them with a wet towel.
- Steam Blocking: Steam a steam iron a few inches above the pieces evenly. Do not let the iron touch the crochet work, as this might flatten the stitches.
Allow to Dry: Leave the pieces pinned until they are scorched. It can take several hours to a full day, depending on the thickness of the yarn and the humidity.
Remove the Pins: Once dry, carefully remove the pins. Your crochet pieces should now hold their blocked shape.
Assemble Your Critter: Proceed to sew the pieces per your pattern instructions.
Additional Tips
- Test the colorfastness of your yarn before wet blocking to avoid color bleeding.
- Steam blocking is generally preferred for acrylic yarn, as wet blocking may not be as effective.
- Be gentle with delicate yarns to avoid damaging them during the blocking process.
RELATED: 35 Wondering Crochet Mouse Patterns And Family Patterns
Suggestions To Add Style & Personal Touch
Adding style and a personal touch to your crochet critters can transform them from simple handmade toys to unique, cherished keepsakes. Here are some suggestions to infuse your projects with personality and flair:
- Customize Colors: Feel free of traditional color schemes. Experiment with bold, unusual color combinations or subtle pastel hues to reflect a unique style.
- Accessorize: Add accessories like scarves, hats, or bow ties. You can crochet these accessories or use small fabric pieces. It not only adds character but also allows for seasonal customization.
- Embroider Features: Instead of using safety eyes or noses, try embroidering these features. It makes the critter safer for small children and adds a personal handmade touch.
- Yarn Textures: Play with different yarn textures. For example, use fluffy yarn for a furry effect or shiny, silky yarn for a sleek look.
- Personalized Tags or Labels: Create or order custom tags with your name, the recipient’s name, or a special message, and attach them to your critters.
- Adjustable Parts: Consider making parts of the critter adjustable. For example, arms or ears that can be posed in different positions.
- Incorporate Beads and Buttons: Add beads or buttons for eyes or as decorative elements for critters not meant for small children.
- Themed Critters: Create critters based on a theme, like holiday-themed, occupation-based (like a doctor or firefighter), or inspired by favorite books or movies.
- Mix Crochet with Fabric: Add fabric elements like a cotton belly patch, felted ears, or paws for a mixed-media approach.
- Create a Story or Birth Certificate: Write a little backstory for your critter or make a ‘birth certificate.’ It can be extraordinary if gifting.
- Unique Stitch Techniques: Use special stitches to add attractive textural elements, like bobble or popcorn stitches, for a 3D effect.
- Interactive Elements: Include squeakers, rattles, or crinkly materials inside the critters for added sensory experience.
- Size Variation: Play with the scale of your critters. A giant version of a typically small animal can be a fun twist.
- Fragrant Stuffing: Add a sachet of lavender or other dried herbs to the stuffing for a subtle scent.
- Experiment with Shapes: Feel free to experiment with the proportions and shapes of your critters for a whimsical effect.
Wash & Care Instructions
Proper wash and care of crochet critters are crucial for longevity and durability. Here are some instructions to keep them looking their best:
- Check the Yarn Label: Before washing, always refer to the yarn label for specific care instructions. Different fibers have different care requirements.
- Spot Cleaning: Spot cleaning is often the best approach for minor stains or dirt. Use a damp cloth with mild detergent and gently dab the stained area.
- Hand Washing: Hand washing is usually the safest method if the critter needs a more thorough cleaning. Fill a basin with lukewarm water and a small amount of mild detergent. Submerge the critter, gently squeezing to let the water and soap through the fibers. Rinse thoroughly with clean water.
- Machine Washing: Only machine wash if the yarn label permits and if the critter is sturdily made. Use a gentle cycle, cool water, and place the critter in a mesh laundry bag for extra protection.
- Avoid Harsh Chemicals: Steer clear of bleach or harsh detergents, as these can damage the fibers and fade the colors.
- Drying: After washing, gently squeeze out excess water without wringing, which can distort the shape. Lay the critter flat on a clean, dry towel. Reshape it as needed and let it air dry completely. Avoid hanging, as this can cause stretching.
- Avoid High Heat: Do not use a dryer unless the yarn label says it’s safe. High heat can shrink or melt certain fibers.
- Regular Dusting: Keep your crochet critters dust-free by regular gentle dusting. It prevents dirt buildup.
- Storage: Store them in a clean, dry place. If storing long-term, a cotton bag or breathable container is ideal to prevent moisture and dust accumulation.
- Avoid Direct Sunlight: Prolonged exposure to direct sunlight can fade the colors. Store and display them away from direct sunlight.
- Dealing with Pilling: If the critter starts to pill, use a fabric shaver or scissors to remove the pills carefully.
- Refreshing the Stuffing: If the critter becomes lumpy or misshapen over time, carefully open a seam, replace or adjust the stuffing, and sew it back up.

A Quick Recap
This article explored the delightful world of crocheting critters tailored for beginners and seasoned crafters. We covered essential tools and materials, like yarn and crochet hooks, and delved into common stitches and techniques fundamental to amigurumi.
We also discussed choosing the suitable yarn and determining yarn quantity for various project sizes. Safety considerations, especially for baby-friendly critters, were highlighted, along with tips to avoid common crochet mistakes for perfect results.
Additionally, we provided a step-by-step guide for crafting a beginner-friendly baby bird critter and shared creative suggestions for personalizing these charming creations. Finally, we outlined wash and care instructions to ensure the longevity and durability of these handmade treasures.
Frequently Asked Questions
What Does “Critter” Actually Mean?
A critter is a type of animal. Critter is a colloquial term for any living thing, from a dog to a bug. You might enjoy visiting the zoo to see various animals or living on a tiny farm where you can have your animals, such as goats and chickens. Critter, an abbreviated slang or comical variant of the word creature, originated in the early nineteenth century.
What Is Meant By “Amigurumi”?
Amigurumi can be used as children’s toys but are usually purchased or created for their aesthetic value. Although amigurumi originally came from Japan, the craft has spread worldwide.
Is It Difficult To Make A Crochet Plushie Toy?
The answer all depends on what kind of pattern you are following. Some patterns require complex knowledge of stitches, whereas others are suitable for beginners. The simplest amigurumi takes about 1-2 hours to crochet, whereas multi-part amigurumi (like teddy bears) without decorations takes about 6 hours.
What Level Of Crochet Skill Is Required For Making Criteria?
Basic crochet skills are sufficient for simple critter patterns. More complex patterns might require intermediate skills like working in rounds, increasing, decreasing, and detailed shaping.
How Long Does It Take To Crochet A Critter?
The time it takes can vary widely depending on the complexity of the pattern and your crochet speed. Simple critters might take a few hours, while intricate ones could require several days.
How Do I Keep The Stuffing From Showing Through?
Using a smaller hook to create tighter stitches helps prevent the stuffing from showing. Also, be cautious not to overstuff the critter.
What’s The Best Way To Create Facial Expressions On Crochet Critters?
Facial expressions can be created by carefully embroidering features like eyes, mouth, and eyebrows. The placement and shape of these features greatly influence the critter’s expression.

- 25 Delightful Crochet Jellyfish Patterns For Sea Lovers - April 17, 2024
- 75 Free Lovely Crochet Sweater Patterns (With Pictures) - February 9, 2024
- 50 Free Crochet Blanket Patterns For A Cozy Home - January 22, 2024