

Do you need help finding that perfect knitting project to elevate your skills? I’ve been there, facing the dilemma of choosing a challenging and rewarding project. As a seasoned knitting expert, I understand that tackling projects that stretch your abilities is the best way to grow.

That’s why I’ve curated a list of 34 V-Neck Vest Knitting Patterns, perfect for those looking to step up their game. These patterns are among the best resources for knitters seeking to enhance their craft. The greatest advantage? They’re varied in complexity, offering something for everyone.
Your best bet is to dive into these patterns, each a great way to learn new techniques while creating something stylish and sought-after.
The universal rule is that practice makes perfect, and these patterns are designed to ensure your success. They’re not just patterns but stepping stones to becoming a more skilled, confident knitter. All you need is your needles, some yarn, and the enthusiasm to embark on a journey of creative exploration. Let’s get knitting!
Benefits Of Knitting V-Neck Vests
Knitting vests offers numerous practical and personal benefits, making it a rewarding hobby for knitters of all skill levels. Here are some key advantages:
- Skill Development: Vests are excellent for honing knitting skills. They often incorporate techniques like ribbing, cabling, and colorwork, providing a comprehensive learning experience.
- Versatility in Style: Knitting your vests means you can choose from many patterns, yarns, and colors, allowing for complete customization. This versatility ensures that each vest can be tailored to personal style preferences.
- Seasonal Suitability: Vests are fantastic for transitional weather. They can be layered over shirts in cooler weather or worn alone in warmer climates, making them a versatile wardrobe staple.
- Sense of Accomplishment: Completing a knitted vest provides a tangible achievement. It’s rewarding to create something functional and stylish from scratch.
- Therapeutic Qualities: Like many crafts, knitting can be incredibly relaxing and meditative, helping to reduce stress and anxiety.
- Eco-Friendly Fashion: By knitting your vests, you’re participating in sustainable fashion practices, reducing waste and the environmental impact of mass-produced clothing.
- Gift-Giving Opportunities: Hand-knitted vests make thoughtful and personalized gifts for friends and family, suitable for many occasions.
- Cultural and Creative Expression: Knitting allows you to explore different cultural patterns and traditions or create your designs, fostering creativity and self-expression.
- Community and Social Interaction: Knitting vests can connect you with a broader community of knitters, whether in local craft groups or online forums, fostering friendships and shared learning.
- Portability: Vest projects are generally smaller and more portable than oversized garments like sweaters or blankets, making them convenient to work on anywhere.
- Suitable for All Ages and Genders: Vests are timeless and can be knitted for people of all ages and genders, making them a universally appealing project.
- Cost-Effective Wardrobe Addition: By knitting your vests, you can create high-quality garments at a fraction of the cost of purchasing designer or boutique items.
- Longevity and Quality Control: Hand-knitted items often last longer due to the quality of the artistry and materials, ensuring that your vests can be cherished for years to come.
Various Stitches To Knit V-Neck Vests
Knitting a V-neck vest involves a variety of stitches, each contributing to the overall design and texture of the garment. Here are some common stitches used in knitting V-neck vests, along with explanations for each:
- Stockinette Stitch: This is one of the most basic knitting stitches. It’s created by knitting all the stitches in one row and purling them in the next row. Stockinette stitch results in a smooth, classic texture with a right side that’s smooth and a wrong side that’s bumpy.
- Rib Stitch: Often used for the borders and hems of vests, the rib stitch is made by alternating knit and purl stitches within the same row. Common rib patterns include 1×1 rib (alternating one knit stitch and one purl stitch) and 2×2 rib (two knit stitches followed by two purl stitches). Ribbing is stretchy and helps to keep the garment’s shape.
- Cable Stitch: Cable stitches create textured, twisting patterns that stand out from the fabric. They involve rearranging the order of stitches by placing several stitches on a cable needle, knitting some stitches from the left-hand needle, and then knitting the stitches from the cable needle.
- Moss Stitch: This stitch creates a textured, bumpy surface and adds visual interest. It’s achieved by alternating knit and purl stitches in rows and columns, creating a checkerboard effect.
- Lace Stitch: Lace stitches create open, decorative patterns in the fabric, often through yarn overs and decreases. They can add intricate details to the vest, especially along edges or panel designs.
- Garter Stitch: Made by knitting every row, the garter stitch is simple yet gives a robust, ridged fabric that lies flat. It’s often used for edging because of its non-curling properties.
- Seed Stitch: This stitch is similar to the moss stitch but involves alternating knit and purl stitches on every row, creating a textured pattern that resembles seeds. It’s often used for borders or to add texture to the main body of the vest.
- Basketweave Stitch: This stitch mimics the look of woven baskets and involves blocks of knit and purl stitches. It’s a great way to add a sophisticated, textured look to a vest.
- Slip Stitch: Slip stitches can create exciting color patterns or textures. In this technique, some stitches are moved from the left needle to the right needle without actually knitting them.
- Fair Isle (Colorwork): This technique uses two or more colors in a row to create patterns. Fair Isle is often used for decorative bands or motifs in a vest.

Common Abbreviations For Knittings
In knitting patterns, various abbreviations are commonly used to simplify instructions and save space. Here’s a list of some of the most frequently encountered knitting abbreviations and their meanings:
- CO: Cast On – Creating the initial stitches on the needle.
- BO: Bind Off – Finish your project by securing the last row of stitches.
- K: Knit – The basic knitting stitch.
- P: Purl – Another basic knitting stitch, often used in conjunction with knit stitches.
- St(s): Stitch(es) – The fundamental unit of a knitting project.
- YO: Yarn Over – An increase technique that also creates a hole, often used in lace knitting.
- K2tog: Knit Two Together – A standard method of decreasing by knitting two stitches together.
- SSK: Slip, Slip, Knit – Another decrease technique where two stitches are slipped and knitted together.
- P2tog: Purl Two Together – Decreasing by purling two stitches together.
- Sl1: Slip One – Slipping a stitch from one needle to another without knitting or purling it.
- Psso: Pass Slipped Stitch Over – Often used with slip and knit stitches for decreasing.
- RS: Right Side – The front or public side of the work.
- WS: Wrong Side – The back or private side of the work.
- PM: Place Marker – Putting a marker on the needle to indicate a specific place in the pattern.
- SM: Slip Marker – Moving the marker from the left needle to the right needle as you come to it.
- M1: Make One – An increase that creates a new stitch.
- Tbl: Through Back Loop – Knitting or purling through the back loop of a stitch, which twists it.
- Rep: Repeat – Do a sequence of stitches or pattern instructions again.
- Inc: Increase – Adding a stitch or stitches to your work.
- Dec: Decrease – Reducing the number of stitches.
- Rnd(s): Round(s) – A complete circle around a circular needle, used in knitting in the round.
- Cont: Continue – To proceed with the pattern as written.
- Beg: Begin(ning) – The start of a row, round, or pattern.
- Remain(ing) Refers to the stitches, or part of the pattern, that is left to work.
Essential Tools & Materials
Knitting a V-neck vest requires a set of essential tools and materials. The right supplies ensure the knitting process is enjoyable and the final product meets your expectations. Here’s a list of the essential tools and materials you’ll need:
V-Neck Vest Knitting Patterns Essentials
Step into the delightful world of knitting patterns! Your journey as a knitter is about to become even more engaging. These time-honored patterns will guide you in crafting a cozy and fashionable garment, perfect for layering over a favorite shirt.
First things first, choosing the correct v-neck knitting pattern can make all the difference. Whether you’re an ambitious beginner or a seasoned pro, there’s something for everyone. Websites like knitting-bee and Ravelry offer numerous free patterns to explore and download.
As you embark on your project, gather the essentials—soft, high-quality yarn and the appropriate knitting needle size- and don’t forget stitch markers to keep track of your progress. After all, precision is key in the world of knitting.
When it comes to mastering the art of knitting a v-neck vest, here are some top tips to keep in mind:
- Gauge matters: Always work a gauge swatch before starting your project. It ensures your vest will fit just right!
- Sizing is crucial: Choose a pattern with a size range that suits your needs. Be sure to select the right size for the intended wearer.
- Think texture: Play with different stitches to add interesting texture to your vest. Patterns like Diamond Texture Vest can help you level up your knitting skills.
RELATED: 25 Knitting Cast-On Methods Dive Into The World Of Crafting
Which Yarn Is Best To Knit V-Neck Vests?
As a seasoned knitter, I’ve found that the choice of yarn can significantly impact the look and feel of a V-neck vest. Different yarns bring unique qualities to the finished garment. Here’s my take on various yarns suitable for knitting V-neck vests:
- Wool: Wool is a classic choice for vests due to its warmth, durability, and elasticity. It’s great for colder climates and holds its shape well. I love using merino wool for a softer touch, especially for vests worn directly against the skin.
- Cotton: Cotton yarn is ideal for warmer climates or springtime vests. It’s breathable, lightweight, and has a nice drape. However, cotton can be less elastic than wool, so it’s best for more structured designs.
- Acrylic: Acrylic is a good choice for those who prefer easy care or are allergic to animal fibers. It’s machine washable and comes in a wide range of colors. However, it doesn’t breathe as well as natural fibers, so I usually consider the climate and use of the vest before choosing acrylic.
- Blends: Blended yarns, like wool-acrylic or cotton-bamboo, combine the best qualities of their components. For instance, a wool-acrylic blend can offer warmth and softness with added durability and ease of care.
- Alpaca: Alpaca is warmer than wool and incredibly soft. It’s perfect for luxurious, cozy vests. However, it can be a bit slippery to work with and may stretch over time, so I use it for special projects where luxury and comfort are essential.
- Cashmere: Cashmere is unbeatable in terms of softness and warmth for an indulgent option. It’s perfect for a high-end vest but can be expensive and requires delicate care.
- Bamboo: Bamboo yarn is smooth, with a lovely sheen and excellent drape. It’s hypoallergenic and cool, ideal for lightweight, summery vests.
- Silk: Silk yarn creates a vest with a beautiful sheen and elegant drape. It’s strong and holds color well, but it can be expensive and require hand washing.
- Linen: Linen has a unique, rustic texture and gets softer over time. It’s excellent for lightweight, breathable vests and particularly for summer wear.
How Much Yarn Do I Need To Knit Mittens?
Determining how much yarn you’ll need for a V-neck vest depends on several factors, such as the vest’s size, the yarn weight, and the pattern’s complexity. Generally, you might need anywhere from 500 to 800 yards of yarn for an average-sized adult vest.
If you’re using a lighter weight yarn, like fingering or sport weight, you’ll need more yardage, whereas heavier yarns like worsted or chunky will require less. The vest’s design also plays a role – a simple stockinette stitch vest will use less yarn than one with intricate cables or colorwork.
Always check the yarn requirements in your pattern, as they provide the most accurate estimate. I also recommend buying a little extra yarn, especially if the yarn is dyed in lots, to ensure color consistency and enough for any miscalculations or adjustments.
Understand Knitting Stitches And Techniques
Understanding knitting stitches and techniques starts with familiarizing yourself with the basics: the knit and purl stitches, which are the foundation of most patterns. I practiced these two stitches until I felt comfortable with their rhythm and tension.
Then, I explored variations like ribbing, created by alternating knit and purl stitches, and more complex patterns like cables and lace, which involve specific combinations of these basic stitches.
Reading patterns and watching instructional videos helped me visualize the techniques. Practice is vital; with each project, my understanding deepened as I applied and experimented with different stitches and techniques.
Basic Knitting Techniques For V-Neck Vests
Knitting a V-neck vest involves various basic techniques for creating a well-structured and attractive garment. Here are some fundamental knitting techniques you’ll likely use when crafting a V-neck vest:
- Casting On: This is the method of creating the initial stitches on your needle. There are various cast-on methods, with the long-tail cast-on being a popular choice for its elasticity and neat edge.
- Knit Stitch (K): The most basic knitting stitch, forming the foundation of many patterns.
- Purl Stitch (P): The inverse of the knit stitch, often combined with knit stitches for various textures and patterns.
- Ribbing: Typically used for the hem, cuffs, and neckline, ribbing is created by alternating knit and purl stitches. Common ribbing patterns for vests include 1×1 (K1, P1) and 2×2 (K2, P2) rib.
- Increasing and Decreasing: Techniques used to shape the vest, particularly around the armholes and the V-neck. Standard methods include knitting two stitches together (k2tog) for decreasing and yarn over (yo) or making one (m1) for increasing.
- Binding Off (or Casting Off): This technique secures the final stitches, so your work doesn’t unravel. It’s used when you’ve completed your vest.
- Picking Up Stitches: For the V-neck and armhole edges, you’ll often need to pick up stitches along the edge to create a ribbed border or to continue knitting in another direction.
- Working in the Round: Some vests are worked in the round to avoid seams. It requires knitting continuously on circular needles.
- Mattress Stitch or Seaming: If your vest is knitted in pieces, you must seam them together. The mattress stitch is a standard method for creating nearly invisible seams.
- Blocking: After finishing your knitting, blocking is the process of wetting and then shaping your garment to the correct size and letting it dry. It helps even out the stitches and gives your vest a professional finish.
Is Knitting V-Neck Vests Beginner Friendly?
From my experience, knitting V-neck vests can be beginner-friendly, depending on the pattern you choose. Simple vest designs that use basic stitches like knit and purl and minimal shaping are an excellent way for beginners to delve into garment making.
The V-neck feature does require some skill in shaping and picking up stitches, but with patience and practice, it’s manageable. I recommend starting with a pattern with clear instructions and watching tutorial videos for tricky parts like the V-neck shaping. It’s a rewarding project that helps beginners build confidence and skills in knitting garments.
How do you cast on to knit V-neck vests, and how many stitches?
Casting on a V-neck vest is crucial, as it sets the foundation for the entire garment. The number of stitches to cast varies depending on several factors: the vest size, the yarn weight, the needle size, and the specific pattern you’re following. Here’s a general guide on how to cast on a V-neck vest:
- Choose Your Pattern and Size: Select a V-neck vest pattern and determine the size you want to knit. The pattern will specify the number of stitches to cast on for your chosen size.
- Gauge Swatch: Before casting on, knit a gauge swatch. This step ensures your knitting matches the pattern’s gauge (stitches per inch/cm). If your gauge is off, you may need to adjust the needle size or modify the number of stitches to cast on.
- Selecting the Cast-On Method: A stretchy yet firm cast-on for V-neck vests is ideal, especially for the bottom edge. The long-tail cast-on is a popular choice as it provides a neat and elastic edge, suitable for the hem of the vest.
- Calculating Stitches: Based on the gauge provided in the pattern (stitches per inch/cm) and your gauge swatch, calculate the number of stitches to cast on. For example, if the pattern gauge is 5 stitches per inch and the width of your vest is supposed to be 20 inches, you will need to cast on 100 stitches (5 stitches x 20 inches).
- Casting On: Using the chosen method (e.g., long-tail cast-on), cast on the calculated number of stitches. Make sure your cast-on edge is not too tight, as this can affect the fit and look of the vest.
- Beginning the Ribbing: Many vests start with a ribbed hem. After casting on, proceed with the ribbing pattern as directed in your pattern (commonly 1×1 or 2×2 rib).
RELATED: The Size Spectrum Exploring Knitting Needle Sizes For Every Project
How To Knit A Beginner-Friendly V-Neck Vest? – Step By Step Instructions
Knitting a beginner-friendly V-neck vest can be a rewarding project for novice knitters. Here’s a step-by-step guide to help you through the process. The difficulty level for this project is beginner to intermediate, mainly because of the V-neck shaping.
Skill Level
Easy
Materials Needed
- Medium-weight yarn (worsted or DK weight is ideal for beginners)
- Circular knitting needles (check the yarn label for recommendations)
- Stitch markers
- Tapestry needle for weaving in ends
- Scissors
Step-by-Step Instructions
- Choose Your Pattern and Yarn: Select a simple V-neck vest pattern and a yarn that matches the recommended weight. Look for patterns with minimal shaping and a straightforward stitch pattern.
- Gauge Swatch: Knit a gauge swatch to ensure your stitch size matches the pattern recommendation. Adjust needle size if necessary to achieve the correct gauge.
- Casting On: Cast on the required number of stitches per your pattern. The long-tail cast-on method is recommended for beginners for its elasticity and ease.
- Knit the Ribbing: Start with the ribbed hem (usually 1×1 or 2×2 rib) for the rows specified. It adds elasticity to the bottom edge of the vest.
- Body of the Vest: After the ribbing, continue knitting the body of the vest in stockinette stitch (knit one row, purl one row) or any simple stitch pattern your pattern suggests up to the armholes.
- Divide for Armholes: Follow your pattern to divide the work for the armholes. It usually involves binding off some stitches and working the front and back separately.
- Shape the V-neck: Follow your pattern closely when you reach the V-neck shaping. It will involve decreasing stitches at the neck edge at specified intervals. Use stitch markers to mark decreased points if needed.
- Knit the Back: The back is typically simpler, often without decreases until the shoulders.
- Shoulder Seams: Once the front and back pieces are complete, bind off the shoulders and seam them together using the mattress stitch or another seaming method.
- Pick Up and Knit Neckline and Armhole Edges: Using your circular needles, pick up stitches around the neckline and armholes and knit the ribbing as directed in your pattern.
- Finishing Touches: Weave in all loose ends with a tapestry needle. Block your vest according to the yarn instructions to even out the stitches and give your vest its final shape and size.
34 V-Neck Vest Styles
1. Classic V-Neck Vest Knitting Pattern
This pattern is timeless and features a simple and clean v-neckline. It typically has a straightforward construction, making it an excellent option for beginners or those who prefer a more traditional look.
Suggested Yarn: Worsted Weight Yarn
Difficulty Level: Intermediate
Yarn Weight: Worsted
Needle Size: 5.0mm (US 8)
2. Cable Knit V-Neck Vest Pattern
This pattern incorporates cable stitches, creating a textured and intricate design. The cables can be arranged in various ways, such as twisting or braiding, to add visual interest and depth to the vest.
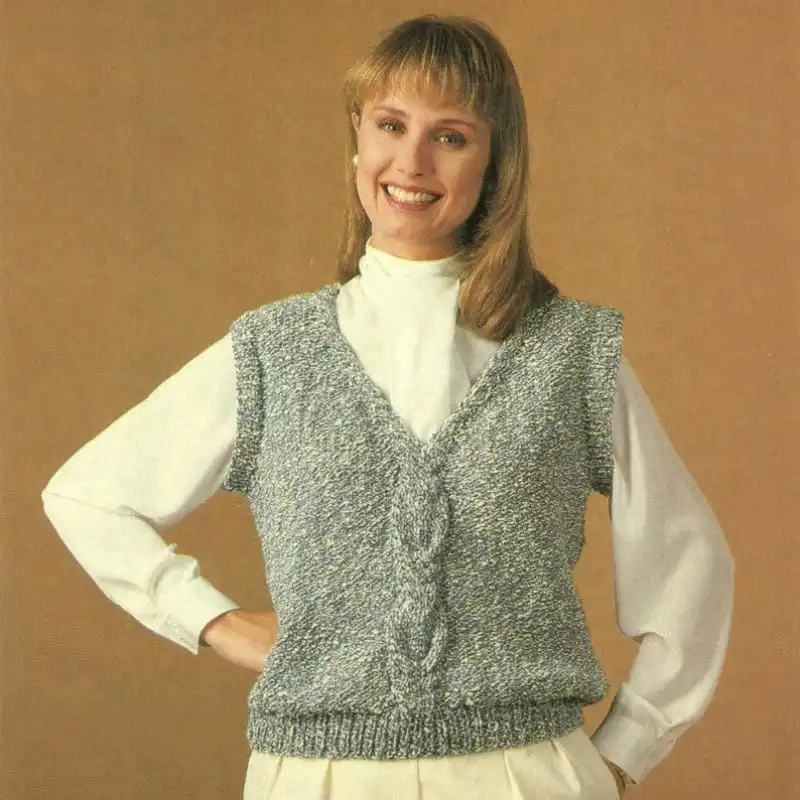
Suggested Yarn: Aran Weight Yarn
Difficulty Level: Intermediate
Yarn Weight: Aran
Needle Size: 5.5mm (US 9)
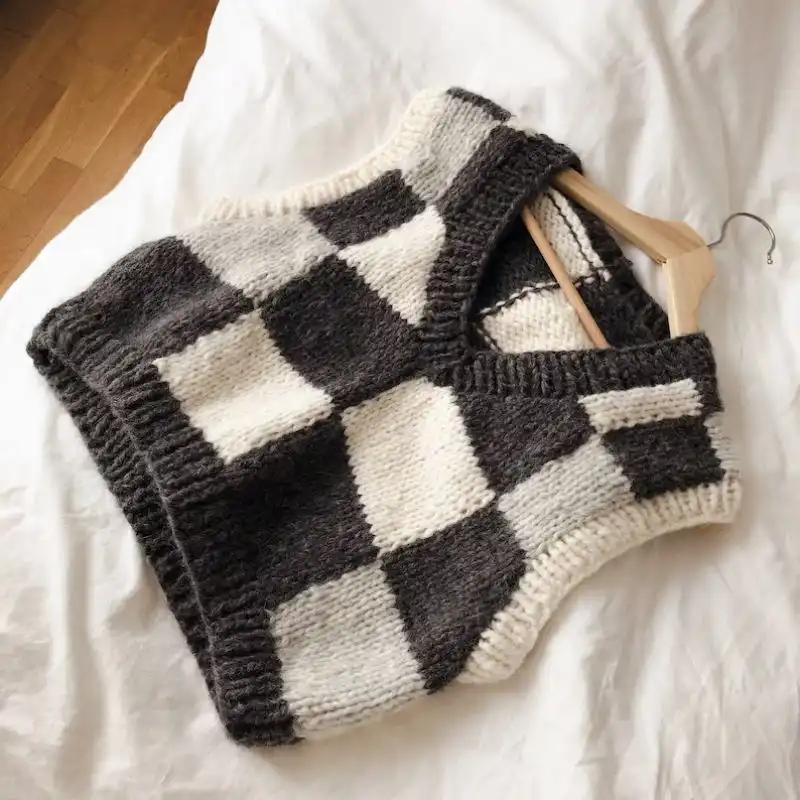
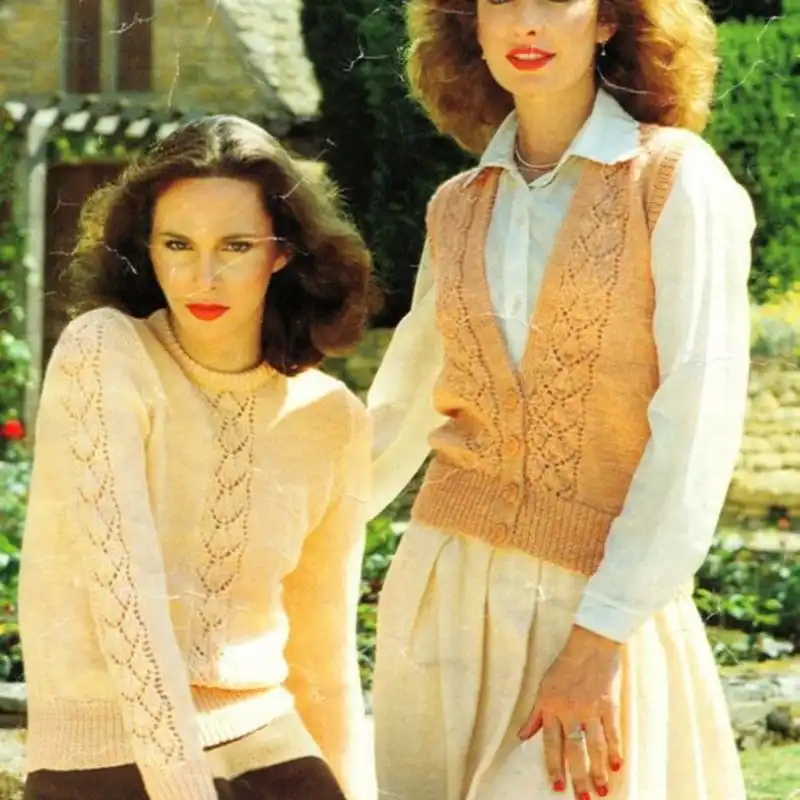
3. 80s Vibe Cable Vest
Relive the bold and dynamic fashion of the 1980s with the 80s Vibe Cable Vest. This vest is a nod to the era’s iconic styles, featuring intricate cable patterns, making it a fashion-forward and nostalgic addition to your wardrobe.
Suggested Yarn: Bulky Weight Yarn
Difficulty Level: Intermediate
Yarn Weight: Bulky
Needle Size: 6.0mm (US 10)
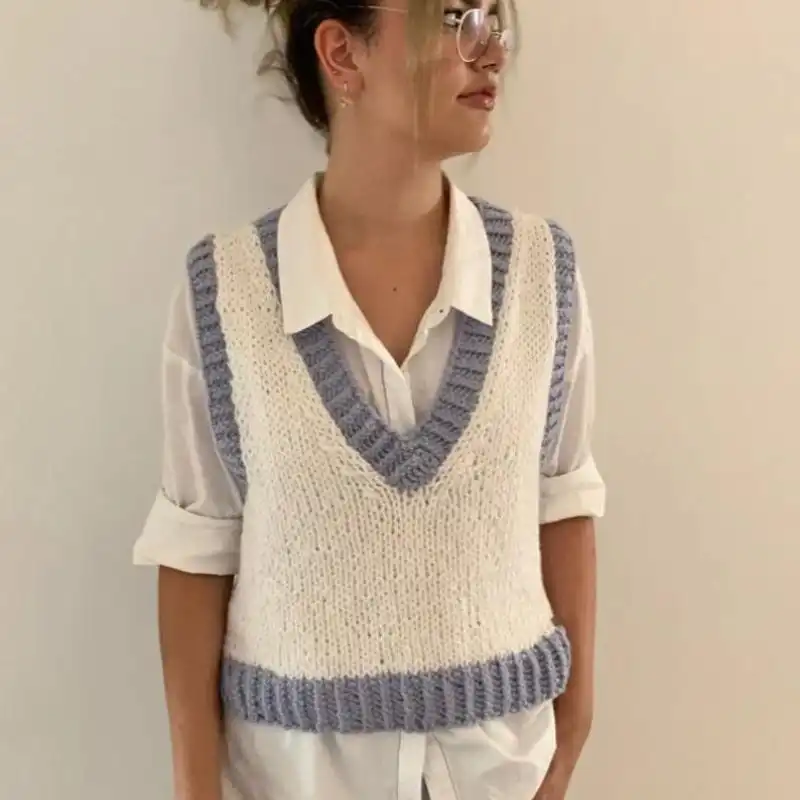
4. Slipover Sleeveless V-neck vest
The Slipover Sleeveless V-Neck Vest is the epitome of effortless style. Its sleeveless design allows for easy layering, making it a versatile garment that transitions seamlessly from season to season.
Suggested Yarn: DK Weight Yarn
Difficulty Level: Intermediate
Yarn Weight: DK
Needle Size: 4.0mm (US 6)
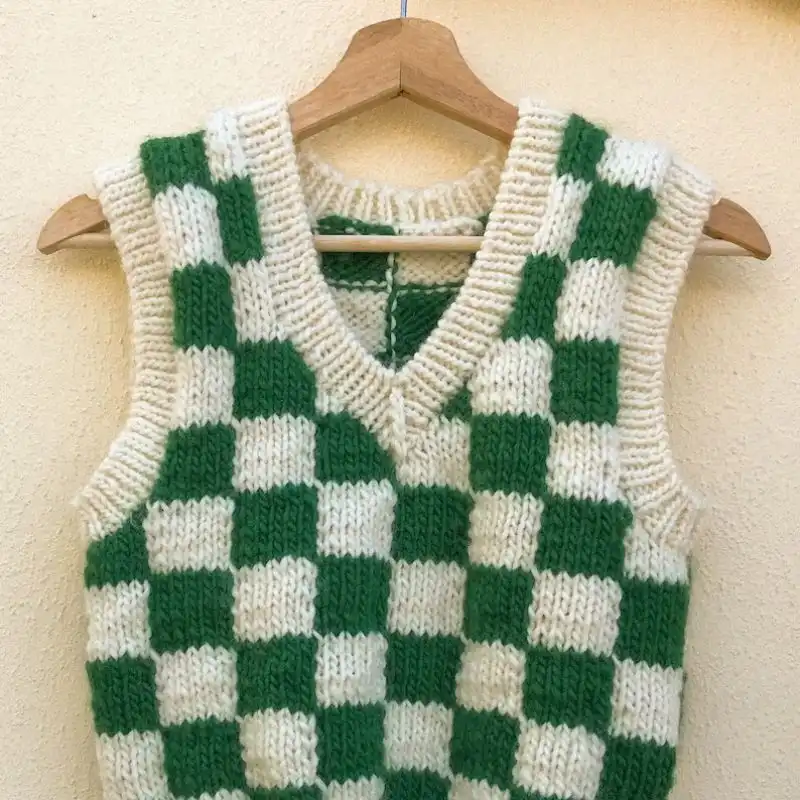
5. The Varsity V-Neck Vest
Show off your team spirit in style with The Varsity V-Neck Vest. Whether cheering for your alma mater or embracing a sporty aesthetic, this vest is a perfect blend of casual comfort and collegiate charm.
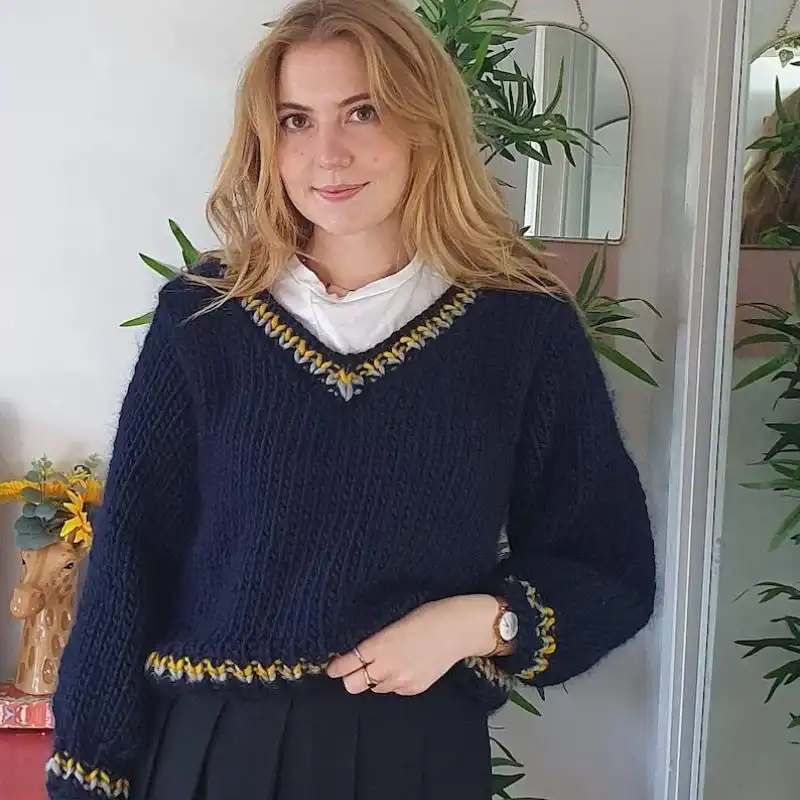
Suggested Yarn: Sport Weight Yarn
Difficulty Level: Intermediate
Yarn Weight: Sport
Needle Size: 3.75mm (US 5)
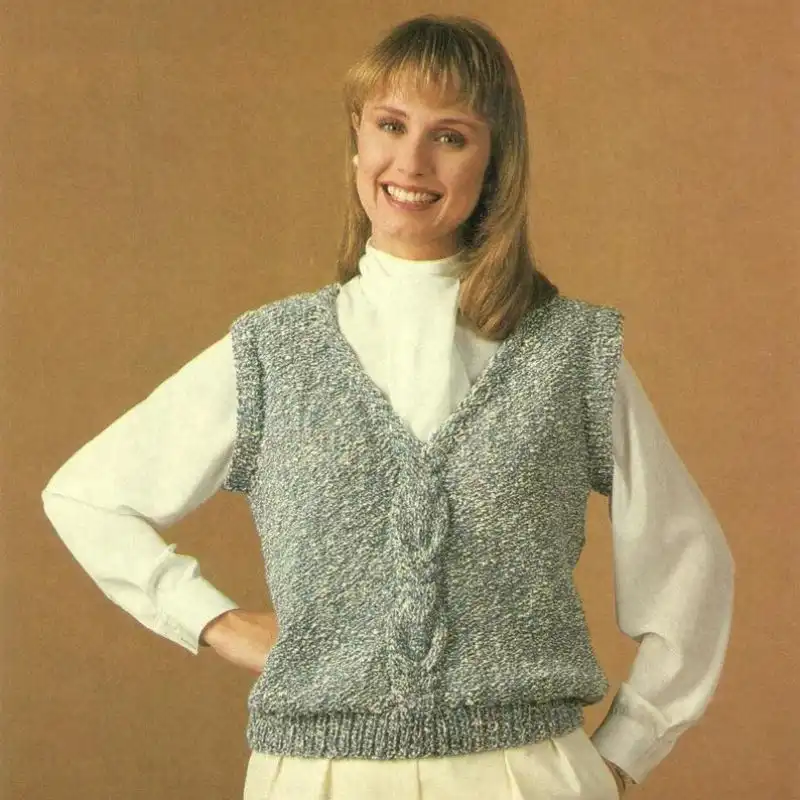
6. V-Neck Sweater Vest
Timeless and versatile, the V-Neck Sweater Vest is a classic wardrobe staple. Its clean lines and simple silhouette make it an ideal canvas for showcasing your favorite yarn and color combinations.
Suggested Yarn: Worsted Weight Yarn
Difficulty Level: Intermediate
Yarn Weight: Worsted
Needle Size: 5.0mm (US 8)
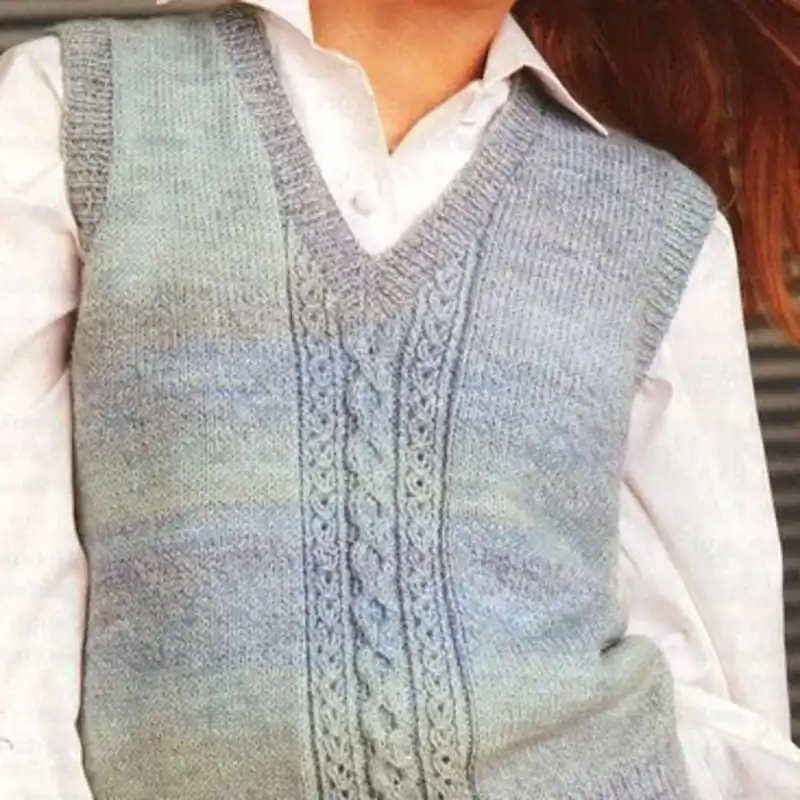
7. Textured V-Neck Vest
Elevate your knitting skills with the Textured V-Neck Vest. Combining different stitch patterns adds depth and visual interest, creating a textured masterpiece that stands out.
Suggested Yarn: Aran Weight Yarn
Difficulty Level: Intermediate
Yarn Weight: Aran
Needle Size: 5.5mm (US 8)
8. Rib Patterned V-Neck Vest
Embrace the understated elegance of the Rib Patterned V-Neck Vest. The ribbed texture adds a touch of sophistication and ensures a comfortable and flattering fit.
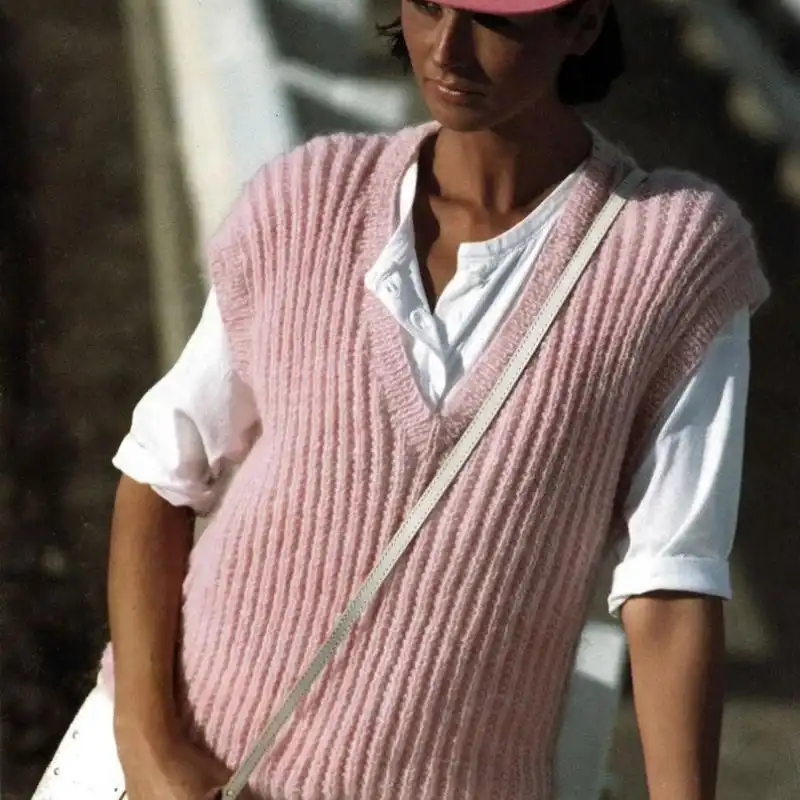
Suggested Yarn: Bulky Weight Yarn
Difficulty Level: Intermediate
Yarn Weight: Bulky
Needle Size: 6.0mm (US 10)
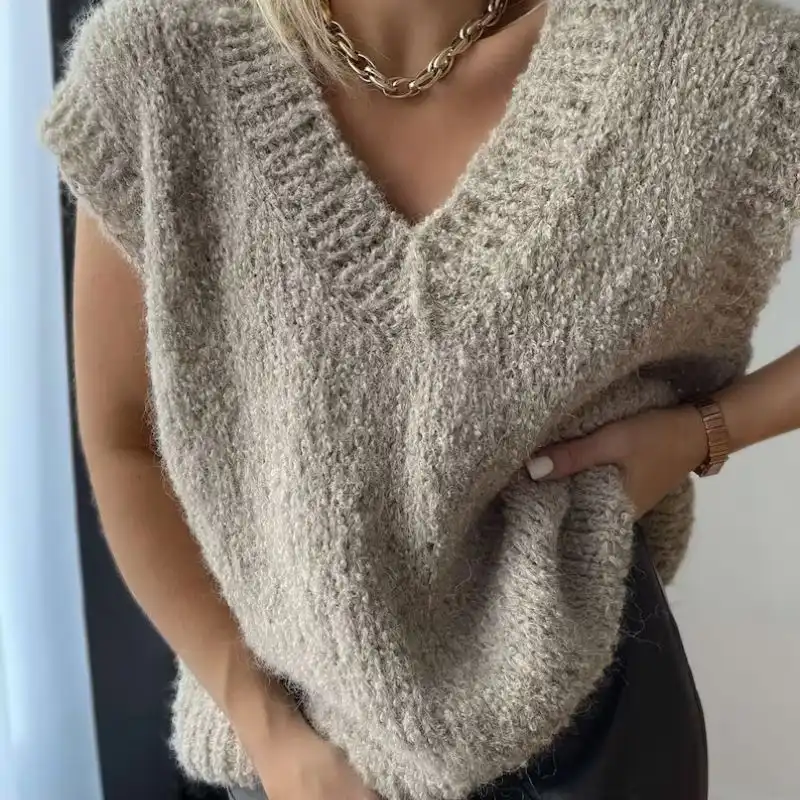
9. Fisherman Rib Slipover V-Neck Vest
Wrap yourself in the cozy comfort of the Fisherman’s Rib Slipover V-Neck Vest. The plushness of the fisherman’s rib makes it a perfect choice for staying warm in style during colder months.
Suggested Yarn: Aran Weight Yarn
Difficulty Level: Intermediate
Yarn Weight: Aran
Needle Size: 5.5mm (US 9)
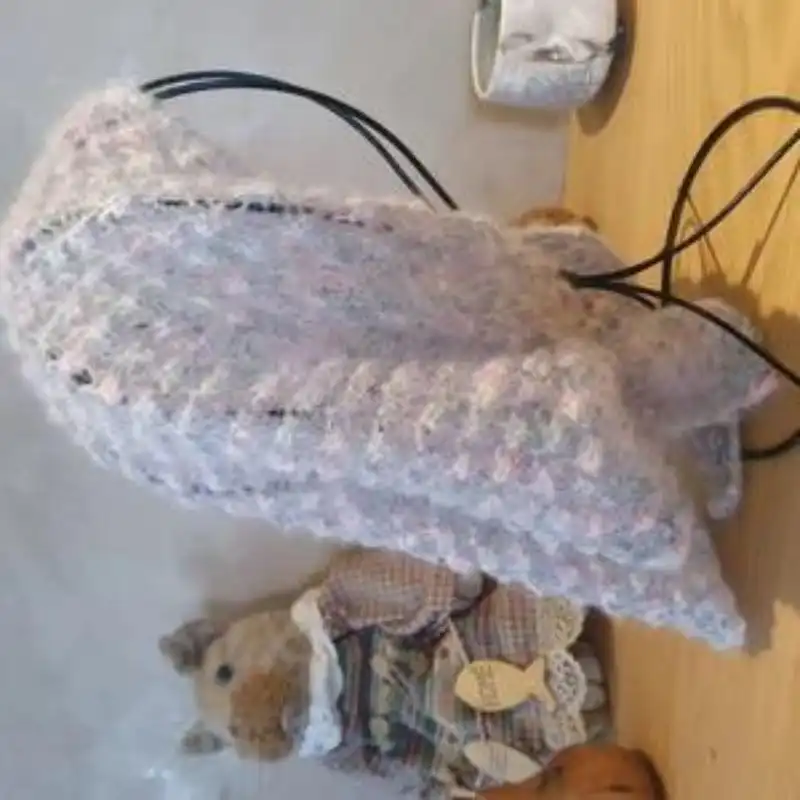
10. Eggcellent V-Neck Vest
Infuse a sense of playfulness into your wardrobe with the Eggcellent V-Neck Vest. This whimsical design, featuring charming egg motifs, brings your ensemble a lighthearted and quirky touch.
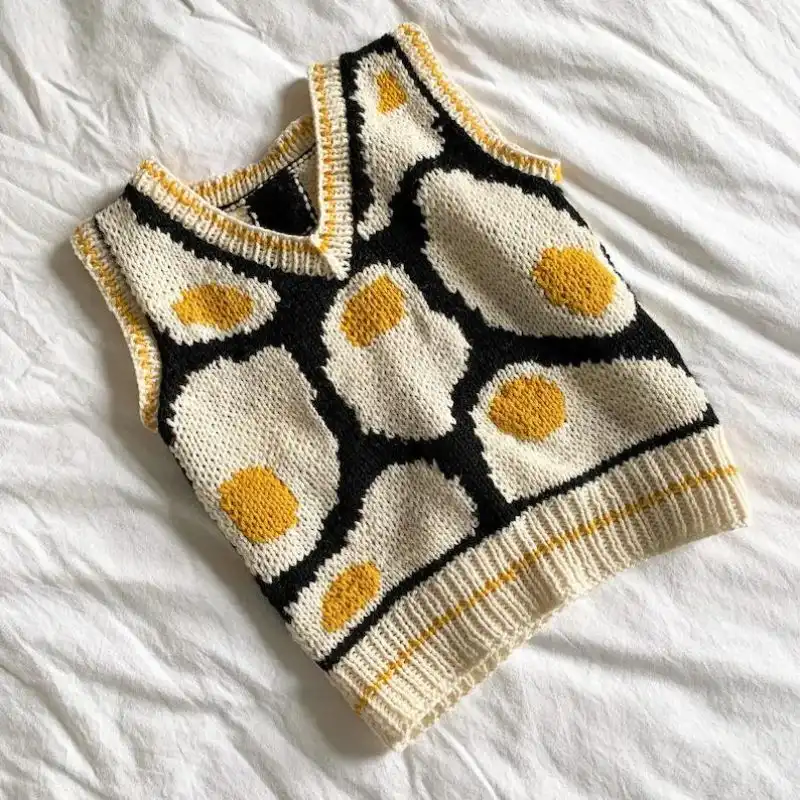
Suggested Yarn: DK Weight Yarn
Difficulty Level: Intermediate
Yarn Weight: DK
Needle Size: 4.0mm (US 6)
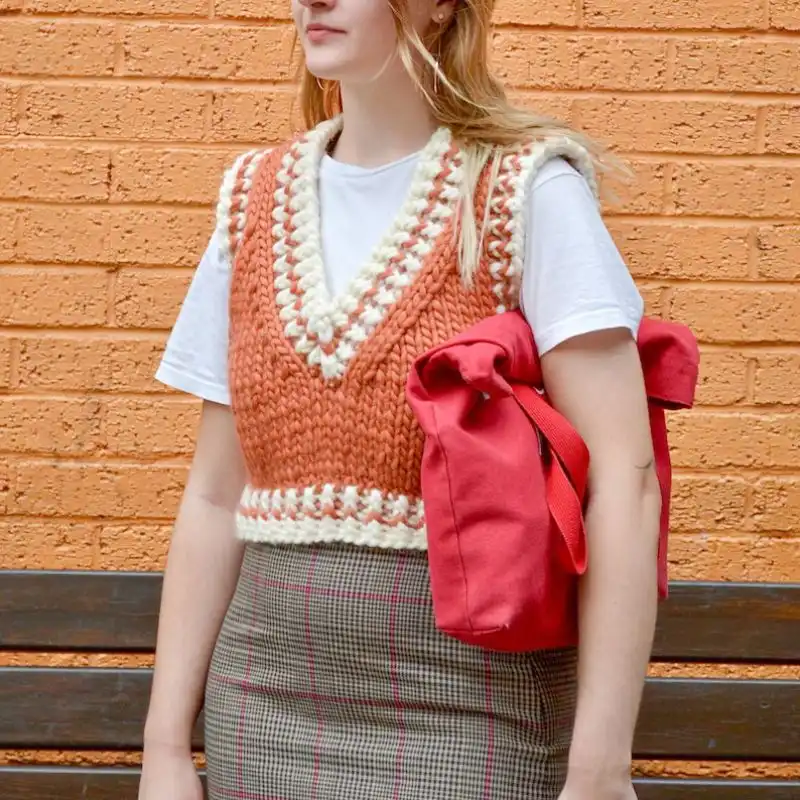
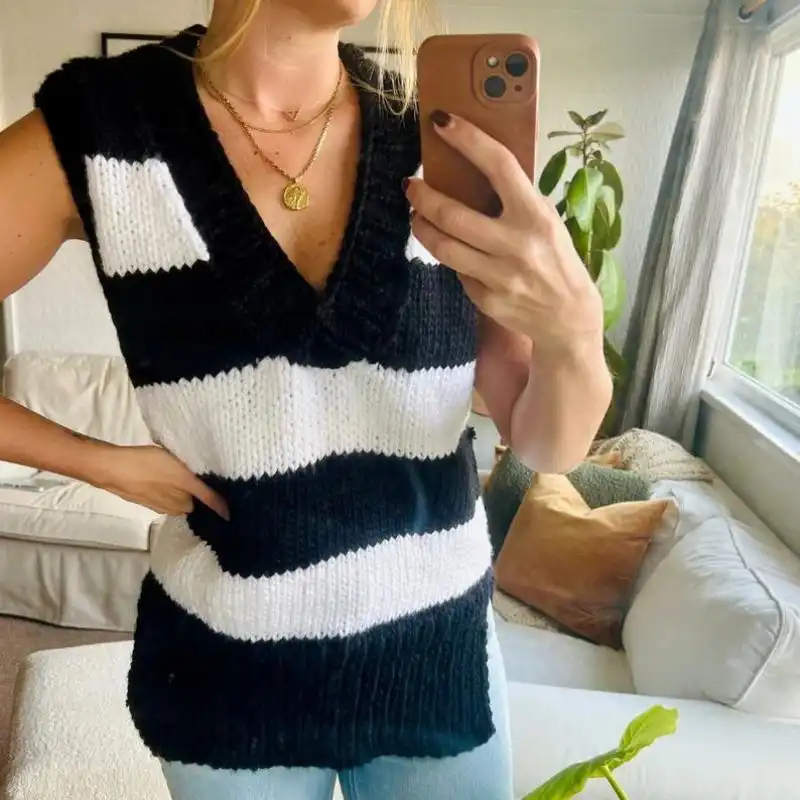
11. Chunky V-Neck Vest
Make a bold statement with the Chunky V-neck vest. The oversized silhouette and chunky yarn create a cozy, fashionable piece perfect for staying warm in chilly weather.
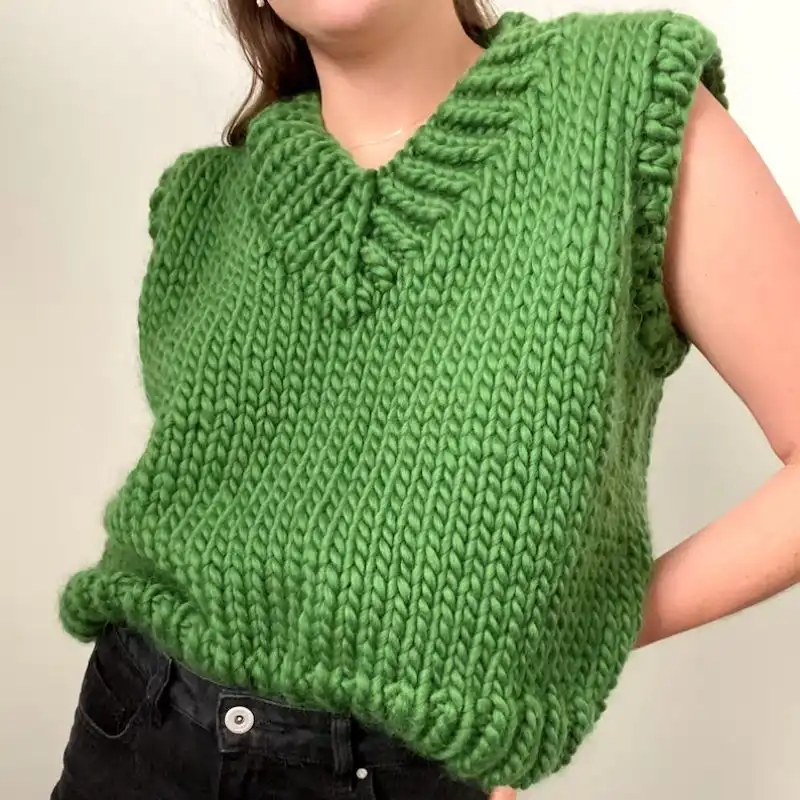
Suggested Yarn: Chunky Weight Yarn
Difficulty Level: Intermediate
Yarn Weight: Chunky
Needle Size: 8.0mm (US 11)
12. Oversized V-Neck Vest
Embrace the trend of oversized fashion with the Oversized V-neck vest. Its relaxed fit adds an element of laid-back chic, making it a go-to choice for casual and comfortable styling.
Suggested Yarn: Worsted Weight Yarn
Difficulty Level: Intermediate
Yarn Weight: Worsted
Needle Size: 5.0mm (US 8)
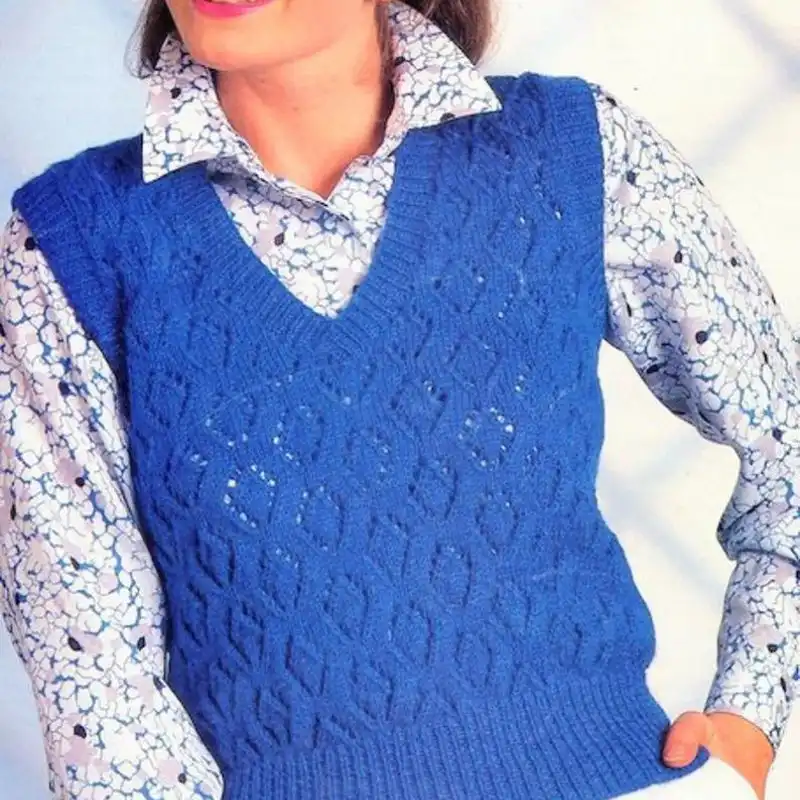
13. Lace Panel V-Neck Vest Knitting Pattern
Add a touch of romance to your wardrobe with the Lace Panel V-Neck Vest. Delicate lace panels create a graceful and feminine look, making it an ideal choice for casual and dressier occasions.
Suggested Yarn: Fingering Weight Yarn
Difficulty Level: Intermediate
Yarn Weight: Fingering
Needle Size: 3.5mm (US 4)
14. Women’s 90s worsted V-Neck Vest
Journey back to the ’90s with this worsted V-Neck Vest designed for women. This vest is a perfect blend of nostalgia and contemporary style, capturing the essence of a fashionable era.
Suggested Yarn: Worsted Weight Yarn
Difficulty Level: Intermediate
Yarn Weight: Worsted
Needle Size: 5.0mm (US 8)
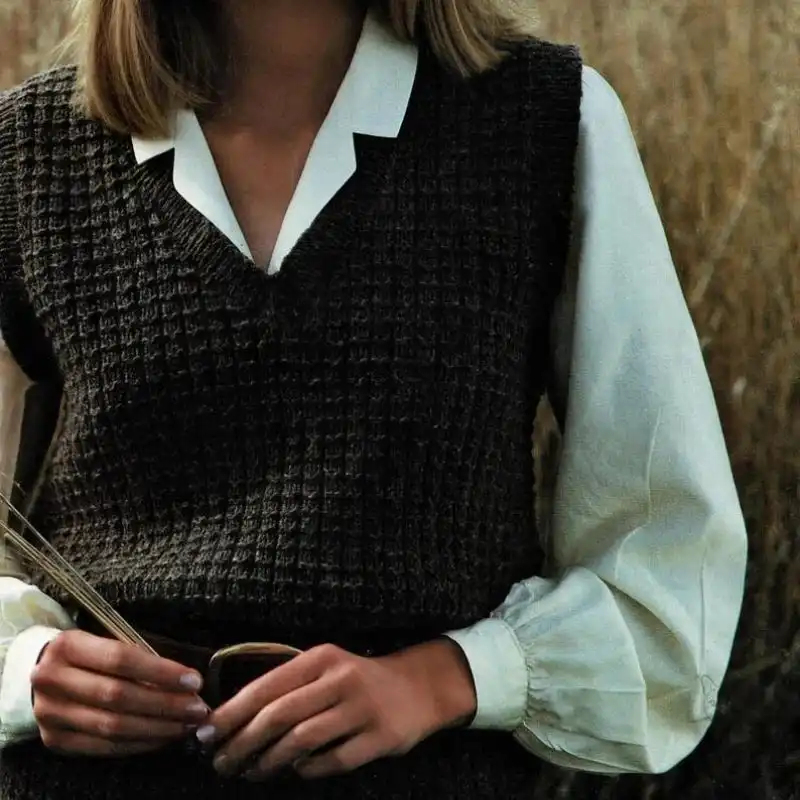
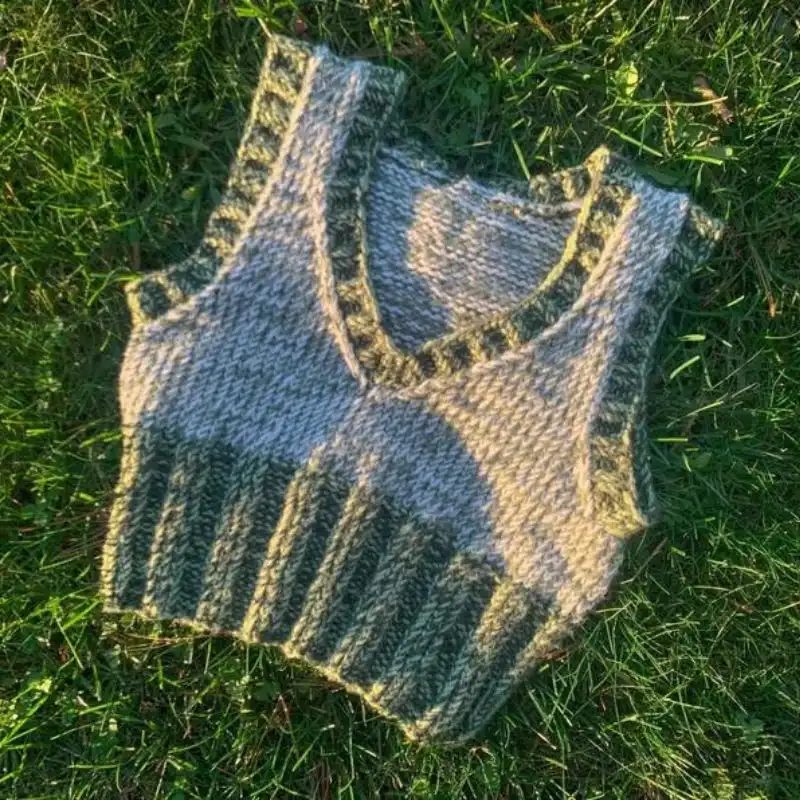
15. Deep V-Neck Moss Stitch Vest
Revel in the allure of the Deep V-Neck Moss Stitch Vest. The moss stitch creates a beautifully textured fabric, while the deep neckline adds a touch of sophistication and allure to your outfit.

Suggested Yarn: DK Weight Yarn
Difficulty Level: Intermediate
Yarn Weight: Worsted
Needle Size: 5.0mm (US 8)
16. The Blossom V-Neck Vest
Embrace the beauty of blossoms with The Blossom V-Neck Vest. Featuring floral motifs, this vest adds a touch of springtime charm to your wardrobe, making it a delightful choice for the season.

Suggested Yarn: Sport Weight Yarn
Difficulty Level: Intermediate
Yarn Weight: Sport
Needle Size: 3.75mm (US 5)
17. Intarsia Squiggly V-Neck Vest
Unleash your creative spirit with the Intarsia Squiggly V-Neck Vest. Playful squiggly patterns add a modern and artistic touch to this unique, eye-catching garment.
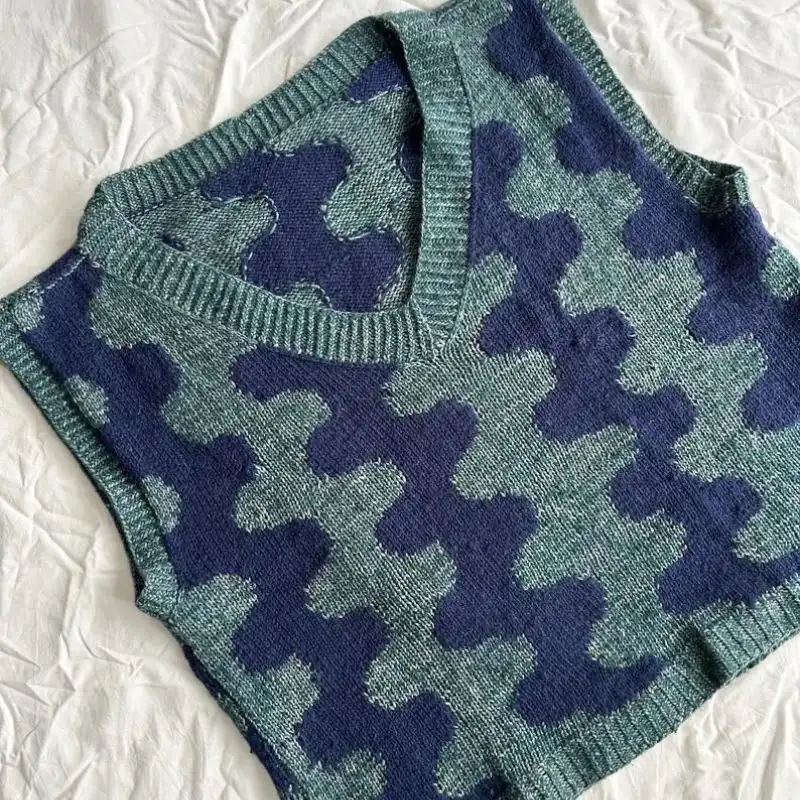
Suggested Yarn: Worsted Weight Yarn
Difficulty Level: Advanced
Yarn Weight: Worsted
Needle Size: 5.0mm (US 8)
18. Chevron Lace V-Neck Vest Pattern
Elevate your ensemble with the Chevron Lace V-neck vest. The chevron lace pattern creates a visually striking design that adds an element of sophistication to your wardrobe.
Suggested Yarn: Fingering Weight Yarn
Difficulty Level: Intermediate
Yarn Weight: Fingering
Needle Size: 3.5mm (US 4)
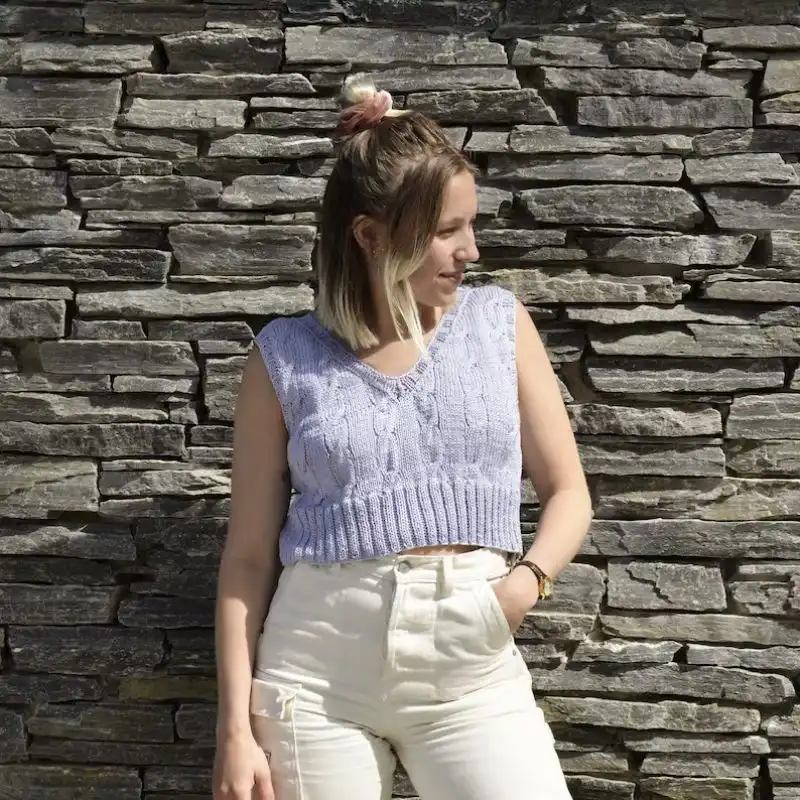
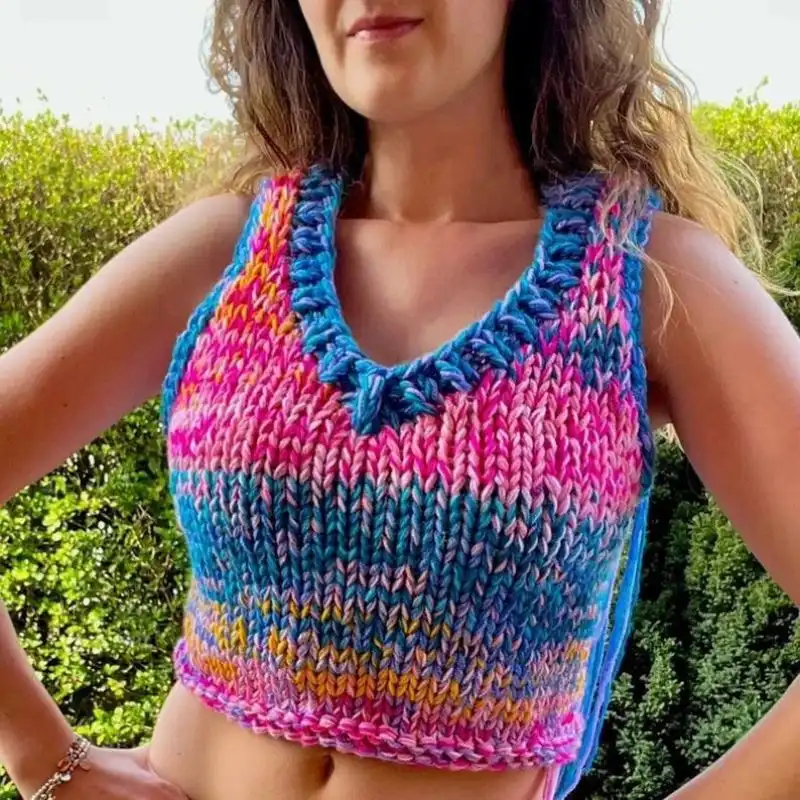
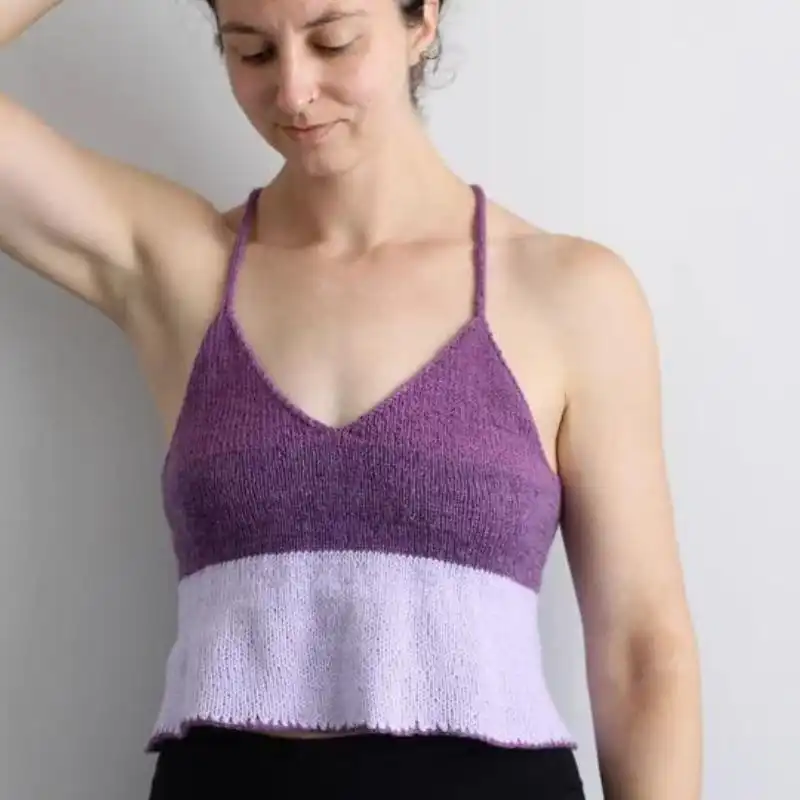
19. Oversized Cropped V-Neck Vest
Stay on-trend with the Oversized Cropped V-neck vest. The combination of an oversized fit and cropped length makes it a contemporary and stylish choice for fashion enthusiasts.
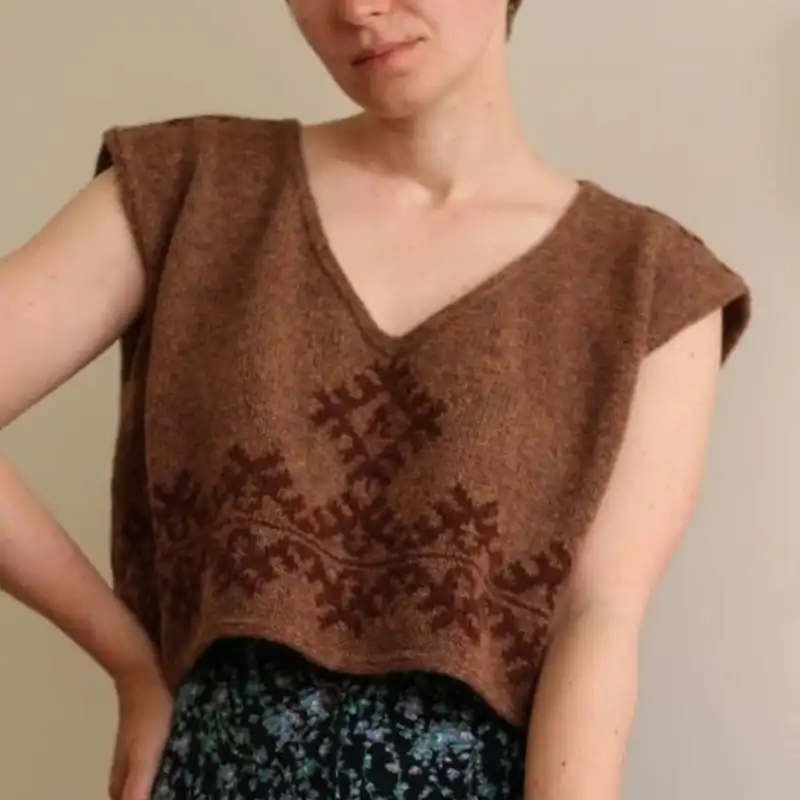
Suggested Yarn: Bulky Weight Yarn
Difficulty Level: Intermediate
Yarn Weight: Bulky
Needle Size: 10.0mm (US 15)
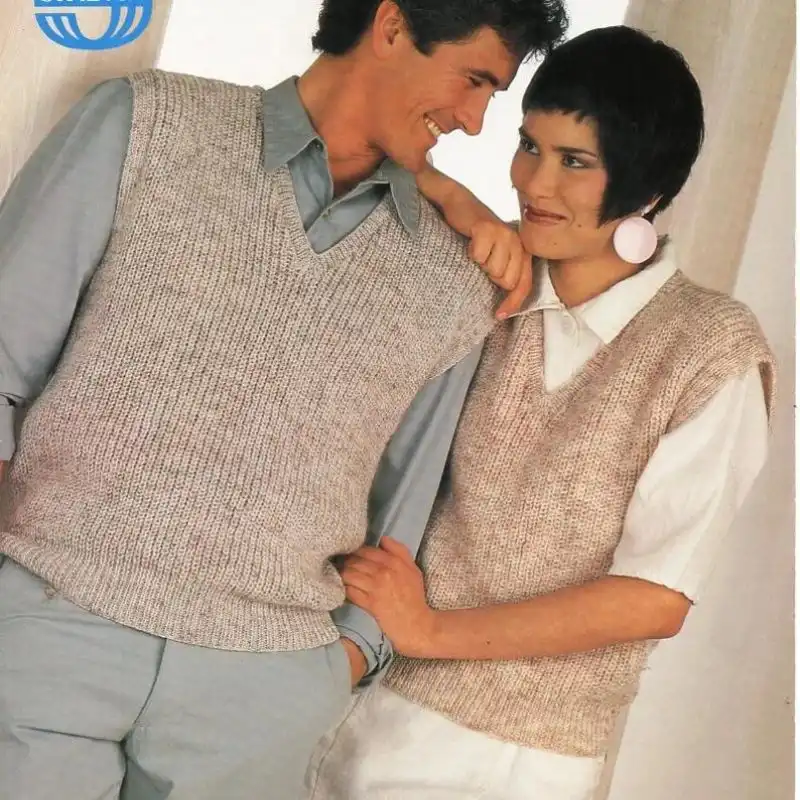
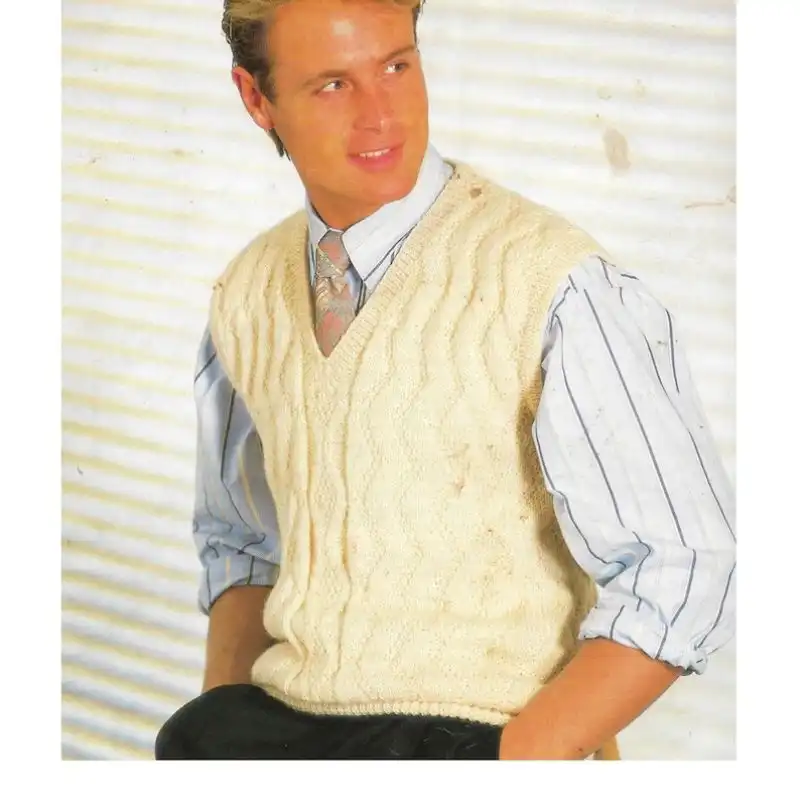
20. Men’s V Neck Sleeveless Sweater Vest
Tailored for the modern man, the Men’s V Neck Sleeveless Sweater Vest is a versatile and masculine addition to any wardrobe. It blends style and comfort effortlessly, ideal for layering over shirts or tees.
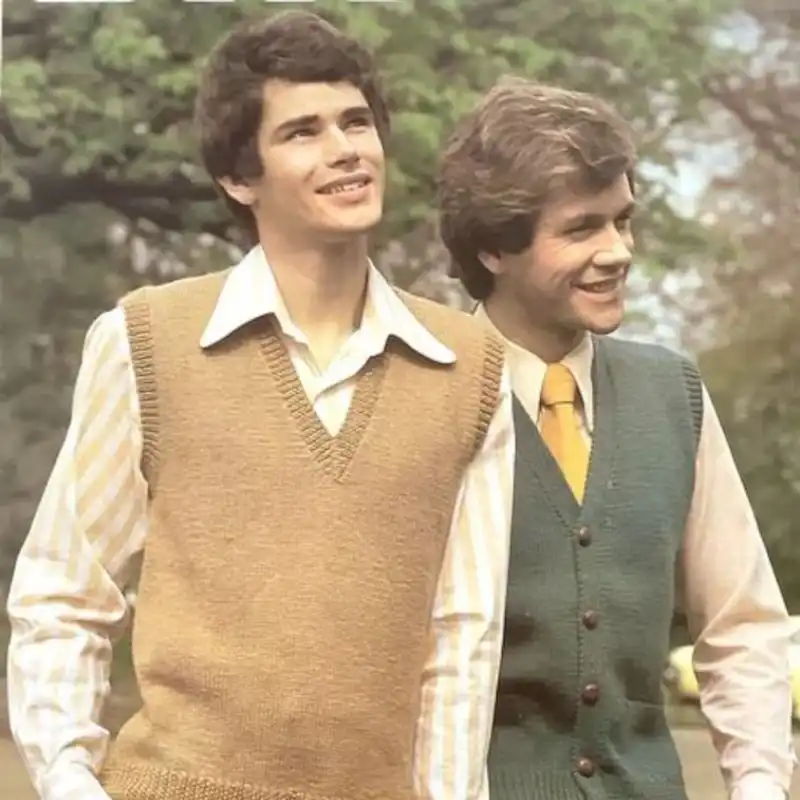
Suggested Yarn: Worsted Weight Yarn
Difficulty Level: Intermediate
Yarn Weight: Worsted
Needle Size: 5.0mm (US 8)
21. College V-Neck Vest
Showcase your school pride with the College V-Neck Vest. Whether you’re an alum or a current student, this vest is a stylish way to represent your alma mater in a sophisticated and fashionable manner.
Suggested Yarn: Worsted Weight Yarn
Difficulty Level: Intermediate
Yarn Weight: Worsted
Needle Size: 5.0mm (US 8)
22. Ficus V-Neck Vest
Inspired by nature, the Ficus V-Neck Vest features botanical motifs that bring a touch of the outdoors to your wardrobe. It’s a perfect balance of style and comfort with a hint of organic elegance.
Suggested Yarn: Sport Weight Yarn
Difficulty Level: Intermediate
Yarn Weight: Sport
Needle Size: 3.75mm (US 5)
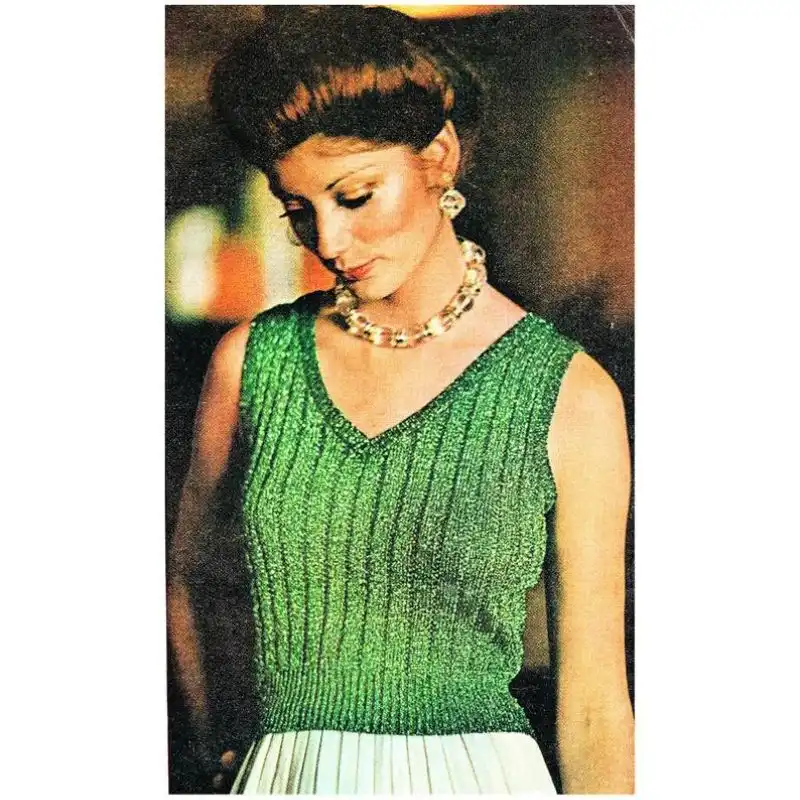
23. Vintage V-Neck Vest
Transport yourself to a bygone era with the Vintage V-Neck Vest. Classic and timeless, it’s a versatile piece that transcends trends, offering a touch of vintage charm to your modern wardrobe.
Suggested Yarn: Worsted Weight Yarn
Difficulty Level: Intermediate
Yarn Weight: Worsted
Needle Size: 5.0mm (US 8)
24. The Jo V-Neck Vest
Named after its effortless and versatile style, The Jo V-Neck Vest is a modern wardrobe essential. Dress it up or down for any occasion, making it a reliable go-to for various looks.
Suggested Yarn: Aran Weight Yarn
Difficulty Level: Intermediate
Yarn Weight: Worsted
Needle Size: 5.0mm (US 8)
25. Diamond Lace V-Neck Vest
Shine bright with the Diamond Lace V-Neck Vest. The intricate lace pattern creates a dazzling effect, making it a statement piece suitable for special occasions and elegant evenings.
Suggested Yarn: Fingering Weight Yarn
Difficulty Level: Intermediate
Yarn Weight: Worsted
Needle Size: 5.0mm (US 8)
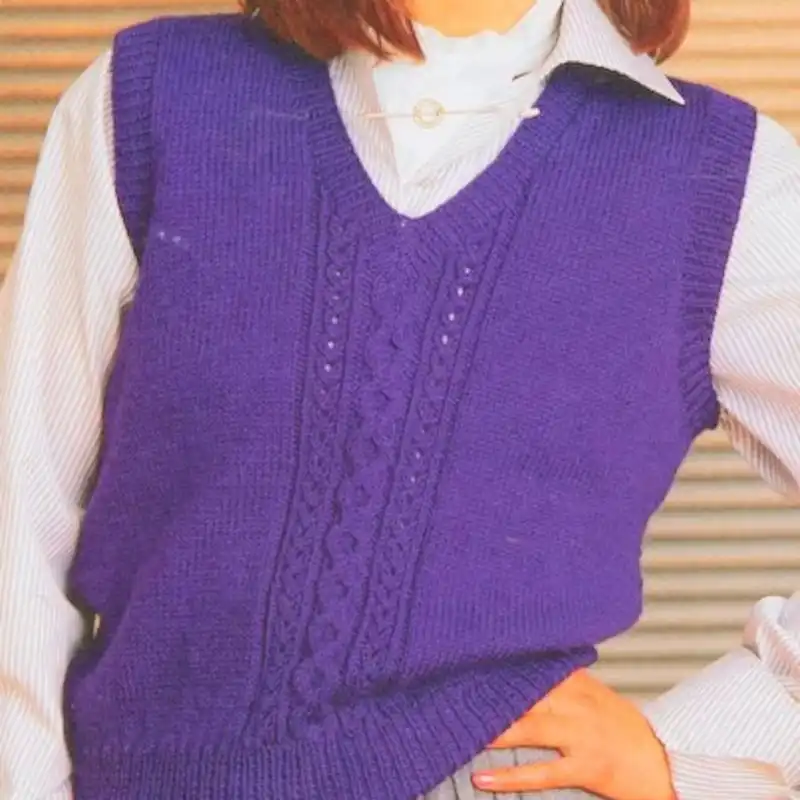
26. Cable V-Neck Vest
Master the art of cables with the Cable V-Neck Vest. This vest showcases classic knitting techniques and is timeless and sophisticated, perfect for those who appreciate intricate craftsmanship.
Suggested Yarn: Worsted Weight Yarn
Difficulty Level: Intermediate
Yarn Weight: Worsted
Needle Size: 5.0mm (US 8)
27. Cowl V-Neck Vest
Experience the best of both worlds with the Cowl V-Neck Vest. The cowl neckline adds a layer of warmth and style, making it a cozy and chic option for colder days.
Suggested Yarn: Worsted Weight Yarn
Difficulty Level: Intermediate
Yarn Weight: Worsted
Needle Size: 5.0mm (US 8)
28. Erudite V-Neck Vest
Embrace scholarly elegance with the Erudite V-Neck Vest. This vest exudes refined style, perfect for adding a touch of sophistication to your professional or academic wardrobe.
Suggested Yarn: Fingering Weight Yarn
Difficulty Level: Advanced
Yarn Weight: Fingering
Needle Size: 3.5mm (US 4)
29. Monster V-Neck Vest
Unleash your inner fashion monster with the Monster V-Neck Vest. This bold and oversized piece is a statement, perfect for those who love to make a unique and daring impact.
Suggested Yarn: Bulky Weight Yarn
Difficulty Level: Intermediate
Yarn Weight: Bulky
Needle Size: 6.0mm (US 10)
30. Evening Sweater V-Neck Vest
Elevate your evening attire with the Evening Sweater V-Neck Vest. Its refined design and luxurious yarn make it a sophisticated choice for special occasions and glamorous nights out.
Suggested Yarn: Worsted Weight Yarn
Difficulty Level: Intermediate
Yarn Weight: Worsted
Needle Size: 5.0mm (US 8)
31. Simple V-Neck Vest
Sometimes, simplicity is the ultimate sophistication. The Simple V-Neck Vest is a clean and classic piece that pairs effortlessly with any outfit, making it a versatile wardrobe essential.
Suggested Yarn: DK Weight Yarn
Difficulty Level: Beginner/Intermediate
Yarn Weight: DK
Needle Size: 4.0mm (US 6)
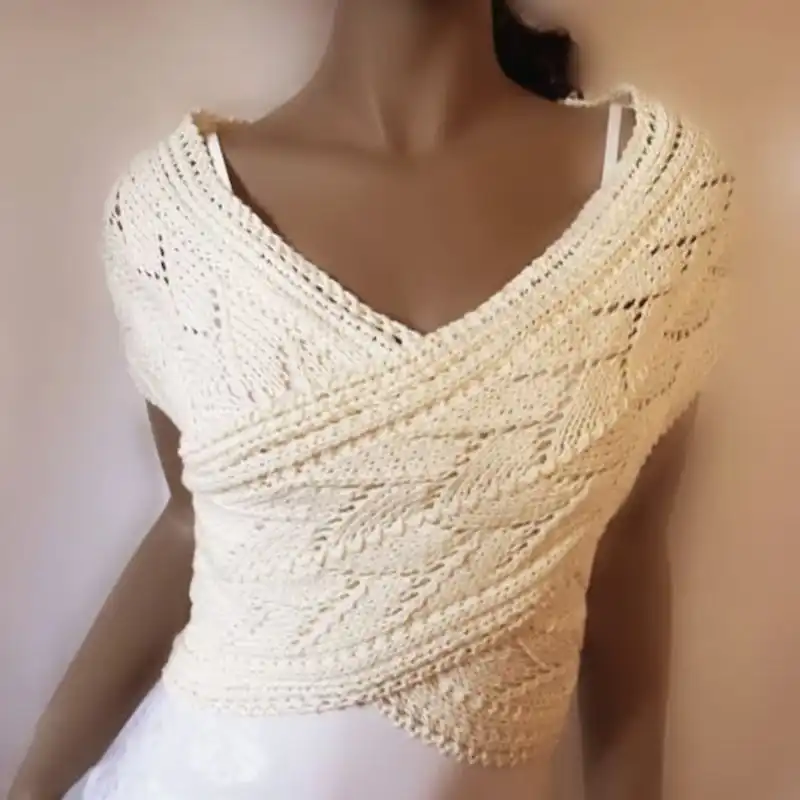
32. Criss Cross Ribbed V-Neck Vest
Add a twist to traditional ribbing with the Criss Cross Ribbed V-Neck Vest. The criss-cross pattern creates a visually exciting texture that sets this vest apart, making it a modern and stylish choice.
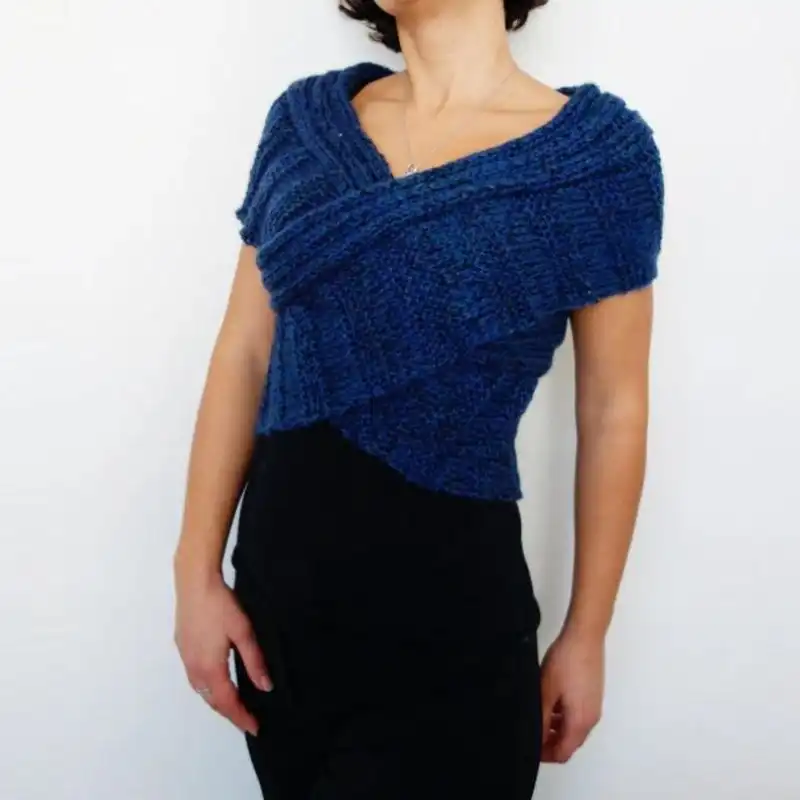
Suggested Yarn: Worsted Weight Yarn
Difficulty Level: Intermediate
Yarn Weight: Worsted
Needle Size: 5.0mm (US 8)
33. Mohair V-Neck Vest
Indulge in the luxurious softness of mohair with this elegant V-neck vest. Its lightweight yet warm construction makes it a perfect choice for all seasons, adding a touch of luxury to your wardrobe.
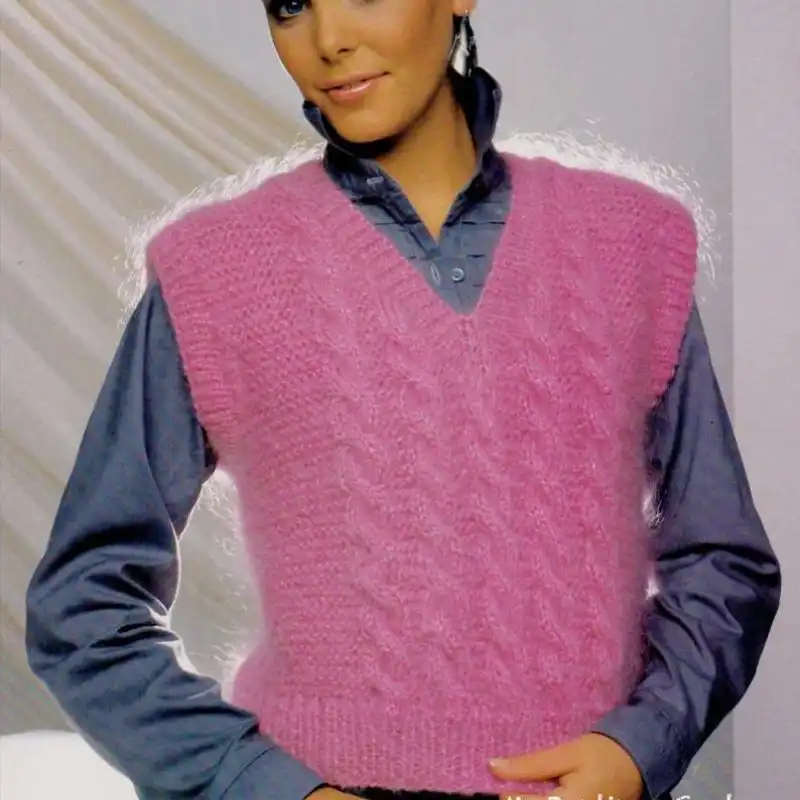
Suggested Yarn: Worsted Weight Yarn
Difficulty Level: Intermediate
Yarn Weight: Worsted
Needle Size: 5.0mm (US 8)
34. Novelty Western Horse Cable V-Neck Vest
Saddle up for style with the Novelty Western Horse Cable V-Neck Vest. Playful horse motifs and cable patterns create a whimsical and eye-catching design, perfect for those who love to showcase their unique style.
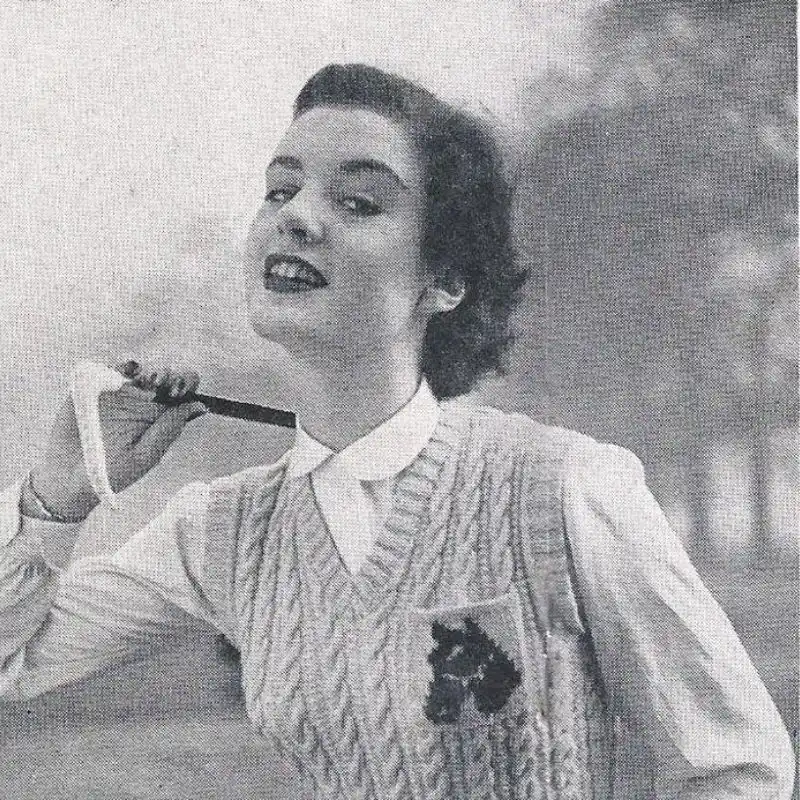
Suggested Yarn: Aran Weight Yarn
Difficulty Level: Intermediate
Yarn Weight: Aran
Needle Size: 5.5mm (US 9)
Sizing And Adjustments
I am thrilled you decided to join us on this magical adventure. Consider some essential sizing adjustments to ensure your V-neck vest is perfect.
Pay close attention to your bust measurement (wink) for a flawless fit, and consider positive ease. Don’t forget to master the art of increasing and decreasing, my dear knitters!
Bust Measurement
Every enchanting V-Neck Vest starts with an accurate bust measurement. Grab that trusty measuring tape and gently wrap it around the fullest part of your chest.
Remember to breathe normally and avoid tight squeezes (we wouldn’t want to suffocate our knitted masterpieces). Jot down your measurements in inches or centimeters, depending on your preference. Ah, impeccable!
Positive Ease Considerations
Please don’t underestimate the power of positive ease, my knitting companions! The extra fabric added around the bust area will be helpful for a comfortable fit. Add 1-3 inches (2.5-7.5 cm) of positive ease to your bust measurement for that marvelous V-Neck Vest with a cozy feel. Voilà!
Increasing and Decreasing
As whimsical as our knits may be, it’s vital to master the expertise of increasing and decreasing. Thankfully, there are plenty of enchanting techniques to choose from:
For increasing
- Make One (M1): A magical little stitch that appears in thin air!
- Knit Front and Back (KFB): One stitch that gracefully transforms into two.
For decreasing
- Knit Two Together (K2Tog): Two stitches joining hands, united as one!
- Slip, Slip, Knit (SSK): A delicate dance between two stitches as they become one.
Tips And Tricks To Avoiding Mistakes
Knitting a V-neck vest can be a fulfilling project, but like any knitting endeavor, it has its share of potential pitfalls. Here are some tips and tricks to help you avoid common mistakes and perfect your V-neck vest:
How To Block Knitted V-Neck Vests?
Blocking is an essential finishing step in knitting, especially for garments like V-neck vests. It helps to even out your stitches, set the final dimensions, and give your vest a professional look. Here’s a step-by-step guide to blocking your knitted V-neck vest:
Prepare Your Blocking Space: You’ll need a flat surface large enough for your vest, like a blocking mat or a clean, dry towel on a bed or floor. If you have blocking wires, they can be helpful, especially for straight edges.
Mix a Soaking Solution: Fill a basin or sink with lukewarm water and add a bit of mild detergent or a wool wash. Avoid using hot water as it can shrink or feel wool.
Soak the Vest: Gently submerge your knitted vest in the water, ensuring it’s thoroughly wetted. Let it soak for about 15-20 minutes. It relaxes the fibers.
Remove Excess Water: Carefully lift the vest out of the water, supporting it to prevent stretching. Gently squeeze out the excess water without wringing or twisting. You can roll it in a clean towel and press it to remove more water.
Lay Out the Vest
- Spread the vest on your prepared surface.
- Shape it gently to its final dimensions as per the pattern specifications.
- Be careful not to stretch it excessively, especially if it’s made of wool.
Pin the Edges
- If using blocking wires, thread them through the edges of your vest.
- Pin the vest into shape, starting from the bottom edge and working your way up.
- Please pay special attention to the V-neck and armholes, ensuring they’re shaped correctly.
Let It Dry: Allow the vest to air dry completely. It can take several hours to a day, depending on the thickness of the yarn and the humidity.
Reposition If Necessary: If your vest isn’t drying evenly, reposition it periodically to ensure proper drying.
Remove Pins and Wires: Carefully remove the pins and blocking wires once the vest is completely dry.
Final Touches: Your vest might need a gentle pressing with a steam iron. Use a pressing cloth and avoid pressing directly on the yarn. Don’t press too hard – the goal is to smooth out the fabric, not flatten the stitches.
RELATED: 30 Knit Blanket Patterns For Beginners With Easy And Cozy Designs
Suggestions To Add A Personal Touch And Style
Adding a personal touch to your knitted V-neck vests can transform them into unique, custom pieces that reflect your style. Here are several suggestions for personalizing your knitted vests:
- Choose Unique Yarns: Experiment with hand-dyed yarns, variegated yarns, or luxury fibers like alpaca or silk blends. The texture and color of the yarn can significantly change the look of the vest.
- Modify the Length: Adjust the length of the vest for a cropped look or a longer, tunic style. It can be quickly done by altering the number of rows knitted in the body.
- Incorporate Colorwork: Add stripes, Fair Isle patterns, or intarsia designs to introduce different colors. It can range from simple two-color stripes to complex multi-colored patterns.
- Experiment with Stitch Textures: Use lace, cables, or moss stitches to add texture to your vest. You can include these in panels, borders, or an all-over design.
- Add Embellishments: Embellish your finished vest with buttons, beads, or embroidery. Even a few well-placed embellishments can significantly affect the overall style.
- Play with Neckline Shapes: While traditional V-neck vests are timeless, experimenting with the depth and width of the V-neck can create different looks. A deeper V-neck, for instance, can give a more modern feel.
- Edge Treatments: Change the ribbing on the edges to a rolled hem, picot edge, or a crochet border for a distinct finish.
- Create a Unique Border: Incorporate a contrasting color or a different stitch pattern for the hem, armholes, and neckline borders.
- Knit in Pockets: Functional and stylish, pockets can be a cozy addition. They can be made in contrasting colors or blend seamlessly with the vest.
- Mix Knitting with Fabric: For a mixed-media approach, you can combine knitted pieces with fabric, creating a vest with a fabric back and knitted front, for example.
- Personalized Fit: Adjust the pattern for a perfect fit. It could mean altering the waist shaping, bust size, or armhole depth.
- Make it Reversible: If you’re an advanced knitter, designing the vest to be reversible can be a fun challenge, giving you two looks in one garment.

A Quick Recap
V-neck vests are a timeless and versatile addition to any wardrobe, offering a perfect blend of style and comfort. Knitting patterns for these vests vary in complexity, accommodating knitters of all skill levels.
There’s a pattern for everyone, from simple, beginner-friendly designs using basic stitches and minimal shaping to more intricate patterns featuring complex stitch textures, cables, or colorwork for advanced knitters.
Essential techniques typically include ribbing for edges, stockinette or patterned bodies, and careful shaping for the armholes and the characteristic V-neckline.
Finishing touches like blocking and seaming contribute to the professional quality of the final garment. Whether for layering in cooler weather or as a standalone piece, hand-knitted V-neck vests are a satisfying project that combines practicality with creative expression.
Frequently Asked Questions
What Are Some Beginner-Friendly V-Neck Vest Patterns For Knitting?
Look for patterns labeled as “easy” or “beginner.” These typically use basic stitches, minimal shaping, and clear instructions. Popular choices include simple stockinette or garter stitch vests with straightforward V-neck shaping.
Where Can I Find Free V-Neck Vest Patterns For Women?
Many websites offer a range of free knitting patterns, including V-neck vests. Many yarn manufacturers also provide free patterns on their websites. Knitting blogs and YouTube channels can also be great resources for free patterns and tutorials.
How Do I Knit A Chunky V-Neck Vest?
Choose a pattern designed for chunky or bulky yarn to knit a chunky V-neck vest. These patterns will use larger needles and fewer stitches per inch, making them knit quickly. Follow the pattern instructions for V-neck shaping, remembering that chunky yarn will create a more substantial fabric.
What Are Some Popular V-Neck Vest Patterns On Ravelry?
Ravelry is an excellent resource for finding patterns. Popular V-neck vest patterns often include those with unique designs, versatile styles, or those particularly well-suited for beginners. The “most favorites” or “most projects” filters on Ravelry can help you find popular patterns within the knitting community.
What Yarn Weight Is Best for Knitting V-Neck Vests?
The best yarn weight for V-neck vests typically ranges from DK (Double Knitting) to worsted weight. These weights offer a good balance between fine detail and quick knitting.
However, the choice can depend on the desired thickness and drape of the vest. Lighter yarns, like sport or fingering, can be used for finer, more delicate vests, while bulkier yarns create thicker, warmer vests.
What Are the Best Stitch Patterns for V-Neck Vests?
Stockinette stitch is a popular choice for its simplicity and smooth finish. Ribbing, moss, or seed stitch can add texture and visual interest, especially for borders or accents.
For a more advanced project, cable or lace patterns offer intricate details. The key is to choose a stitch pattern that complements the yarn and fits your skill level.

- 30 Polo Sweater Knitting Patterns To Keep You Stylish On Every Occasion - January 1, 2024
- 21 Baby Blanket Knitting Kits To Wrap Bundle Of Joy With Love - January 1, 2024
- 15 Cashmere Knitting Kits For Fashionable Knits To Embrace Comfort And Style - January 1, 2024
