
The rhythmic dance of the hook and yarn, the satisfaction of watching a pattern come to life, stitch by colorful stitch. Now, imagine combining that creative joy with the practical warmth of gloves and mittens.

Welcome, dear readers, to the magical realm of crochet gloves and mittens! A realm where cozy warmth and chic style intertwine in a beautiful symphony of thread and creativity.
Our journey across this realm will traverse the winding paths of 30 unique patterns – from the elegance of intricate lace gloves to the comforting simplicity of chunky mittens, from the playful whimsy of fingerless gloves to the timeless grace of Victorian-inspired designs.
So, whether you’re seeking to wrap your hands in comfort during a cold winter’s day or you’re looking to add a touch of homemade charm to your fashion repertoire, these patterns hold the potential to transport you into a world of style, warmth, and yes, quite a bit of fun!
Crocheting lovers and style enthusiasts prepare to embark on an adventurous voyage through these delightful patterns.
History & Different Types Of Gloves
Gloves, both a symbol of elegance and a practical tool, have a fascinating history that extends far back into antiquity. The earliest evidence of glove use dates back to the ancient Egyptians, with murals depicting pharaohs wearing them.
In ancient Rome, people used gloves primarily for protection and practicality. At the same time, in the Middle Ages, they took on symbolic importance, used in ceremonies and as signs of status and power.
In the 16th and 17th centuries, however, gloves truly evolved into fashion accessories, with Queen Elizabeth I setting the trend for decorative gloves with intricate embroidery and jewels.
Throughout their evolution, gloves have been adapted into various styles for different purposes. There are dress gloves, typically made from high-quality materials like leather, silk, or lace, and worn on formal occasions.
On the other hand, work gloves, usually made of durable materials, are designed for manual labor, gardening, or other heavy-duty tasks.
Sport-specific gloves are another type, tailored for various activities from cycling and golf to baseball and boxing. Each class is designed to protect the hands while facilitating the necessary grip and flexibility for the sport.
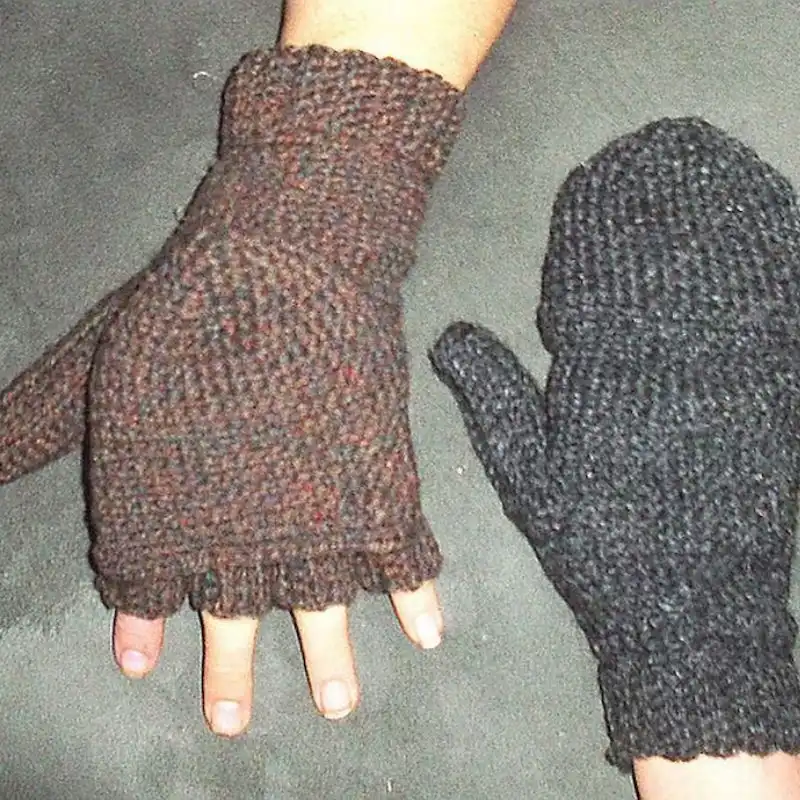
In winter wear, mittens and gloves provide warmth in chilly temperatures. Mittens, characterized by a single compartment for all four fingers and a separate one for the thumb, tend to be warmer but offer less dexterity.
Gloves, with individual fingers, provide more mobility but may sometimes offer a different level of warmth than mittens.
And let’s not forget fingerless gloves – a modern trend that combines the warmth of gloves with the dexterity of bare fingers, proving especially popular in the digital age where constant smartphone usage is the norm.
This brief overview of gloves in history and their various types underscores the vast spectrum of styles, each serving its unique blend of purpose and aesthetics.
Whether for protection, warmth, elegance, or a combination thereof, gloves remain essential to our clothing repertoire.
RELATED: Discover What Are Cowboy Cut Jeans With Our Comprehensive Style Guide
The Popularity Of Crochet Fingerless Glove
As an expert crocheter, I’ve personally witnessed the remarkable rise in the popularity of crochet fingerless gloves over the years.
Their surge in demand is, in no small part, due to the increasing admiration for handcrafted, artisanal creations that seamlessly meld style, function, and individuality.
When you wear them, you’re wrapped in warmth and coziness, yet your fingers remain free, allowing you to carry out tasks that would otherwise be cumbersome with conventional gloves.
And it’s not just about utility; the fashion world too has embraced them wholeheartedly. Whether it’s with a casual jeans-and-tee combination or a more upscale outfit, these gloves fit right in.
Their design spectrum is broad, spanning from the timeless charm of traditional and vintage patterns to the bold aesthetics of modern, lively motifs. This ensures that they cater to a diverse audience, making them even more sought after.
The fact that crochet, as a craft, has become so accessible and prevalent only adds fuel to the fire.
As more and more people immerse themselves in the world of DIY crafting, either as a hobby or even as a budding business venture, crochet fingerless gloves continue to hold their own as a beloved accessory.
To me, they are more than just a trend; they symbolize a blend of fashion-savviness and a deep-rooted respect for artistry.
Essential Tools & Materials
As someone who’s spent countless hours crocheting and has a deep passion for the craft, I can’t stress enough the importance of having the right tools and materials on hand. When it comes to creating fingerless gloves, here’s what I always ensure I have within arm’s reach:
It’s generally recommended for beginners to start with a medium-sized hook (for example, size H/8 or 5mm) which can be used with most yarn types.
Yarn: The heart and soul of any crochet project. The yarn you select will dictate the final texture, appearance, and feel of your gloves. Over the years, I’ve experimented with wool, acrylic, cotton, and various blends. Each has its merit, be it warmth, lasting power, or a gentle touch against the skin. As for colors, well, that’s where you let your personality shine!
A medium-weight thread (worsted weight) is usually recommended for beginners because it’s easy to work with.
Crochet Hook: Your crochet journey’s companion. The size of this tool will be contingent on your yarn selection and the specific stitch you decide to adopt. While the yarn’s packaging often lends guidance on the apt hook size, I frequently find myself gravitating towards the 4.0mm to 5.5mm range for gloves.
Stitch Markers: A savior for many! While they might seem trivial, especially for seasoned crocheters, they’re invaluable for novices. These little markers help delineate the beginning and end of rounds or pinpoint critical junctures in your pattern.
Scissors: A pair of trusty, sharp scissors will be your ally in neatly cutting the yarn.
Yarn Needle: Often referred to as a darning needle, this tool is a must-have for seamlessly weaving in those yarn ends post-crochet.
Pattern: The blueprint of your creation. I’ve encountered numerous fingerless glove patterns, both free and priced, across the internet. These patterns serve as the guiding light, detailing stitch counts, rows, unique techniques, and more.
Tape Measure: Precision is paramount. You’ll want to gauge the width around the hand, excluding the thumb. Occasionally, patterns might also direct you to measure the hand’s length, from wrist to fingers’ base, or even individual finger sizes.
It’s paramount to remember that the tools and materials might vary based on the specific pattern you opt for. Always pore over the chosen design thoroughly to ensure you’re equipped with everything to bring your crochet vision to life.
Glossary of common crochet stitches and techniques
Diving into the world of crochet, I’ve come to appreciate the myriad stitches and techniques that bring our creations to life. Here’s a glossary, drawn from my years of experience, to elucidate some of these essential elements:
Chain Stitch (ch): The cornerstone of nearly every crochet project, this is our starting point.
Slip stitch (sl st): An invaluable stitch for joining work, subtly relocating yarn, or putting the finishing touch on a piece.
Single crochet (sc): One of the foundational stitches that graces countless creations.
Half Double Crochet (hdc): Perfectly nestled between a single and a double crochet in height.
Double Crochet (dc): A popular stitch that towers over its single and half-double counterparts.
Treble Crochet (tr): Ideal when aiming for an airy and relaxed fabric.
Magic Circle or Magic Ring: My go-to when commencing a circular project, ensuring no pesky hole emerges in the center.
Increase (inc) & Decrease (dec): Techniques to respectively add or deduct stitches, giving shape and form to our work.
Yarn Over (yo): Fundamental in multiple stitches, it’s the art of looping over the hook.
Front Loop Only (FLO) & Back Loop Only (BLO): Techniques close to my heart that lend texture and elasticity by working into just one part of the stitch.
Gauge: A measure of stitches and rows over a set distance, this ensures our creations fit as intended.
Blocking: A finishing touch, especially vital for garments and delicate lacework, to set and shape our work.
Joining/Yarning over and pulling through: Techniques I use frequently to link stitches or round off rows. Working in the Round: Essential for crafting circular items like my favorite hats and gloves.
Of course, this is just scratching the surface! Crochet is a vast ocean of stitches and techniques.
Decoding Crochet Stitches & Techniques For those keen on mastering crochet, I’ve cultivated a few pearls of wisdom over the years:
Study Patterns: Begin with elementary patterns. They’ll be your introduction to the crochet lexicon and exhibit how different stitches weave diverse patterns.
Harness Online Resources: The web brims with tutorials and videos. They’ve been a lifeline for me, especially when grappling with tricky stitches.
Practice is Key: The more stitches you hook, the more intuitive and familiar techniques become. Kick off with rudimentary projects and gradually embrace complexity.
Venture with Yarns & Hooks: Each yarn and hook imparts a unique touch. Through trial, you’ll discern their nuances.
Maintain a Swatch Book: A handy compilation of various stitches, this has often been my reference guide.
Embrace Workshops: There’s nothing like live sessions. Immediate feedback and the camaraderie of fellow enthusiasts make them invaluable.
Decipher Crochet Diagrams: Sometimes, visual cues resonate better than written ones. And the universality of diagrams bridges language barriers.
Gauge Mastery: Ensuring the right size is pivotal. Personal tension might differ from patterns, so adjusting the hook size can work wonders.
Foster Community Ties: Engaging with fellow crocheters, be it online or offline, has been a fount of inspiration, guidance, and camaraderie.
Patience and Tenacity: Every new stitch or technique conquered is a testament to dedication. Challenges are stepping stones, refining our craft with each loop.
Remember, with each stitch, you’re not just crafting a piece but weaving a part of your story.
RELATED: 26 Ultimate Types Of Sweatshirts For Men And Women According To Their Taste
Which Yarn Is Best For Crochet Fingerless Gloves?
Throughout my journey as a seasoned crocheter, one of the most frequent queries I encounter is: “Which yarn should I pick for my crochet fingerless gloves?” Your choice is pivotal, impacting warmth, resilience, feel, and maintenance of your gloves.
Let me share some of my go-to yarns for these gloves:
Wool: Ah, the classic wool! This fiber has a natural warmth, elasticity, and breathability that makes it a top choice for those chilly days.
Among the wool varieties, I’ve always had a soft spot for Merino wool. It wraps your hands in a gentle embrace, devoid of the scratchiness sometimes associated with other wools.
Acrylic: If you’re leaning towards durability and straightforward care, acrylic yarn might be your ally. Not only does it resist shrinkage, making it machine-friendly, but it also won’t break the bank. Its vast color spectrum is a treat for those looking to experiment.
Cotton: When I envision a pair of gloves for those transitional seasons – spring’s bloom or autumn’s fall – cotton is my pick. It’s breathable and incredibly cozy.
However, its elasticity doesn’t match up to wool or acrylic, so over time, it might lose a bit of its initial snugness.
Blends: Sometimes, the magic lies in the mix. Blends, like cotton-acrylic or wool-acrylic, merge the best of both worlds. I’ve often turned to a wool-acrylic blend, enjoying the warmth wool provides, balanced by acrylic’s durability and easy care.
Another facet I always stress upon is yarn weight. For fingerless gloves, which require a harmony of warmth and agility, light to medium weights, spanning from DK to worsted, are my recommendations.
Lastly, always keep in mind the tactile sensation of the yarn. Especially if, like me, you’re a tad sensitive, ensure the yarn feels pleasant against your skin.
And, as a little pro tip, always glance over the care guidelines for your chosen yarn. This ensures your gloves not only look fabulous but also last for many seasons to come.
How Much Yarn Do I Need To Crochet Fingerless Gloves?
In my years as a dedicated crocheter, one of the most common questions I’m posed with is: “How much yarn do I need for my fingerless gloves?” It’s a pertinent query, as being caught short or drowning in surplus yarn can be frustrating.
Let me share some insights based on my experiences:
The yarn quantity hinges on a slew of factors: your chosen pattern, the compactness of the stitches, the size of the gloves, and the yarn weight.
As a ballpark figure, for adult-sized fingerless gloves, I’ve often used anywhere between 100 to 200 yards of yarn.
Delving deeper, if you’re working with a lighter yarn, such as DK or sport weight, you’d be veering towards the upper limit of 200 yards.
In contrast, for medium-weight yarns, like the trusty worsted weight, around 100-150 yards typically suffices.
But remember, these are broad strokes. For a laser-focused estimate, always refer to the pattern you’re employing.
Most patterns I’ve come across diligently mention the yarn yardage required. And here’s a nugget of wisdom from my stash of crochet anecdotes: always stock a smidgen more yarn than you think you need.
It’s always better to have a little extra on hand, ensuring your project sails smoothly to completion.
Is It Beginner-Friendly?
Ah, the age-old question: “Is it beginner-friendly?” In the world of crochet, where patterns range from the simple to the intricate, it’s a pertinent query. When it comes to crochet fingerless gloves, let me share my perspective.
Indeed, crochet fingerless gloves can be a welcoming project for beginners, provided you opt for the right pattern.
I’ve come across numerous designs that rely solely on foundational stitches, like the chain stitch, single crochet, and double crochet. These are staples that even those new to the craft can easily grasp.
To smooth out the initiation journey, here are some pointers that I’ve often shared with crochet novices:
Pick a Straightforward Pattern: Ease into the process by choosing a design that steers clear of intricate shapes or myriad color transitions. Basic stitches should be your go-to.
Lean Towards Light-Colored Yarn: Especially as a newcomer, being able to discern each stitch distinctly is invaluable. Lighter shades can be your best ally in this.
Kickstart with Larger Hooks and Robust Yarn: Amplified stitches, thanks to chunkier yarns and more significant hooks, can be more forgiving and discernible. As you gain dexterity, transitioning to delicate yarns and smaller hooks becomes more intuitive.
Hone Basic Stitches: Before diving into your glove project, set aside time to practice the core stitches. Mastery over these foundational loops will boost your confidence manifold.
Embrace Stitch Markers: I cannot emphasize enough the utility of these tiny helpers. Especially for projects like gloves, they demarcate rounds and ensure consistency.
Nurture Patience: Each loop and stitch is a step in your crochet journey. Revel in the process, be patient, and remember, every seasoned crocheter started with that very first uncertain stitch.
Venturing into fingerless gloves might seem daunting, especially when juxtaposed with seemingly simpler projects like scarves.
However, the compact nature of gloves means they come to fruition quicker. And there’s an unparalleled joy in donning an accessory, knowing every loop and stitch was crafted by your very own hands. Welcome to the fulfilling world of crochet!
How To Crochet A Basic Beginner-Friendly Gloves And Mittens?
Certainly! Crocheting a basic pair of gloves or mittens is a rewarding project for novice crocheters. Here’s a step-by-step guide to get you started:
Materials You’ll Need
- Worsted weight yarn (Choose a color you love)
- Crochet hook (Size H/8 or 5.00mm is a good start)
- Scissors
- Yarn needle for weaving in ends
Step 1: Measure Your Hand Before diving into crochet, measure your hand to determine the size you’ll need for your gloves or mittens.
Measure around your hand at its widest point, just below your knuckles, and also measure from your wrist to the tip of your middle finger.
Step 2: Start with a Foundation Chain Using the yarn and hook, create a foundation chain with a length that matches the circumference of your hand measured in step 1.
Make sure it’s a multiple of 2, as we’ll be working with half-double crochet stitches. For example, if your hand measures 7 inches around, you might start with a foundation chain of 28 stitches (14 x 2).
Step 3: Join in the Round To form the first round, slip stitch to the first chain to create a ring. Be careful not to twist your chain.
Step 4: Crochet the Wrist Chain 1 (this counts as your first half-double crochet), then work a half-double crochet into each chain around the ring.
Continue until you have the desired length for the wrist of your gloves or mittens, usually about 2-3 inches.
Step 5: Begin Shaping the Hand Now, we’ll start shaping the hand part of the gloves or mittens. Begin by crocheting a half-double crochet in the back loop only of each stitch for each round. This creates a ribbed effect.
Continue crocheting in the back loop only until the piece measures the length from your wrist to the base of your fingers, as measured in step 1. This will vary depending on your hand size.
Step 6: Shape the Thumb Opening (For Gloves) If you’re making gloves, it’s time to create an opening for your thumb. This is typically done on one side of the hand.
To do this, leave a gap of about 1-1.5 inches (adjust for your thumb size) and skip those stitches when crocheting in the round. Continue crocheting as usual for the rest of the hand.
Step 7: Finish the Finger Section Continue crocheting until the piece reaches the tip of your fingers. You can try it on as you go to ensure a good fit. Remember, it’s okay to adjust your stitch count if needed.
Step 8: Create the Thumb Hole (For Mittens) For mittens, we’ll create a thumb hole in a similar way. Leave a gap of about 1-1.5 inches and skip those stitches for a few rounds.
Then, when you reach the gap again, reattach your yarn and continue crocheting the rest of the mitten.
Step 9: Finish the Mitten Continue crocheting until the mitten reaches the desired length for your fingers. Try it on as you go to ensure a good fit.
Step 10: Finish and Secure Ends Once you’ve reached the desired length, fasten off your yarn and leave a long tail. Thread the tail through a yarn needle and weave it in along the inside of the glove or mitten to secure it. Repeat this for any other loose ends.
And there you have it—a basic pair of crochet gloves or mittens! Remember, practice makes perfect, so don’t be discouraged if your first pair isn’t perfect.
How To Measure Your Hand For Gloves?
Crocheting gloves or mittens that fit well start with accurate measurements. Here’s a step-by-step guide on how to measure your hands:
Step 1: Measure Around Your Hand
Wrap a soft measuring tape around your hand at the widest part, just below your knuckles. Exclude your thumb from this measurement.
If you don’t have a soft measuring tape, you can use a piece of string, mark the size, and then measure the string with a ruler. This measurement is called your ‘hand circumference.’
Step 2: Measure Your Hand Length
Measure from the base of your hand (where it meets your wrist) to the tip of your middle finger. It is your ‘hand length.’
Step 3: Measure Your Wrist
Wrap the measuring tape around your wrist to get your ‘wrist circumference.’ It’s important to measure where your hand naturally bends.
Step 4: Measure Your Forearm
If you’re making longer gloves that go up your arm, measure the circumference of your forearm at the widest part. It is your ‘forearm circumference.’
Step 5: Measure Your Thumb Length
Take this measurement from the base of the thumb (where it meets your hand) to the tip of your thumb.
Step 6: Measure Thumb Circumference
Finally, wrap the tape around the widest part of your thumb to get the ‘thumb circumference.’
Keep these measurements handy while following your chosen pattern. Everyone’s hand shape and size vary, and what fits one person perfectly may not suit another.
Therefore, consider the gloves or mittens’ intended recipient (if not yourself) while taking measurements.
Always round your measurements up to the nearest half inch or centimeter to ensure a comfortable fit, and consider the stretch of your chosen yarn.
By following these steps, you’ll have the precise measurements to crochet gloves or mittens that fit perfectly!
30 Different Crochet Patterns For Gloves
1. Classic Fingerless Gloves
These are the perfect beginner-friendly pattern. They are simple and quick to make, providing warmth to the hands while leaving the fingers free for typing, texting, or any other tasks that require dexterity.
These gloves expose the fingertips, providing agility while keeping the hands warm. They are versatile and great for activities that require finger movement, such as typing or texting.
Suggested Yarn: Worsted Weight Yarn
Difficulty Level: Intermediate
Yarn Weight: Medium (4)
Crochet Hook: G/6 (4.0 mm)
2. Textured Mittens with Ribbed Cuff
These mittens offer a bit of flair with a beautiful textured stitch pattern that adds interest and extra warmth. The ribbed cuff ensures a snug fit that keeps the cold out.
These mittens feature a textured stitch pattern on the hand and a ribbed cuff for a snug fit. The texture adds visual interest and enhances warmth.
Suggested Yarn: Worsted Weight Yarn
Difficulty Level: Intermediate
Yarn Weight: Medium (4)
Crochet Hook: H/8 (5.0 mm)
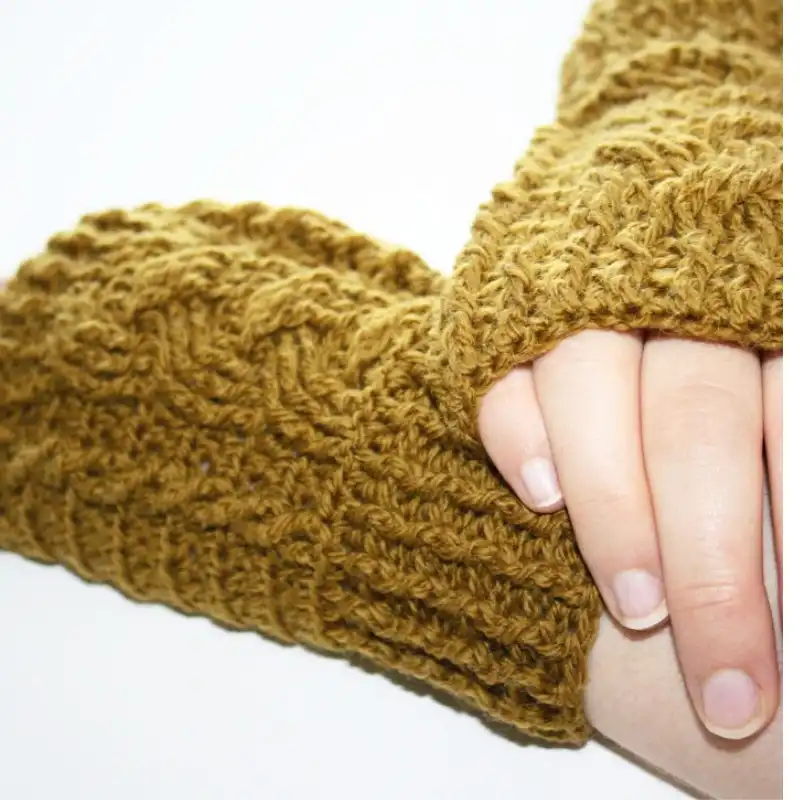
3. Cozy Cable Gloves
These gloves feature classic cable stitches running down the length, offering an elegant, timeless design. The cable stitches add extra warmth, making them perfect for colder days.
These gloves showcase intricate cable patterns, adding a classic and cozy look. The cables create a thick, insulating fabric, making them perfect for colder climates.
Suggested Yarn: Aran Weight Yarn
Difficulty Level: Intermediate
Yarn Weight: Medium (4)
Crochet Hook: H/8 (5.0 mm)
4. Striped Fingerless Mitts
This pattern brings a splash of color and fun with its striped design. These fingerless mitts are practical and stylish, perfect for adding color to your outfit.
These fingerless mittens have colorful stripes, adding a playful touch. They provide warmth to the hands while allowing the fingers to be accessible for ease of use.
Suggested Yarn: Fingering Weight Yarn
Difficulty Level: Intermediate
Yarn Weight: Light (3)
Crochet Hook: D/3 (3.25 mm)
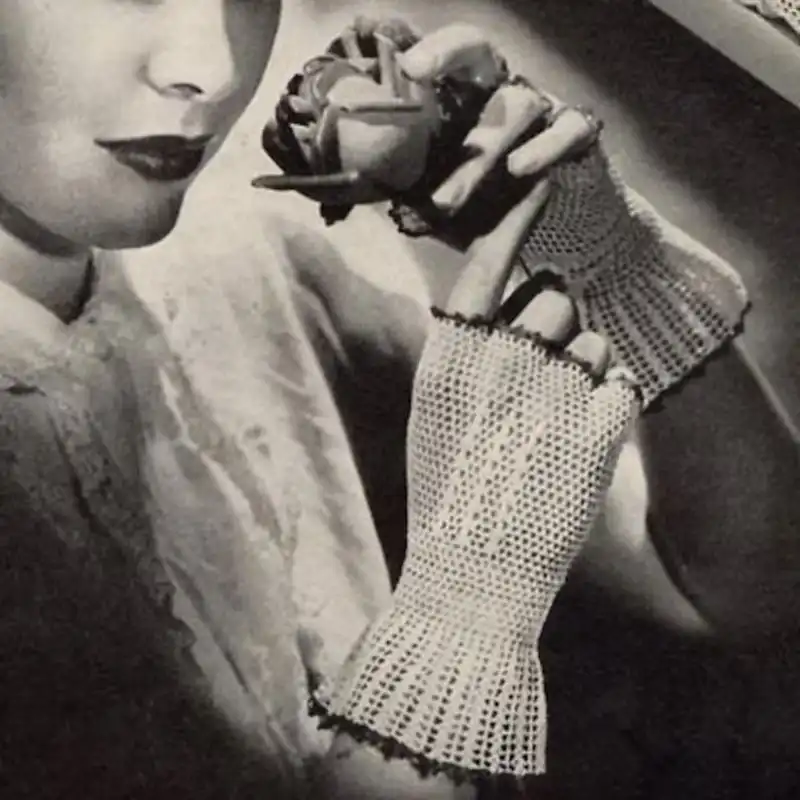
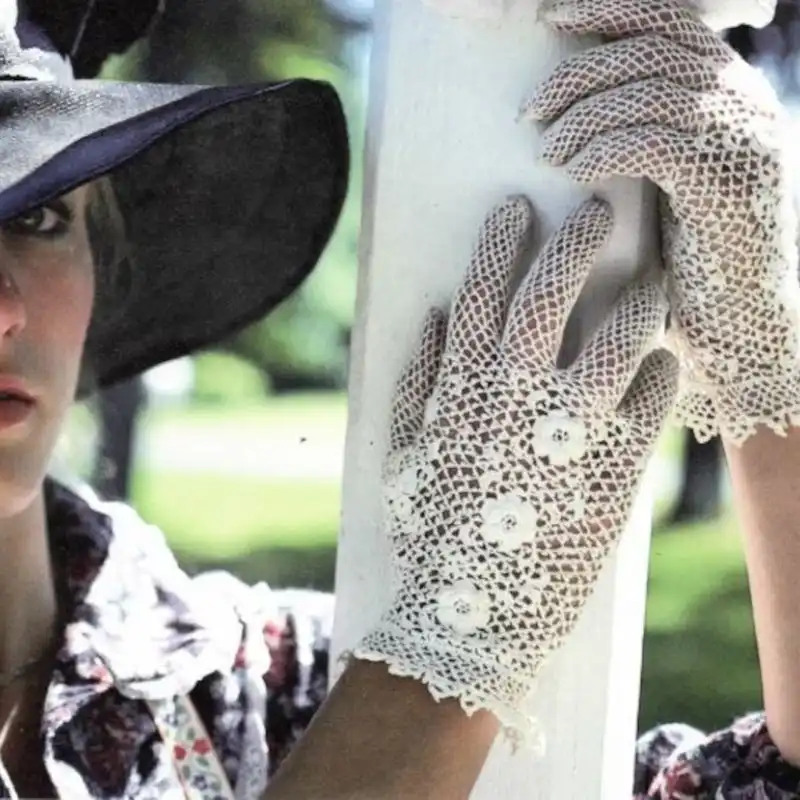
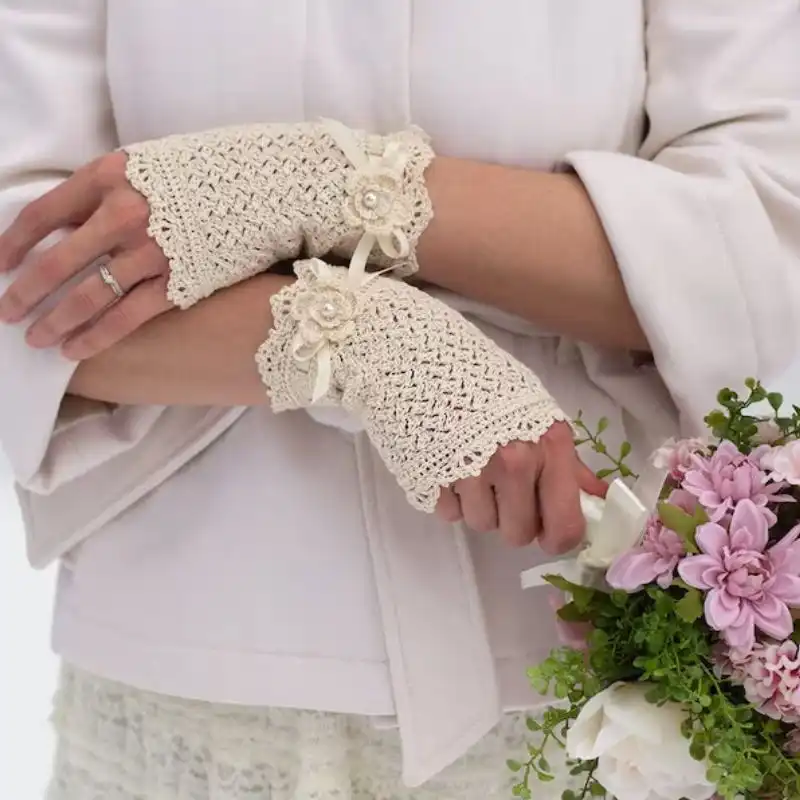
5. Lace Gloves with Button Detail
These gloves are delicate and sophisticated, with a lacy openwork design. The button detail adds a charming vintage touch. Perfect for special occasions or when you want to feel a bit fancy.
These delicate gloves feature a lacy stitch pattern and look adorable with buttons for added elegance. They are ideal for special occasions or for adding a feminine touch to any outfit.
Suggested Yarn: Lace Weight Yarn
Difficulty Level: Intermediate
Yarn Weight: Medium (4)
Crochet Hook: G/6 (4.0 mm)
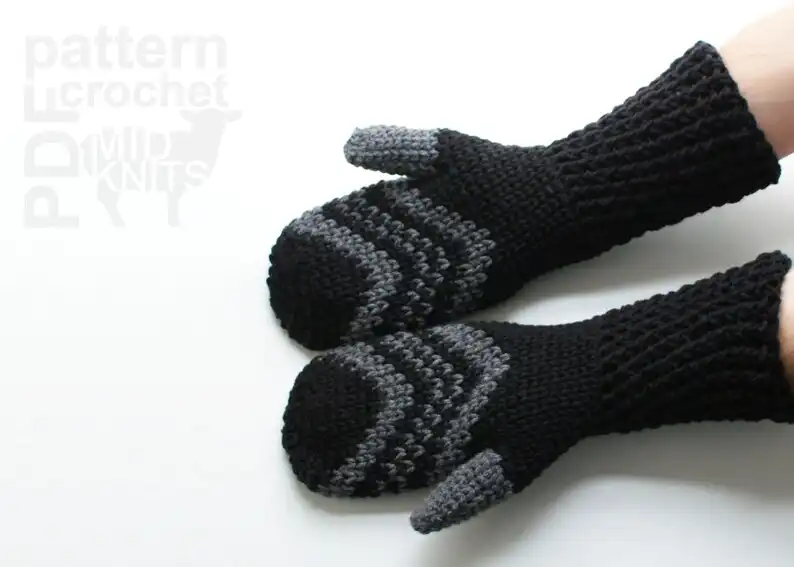
6. Chunky Mittens
These mittens are incredibly warm and cozy, made with chunky yarn. They’re perfect for the coldest winter days and work up quickly due to the thick yarn.
These mittens are made with chunky yarn. They offer extra warmth and a cozy fit, making them suitable for colder temperatures.

Suggested Yarn: Bulky Weight Yarn
Difficulty Level: Intermediate
Yarn Weight: Bulky (5)
Crochet Hook: K/10.5 (6.5 mm)
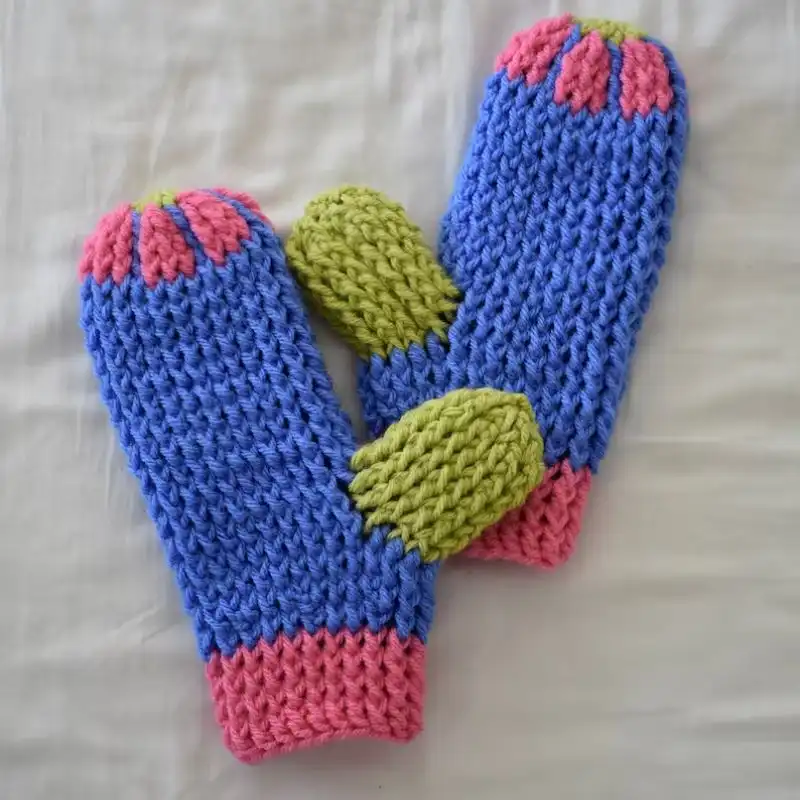
7. Colorful Granny Square Mittens
These mittens offer a fun twist on the classic granny square pattern. They’re colorful, playful, and great for using any leftover yarn scraps.
These mittens incorporate the popular granny square motif, creating a bright and unique design. They are a fun and vibrant option for those who love crochet squares.

Suggested Yarn: Worsted Weight Yarn
Difficulty Level: Intermediate
Yarn Weight: Medium (4)
Crochet Hook: H/8 (5.0 mm)
8. Maddy Fingerless Gloves
The popcorn stitch adds a fun textural element to these gloves. They’re unique, stylish, and sure to catch people’s attention.
These fingerless gloves feature the popcorn stitch, creating a raised, textured effect. The popcorn stitches add visual interest and make them stand out.

Suggested Yarn: Fingering Weight Yarn
Difficulty Level: Intermediate
Yarn Weight: Light (3)
Crochet Hook: D/3 (3.25 mm)
9. Fair Isle Mittens
These mittens showcase the traditional Fair Isle knitting technique, characterized by intricate, multicolored patterns.
They’re a project for the more advanced crocheter and a great way to try colorwork. These mittens showcase the traditional Fair Isle knitting technique with colorwork patterns. They often feature intricate motifs and a blend of colors, making them visually striking.
Suggested Yarn: Sport Weight Yarn
Difficulty Level: Intermediate
Yarn Weight: Light (3)
Crochet Hook: G/6 (4.0 mm)
10. Ruffled Fingerless Gloves
These gloves feature a charming ruffle detail at the wrist, adding a feminine and playful touch. They’re perfect for those who like their accessories with flair.
These gloves have a ruffled or frilled edge at the wrist, adding a feminine and playful touch. They are fashionable and can be dressed up or down.

Suggested Yarn: Worsted Weight Yarn
Difficulty Level: Intermediate
Yarn Weight: Medium (4)
Crochet Hook: G/6 (4.0 mm)
11. Cable Cuff Mittens
A beautiful cable stitch detail on the cuff characterizes these mittens. They offer a blend of practicality and elegance, perfect for those chilly but stylish winter days.
These mittens have a cable pattern on the cuff, providing a decorative detail. The cable adds a touch of elegance and can be combined with various stitch patterns.

Suggested Yarn: Aran Weight Yarn
Difficulty Level: Intermediate
Yarn Weight: Medium (4)
Crochet Hook: H/8 (5.0 mm)
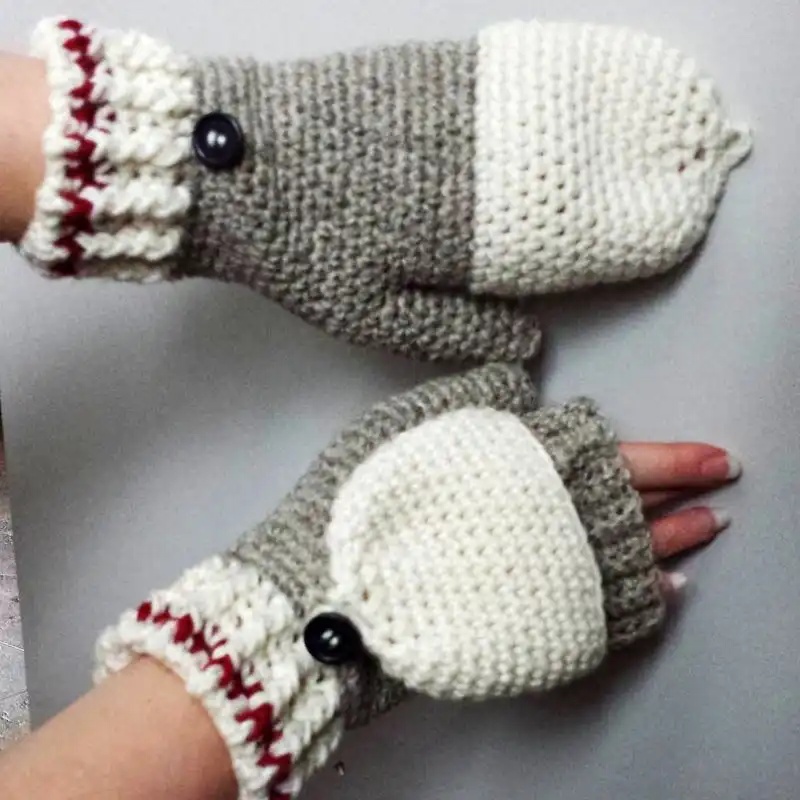
12. Buttoned Fingerless Gloves
These gloves stand out for their button detail, adding a charming, rustic touch. The fingerless design means you get the warmth of gloves without sacrificing agility.
These fingerless gloves feature buttons as a closure or decorative element. The buttons can be functional or purely for aesthetic purposes, adding a unique look.

Suggested Yarn: Worsted Weight Yarn
Difficulty Level: Intermediate
Yarn Weight: Medium (4)
Crochet Hook: H/8 (5.0 mm)
13. Striped Mittens with Faux Fur Trim
These mittens are all about luxury. The faux fur trim adds a soft, warm, and stylish edge to the classic striped mitten. These mittens have stripes in different colors and are embellished with faux fur trim. The combination of lines and fur creates a stylish and cozy design.

Suggested Yarn: Bulky Weight Yarn
Difficulty Level: Intermediate
Yarn Weight: Bulky (5)
Crochet Hook: K/10.5 (6.5 mm)
14. Bonfire Buddy Drink Cozy Mitten
These mitts feature the decorative shell stitch, creating a unique scalloped edge. They’re perfect for those who want a blend of elegance and functionality.
These fingerless mittens showcase the shell stitch, creating a beautiful textured pattern. The shells give them an elegant and feminine appearance.

Suggested Yarn: Worsted Weight Yarn
Difficulty Level: Beginner
Yarn Weight: Medium (4)
Crochet Hook: H/8 (5.0 mm)
15. Lacy Fingerless Gloves
These gloves are a more delicate option, featuring a beautiful lace pattern. They’re perfect for occasions where you want a light, elegant accessory rather than warmth.
These gloves feature an openwork stitch pattern, often with lace motifs. They are lightweight, perfect for transitional seasons or an accessory for more formal occasions.
Suggested Yarn: Sport Weight Yarn
Difficulty Level: Intermediate
Yarn Weight: Light (3)
Crochet Hook: E/4 (3.5 mm)
16. Convertible Flip-Top Mittens
These mittens have a clever design that allows the top to flip back and expose your fingers, turning them into fingerless gloves when you need more skill.
It’s like having two styles in one! These mittens have a unique feature that allows the top to be flipped open, exposing the fingertips. They allow switching between full coverage and finger freedom, making them versatile for various activities.
Suggested Yarn: Worsted Weight Yarn
Difficulty Level: Intermediate
Yarn Weight: Medium (4)
Crochet Hook: G/6 (4.0 mm)
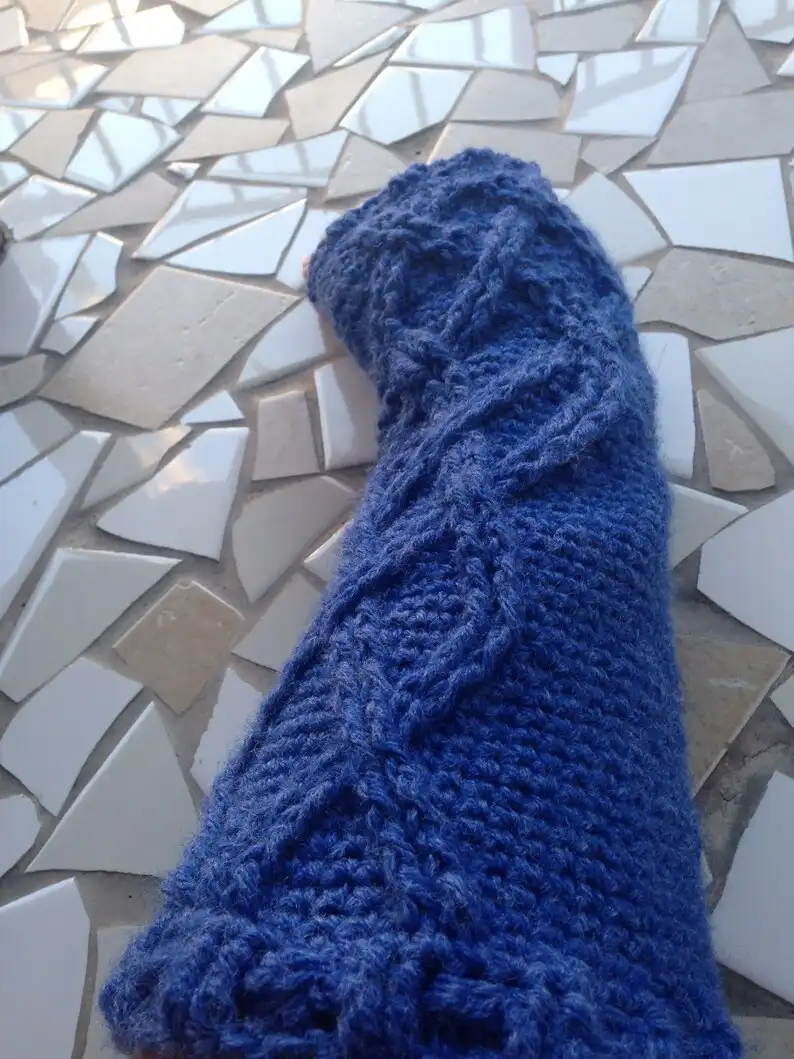
17. Crocodile Stitch Mini Scale Gloves
Named after the Aran Islands off the coast of Ireland, these gloves feature intricate cable patterns that give them a beautiful, classic look. The dense stitchwork adds extra warmth and durability.
These gloves showcase the traditional Aran stitch patterns, characterized by intricate cables and textured designs. They have a classic and timeless appeal, perfect for those who appreciate traditional knitting techniques.

Suggested Yarn: Sport Weight Yarn
Difficulty Level: Advanced
Yarn Weight: Light (3)
Crochet Hook: D/3 (3.25 mm)
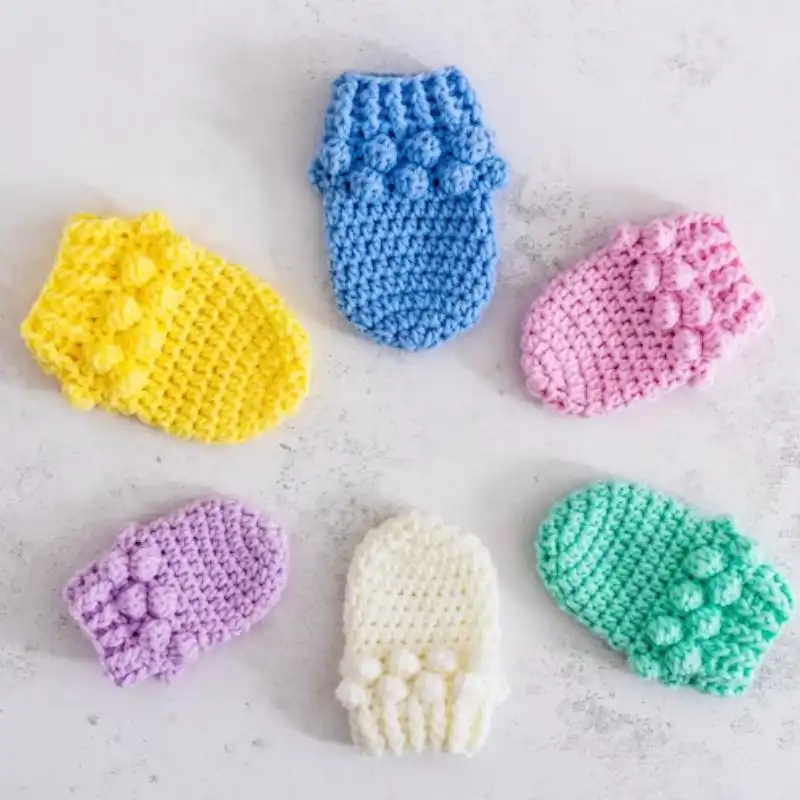
18. Bobble Stitch Mittens
The bobble stitch creates little ‘bubbles’ in the fabric, adding a fun and tactile dimension to these mittens. They’re perfect for adding a touch of whimsy to your winter wardrobe.
These mittens feature the bobble stitch, creating raised, round textures throughout the fabric. The bobbles add a playful and three-dimensional element, making them stand out.
Suggested Yarn: Worsted Weight Yarn
Difficulty Level: Intermediate
Yarn Weight: Medium (4)
Crochet Hook: H/8 (5.0 mm)
19. Lace Overlay Fingerless Gloves
These gloves combine fingerless gloves’ practicality with the lace overlay’s elegance. They’re both stylish and functional, providing warmth while allowing full use of your fingers.
These fingerless gloves have a delicate lace overlay on the top, creating an elegant and feminine look. The lace adds a touch of sophistication while maintaining the practicality of fingerless gloves.
Suggested Yarn: Lace Overlay Fingerless Gloves
Difficulty Level: Advanced
Yarn Weight: Light (3)
Crochet Hook: D/3 (3.25 mm)
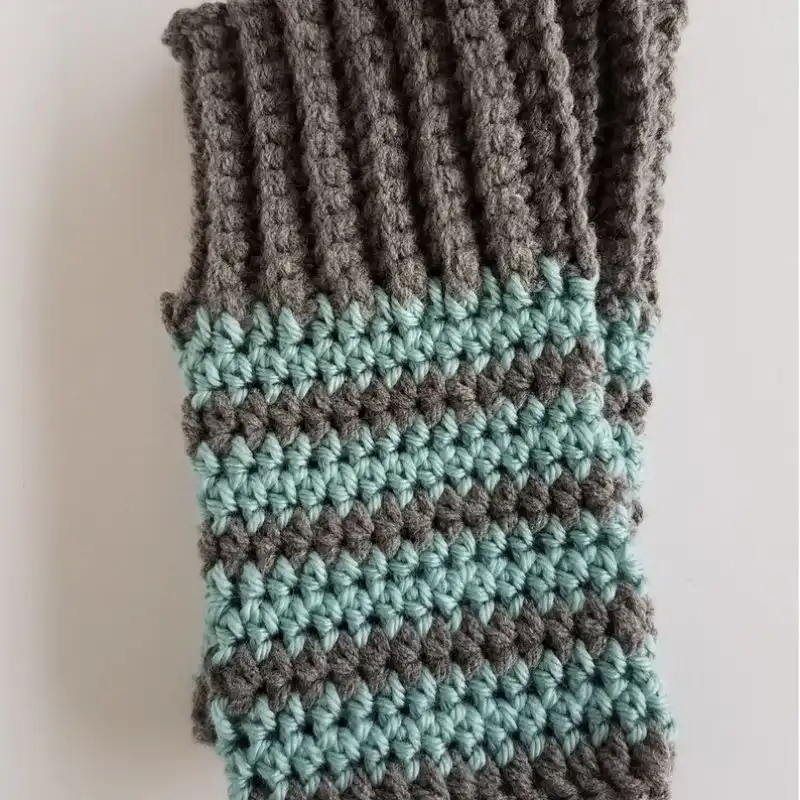
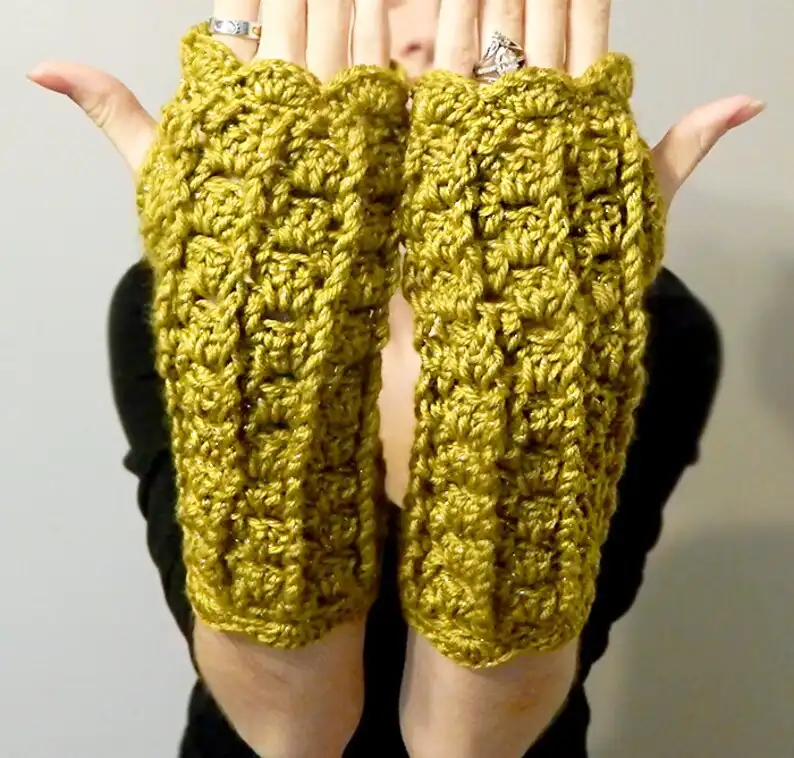
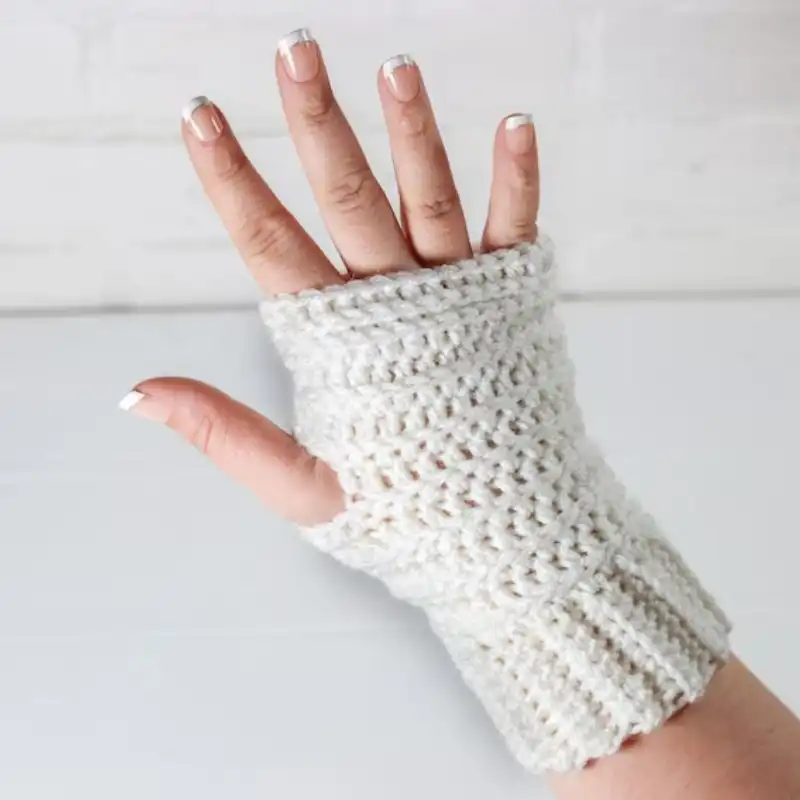
20. Ribbed Wrist Warmers
The ribbed pattern on these wrist warmers makes them stretchy and comfortable. They provide warmth to the wrists and hands while leaving the fingers free.
These gloves have a ribbed stitch pattern on the wrist section, providing a snug and stretchy fit. The ribbing adds elasticity and helps to keep the gloves in place.

Suggested Yarn: Worsted Weight Yarn
Difficulty Level: Beginner
Yarn Weight: Medium (4)
Crochet Hook: G/6 (4.0 mm)
21. Textured Slouchy Mittens
These mittens offer a more relaxed fit with their slouchy design, and the textured stitches give them a cozy, homemade look. They’re perfect for casual winter wear.
These mittens have a relaxed and slouchy fit, giving them a casual and comfortable appearance. They often feature textured stitch patterns that enhance the cozy look.

Suggested Yarn: Bulky Weight Yarn
Difficulty Level: Intermediate
Yarn Weight: Bulky (5)
Crochet Hook: D/3 (3.25 mm)
22. Flower Appliqué Fingerless Gloves
The flower appliqué adds a cute and feminine touch to these fingerless gloves. It’s an embellishment that can transform a simple pattern into something more personalized and fun.
These fingerless gloves are adorned with crochet flower appliqués, adding a feminine and decorative touch. You can use the flowers to create a pop of color or add a playful element.

Suggested Yarn: Sport Weight Yarn
Difficulty Level: Intermediate
Yarn Weight: Light (3)
Crochet Hook: E/4 (3.5 mm)
23. Color Block Mittens
With bold blocks of color, these mittens are modern and stylish. It’s a great pattern for playing with color combinations and using leftover yarn.
These mittens are designed with distinct color blocks, where different sections are crocheted in contrasting colors. The color blocking creates a modern and eye-catching effect.
Suggested Yarn: Worsted Weight Yarn
Difficulty Level: Intermediate
Yarn Weight: Medium (4)
Crochet Hook: H/8 (5.0 mm)
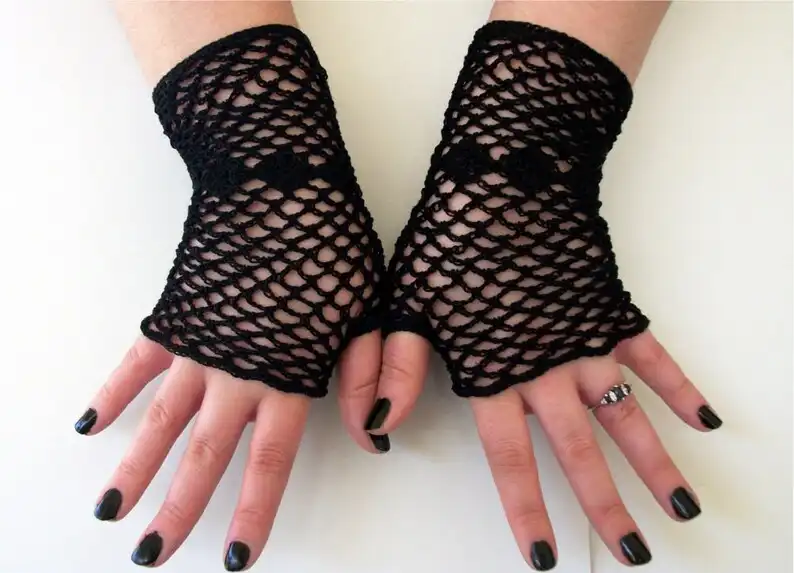
24. Mesh Stitch Gloves
The mesh stitch creates an open, lace-like design, making these gloves a lighter option for transitional seasons or when you want something a bit dressier.
These gloves feature a mesh stitch pattern that creates an airy, breathable fabric. They are lightweight and suitable for warmer climates or as accessories for transitional seasons.
Suggested Yarn: Sport Weight Yarn
Difficulty Level: Intermediate
Yarn Weight: Light (3)
Crochet Hook: E/4 (3.5 mm)
25. Braided Cable Fingerless Mitts
These mitts feature a beautiful braided cable pattern running down the center. They’re warm, functional, and have a classic, timeless style.
These fingerless mittens showcase braided cable stitches, which intertwine to create a braided pattern. The cables add texture and give the gloves a unique and intricate look.
Suggested Yarn: Worsted Weight Yarn
Difficulty Level: Intermediate
Yarn Weight: Medium (4)
Crochet Hook: H/8 (5.0 mm)
26. Striped Arm Warmers
The stripes add a fun and sporty look to these arm warmers. They’re great for adding a layer of warmth on chilly days without restricting hand movement.
These gloves are longer and cover the forearm, providing extra warmth. They often feature bold or contrasting stripes, making them a stylish accessory.
Suggested Yarn: Worsted Weight Yarn
Difficulty Level: Intermediate
Yarn Weight: Medium (4)
Crochet Hook: H/8 (5.0 mm)
27. Textured Thumbless Mittens for Babies
These mittens are designed specifically for babies, without a separate space for the thumb. The textured pattern adds a tactile interest that babies will love.
These thumbless mittens are designed for babies, ensuring their tiny hands stay warm. They feature textured stitch patterns to add visual appeal and are practical for infants who haven’t developed thumb coordination.
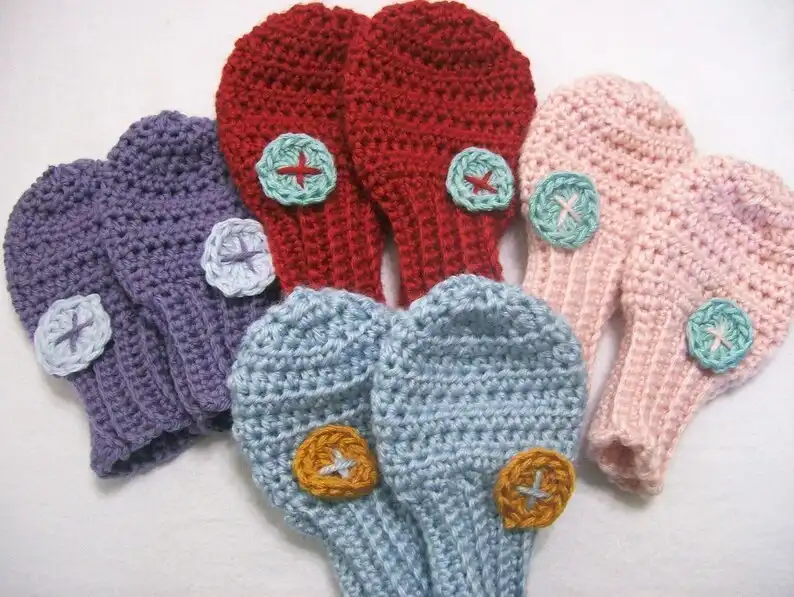
Suggested Yarn: Baby Weight Yarn
Difficulty Level: Beginner
Yarn Weight: Light (3)
Crochet Hook: E/4 (3.5 mm)
28. Buttoned Wrist Cuff Gloves
The buttoned cuff on these gloves adds a touch sof elegance and interest. It’s a small detail that can make a big difference in style.
These gloves have a buttoned wrist cuff as a closure or decorative element. The buttons can be functional or purely for aesthetics, offering a personalized touch.
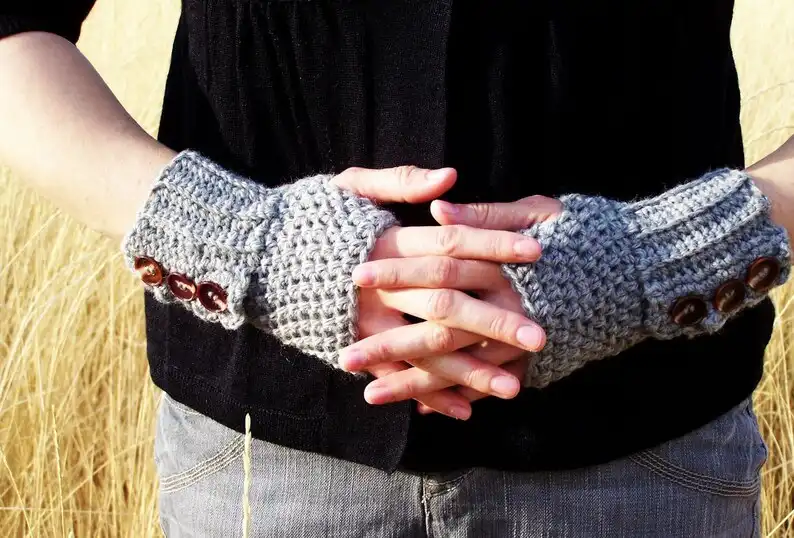
Suggested Yarn: Worsted Weight Yarn
Difficulty Level: Intermediate
Yarn Weight: Medium (4)
Crochet Hook: H/8 (5.0 mm)
29. Bow-Embellished Fingerless Gloves
The bow embellishment on these gloves adds a playful and feminine touch. It’s a simple detail that adds a lot of charm.
These gloves are versatile and can be worn for various occasions, from casual outings to more formal events.
The bow embellishments provide a delicate and feminine touch, making them a popular choice for those who want to add a romantic and whimsical element to their outfits.

Suggested Yarn: Worsted Weight Yarn
Difficulty Level: Intermediate
Yarn Weight: Medium (4)
Crochet Hook: G/6 (4.0 mm)
30. Chevron Stripe Mittens
These mittens stand out with a chevron stripe pattern that adds a modern and stylish touch.The zigzag stripes create a dynamic visual interest.
These mittens incorporate chevron stripes, creating a zigzag pattern. The chevron design adds visual appeal and makes them unique compared to traditional straight-striped mittens.

Suggested Yarn: Worsted Weight Yarn
Difficulty Level: Intermediate
Yarn Weight: Medium (4)
Crochet Hook: H/8 (5.0 mm)
Do’s & Don’ts For Gloves Patterns
Do’s
- Do measure your hands (or the recipient’s hands) accurately before you start your project. It is critical to achieving the right fit.
- Do select the suitable yarn for your project. Remember the yarn’s durability, warmth, and washability, mainly if you use gloves heavily.
- Do read through the entire pattern before you begin. It’s essential to familiarize yourself with the design and understand all the steps and techniques required.
- Do check your gauge. Even being slightly off can significantly affect the size and fit of your gloves.
- Do take your time. Crocheting gloves can be intricate, significantly when shaping the fingers or thumb. Don’t rush—patience will lead to a better result.
- Do keep track of your stitches. Ensuring both gloves are identical is essential, so counting stitches can help maintain symmetry.
- Do try on your gloves as you go. It allows you to check the fit and make any necessary adjustments.
Don’ts
- Remember to consider the yarn’s stretch. Some yarns stretch more than others, affecting the finished gloves’ size and fit.
- Pay attention to the importance of gauge. It’s essential for achieving the correct size and fit.
- Feel free to rip back if something needs to be fixed. It’s better to undo a few rounds and correct a mistake than to continue and end up with gloves that don’t fit or look the way you want them to.
- Remember to consider the importance of blocking. It can help even your stitches and give your gloves a more finished look.
- Be sure to complete the care instructions for your yarn. It is essential if the gloves will need to be washed regularly.
Tips & Tricks To Avoid Crochet Mistakes
Having devoted countless hours to crocheting, I’ve experienced my fair share of snags, dropped stitches, and the occasional moments of utter bewilderment. Crafting that impeccable pair of fingerless gloves isn’t just about skill; it’s also about mindfulness. Here are some pearls of wisdom I’ve gathered over the years to sidestep those pesky crochet pitfalls:
- Understand the Blueprint: Before diving into those loops and stitches, immerse yourself in the pattern. Comprehend every stitch, every technique. Stuck? Dive into tutorials, forums, or reach out to fellow crocheters.
- Yarn Selection is Key: Not all yarns weave the same tale. Ensure the yarn weight resonates with your pattern and is conducive for wearable items.
- Gauge is Your Compass: For wearables, fit is paramount. A minor deviation in gauge can lead to gloves that pinch or sag. Always kick off with a gauge swatch to set the right course.
- Keep a Stitch Tally: Especially when you’re spiraling in rounds, stitches can stealthily add on or vanish. Regular stitch counts keep these sneaky errors at bay.
- Stitch Markers are Your Companions: Working in rounds? Stitch markers can be your guiding stars, demarcating rounds or signaling increases and decreases.
- Tangle-Free Yarn: A rolling ball of yarn might seem playful until it weaves a web of tangles. A simple container or yarn bowl keeps it in check.
- Heed Your Body: Hours of crocheting can take a toll on your hands and eyes. Regular intervals of rest and stretches can rejuvenate you and ward off errors borne out of fatigue.
- Pilot New Stitches: Stumbled upon a novel stitch in your pattern? Before integrating it into your gloves, run a few practice loops on a test swatch.
- Embrace the Art of Frogging: Yes, unraveling stitches might seem disheartening, but if an error surfaces, it’s often better to retrace a few rows than to forge ahead with regret.
- Relish the Journey: Crocheting isn’t just about the end product. Each loop, each stitch, is a moment of creation. Embrace both the perfections and imperfections. Remember, every stitch is a story, every error a lesson, and every project a chapter in your crochet journey.
How To Block The Crochet Fingerless Gloves?
Ah, the magic of blocking! As a seasoned crocheter, I’ve often seen projects transformed from “just done” to “just perfect” with a bit of blocking. And when it comes to crochet fingerless gloves, this step can genuinely elevate your craftsmanship.
Here’s my personal walkthrough on how to block those freshly-hooked gloves:
Materials You’d Need
- A basin brimming with tepid water.
- A dash of mild detergent (though this is optional).
- Fresh, absorbent towels.
- A blocking mat, though any flat, water-resistant surface would do in a pinch.
- Rust-resistant pins, the unsung heroes of blocking.
The Stepwise Dance Of Blocking:
- Water Prep: First, fill your sink or basin with lukewarm water. If you’re veering towards the detergent route, add a smidgen and swirl it around until it melds with the water.
- The Gentle Soak: Immerse your crochet fingerless gloves into this tranquil bath. Caress them gently, allowing the water to seep into the stitches, but steer clear of any twisting or undue stretching. Let them luxuriate for about a quarter of an hour.
- Rinse Ritual (Conditional): If detergent had joined the party, drain your basin and cascade clean, lukewarm water over the gloves until it runs transparent.
- Water Ejection: Tenderly press out any lingering water from the gloves. Remember, wringing them out might mar their shape, so resist the temptation.
- Towel Tango: Spread out a pristine, dry towel. Place the damp gloves atop and commence a gentle roll, pressing softly. This will siphon off residual moisture. If they still feel quite damp, dance once more with a fresh towel.
- Pinning: Here’s where the magic unfolds. Spread your gloves on a dry towel or blocking mat. Mold them into your envisioned shape. Using your rust-resistant pins, anchor them down, ensuring they lay symmetrically.
- Drying Interlude: This is where patience plays its part. Let the gloves rest until they’ve completely dried. Depending on your home’s ambiance and the yarn’s nature, this could span from mere hours to a couple of days.
- The Grand Reveal: Once bone-dry, unpin the gloves. Slip them on, and you’ll witness how they conform beautifully to the shape you sculpted.
- A word to the wise: blocking isn’t a one-off affair.
After subsequent washes or prolonged use, your gloves might yearn for another round. Also, be yarn-savvy. Not every yarn type basks in the glory of blocking, so always keep an eye on those yarn care tags.
RELATED: 41 Different Types Of Belt Buckles To Transform Your Ensemble
Suggestions To Add a Personal Touch
Ah, the joy of customization! After countless crochet projects, one thing stands out: the beauty of adding a personal touch. Transforming standard crochet fingerless gloves into a bespoke masterpiece is all about creativity.
Let me share some personalized spins I’ve tried over the years:
Dabble in Colors: The color palette is your canvas. Echo the wearer’s persona through their favored shades or perhaps venture into variegated yarns for a delightful chromatic dance.
Sprinkle Some Embellishments: Nothing screams bespoke like a smattering of beads, sequins, or buttons. Maybe anchor a petite button at the gloves’ brim, or perhaps affix fabric patches that resonate with the wearer’s passions.
Embroidery Elevates: With embroidery floss at your disposal, your gloves can be embroidered with intricate designs, initials, or even mini artistic renditions. Imagine the charm of personalized initials gracing each glove.
Surface Crochet’s Charm: By crocheting atop your finished glove, you can introduce patterns, splashes of color, or perhaps meaningful words or dates.
Edgy Edgings: The cuffs of your gloves can be canvases for ornate edgings. From the dainty picots to the grandeur of shells, the choices are myriad.
Texture Tells a Tale: Stitches like the popcorn or the bobble lend an enticing tactile feel to gloves. Whether it’s gracing the entire glove or just strategic spots like the back of the hand, textured stitches can transform the look.
Play with Length: While standard gloves have their charm, tailoring the length can be game-changing. Elongated gloves exude elegance, while the shorter ones lean towards the practical side.
Yarn Varieties: The universe of yarn is vast. From the ethereal fluffiness of certain yarns to the sheen of others, the material you pick can dramatically alter the glove’s vibe.
But amidst all these tweaks and embellishments, always center the wearer’s essence. Because, at its heart, customization is about mirroring individuality.
Go on, embrace your creativity, and remember, in the realm of crochet, there’s no right or wrong—only myriad threads of imagination waiting to be woven.

Wash & Care Instructions
Through my many years immersed in the art of crocheting, I’ve come to realize that crafting a piece is just half the journey. The other half? Ensuring its longevity through proper care.
Crochet fingerless gloves, like any other crafted treasure, deserve tender love and care. Here’s my personal guide on how to pamper them:
Peruse the Yarn Label: This is your first stop. Every yarn label is a treasure trove of care instructions tailored for that specific fiber. It’s the yarn’s way of whispering its needs to you.
The Gentle Embrace of Hand Washing: When unsure, this is your safest bet. Envision a calm spa for your gloves.
Fill a basin with lukewarm water: Infuse it with a touch of mild detergent, and let your gloves soak, gently swishing now and then. A 15-minute soak usually does the trick.
Rinsing, the Right Way: After their serene soak, introduce your gloves to fresh water. As you rinse, resist the urge to wring. Instead, opt for a tender squeeze to shed excess water.
To wick away more moisture, cocoon them in a clean towel and press gently. Subsequently, let them lounge flat on a fresh towel or a mesh rack. And if they’ve gone a tad out of shape, mold them back while they’re still damp.
Revisit Blocking: Post-washing, your gloves might yearn for some reshaping. Here’s where our old friend, blocking, comes into play. Just as you did post-creation, pin them onto a flat terrain and let them air-dry into perfection.
Shun Heat and Harsh Rays: Direct heat can be the nemesis of your gloves, risking shrinkage or warping. And the blazing sun? It could rob them of their vibrant hues. So, no radiators or sunbathing for these beauties.
Storing with Care: When they’re not gracing your hands, let your gloves rest in a serene, cool spot, shielded from sunlight’s harsh glare. And if they’re on a seasonal hiatus, a sprinkle of cedar balls or pouches of lavender can keep those pesky moths at bay.
In essence, every stitch, every loop, is a testament to your dedication. And with the right care, your crochet fingerless gloves can be a hand-warming companion for many chilly days ahead. Cherish them, care for them, and they’ll return the favor in kind.
RELATED: 58 Different Types Of Collars On Coats To Explore The Vast Array Of Designs
A Quick Recap
Ah, let’s distill the essence of our crochet fingerless glove journey, shall we?
Crochet fingerless gloves stand tall as a cherished accessory, merging utility with flair. Whether it’s the heat of summer or winter’s chill, they seamlessly adapt, mirroring one’s distinct style.
For those dipping their toes (or should I say fingers?) into the world of crochet, these gloves present a friendly canvas. With basic crochet tools in tow and a yarn length spanning anywhere between 100 to 200 yards, you’re all set.
Precision lies at the heart of crafting these gloves. A thorough grasp of stitches and techniques, meticulous gauge checks, and diligent stitch counts lay the foundation. And for that polished finale? Ah, the magic of blocking!
But why stop at basics? Unleash your creativity. Paint with colors, play with textures, dabble in edgings, sprinkle embellishments, or etch designs with surface crochet. The sky is the limit.
Now, once birthed, these gloves are akin to delicate artifacts. Tender hand washing, mindful drying, and considerate storage are their sustenance, ensuring their vibrancy endures.
So, fellow crochet enthusiasts, armed with your trusty hook and the yarn of your choice, embark on this journey. Sculpt, shape, and stitch your very own finger-warming masterpiece. Let’s crochet!
Frequently Asked Questions
Is Crocheting Excellent Or Bad For Your Hands?
Crocheting can benefit your hands as it improves hand-eye coordination, talent, and fine motor skills. However, excessive crocheting without breaks can strain your hands and fingers, leading to discomfort or even repetitive strain injuries.
Can I Get Carpal Tunnel Syndrome From Crocheting?
Prolonged, repetitive hand movements, like those used in crocheting, could contribute to carpal tunnel syndrome. It’s essential to take frequent breaks, maintain good posture, and use ergonomic crochet hooks to reduce the risk.
What Kind Of Yarn Do You Use To Crochet Mittens?
The yarn choice can vary based on your preference, but wool or a wool blend is famous for mittens due to its natural warmth. Acrylic yarn can also be a good choice as it is easy to care for and holds up well.
What Is The Best Crochet Stitch For Fingerless Gloves?
There’s no definitive “best” stitch, as it depends on the desired look and level of warmth. However, the half-double crochet stitch is a popular choice for fingerless gloves, as it creates a dense fabric that’s warm but not too thick.
What Size Crochet Hook For Gloves?
The size of the crochet hook depends on the yarn you’re using and your tension. However, a standard size for gloves is around 4-5mm (US sizes G or H). Always check your pattern, though, as it should recommend a hook size.

- 25 Delightful Crochet Jellyfish Patterns For Sea Lovers - April 17, 2024
- 75 Free Lovely Crochet Sweater Patterns (With Pictures) - February 9, 2024
- 50 Free Crochet Blanket Patterns For A Cozy Home - January 22, 2024
