

Do you love penguins almost as much as you love crocheting? Well, you’ve come to the right place! Penguin crochet patterns can guide you through the process of making a novelty or festive penguin item.
To make things easier, we’ve compiled a list of the very best penguin crochet patterns available on Etsy right now, all of which have multiple positive reviews from happy customers.
In this article, we’ve included a huge array of projects such as amigurumi toys, baby rattles, throw blankets, and winter scarves. Let’s dive in!

Is It Worth To Crochet A Penguin?
Crocheting a penguin can be a wonderfully rewarding experience, blending the joy of crafting with the charm of these adorable creatures. This project is excellent for beginners and seasoned crocheters, offering an opportunity to practice shaping and color work in a fun, manageable package.
The finished product, a cute and personal handmade item, is perfect for gifting or adding a touch of whimsy to your decor. Furthermore, the sense of accomplishment and the therapeutic benefits of crocheting make it a worthwhile endeavor. In essence, crocheting a penguin is not just about creating a cute item; it’s about enjoying the creative journey.
RELATED: How To Make Crossed Stitch In Crochet With Tips For Flawless Handiwork?
Various Stitches To Crochet A Penguin
Crocheting a penguin involves a variety of stitches that cater to different parts of the project, enhancing its texture and shape. Here are some essential stitches you’ll likely use, along with explanations for each:
- Chain Stitch (ch): The most basic crochet stitch is often used to begin patterns. It creates a foundation row upon which other stitches are built.
- Single crochet (sc): A fundamental stitch that forms a tight, dense fabric. It’s used for the main body of the penguin, providing a smooth surface.
- Slip stitch (sl st): This stitch combines rounds or pieces without adding height. It’s perfect for finishing edges or detail work on the penguin, like attaching flippers or feet.
- Half Double crochet (hdc): A stitch slightly taller than a single crochet. It’s useful for parts of the penguin where you want a bit more texture or height, like the wings or feet.
- Double Crochet (DC): This stitch is taller and creates a more open fabric. It might be used for decorative elements or accessories for the penguin, like a scarf.
- Increase (inc): This technique involves making two stitches in the same stitch from the previous row to widen the crochet fabric. It’s essential for shaping the round body of the penguin.
- Decrease (dec): Unlike increase, decrease is used to taper the crochet fabric. It is instrumental in shaping the top of the penguin’s head or the ends of its flippers.
- Magic Ring (or Magic Circle): A technique to start crocheting in the round without leaving a hole. It’s perfect for starting the penguin’s body or head, giving a neat, closed start.
- Bobble Stitch: This stitch creates a textured, raised design. It can be used to add a unique touch, like creating a 3D effect for the penguin’s eyes or beak.
- Loop Stitch: This can create a furry or feathered texture. While not an ordinary stitch for penguins, it could be used creatively for a fluffy baby penguin look.
How Long Should A Penguin Be?
The size of a crocheted penguin can vary greatly depending on the pattern, yarn weight, and hook size used. There’s no one-size-fits-all answer, but here’s a general guide to different sizes you might consider:
- Mini or Amigurumi Penguins: These are typically very small, ranging from 2 to 4 inches tall. They’re perfect for keychains, ornaments, or small toys. They are usually made with lightweight yarn (like sport or fingering) and a smaller hook to keep the stitches tight and the filling from showing.
- Small Penguins: A small penguin might measure 5 to 7 inches tall. This size is great for a desk buddy or a small plush toy for children. It usually requires a light to medium-weight yarn and a corresponding hook size.
- Medium Penguins: Medium-sized penguins are generally about 8 to 12 inches tall. They make lovely cuddle buddies for kids and can be used as decorative pieces in a nursery. For this size, a medium-weight yarn (like worsted or aran) and a larger hook are typically used to get a softer, squishier feel.
- Large Penguins can range from 13 inches to over 2 feet tall. They are ideal as statement plushies or large decorative items. Large penguins require larger hooks and bulkier yarns (like chunky or super bulky). The large size can be particularly appealing for a cozy, huggable toy.
- Life-Sized Penguins: For an ambitious project, some crocheters might attempt a life-sized penguin, matching the actual size of certain penguin species. For example, an Emperor Penguin can stand about 3 to 4 feet tall. Such projects are highly detailed and can be pretty complex.
Essential Tools And Materials
Crocheting a penguin requires a set of essential tools and materials. Here’s a list of essential items you’ll need:
Glossary Of Crochet Stitches And Techniques
Here’s a glossary of common crochet stitches and techniques that every crocheter should be familiar with:
- Chain (ch): The basic starting stitch for most crochet projects, forming a series of loops.
- Slip stitch (sl st): Used to join stitches together without adding height, often used to finish a round or row.
- Single crochet (sc): A basic stitch creates a tight, dense fabric.
- Half Double crochet (hdc): A stitch taller than a single crochet but shorter than a double crochet.
- Double Crochet (DC): A taller standard stitch that creates a looser fabric than a single crochet.
- Treble Crochet (tr): A tall stitch that creates a more open and airy fabric.
- Magic Ring/Circle: A technique used to start crocheting in the round, particularly in amigurumi, that allows for a tightly closed center.
- Increasing (inc): Adding stitches to a row or round to widen the fabric.
- Decreasing (dec): Combining stitches to reduce the width or to shape the fabric.
- Front Loop Only (FLO): Crocheting into the stitch’s front loop only creates a ribbed texture.
- Back Loop Only (BLO): Crocheting into the back loop of the stitch only, also used for ribbing.
- Fasten Off: Cut the yarn and pull the tail through the last loop to secure the end of the project.
- Weaving in Ends: Using a yarn needle to hide yarn tails in the finished work for a neat appearance.
- Gauge: The number of stitches and rows per inch is vital for ensuring the project size is correct.
- Yarn Over (yo): A fundamental move in crochet where the yarn is looped over the crochet hook.
- Cluster Stitch: A group of stitches worked together in the same space, often used for texture.
- Popcorn Stitch: A technique where multiple stitches are made in the same space and then joined together, creating a “popcorn” effect.
- Bobble Stitch: Similar to the popcorn stitch, the stitches are half-completed and joined together.
- Shell Stitch: Multiple stitches worked in the same space, creating a shell-like shape for decorative edging or patterns.
- Picot: A small loop often used for decorative edging.
- Loop Stitch: Creates loops of yarn on the fabric’s surface, often used for a furry texture.
- Blocking: A finishing technique where the crochet item is wet, shaped, and allowed to dry to give it a neat, professional appearance.
- Amigurumi: The Japanese art of knitting or crocheting small, stuffed yarn creatures.
Understand Crochet Stitches And Techniques
As an experienced crocheter, I’ve learned that understanding crochet stitches and techniques begins with mastering the basics. Start by familiarizing yourself with simple stitches like the chain and single and double crochet.
Practice them until they feel natural. Please pay attention to yarn over and pulling through motions, which are fundamental to most stitches. Reading patterns come next, like a unique language with abbreviations and symbols.
I recommend starting with simple projects to build your skills gradually. Crochet is tactile and visual, so watching tutorials can be beneficial. Most importantly, be patient with yourself and enjoy the learning process!
Which Yarn Is Best For Crochet Penguin?
As a crochet enthusiast who loves making adorable creatures like penguins, I’ve experimented with various yarns to find the best fit for these projects. Here’s my take on different yarn types for crocheting a penguin:
- Acrylic Yarn: This is my go-to for amigurumi-like penguins. It’s affordable, durable, and comes in various colors. Acrylic holds its shape well, which is crucial for stuffed toys.
- Cotton Yarn: I use cotton for a smoother texture and more weight. It’s great for detailed work and provides a lovely sheen, but it’s less forgiving than acrylic and only stretches a little.
- Wool Yarn: Wool can be fantastic for a warmer, fuzzier look. It’s perfect if you want a more natural or traditional feel. However, wool can be more expensive and requires careful washing.
- Superwash Wool: This wool has been treated to make it machine washable. It combines the natural feel of wool with the practicality of acrylic. I find it an excellent gift choice, as it’s easier to care for.
- Velvet Yarn: For a luxurious, soft penguin, velvet yarn is my choice. It gives the penguin a plush, cuddly texture, perfect for a cozy toy. However, it can be a bit more challenging to work with due to its texture.
- Chunky Yarn: Chunky yarn is ideal when I want to make a more giant penguin quickly. It works up fast and gives the penguin a squishy feel. The only downside is that finer details can be more complicated to achieve with thicker yarn.
- Blend Yarns: Sometimes, I use blend yarns (like acrylic wool or cotton-acrylic) to get the best of both worlds. These can offer durability, ease of care, and a pleasant texture.
How Much Yarn Do I Need To Crochet A Penguin?
From my experience in crocheting creatures like penguins, the amount of yarn needed can vary based on the project’s size and the yarn’s thickness.
For a standard small to medium-sized penguin (about 6 to 10 inches tall), I usually need about 100 to 150 grams of yarn. It is typically one or two skeins of standard medium-weight yarn, like worsted or aran.
If you’re using a finer yarn, like Sport or DK, you might need slightly less, as these yarns tend to have more yardage per gram. Conversely, you may need more for bulkier yarns due to the lower yardage.
Remember, this estimate also depends on the density of your crochet stitches. If you crochet loosely, you’ll use more yarn; tighter stitches will use less.
It’s always a good idea to have a bit extra yarn on hand, just in case, especially if you’re adding additional details like a scarf or hat. And remember a small amount of contrasting yarn for the beak and feet!
Is It Beginner Friendly?
As someone who’s been crocheting for years, making a penguin can be beginner-friendly, especially if you choose a simple pattern. Penguins usually have basic shapes and require fundamental stitches like single crochet, increasing, and decreasing.
These are techniques most beginners learn early on. Plus, the color changes are minimal, usually between the body and beak colors.
It’s a fun and satisfying project for newcomers to the craft, offering just enough challenge to build skills without being overwhelming. So, if you’re new to crochet and love these adorable creatures, I’d recommend trying a penguin project.
How To Crochet A Beginner-Friendly Penguin?
Skill Level: Beginner
Materials
- Medium-weight yarn (e.g., worsted weight) in black and white and a small amount of yellow or orange for the beak.
- Crochet hook (usually size G/6 or 4 mm for medium-weight yarn).
- Stitch markers.
- Yarn needle.
- Scissors.
- Polyester fiberfill for stuffing.
- Safety eyes (around 9mm) or black yarn for embroidered eyes.
Basic Crochet Stitches to Know
- Chain (ch)
- Single crochet (sc)
- Increase (inc)
- Decrease (dec)
- Slip stitch (sl st)
Step-by-Step Instructions
Head and body (in black and white yarn)
- Start with a magic ring using white yarn.
- Round 1: 6 sc in magic ring. (6 sts)
- Round 2: Inc in each stitch around. (12 sts)
- Round 3: [Sc, inc] Repeat around. (18 sts)
- Continue increasing in this pattern until you reach a comfortable size for the penguin’s head.
- Then, work several rounds without increasing to form the head.
- Switch to black yarn and continue crocheting for the body, gradually decreasing to form a rounded shape.
- Stuff the head and body firmly with fiberfill before completely closing the opening.
Beak (in yellow or orange yarn)
- Start with a magic ring.
- Round 1: 4 sc in magic ring. (4 sts)
- Round 2: Sc in each stitch around. (4 sts)
- Flatten the piece and sew it onto the head.
Flippers (make 2, in black yarn)
- Chain 6.
- Starting from the second chain from the hook, sc in each chain across.
- Work a few rows in sc.
- Decrease to shape the flipper, then fasten off.
- Sew the flippers to each side of the body.
Feet (make 2, in yellow or orange yarn)
- Similar to flippers, but smaller. Start with a chain of 4.
- Sew them to the bottom of the body.
Eyes: Attach safety eyes between the white and black parts of the body or embroider the eyes with black yarn.
Finishing
- Weave in all loose ends with a yarn needle.
- If desired, add extra details like a small scarf or hat.
19 Penguin Crochet Patterns
1.Giant Penguin
Dive into the world of oversized charm with the Giant Penguin crochet pattern. Create an adorable giant penguin friend that brings a touch of whimsy and cuddliness to your crochet collection.
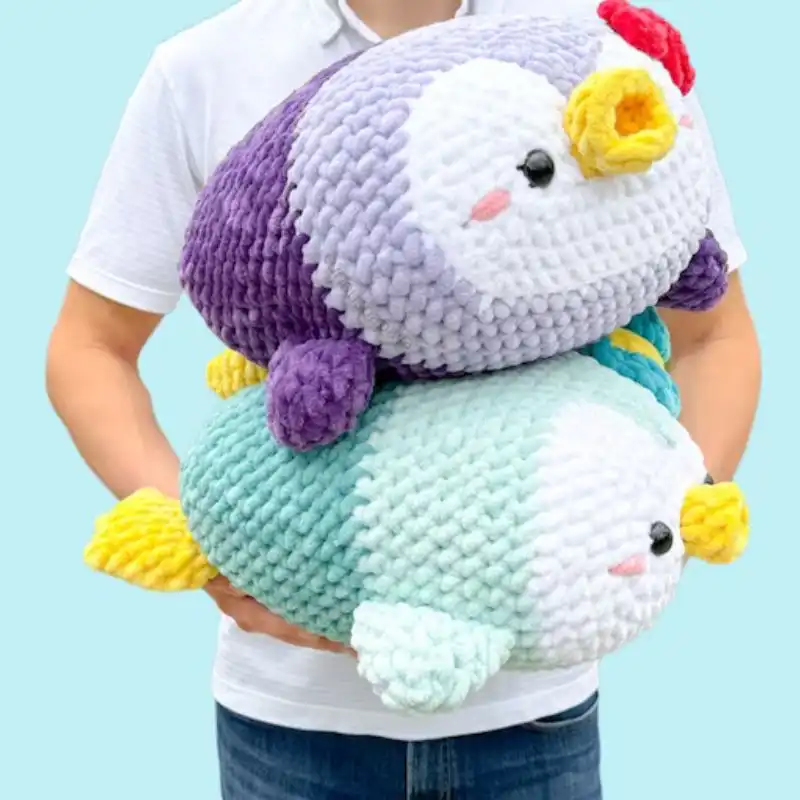
Suggested Yarn: Bulky Weight Yarn
Difficulty Level: Intermediate
Yarn Weight: Worsted
Crochet Hook: 5.5mm
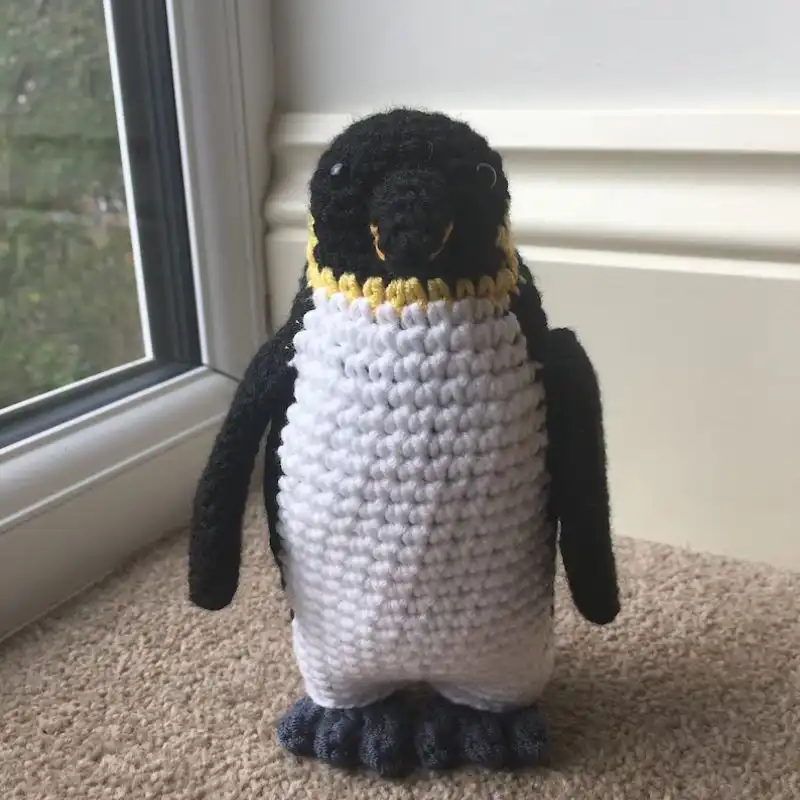
2.Irene Strange Crochet Pattern – Little Penguin Pip
This PDF pattern will help you make your own Emperor penguin chick; the result is simply adorable! The penguin has a soft, plush body and is perfect for chunky chenille-style yarn.
The finished product measures 28cm tall.
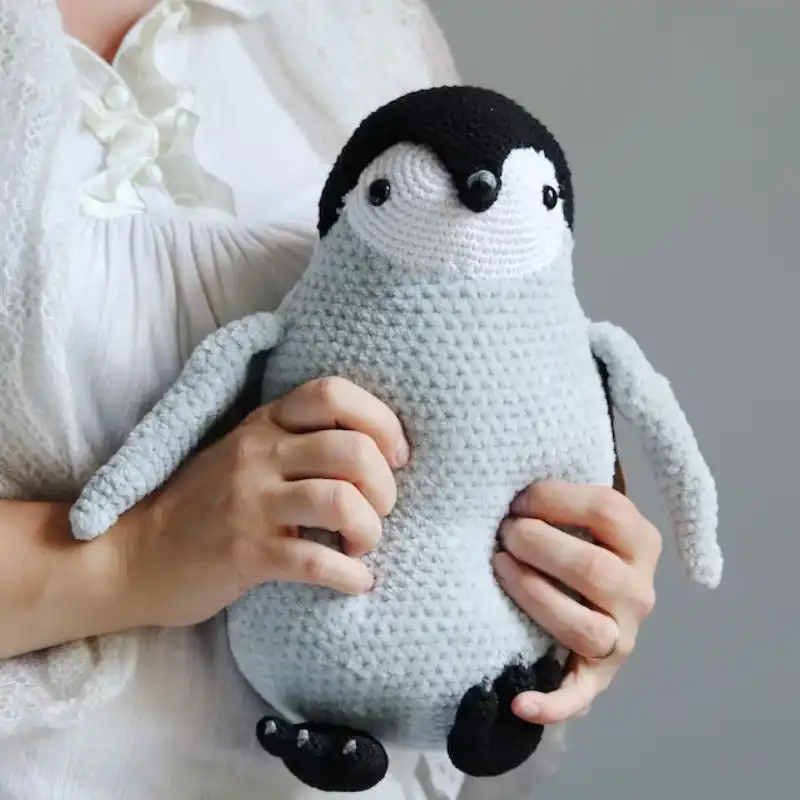
Suggested Yarn: Worsted Weight Yarn
Difficulty Level: Intermediate
Yarn Weight: Worsted
Crochet Hook: 5.5mm
3.African Flower Penguin
Explore the beauty of African Flower motifs with the African Flower Penguin crochet pattern. Craft a delightful penguin adorned with vibrant and intricate floral patterns, adding a unique and artistic flair to your crochet creations.
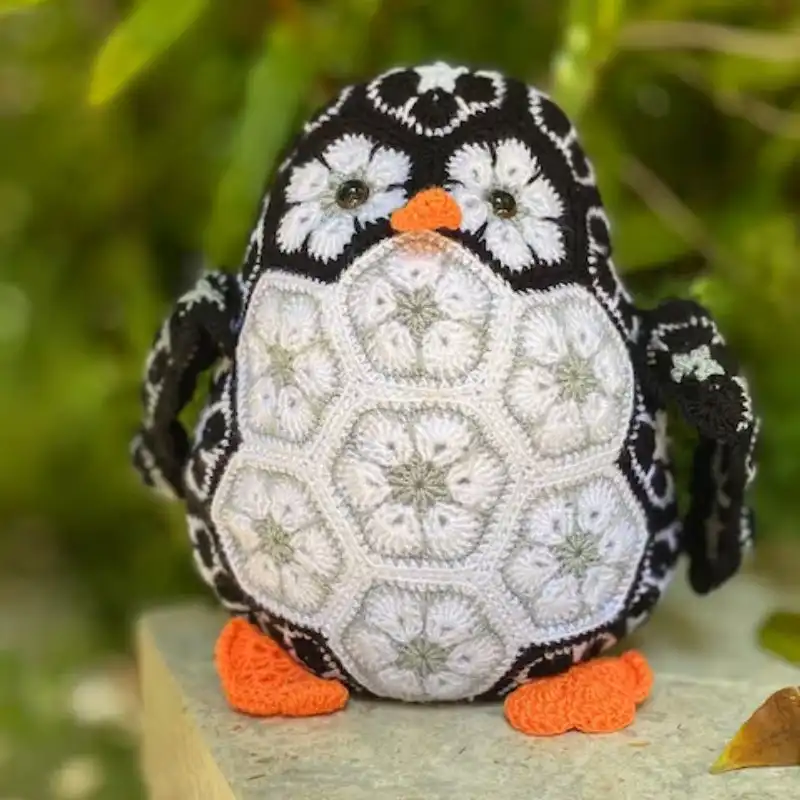
Suggested Yarn: Worsted Weight Yarn
Difficulty Level: Intermediate
Yarn Weight: Worsted
Crochet Hook: 4mm
4.Penguin Earflap Hat Crochet Pattern
What better hat to wear during the harsh winter than a penguin hat?! It’s ideal for any girl or boy, and they will surely like it! This hat is available in sizes newborn to adult and has the appearance of feathers thanks to puffs.
To create this item, you will need woolen-weight yarn.
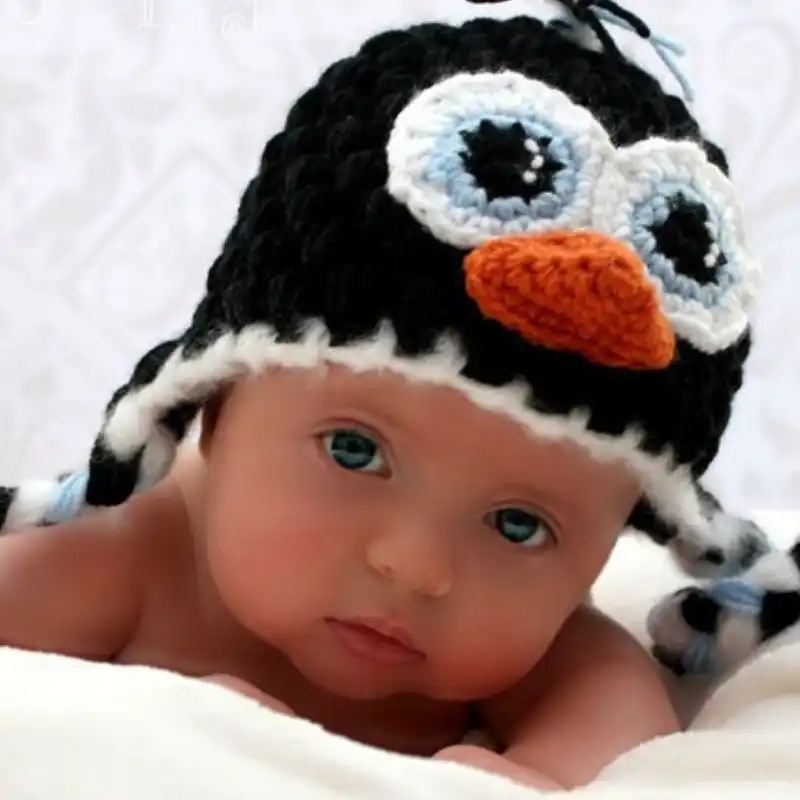
Suggested Yarn: Worsted Weight Yarn
Difficulty Level: Beginner/Intermediate
Yarn Weight: Worsted
Crochet Hook: 5mm
5.Crochet Pattern – Penguin Girl Lina
How beautiful is this crochet penguin pattern? We love the final result and think it would make a perfect Christmas gift for a child. Alternatively, this would look great in any home as a festive ornament.
The finished product measures 27cm in height and is created using a wire body so the limbs and wings can be moved and positioned in any way you like.

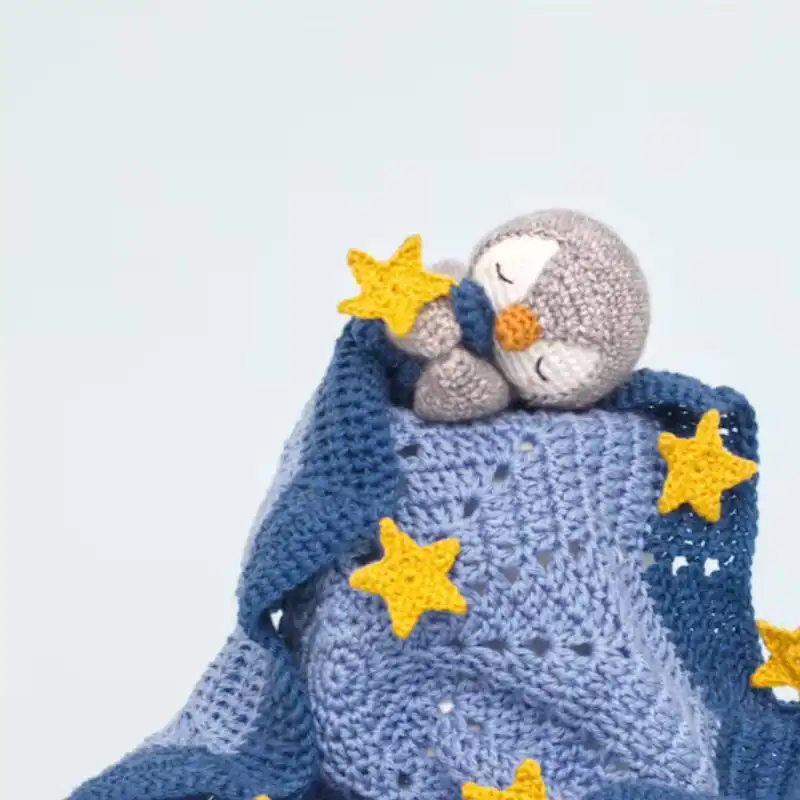
6.Peter The Penguin Comfort Blanket Crochet Pattern
This charming penguin blanket makes an excellent baby shower or birthday present for the little people in your life. The crochet pattern is in English (US terms). You can access it right away after purchasing it. You will acquire a 6-page PDF pattern download.
Suggested Yarn: Worsted Weight Yarn
Difficulty Level: Intermediate
Yarn Weight: Worsted
Crochet Hook: 5mm
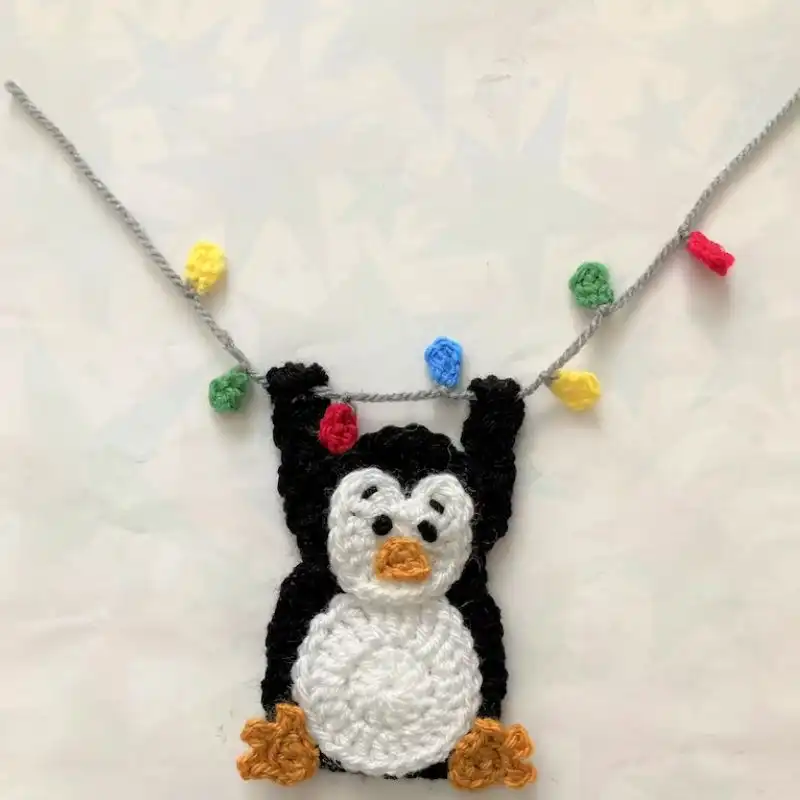
7.Fairy Light Penguin Applique
Add a sprinkle of enchantment to your projects with the Fairy Light Penguin Applique crochet pattern. Craft a whimsical penguin adorned with fairy lights, perfect for embellishing blankets, garments, and more with magical charm.
Suggested Yarn: Fingering Weight Yarn
Difficulty Level: Intermediate
Yarn Weight: Worsted
Crochet Hook: 5.5mm
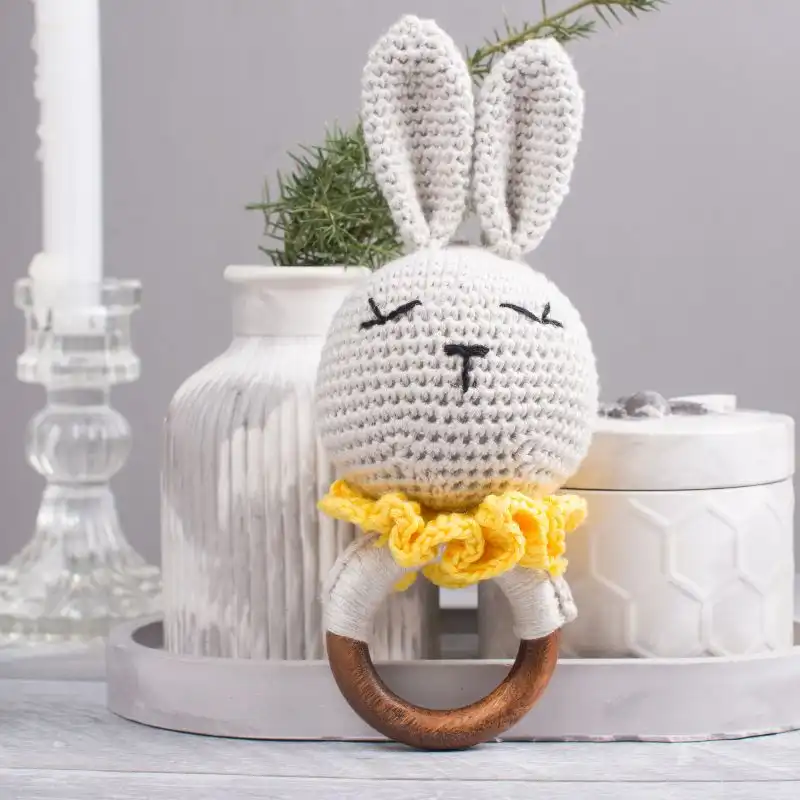
8.Peter The Penguin Crochet Baby Rattle
This charming Penguin rattle makes a beautiful baby shower or birthday present for the small children in your life. If you use the recommended yarn and wooden ring, the finished toy will be around 12 cm (4.7 inches) in size.
Suggested Yarn: Worsted Weight Yarn
Difficulty Level: Intermediate
Yarn Weight: Worsted
Crochet Hook: 5mm
9.Amigurumi Pattern Crochet Penguin Tux Hawaiian Animal Doll
How cool is this penguin crochet pattern? We love how funny and unique it is, and we think you will, too! This amigurumi design involves directions for crocheting Tux the Penguin as a surfer and its Hawaiian outfit and surfboard!

Suggested Yarn: Worsted Weight Yarn
Difficulty Level: Intermediate
Yarn Weight: Worsted
Crochet Hook: 4mm
10.Christmas Penguin Toy Crochet Pattern
This pattern will guide you through making your Christmas penguin toy. It works great as a fun gift for a child, but it also works well as a novelty Christmas decoration and would look fantastic in just about any home.
The Christmas tree measures 12cm tall, making it the ideal festive centerpiece.
11.Chilly Charlie Penguin Toy Crochet Pattern
This crochet pattern will teach you how to make your penguin plush toy, complete with a winter scarf and hat! This pattern is easy to follow, and yet straightforward enough for beginners to grasp quickly.
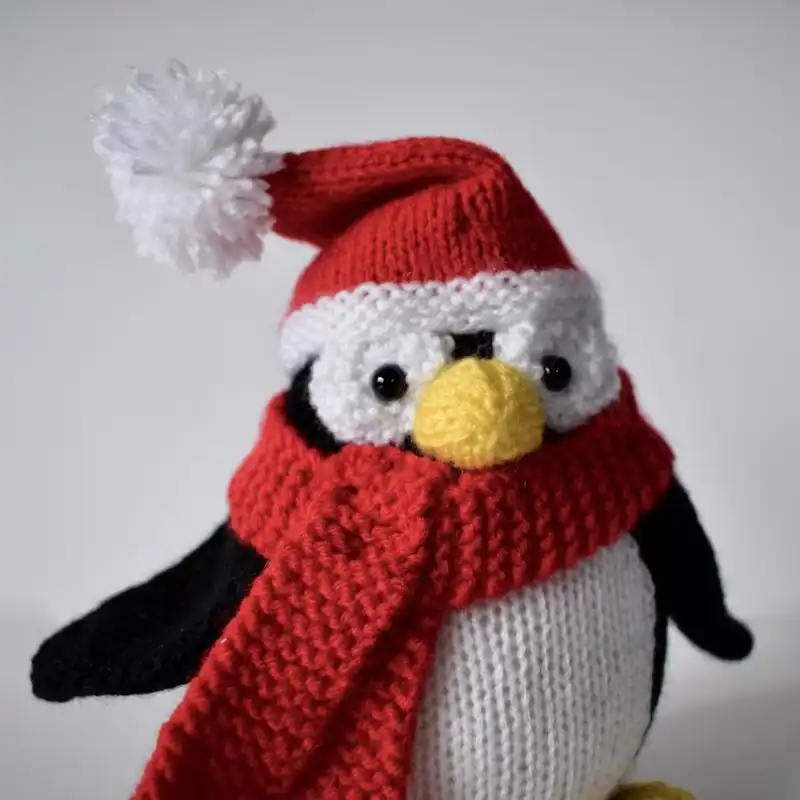
Suggested Yarn: Worsted Weight Yarn
Difficulty Level: Intermediate
Yarn Weight: Worsted
Crochet Hook: 3.75mm
12.Pierre The Penguin Crochet Pattern
This pattern will contain instructions to create your own Pierre the Penguin toy. Every morning, he puts on his favorite marinière shirt and beret and walks to the bakery down the street to get a couple of warm baguettes.
It makes this pattern perfect for any Paris enthusiast.
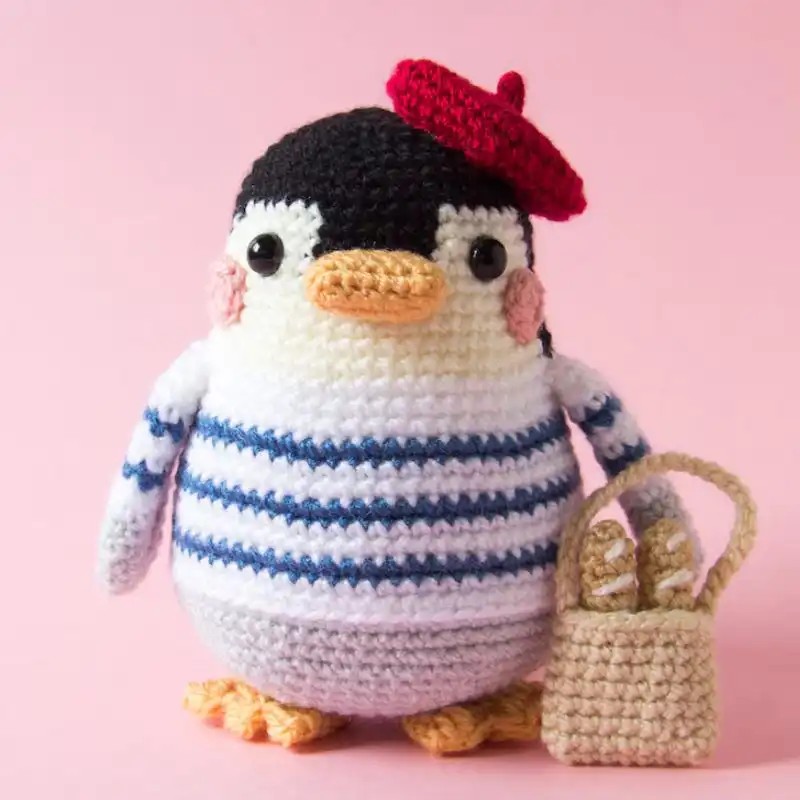
Suggested Yarn: Worsted Weight Yarn
Difficulty Level: Intermediate
Yarn Weight: Worsted
Crochet Hook: 4mm
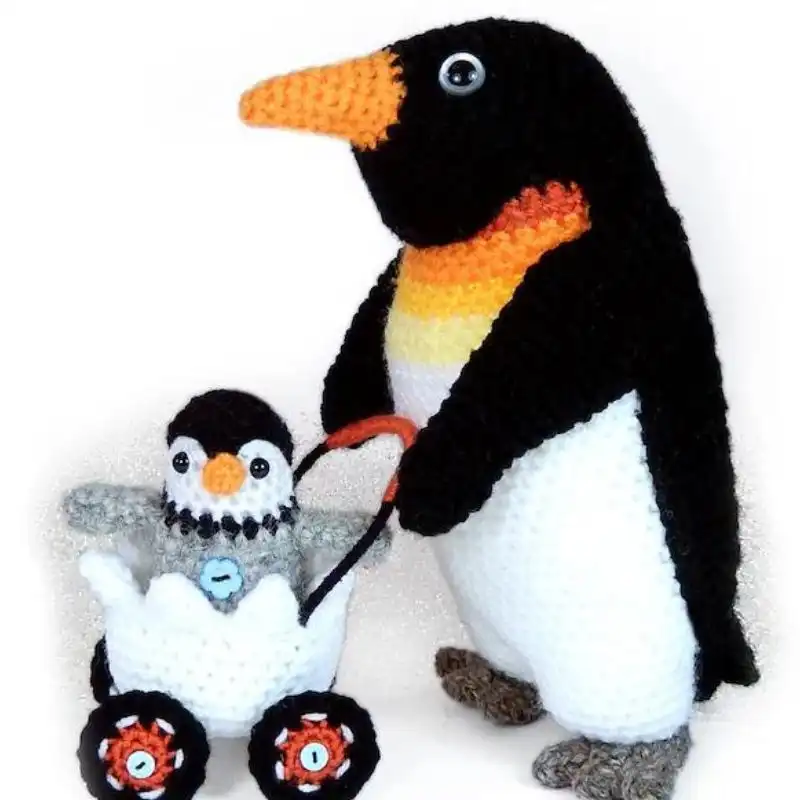
13.Laying Emperor Penguin & Chick Crochet Pattern
This 14-page pattern provides directions for the penguin, baby, and egg. The penguin chick slips inside the egg, which goes inside the penguin, allowing her to lay the egg, which can then hatch!
The chick can then perch on the parent penguin’s toes, just as male emperor penguins do for their young.
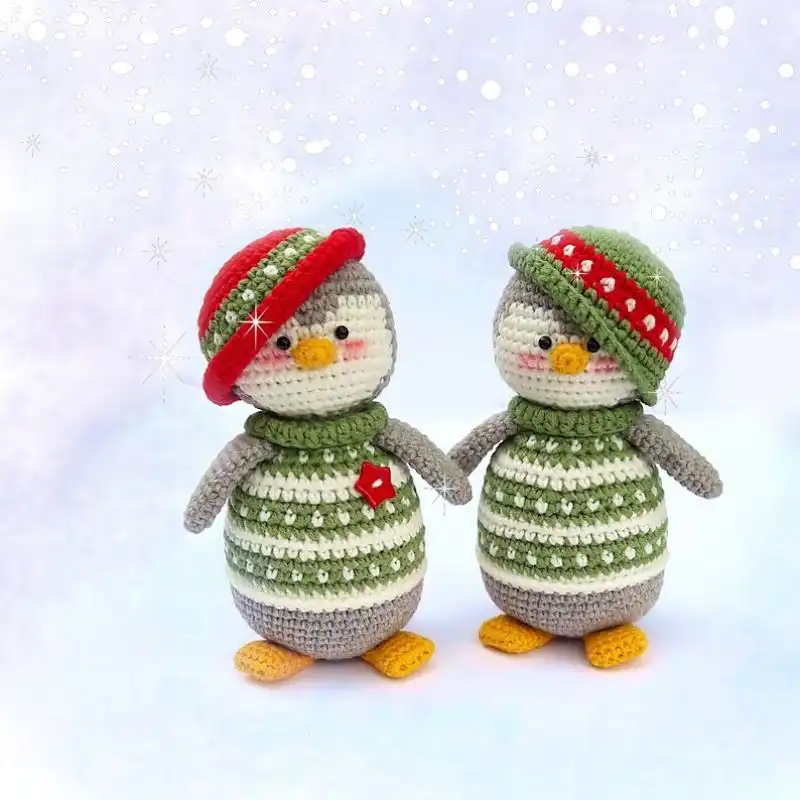
14.Papa Penguin and Pierre Baby Pierre
Embark on a heartwarming crochet journey with the Papa Penguin and Pierre Baby Pierre pattern. Create a lovable duo of penguins, perfect for gifting or as adorable decorations, spreading joy and cuteness wherever they waddle.
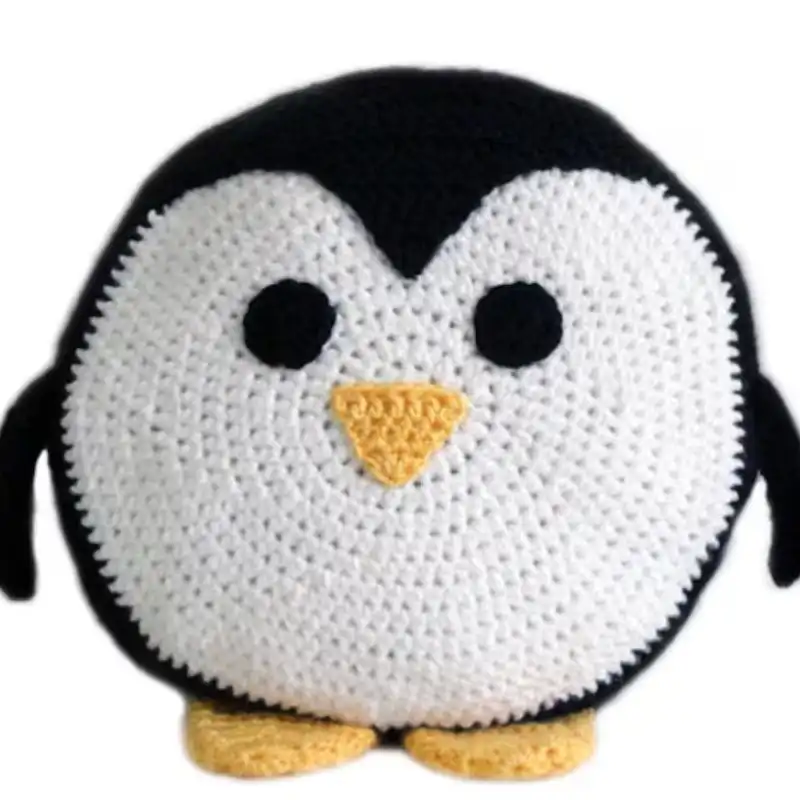
15.Penguin Pillow – Crochet Pattern
Do you like penguins or know somebody who does? This cushion is a full-size spherical pillow shaped like a plump penguin.
The pillow is crocheted in huge, thick stitches, which makes it relatively rapid to make for its size. After that, the face, wings, and feet are sewn on. The pillow’s feathers and feet can be moved, making it fun to play with.
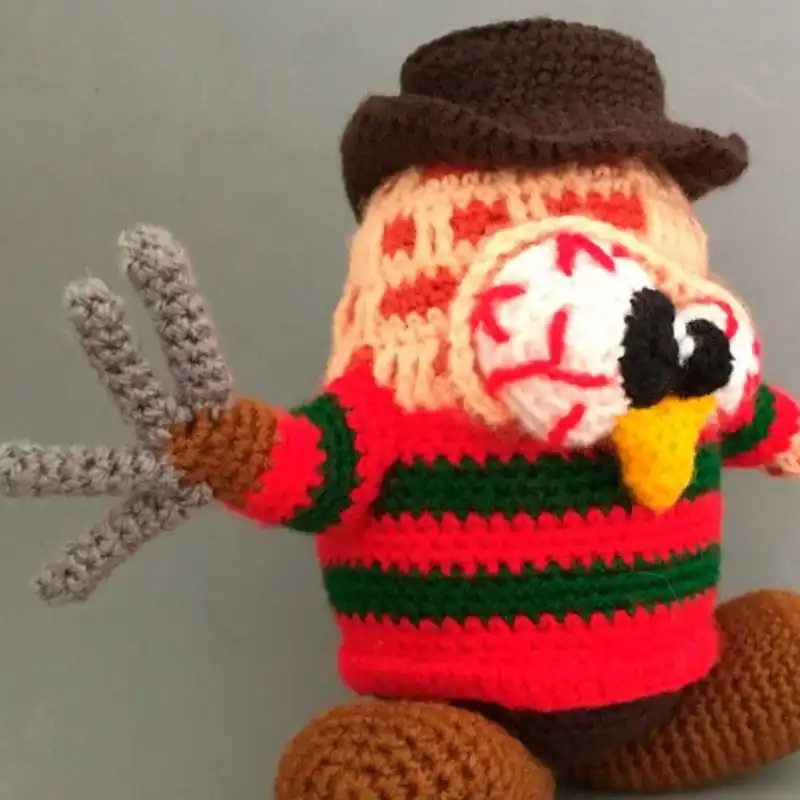
16.Amigurumi Pattern Crochet Freddy Krueger Penguin
Tux The Penguin, costumed as Freddy Krueger from “A Nightmare on Elm Street,” is crocheted in this amigurumi design!
Suggested Yarn: Worsted Weight Yarn
Difficulty Level: Intermediate
Yarn Weight: Worsted
Crochet Hook: 4mm
17.Crochet Penguin Doorstop Pattern Only
How adorable is this crochet penguin doorstop? It would look super cute in almost any home and make for a perfect festive decoration. The finished product measures 13 x 7 x 7 inches.
You’ll need some intermediate crochet skills and knowledge to make this pattern.

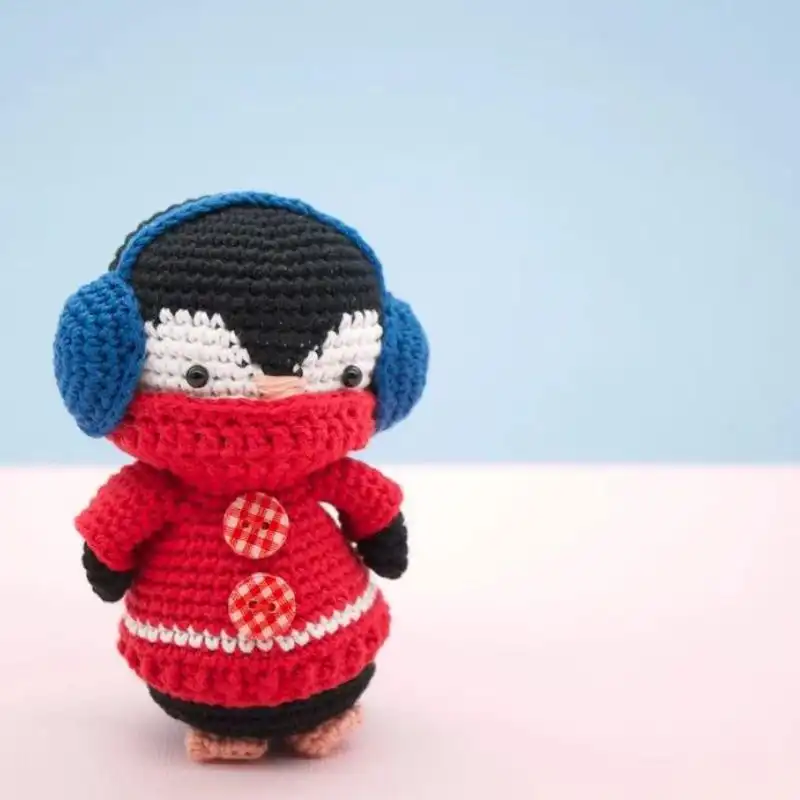
18.Amigurumi Crochet Pattern – Kenny The Penguin Bird
We’re obsessed with this adorable little penguin pattern, and we’re sure you will be too! How adorable are this little guy’s sweater and earmuffs? – Too cute!
This pattern is suitable for intermediate crocheters, and the finished product measures approximately 11.5 cm tall but can vary depending on the type of yarn you choose.
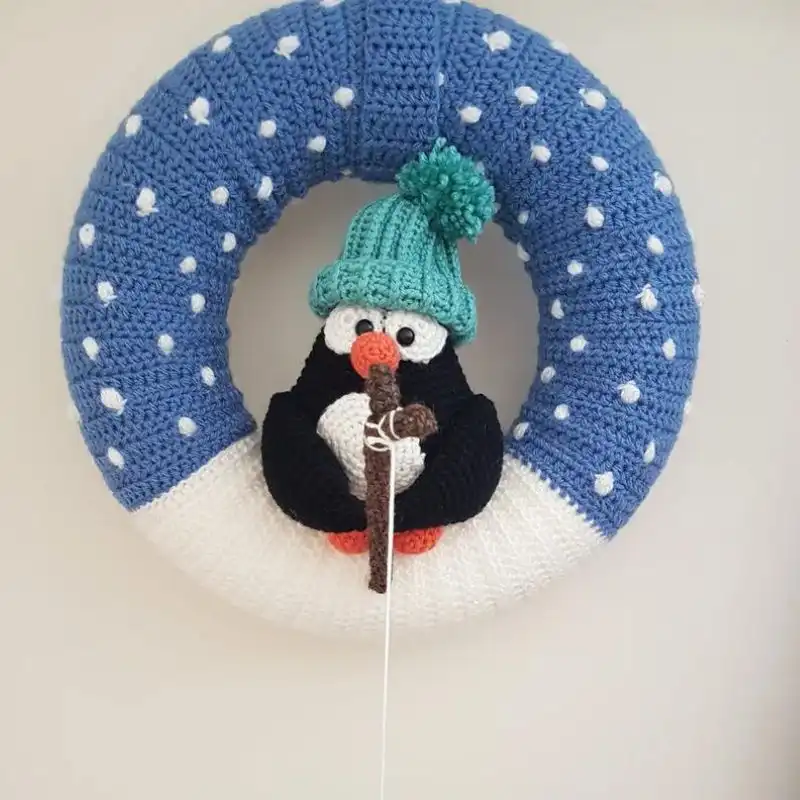
19.Penguin Winter Wreath Crochet Pattern
This wreath is perfect as a window or door ornament in wintertime. This pattern includes making the penguin, hat, fishing rod, and wreath covering.
Suggested Yarn: Worsted Weight Yarn
Difficulty Level: Intermediate
Yarn Weight: Worsted
Crochet Hook: 4mm
Do’s & Don’ts To Crochet A Safe Penguin
Do’s for Crocheting a Safe Penguin
- Use Safe Materials: Choose hypoallergenic yarn and stuffing, primarily if the penguin is intended for young children or individuals with allergies.
- Secure Attachments: Ensure all parts like eyes, beak, and flippers are securely attached to prevent them from being pulled off, especially when given to infants or pets.
- Opt for Safety Eyes or Embroidery: For young children, use safety eyes that lock in place or, even better, embroider the eyes and facial features to eliminate choking hazards.
- Tight Stitches: Crochet tightly to prevent the stuffing from coming out and to ensure the toy’s durability.
- Check for Loose Ends: Regularly inspect the penguin for any loose ends or wear and repair immediately to maintain safety.
- Washable Yarn: Use machine-washable yarns for easy cleaning, hygiene, and durability.
- Non-Toxic Materials: Ensure all materials (yarn, stuffing, embellishments) are non-toxic.
Don’ts for Crocheting a Safe Penguin
- Avoid Small, Loose Parts: Do not use beads, buttons, or any small detachable items for eyes or decoration, especially for toys meant for babies and toddlers.
- Don’t Use Stiff Yarn: Avoid yarns that are too stiff or scratchy, as they can be uncomfortable for cuddling.
- Avoid Harmful Chemicals: Don’t use yarns treated with chemicals or dyes that could be harmful if ingested.
- Don’t Overstuff: Avoid overstuffing the penguin, as this can lead to seams bursting and the stuffing becoming accessible.
- Don’t Ignore the Care Instructions: Not following the appropriate instructions can lead to the toy deteriorating quickly, potentially becoming unsafe.
- Don’t Use Fragile Materials: Avoid materials that can break easily, such as thin plastic or glass.
- Remember to Test Strength: Pull on all attached parts to ensure they are secure before giving the toy to a child.
Tips & Tricks To Avoid Crochet Mistakes
Creating a perfect crochet penguin project can be a smooth and enjoyable experience if you keep in mind some essential tips and tricks to avoid common mistakes:
How To Block The Crochet Penguin?
Blocking a crochet penguin is a great way to give it a more polished and defined shape. Here’s a step-by-step guide on how to do it:
- Gather Your Materials: You’ll need a blocking board or any flat, waterproof surface, rust-proof pins, a spray bottle with water, or a steam iron.
- Finish Crocheting: Complete your penguin, including sewing all parts together and adding any embellishments.
- Prepare the Surface: Lay out your blocking board or alternative surface. If you don’t have a blocking board, use a foam mat, a thick towel, or an ironing board.
- Position Your Penguin: Gently lay your crocheted penguin on the surface in its desired final shape. Be careful not to stretch it too much, but guide it into a natural, even shape.
- Pin It Down: If necessary, use rust-proof pins to hold parts of the penguin in place, like the edges of flippers or feet. This step is more critical for flat pieces or if your penguin has parts that curl or need shaping.
- Wet Blocking Method: If using the wet blocking method, fill a spray bottle with room-temperature water and lightly mist your penguin until it’s damp but not soaking wet. Skip this step if you’re using Steam.
- Steam Blocking Method: If using a steam iron, hold the iron a few inches above the penguin and gently steam it. Be careful not to let the iron touch the yarn directly, as this can damage the fibers, especially using acrylic yarn.
- Let It Dry: Allow your penguin to dry completely. Depending on the humidity and the yarn used, it may take several hours to a full day.
- Remove the Pins: Once dry, carefully remove any pins if they are used.
- Final Touches: If needed, gently adjust the shape with your hands to give your penguin the perfect finish.
RELATED: 41 Free Quick And Easy Crochet Borders [2 Rows Only]
Suggestions To Add Style & Personal Touch
Adding style and personal touches to your crochet penguin can transform it from a simple craft project into a unique piece of art. Here are various suggestions to infuse your penguin with personality and flair:
- Color Variations: Don’t feel restricted to traditional penguin colors. Experiment with unusual color combinations or ombre yarns for a whimsical twist.
- Textured Yarns: Use textured yarns like bouclé, chenille, or eyelash yarn for parts of the penguin to add interesting tactile elements.
- Clothing and Accessories: Crochet tiny scarves, hats, or sweaters for your penguin. A miniature bow tie or a floral crown can also add charm.
- Embroidery Details: Add embroidered details like cheeks, eyelashes, or unique feather patterns. It can give your penguin more expression and character.
- Change the Size: Play with the size of the penguin. A giant penguin can be a cozy pillow, while a tiny one can be a cute keychain or ornament.
- Felt Features: Use felt to add details like the beak or feet. Felt gives a smooth, defined look that can be easier for beginners than crocheting tiny parts.
- Theme Your Penguin: Create a themed penguin, like a pirate, astronaut, or fairy-tale character. It could involve unique color schemes, accessories, or even pattern modification.
- Add Sounds or Textures for Children: If the penguin is for a child, consider sewing in a small bell or crinkle paper inside to make it more engaging.
- Personalize with Initials or Dates: If the penguin is a gift, embroider the recipient’s initials or a particular date onto it, perhaps on a scarf or hat.
- Interactive Elements: Consider adding elements like flappable wings or a removable backpack.
- Use Beads or Sequins: Small beads or sequins can add a touch of elegance to an adult’s decorative piece.
- Mix Crochet Techniques: Combine standard crochet with Tunisian or amigurumi techniques for a unique texture and look.
- Add a Companion: Crochet a mini fish, egg, or baby penguin as a companion for your penguin, enhancing its story and appeal.
Wash & Care Instructions
Properly caring for your crochet penguin will ensure its longevity and durability. Here are some wash and care instructions:
- Check Yarn Labels: Always refer to the care instructions on the yarn labels used in your project. Different fibers have different care needs.
- Hand Washing: Hand washing is the safest method for most handmade crochet items. Use lukewarm water and a gentle detergent. Submerge the penguin, gently agitate the water, and let it soak for 10-15 minutes.
- Spot Cleaning: Spot cleaning is often sufficient for minor stains or dirt. Use a damp cloth and a mild detergent to clean the affected area gently.
- Rinse Thoroughly: Rinse thoroughly to remove all soap residues after washing or spot cleaning. Excess soap can attract dirt and can be harsh on the fibers.
- Squeeze Out Water: Gently squeeze out the water from the penguin. Avoid wringing or twisting, as this can misshape the item.
Drying:
- Lay the penguin flat on a clean, dry towel in a well-ventilated area.
- Reshape it as needed.
- Avoid hanging to dry, as the weight of the water might stretch the yarn.
- Avoid High Heat: Protect the penguin from direct heat sources like radiators or hot air dryers. Excessive heat can shrink or damage the fibers, especially if it’s made of acrylic or other synthetic materials.
- Machine Washing (If Applicable): If the yarn used is machine washable and the penguin doesn’t have delicate attachments, you can machine wash it in a gentle cycle with cool water. It’s advisable to place the item in a pillowcase or laundry bag to prevent snagging.
- Machine Drying (If Applicable): If the yarn is suitable for machine drying, use a low-heat, delicate setting. Remove the item while it’s still slightly damp to reshape and air dry completely.
- Regular Fluffing and Reshaping: Periodically fluff up the penguin and adjust its shape to keep it looking fresh.
- Storage: Store the crochet penguin in a clean, dry place. Avoid storing in plastic bags for long periods as this can trap moisture and lead to mildew.

A Quick Recap
This guide explores the delightful world of crocheting penguins, providing everything you need to know to create your adorable penguin buddy. From selecting the best yarn and mastering essential stitches to avoiding common mistakes and adding unique personal touches, we covered all the bases to ensure your crochet journey is as smooth and enjoyable as possible. We also delved into the essential aspects of washing and caring for your penguin to ensure longevity.
Now it’s your turn to bring these charming creatures to life! Whether you’re a beginner or an experienced crocheter, there’s a penguin pattern out there that’s perfect for you. So grab your hooks and yarn, and let your creativity take flight. Share your creations with us, and let’s spread the joy of crocheting penguins!
Frequently Asked Questions
What Is Meant By An “Amigurumi Pattern”?
You’ve probably heard of amigurumi, which are adorable yarn toys. And you’re undoubtedly aware that amigurumi originated in Japan. The first kanji (Japanese writing symbol) is the character meaning “knit”; it can also mean a variety of other things, but the stitching is crucial here.
What Is The First Thing I Should Crochet As A Beginner?
Beginning crocheters typically begin by mastering the chain stitch. The chain stitch is among the most fundamental basic stitches to learn because it is the basis for most crochet projects.
Which Is Easier – Knitting Or Crochet?
Crocheting is often easier than knitting once you’ve mastered the basics since you don’t have to shift the threads back and forth between hooks.
Crocheting is less prone than knitting to unravel by accident. It is a significant advantage of crocheting over knitting when initially learning to crochet.
What’s The Best Way To Stuff A Crochet Penguin To Maintain Its Shape?
Use polyester fiberfill and stuff evenly, ensuring it’s firm enough to hold shape but not overstuffed, which can distort the stitches and shape.
How Do I Attach The Limbs Securely To The Crochet Penguin Body?
Sew the limbs using a yarn needle and the same yarn, ensuring tight and multiple stitches for durability, especially if the toy is for young children.
Are There Any Special Techniques I Need To Learn For Crocheting A Penguin?
Basic crochet skills are usually sufficient, but familiarizing yourself with amigurumi techniques, like working in the round and invisible decrease, can be helpful.
How Do I Keep The Crochet Penguin Clean?
Regular light dusting and spot cleaning with a damp cloth for minor stains work well. For a deeper clean, use a hand wash or machine wash (if yarn permits) using a gentle cycle.

- 30 Polo Sweater Knitting Patterns To Keep You Stylish On Every Occasion - January 1, 2024
- 21 Baby Blanket Knitting Kits To Wrap Bundle Of Joy With Love - January 1, 2024
- 15 Cashmere Knitting Kits For Fashionable Knits To Embrace Comfort And Style - January 1, 2024