

Turtles are fascinating creatures, with most species living quite a long life, so it is no wonder they are often depicted as wise! Turtles can also belong on land or on the sea, or enjoy a mix of both worlds, so you can pick and choose which ones you like the most!
If you love turtles and find them cute (as you should), then you might want to have a little crochet turtle, made by you, you (or for a friend or family member as a cute homemade gift).
If that is the case, then you’re in luck. We’ve put together a list with 19 of our favorite crochet turtle patterns, all of them suitable for beginners to advanced levels, with detailed instructions to help you along the way. Let’s get into them all!
Here are our 19 favorite crochet turtle patterns

Is It Worth To Crochet A Turtle?
Crocheting a turtle is worth it for those who enjoy the art of crochet and appreciate handmade crafts. Creating a crocheted turtle offers a fulfilling and meditative experience, often resulting in a sense of accomplishment and pride.
These charming turtles not only serve as adorable decorations or heartfelt gifts but also provide an excellent opportunity to practice and enhance crochet skills, especially in techniques specific to amigurumi.
Moreover, they are perfect projects for using up scrap yarn, making them both an economical and eco-friendly crafting choice. Crocheting a turtle is a rewarding endeavor combining creativity, skill, and the joy of crafting.
Various Stitches To Crochet A Turtle
Crocheting a turtle involves a variety of stitches, each contributing to the finished toy’s overall shape, texture, and detail. Here are some common stitches used in crocheting a turtle, along with their explanations:
- Chain Stitch (ch): The foundation of most crochet projects, this stitch is used to create the basic length of yarn needed to start most patterns.
- Single Crochet (sc): This basic crochet stitch creates a tight, dense fabric. It’s often used for the turtle’s body and shell to give a smooth, sturdy texture.
- Slip Stitch (sl st): Used to join stitches together without adding height, and it’s often employed in finishing touches or in shaping the amigurumi.
- Double Crochet (DC): This stitch is taller and creates a looser fabric than a single crochet. It might be used in parts of the turtle that require a softer or more flexible texture.
- Half Double Crochet (hdc): This stitch is between single and double crochet in height and density. It could be used for varied textures in the turtle’s body or limbs.
- Increase (inc): Used to add stitches and create a wider fabric, essential in shaping the round body and shell of the turtle.
- Decrease (dec): The opposite of an increase, this stitch reduces the number of stitches and is vital in shaping and tapering the turtle’s extremities.
- Magic Ring (also known as Magic Circle or Adjustable Ring): A technique used to start amigurumi projects, it allows you to crochet in a round and tightly close the center, perfect for the beginning of the turtle’s body or shell.
- Bobble Stitch: This stitch can create texture and add a unique, raised pattern to the turtle’s shell.
How Long Should A Turtle Be?
The size of a crocheted turtle can vary greatly depending on the pattern, yarn weight, crochet hook size, and the individual’s crochet tension. Here’s a discussion of various sizes and factors influencing the length of a crocheted turtle:
- Small/Miniature Turtles: These are often around 2 to 4 inches long and are typically made with lightweight yarn (like fingering or sport weight) and a smaller crochet hook (e.g., 2.5mm to 3.5mm). They are popular as keychains, ornaments, or small gifts.
- Medium Turtles: A medium-sized crocheted turtle can be 5 to 8 inches long. They are usually made with medium-weight yarn (worsted or DK weight) and a hook size of around 3.5mm to 5mm. These sizes are often preferred for toys or decorative pieces.
- Large Turtles: Large crocheted turtles can be anywhere from 9 to 12 inches or more long. These are typically made with bulkier yarns (like chunky or bulky weight) and larger hooks (6mm above). They make excellent cuddly toys or statement decorative pieces.
- Jumbo or Oversized Turtles: For a dramatic effect, some patterns create jumbo-sized turtles that can exceed 12 inches, reaching 18 inches or more. These are often crocheted with super bulky yarn and huge hooks. They are great as novelty gifts or as unique home décor items.
The pattern and the maker’s preference ultimately determine the turtle’s length. It’s important to note that changing the yarn weight or hook size from what the pattern recommends will alter the size of the finished turtle.
Everyone’s crochet tension is slightly different, which can also affect the size. For precise sizing, following the pattern recommendations and making a gauge swatch if the size is critical is advisable.
Essential Tools And Materials
Creating a crocheted turtle requires a selection of tools and materials essential for bringing your project to life. Here’s a list of what you’ll typically need:
Glossary Of Crochet Stitches And Techniques
- Chain Stitch (ch): The basic starting stitch for most crochet projects involves looping the yarn over the crochet hook.
- Slip Stitch (sl st): A method used to combine stitches without adding height, commonly used to finish rounds or join different pieces.
- Single Crochet (sc): A basic crochet stitch creating a tight and dense fabric, fundamental for many patterns.
- Half Double Crochet (hdc): A stitch taller than a single crochet but shorter than a double crochet, beneficial for various textures.
- Double Crochet (DC): A standard stitch doubles the height of a single crochet, creating a looser and taller stitch pattern.
- Treble Crochet (tr): A tall stitch triple the height of a single crochet for creating large, airy fabric.
- Magic Ring or Circle: A technique used in amigurumi and other projects worked in the round, allowing for a tightly closed center.
- Increasing (inc): Adding more stitches to a row or round is essential for shaping your crochet work.
- Decreasing (dec): Combining stitches to reduce the number of stitches in a row or round is also vital for shaping.
- Front Loop Only (FLO) and Back Loop Only (BLO): Crocheting into only one loop of the stitch instead of both, creating a ribbed or textured effect.
- Yarn Over (yo): Wrapping the yarn over the crochet hook is a fundamental movement in creating stitches.
- Fasten Off: Cut the yarn and pull the tail through the last loop to secure your crochet work.
- Weaving in Ends: Using a yarn needle to weave in loose yarn ends for a neat finish.
- Bobble Stitch: A textured, bulbous stitch made by partially completing several stitches in the same stitch and then joining them together.
- Cluster Stitch: Similar to the bobble stitch, it typically involves fewer and less pronounced stitches.
- Popcorn Stitch: This creates a popped-out texture and is made by completing several stitches in the same place and then joining them together from the front.
- Gauge: A measure of how many stitches and rows per inch you get, essential for ensuring that the finished project is the right size.
- Blocking: The process of wetting or steaming a finished crochet item and then pinning it into shape until dry, used to give projects a professional, finished look.
Understand Crochet Stitches And Techniques
As a seasoned crocheter, I’ve learned that understanding crochet stitches and techniques starts with mastering the basics. I began by familiarizing myself with foundational stitches like the chain, single, double, and treble crochet. Each stitch has its rhythm and technique, which I practiced consistently.
I paid attention to yarn over movements and how the hook is inserted into a stitch. Reading patterns and watching tutorials expanded my knowledge, especially for techniques like increasing, decreasing, and working in the round.
Patience and practice are essential. As I experimented with different projects, I gradually understood how these stitches and techniques combine to create diverse textures and shapes.
RELATED: 41 Free Quick And Easy Crochet Borders [2 Rows Only]
Which Yarn Is Best For Crochet Turtles?
As an avid crocheter who has made many crochet turtles over the years, I’ve experimented with various yarns and discovered that the best yarn often depends on the project’s purpose and the desired effect. Here’s my take on different yarns for crocheting turtles:
- Cotton Yarn: My go-to toy choice, especially for babies and toddlers, is cotton yarn. It’s soft, durable, and washable, making it ideal for items that will be handled frequently. Cotton also holds its shape well, which is excellent for amigurumi projects like turtles.
- Acrylic Yarn: I often use acrylic yarn for a more budget-friendly option. It’s available in various colors, is easy to care for, and is hypoallergenic. However, it’s less breathable than cotton and sometimes feels less soft.
- Wool Yarn: Wool is a fantastic choice for a warm, natural feel. It’s resilient and has a lovely texture. However, I use it sparingly for toys due to potential allergies and the care required in washing.
- Blend Yarns: Sometimes, I opt for yarns that blend cotton wool or acrylic. These blends can offer the best of both worlds – the softness and breathability of natural fibers with the durability and easy care of acrylic.
- Chunky or Bulky Yarn: When I want to make a larger turtle, I choose chunky yarns. They work up quickly and create a cozy, plush toy.
- Variegated and Textured Yarns: For a fun and unique look, variegated yarns (yarns with multiple colors) or textured yarns can add an attractive visual appeal to the turtle’s shell or body.
How Much Yarn Do I Need To Crochet A Turtle?
As someone who has crocheted quite a few turtles, I can tell you that the amount of yarn you’ll need largely depends on the turtle’s size and the yarn’s thickness.
For a standard medium-sized turtle, about 5 to 8 inches in length, I typically use about 50 to 100 grams of medium-weight yarn, like worsted or DK weight.
If you’re working with a finer yarn, like sport or fingering, you might need slightly less as these yarns go further in length per gram. On the other hand, if you’re making a larger turtle with bulky or super bulky yarn, you could require 100 to 150 grams or more.
Is It Beginner Friendly?
As a crochet enthusiast, crocheting a turtle can be beginner-friendly, especially if you choose the correct pattern. Many turtle patterns use basic stitches like single crochet and are worked in the round, which are fundamental techniques that are easy for beginners to grasp.
The simplicity of the shape makes it a manageable project for those just starting. Creating something as cute as a turtle is incredibly rewarding and can boost confidence for tackling more complex projects.
However, patience and practice are essential, as getting comfortable with the stitches and understanding the shaping takes a little time.
How To Crochet A Beginner-Friendly Turtle?
Skill Level: Beginner
Materials:
- Medium-weight yarn in green and a contrasting color for the shell
- Crochet hook (size usually 3.5mm to 5mm)
- Stitch markers
- Yarn needle
- Polyester fiberfill for stuffing
- Safety eyes (or black yarn for embroidered eyes)
- Scissors
Step-by-Step Instructions
Shell (Top and Bottom)
- Start with your contrasting color yarn.
- Make a magic ring.
- Round 1: Work 6 single crochets (sc) into the ring. Pull the ring closed.
- Round 2: Increase (inc) in each stitch around (12 stitches).
- Round 3: Sc in the next stitch, inc in the next stitch, repeat around (18 stitches).
- Repeat this pattern of increasing in each round until the shell is the desired size.
- Repeat these steps for the bottom shell in green, but make it slightly smaller by doing one less increase round.
Head, Legs, and Tail
- Switch to green yarn.
- For each part, start with a magic ring.
- Round 1: Work 6 sc into the ring.
- Round 2: Inc in each stitch around (12 stitches).
- Round 3 and beyond: Continue with sc in each stitch until each part reaches the desired length.
- Make 4 legs, 1 head, and a small tail.
Assembly
- Before fully closing each part, stuff them with polyester fiberfill.
- Using a yarn needle, sew the head, tail, and legs to the bottom shell.
- Place the top shell over the bottom shell, aligning the edges, and sew them together, leaving an opening for stuffing.
- Once stuffed to your liking, sew the opening closed.
Finishing Touches
- Attach safety eyes to the head or embroider eyes with black yarn.
- You can add more details like a mouth or patterns on the shell using a yarn needle and contrasting yarn.
Note: Keep your stitches tight to ensure the stuffing doesn’t show through. It’s also essential to read through the entire pattern before starting and to count your stitches at the end of each round to ensure accuracy. This project is a great way to practice working in the round and increasing/decreasing stitches, fundamental skills in amigurumi.
21 Crochet Turtle Patterns You Must Try
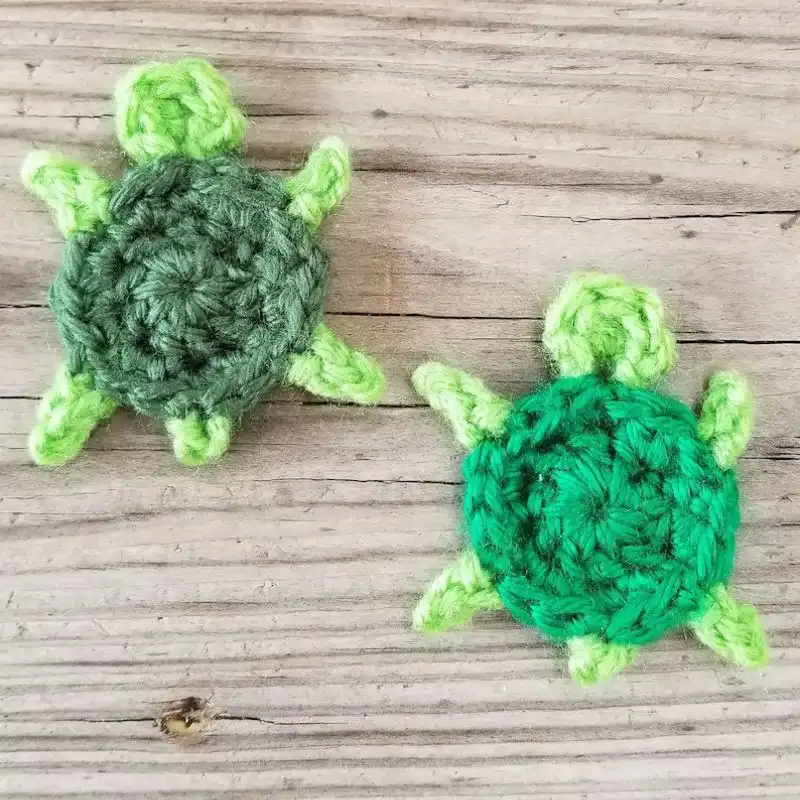
1.Turtle Applique Crochet Pattern
This turtle crochet pattern by HCK Crafts is by far one of the easiest and, therefore, most suitable for beginners. It is also perfect for using up any scrap yarn, as it is tiny and simple!
The result is a cute little turtle that can be used as decoration and could even be attached to clothing, a bag, or similar!
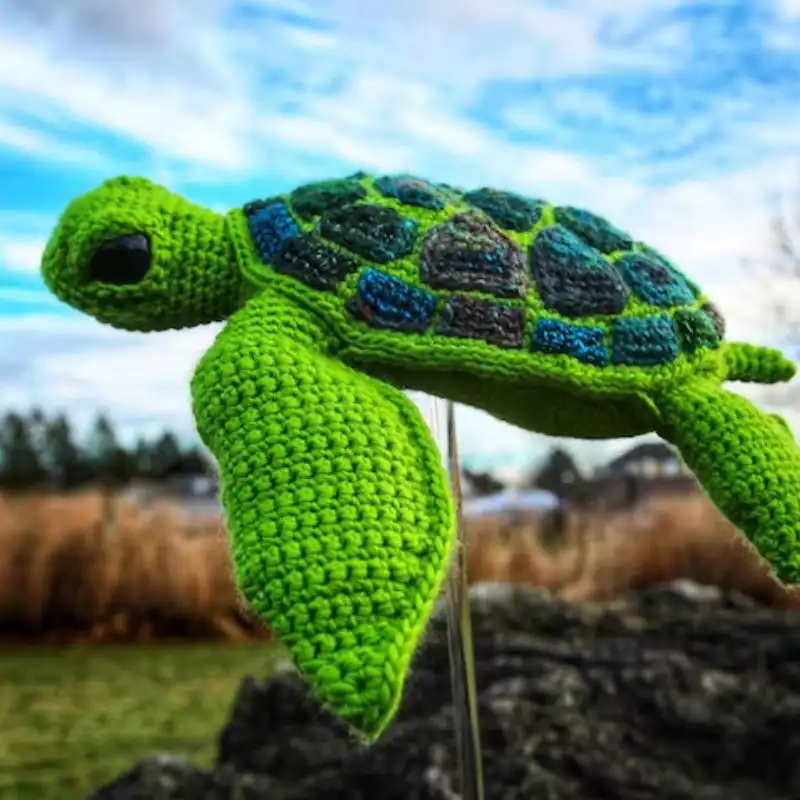
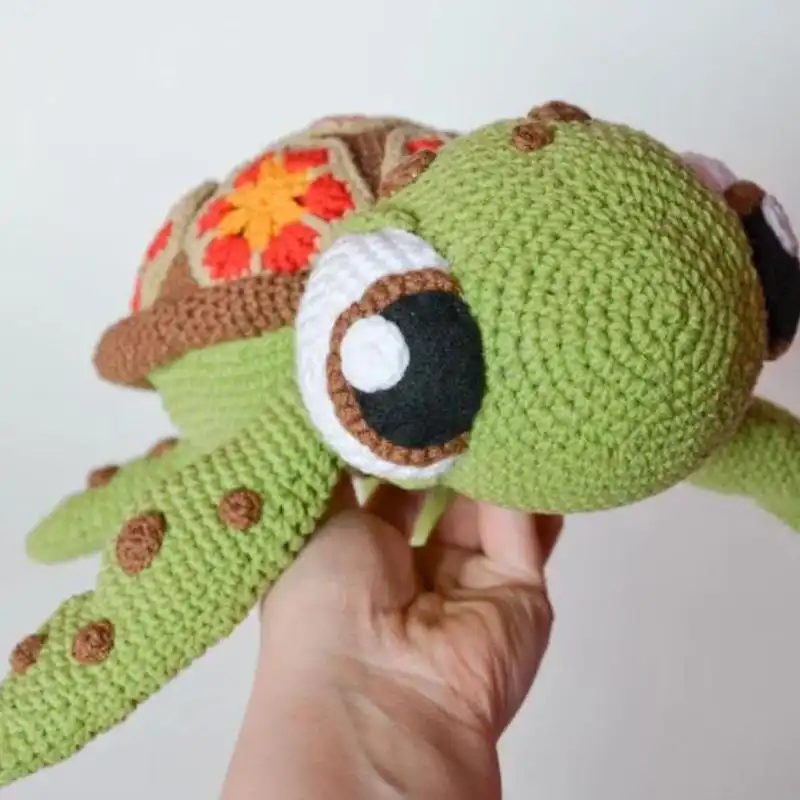
2.Green Sea Turtle Crochet Pattern
This Boxfish Handicraft Green Sea Turtle crochet pattern is perfect for creating your sea turtle. It has a gorgeous design that is perfect for lovers of the animal. The result is Shila the sea turtle, which should measure 31 x 16 x 29 cm in size (unless you make her bigger or smaller depending on the yarn used).
It’s suitable for advanced beginners who are willing to put their skills to the test.

Suggested Yarn: Worsted Weight Yarn
Difficulty Level: Intermediate
Yarn Weight: Fingering
Crochet Hook: 4mm
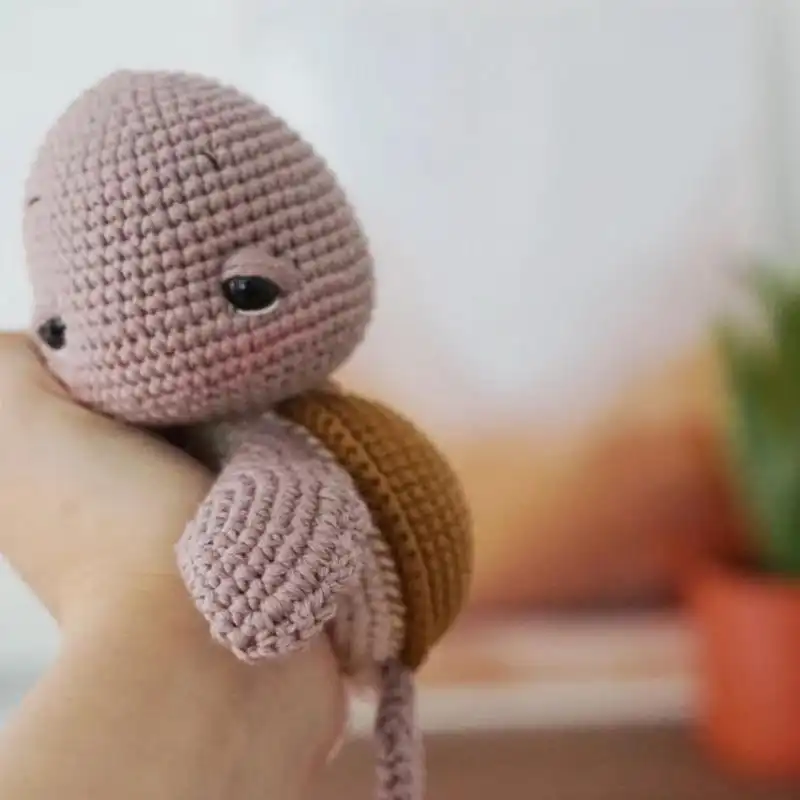
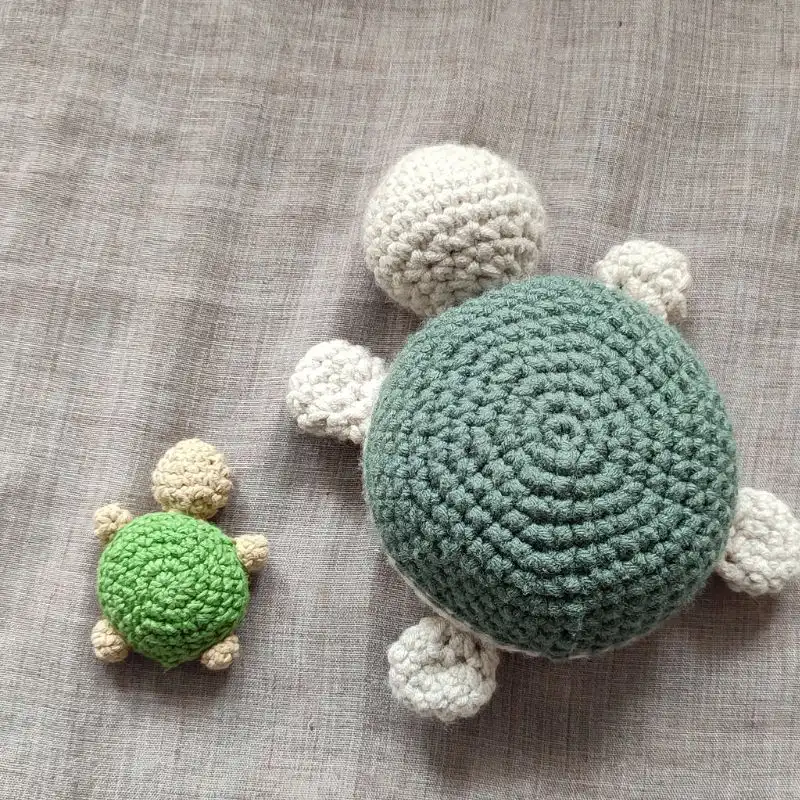
3.Little Turtle Crochet Pattern
If you want a small and simple crochet turtle, we recommend using this pattern by Petit Bonnet. The result is a cute little turtle, perfect for being attached to a keychain or a baby toy or to just keep on your mantelpiece!
It is perfectly suitable for complete beginners, as it is a very easy process.
4.Willy the Turtle Crochet Pattern
If you want to create a fun-looking crochet turtle that is perfect as a cuddly toy for a young child or yourself, then look at this pattern by ChiquiPork. The result will be a very cute-looking Willy the Turtle, It is suitable for those at an intermediate crochet level.
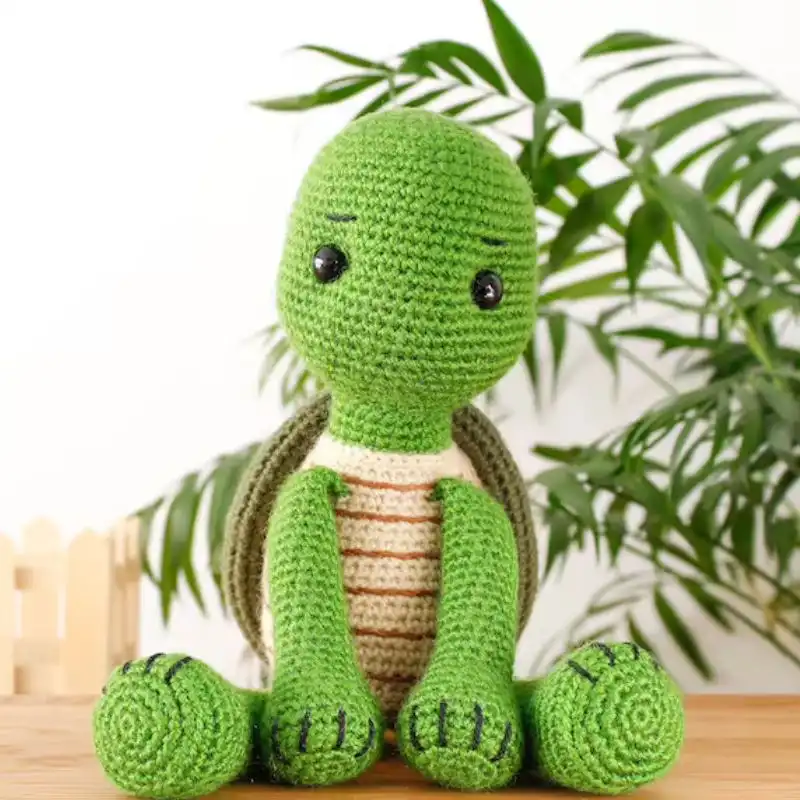
Suggested Yarn: Worsted Weight Yarn
Difficulty Level: Intermediate
Yarn Weight: Worsted
Crochet Hook: 4mm
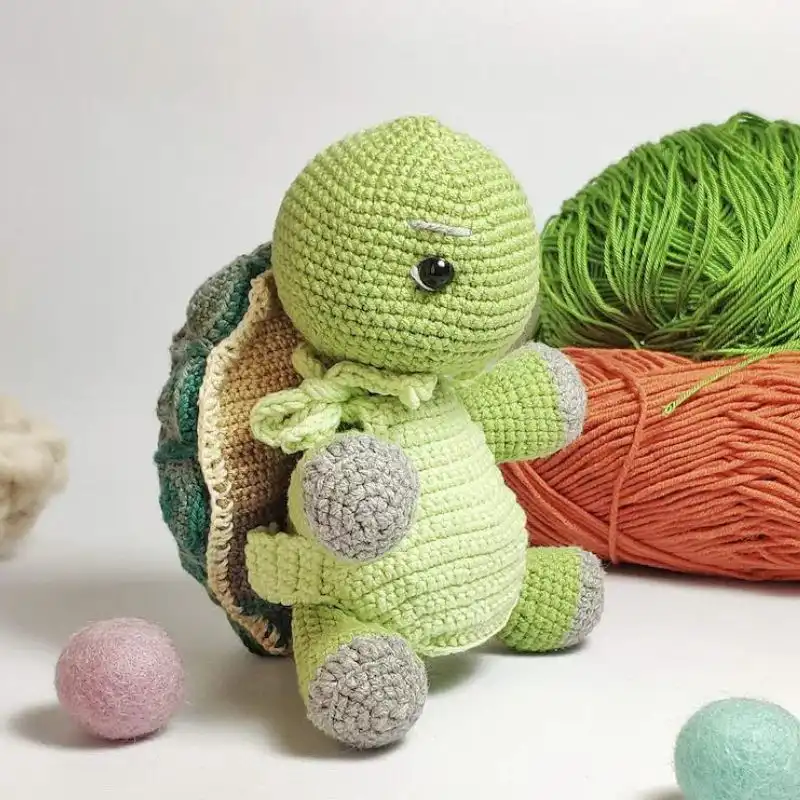
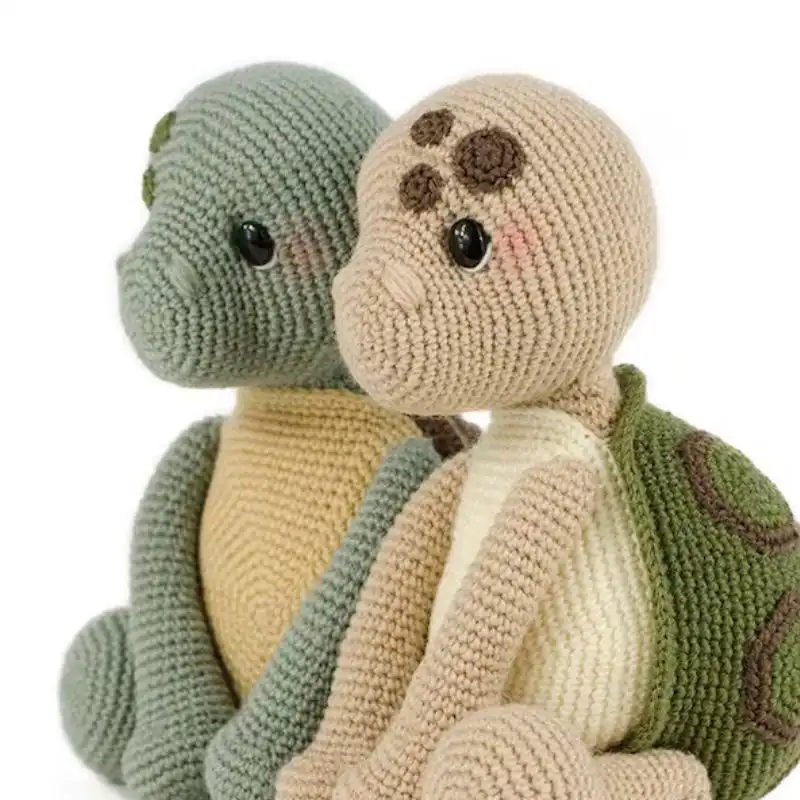
5.Simple Turtle Crochet Pattern
Simple, cute, soft, and perfect for cuddling. That is how we would describe the result of this turtle crochet pattern by Rose and Lily Crochet. An adorable plushie, ideal for all ages.
Suggested Yarn: Worsted Weight Yarn
Difficulty Level: Intermediate
Yarn Weight: Worsted
Crochet Hook: 4mm
6.Sea Turtle Crochet Pattern
Another beautiful sea turtle crochet pattern option we love is this by Crafty Intentions. The result is a sea turtle with long legs and a fantastic shell design, specifically a small Eastern Dragon species of sea turtle.
7.Gingerbread Turtle Crochet Pattern
Bring a touch of sweetness to your crochet collection with the Gingerbread Turtle Crochet Pattern. This adorable design combines a gingerbread motif’s charm with a turtle’s cuteness, creating a delightful and festive amigurumi friend.
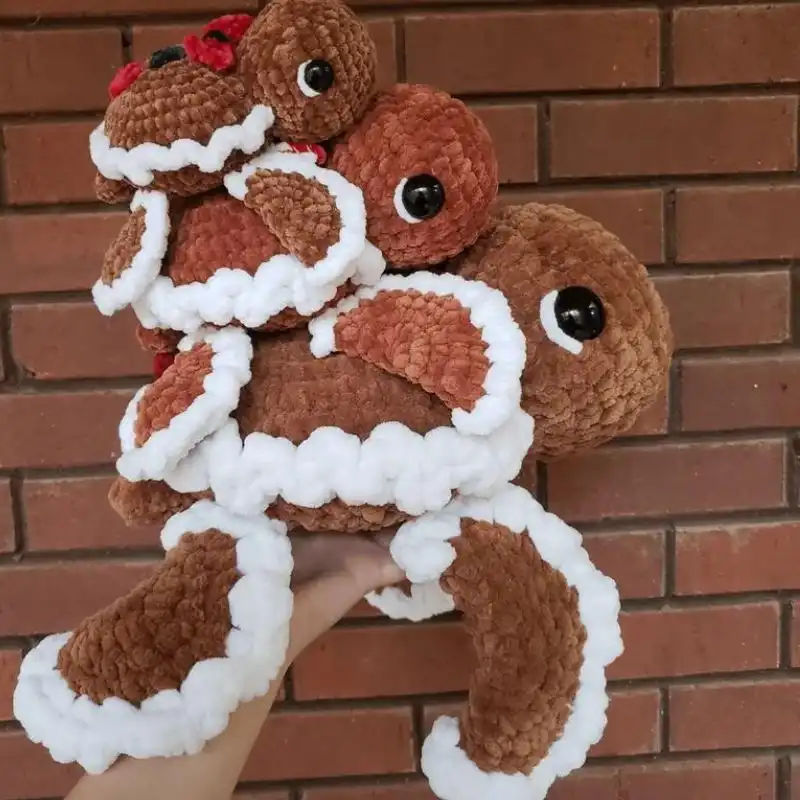
Suggested Yarn: Fingering Weight Yarn
Difficulty Level: Beginner
Yarn Weight: Fingering
Crochet Hook Size: 3.5mm
8.Timmy the Tiny Turtle Crochet Pattern
The small crochet turtle you can create with this pattern by Theresa’s Crochet Shop will melt your heart. Timmy the Tiny Turtle is indeed tiny, soft, and cuddly. And he has the Disney sad puppy eyes that will always make you want to hug him!
It should only take you around a few hours or so to complete!
Suggested Yarn: Fingering Weight Yarn
Difficulty Level: Intermediate
Yarn Weight: Fingering
Crochet Hook: 3.5mm
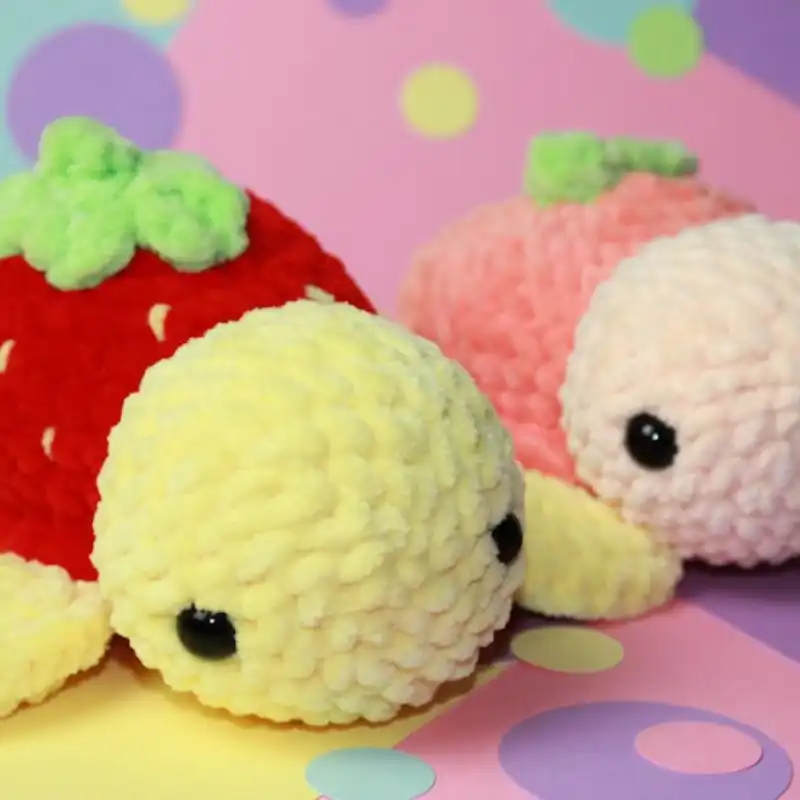
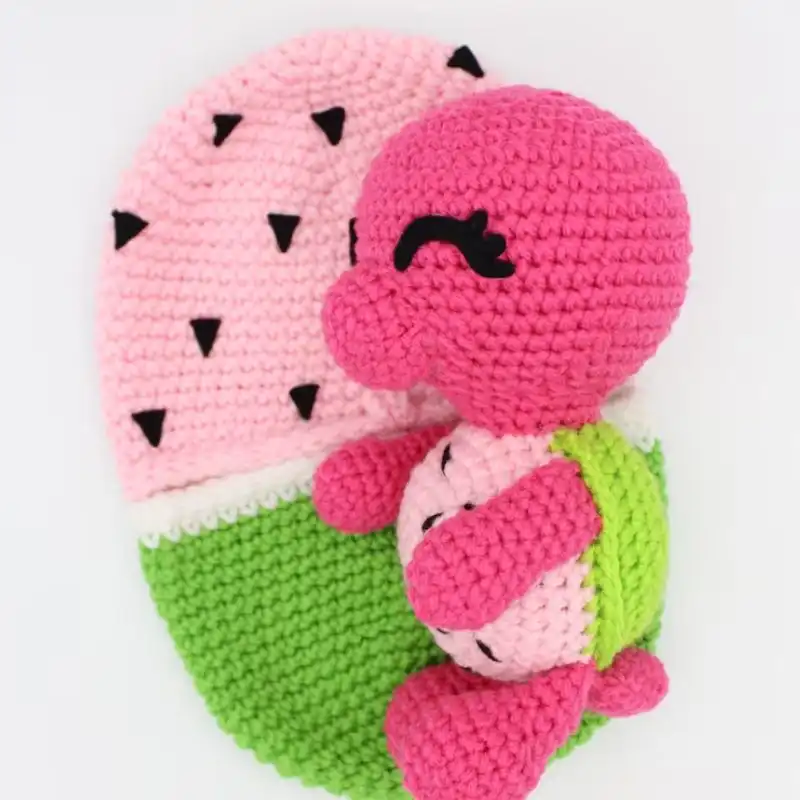
9.Small 3 in 1 Sea Turtle Crochet Pattern
If you love sea turtles but would like a crochet version that is small, soft, cuddly, and super cute, we recommend trying out this fun design by DEcrochet By Sisters. The result is a cuddly tiny sea turtle, which you can crochet so that the shell looks like a strawberry or a peach, making it adorable.
The pattern is easy to follow, suitable for beginners, and fast to complete.
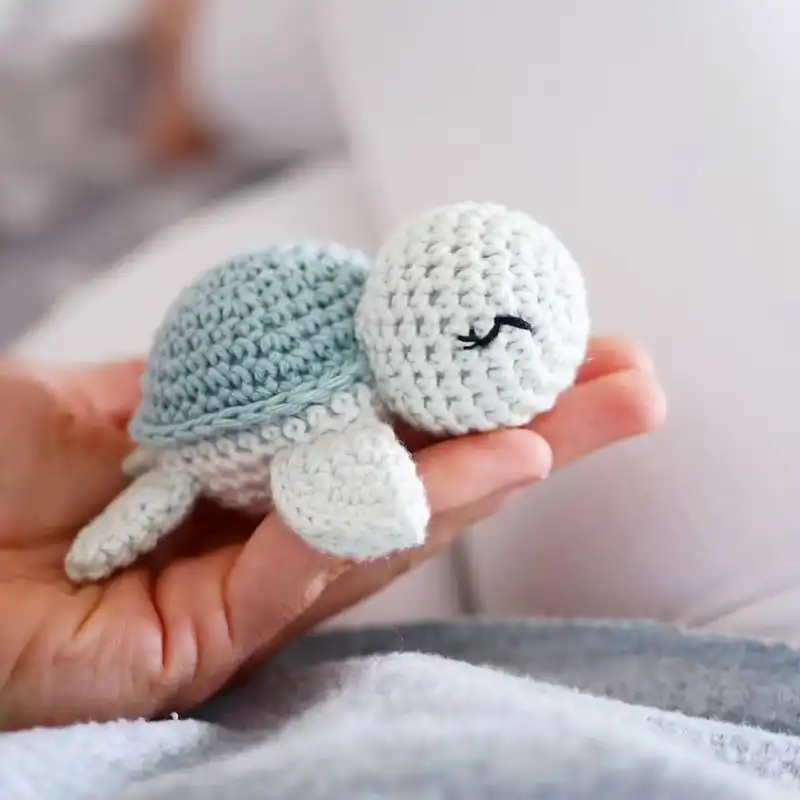
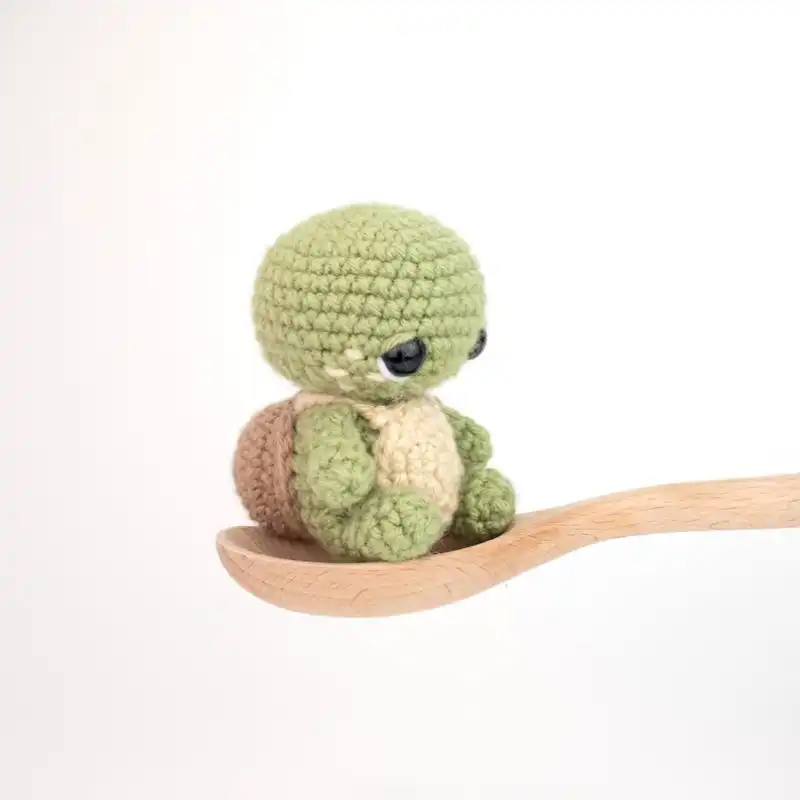
10.Ocean Crochet Turtle Pattern
Yet another adorable sea turtle crochet pattern option is this one by Lulu Loves the Moon. Inspired by the Ocean, this crochet turtle is small and soft, with sad, sleepy eyes that make you want to cuddle.
It is suitable for beginners, as it is a very simple pattern process.
Suggested Yarn: Worsted Weight Yarn
Difficulty Level: Intermediate
Yarn Weight: Worsted
Crochet Hook: 4mm
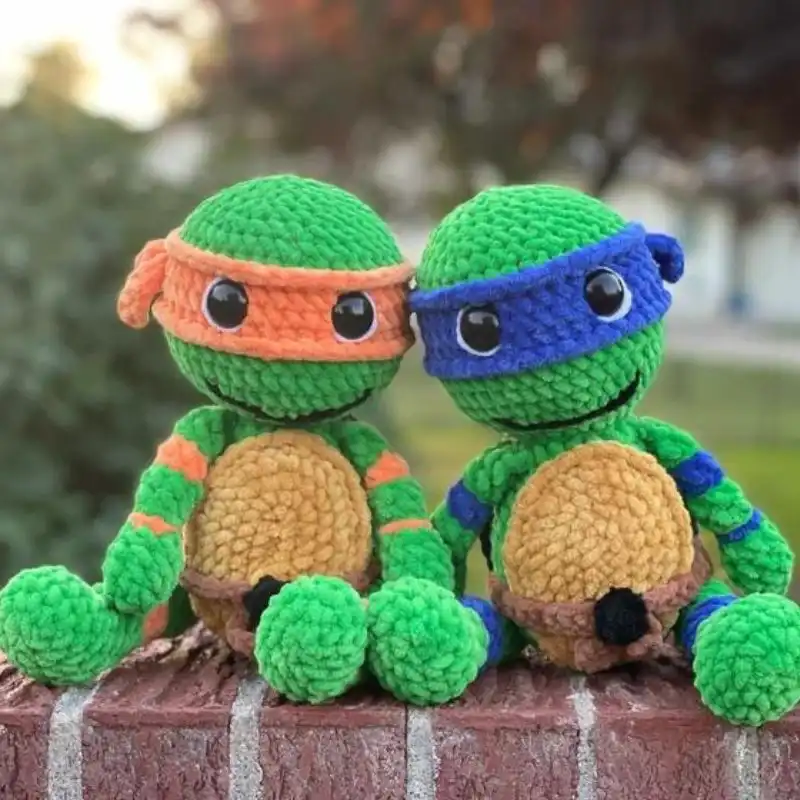
11.Giggles 90’s Inspired Turtle Crochet Pattern
Take a nostalgic trip back to the ’90s with the Giggles 90’s Inspired Turtle Crochet Pattern. This amigurumi turtle is a cute companion and a playful nod to the vibrant and fun aesthetics of the 1990s.
12.Krawka Sea Turtle Crochet Pattern
Have you ever watched Finding Nemo, as in the Disney Pixar animated movie? Well, one of the most endearing characters from that movie happens to be a young sea turtle, Squirt. And that’s exactly who you will end up with if you follow this crochet pattern by Krawka! 12-inches long, he is super cute and super cuddly! Perfect as a Disney-themed gift for someone in love with sea life.
Suggested Yarn: Sport Weight Yarn
Difficulty Level: Intermediate
Yarn Weight: Sport
Crochet Hook: 3.5mm
13.Jumbo Turtle Plushie Crochet Pattern
If you are looking for a fun-looking crochet turtle, perfect as a cuddly toy or as home decor, then look at this crochet pattern option by the Crochet Chameleon. You’ll end up with a Jumbo the Turtle in whichever colors you choose to crochet.
It is suitable for beginner to intermediate skill levels, and the finished product should be around 10 inches long.
14.Cereal Bowl Turtle Crochet Pattern
Add a dash of whimsy to your crochet creations with the Cereal Bowl Turtle Crochet Pattern. This charming amigurumi turtle takes on the form of a cereal bowl, making it a delightful and unique addition to your handmade toy collection.
Suggested Yarn: Worsted Weight Yarn
Difficulty Level: Intermediate
Yarn Weight: Fingering
Crochet Hook: 4mm
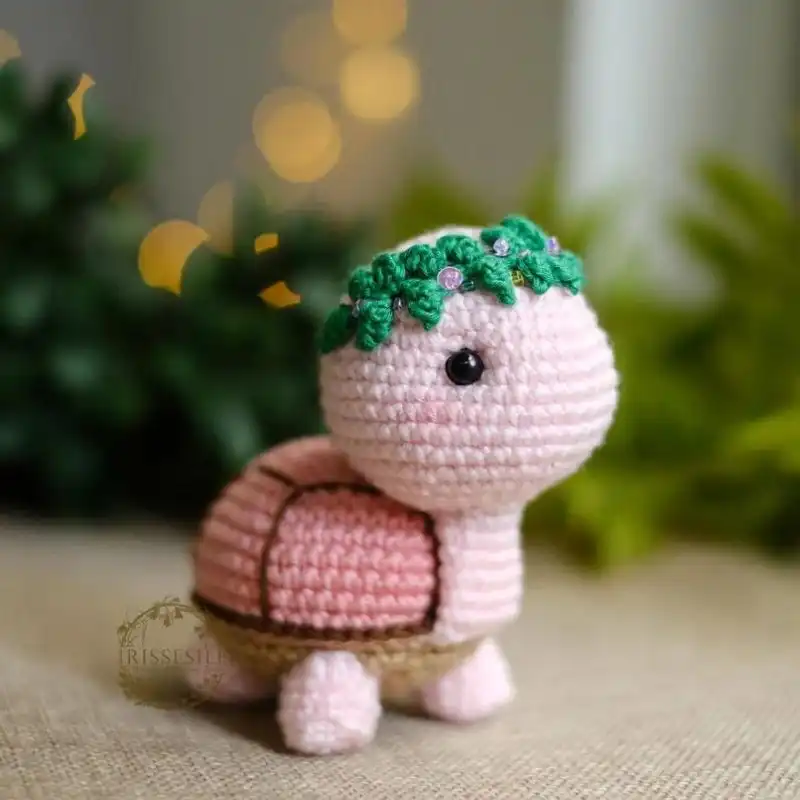
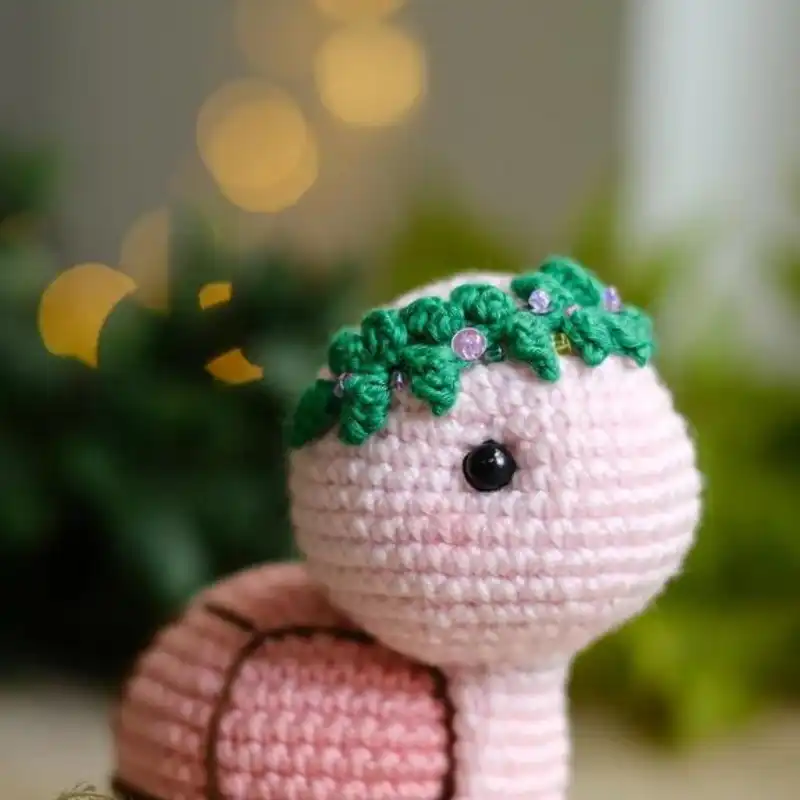
15.Myrtle The Turtle Crochet Pattern
If you can’t decide between using your crochet skills to create a turtle or something cottagecore-themed, then why not mix them both? This crochet turtle by Iris Sesile is adorable and wears a little crown of leaves, making it the cutest ever! Myrtle, the turtle should be around 10cm tall when finished and looks especially good in pink (although the colors are entirely up to you).
15.Tommy The Turtle Crochet Pattern
Tommy, the turtle, is another fantastic and super cute crochet turtle pattern option from Theresa’s Crochet Shop. Easy to make in just a few hours, Tommy the Turtle has a friendly smile and wears his shell almost as an apron, reminding you to take things easy.
Suggested Yarn: Fingering Weight Yarn
Difficulty Level: Intermediate
Yarn Weight: Fingering
Crochet Hook: 3.5mm
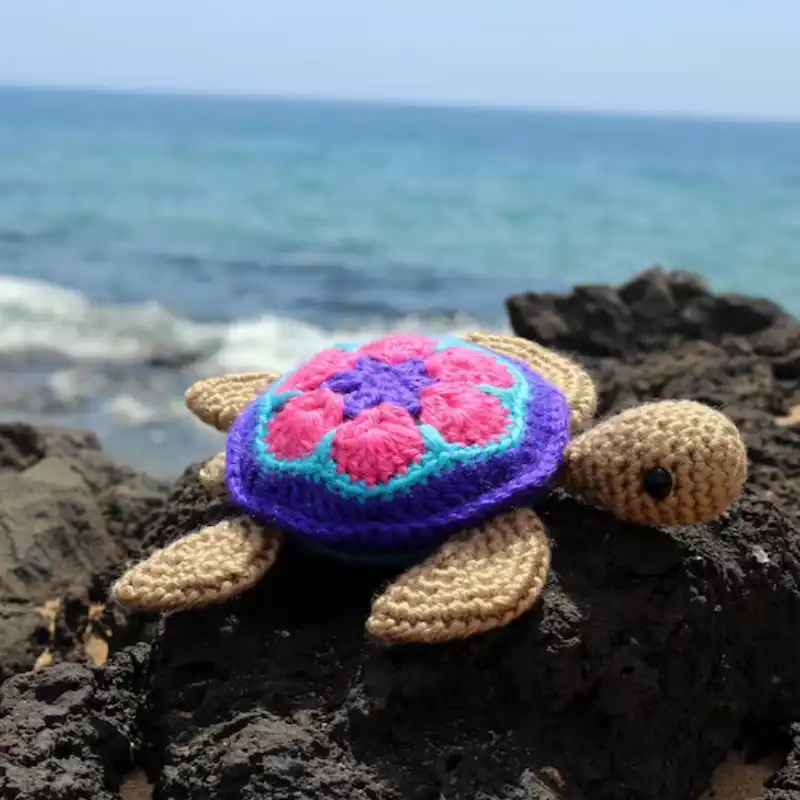
16.Crochet Sea Turtle Pattern
This Loops and Love Crochet pattern is perfect for creating your unique crochet turtle. You could create a bunch of turtles with this pattern, switching up the colors for the shell to make every single one unique. Measuring about 6.5 inches long, the result is perfect as a cuddly toy and home decor. Your choice!
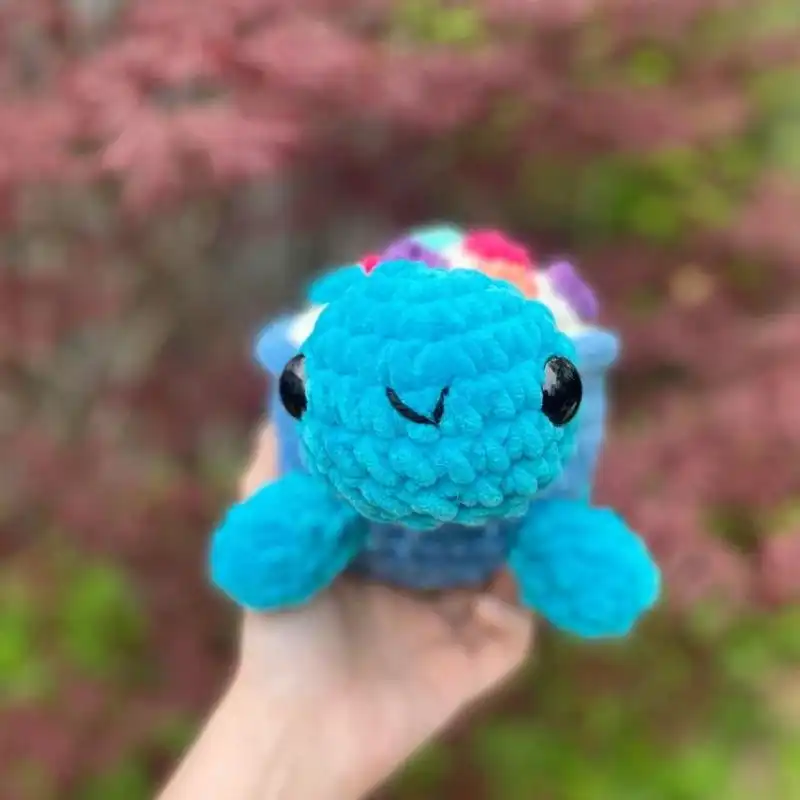
18.Hatching Turtle Crochet Pattern
Okay, hear us out. It’s a crochet pattern to create a hatching turtle, but instead of an ordinary hatching turtle, it’s a tiny cute turtle sleeping in an egg-looking bed. How adorable would that be? Well, you can create your very own using the Kayte Dids pattern! Plus, it’s fruit-themed, although you could change that depending on the colors you use. So you know, extra cute!
Suggested Yarn: Fingering Weight Yarn
Difficulty Level: Intermediate
Yarn Weight: Fingering
Crochet Hook: 3.5mm
19.Turtle Leia Crochet Pattern
This crochet turtle by Toys Need, called Leia, isn’t quite Leia from Star Wars, although a turtle version of the character would be pretty cool. Instead, she’s an adorable, soft, and cuddly turtle that should be around 5 inches big when finished.
It is suitable for those with an intermediate skill level, and the seller is also available to answer any questions you might have!
Suggested Yarn: Worsted Weight Yarn
Difficulty Level: Intermediate
Yarn Weight: Worsted
Crochet Hook: 4mm
20.Turtle Spikkel Crochet Pattern
Dive into the world of creativity with the Turtle Spikkel Crochet Pattern. This unique amigurumi turtle features a spiky texture, adding a touch of originality to your crochet projects. Create a one-of-a-kind turtle companion with this intriguing pattern.
21.Bumble Turtle No Sew Crochet Pattern
Experience the joy of crafting without the need for sewing with the Bumble Turtle No Sew Crochet Pattern. This amigurumi turtle is designed for simplicity, offering a delightful project that’s easy to create and equally adorable as a finished piece.
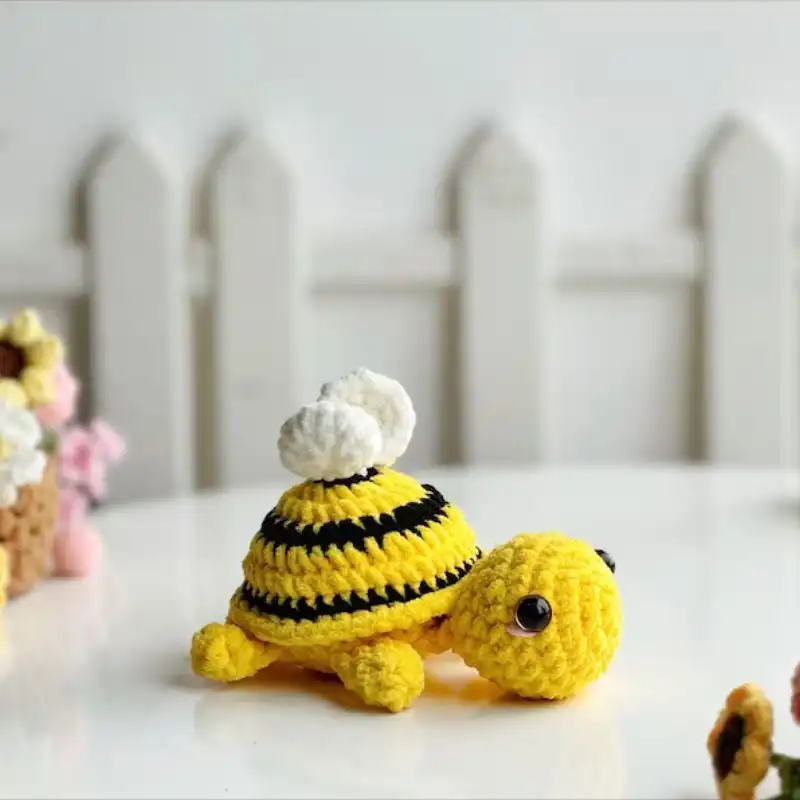
Suggested Yarn: Worsted Weight Yarn
Difficulty Level: Intermediate
Yarn Weight: Worsted
Crochet Hook: 4mm
Do’s & Don’ts To Crochet A Safe Turtle
Do’s for Crocheting a Safe Turtle
- Use Safe Materials: Opt for non-toxic, washable yarns, especially if the turtle is for a young child. Natural fibers like cotton are often a good choice.
- Secure Attachments: Ensure that all parts, such as eyes, limbs, and other accessories, are securely attached to prevent choking hazards.
- Tight Stitches: Crochet tightly to ensure the stuffing doesn’t come out, which can be a safety risk for small children.
- Safety Eyes or Embroidered Eyes: For very young children, instead of using plastic safety eyes, consider embroidering the eyes with yarn to avoid any choking risk.
- Non-Toxic Stuffing: Use safe, hypoallergenic stuffing material, like polyester fiberfill.
- Regular Inspections: Check the toy regularly for wear and tear, primarily if it’s frequently used or washed, to ensure it remains safe over time.
Don’ts for Crocheting a Safe Turtle
- Avoid Small, Loose Parts: For children under 3, avoid adding small, detachable parts like buttons or beads.
- Don’t Use Delicate Yarns: Avoid using delicate yarns that can quickly unravel or shed fibers, as these can be hazardous.
- Avoid Harsh Chemicals: Don’t use yarns treated with chemicals or harsh dyes, which could be harmful if a child puts the toy in their mouth.
- Don’t Leave Long Strings: Any long strings or yarn ends should be trimmed and securely woven in, as they can pose a strangulation hazard.
- Don’t Use Stiff Stuffing: Avoid over-stuffing or using stiff stuffing materials that could make the toy hard and uncomfortable for cuddling.
- Please don’t ignore the washing instructions: Always follow the instructions for the yarn and the finished toy to maintain their integrity and safety.
Tips & Tricks To Avoid Crochet Mistakes
Crocheting a perfect turtle, especially for beginners, can be challenging, but with these tips and tricks, you can avoid common mistakes and enhance your crafting experience:
How To Block The Crochet Turtle?
Blocking a crochet turtle is a great way to give your finished project a professional, neat appearance. Here’s a step-by-step guide:
- Prepare Your Blocking Area: Lay out a blocking mat or a clean, dry towel on a flat surface. Any foam surface or mattress will do if you don’t have a blocking mat.
- Mix a Blocking Solution (Optional): If desired, mix a little mild detergent or a special wool wash in a bowl of lukewarm water. This step is optional and more commonly used for natural fibers.
- Dampen the Turtle: If you’re using the blocking solution, gently submerge your turtle in it. If not, simply dampen your turtle with a spray bottle filled with water. Be careful not to soak it; it just needs to be damp.
- Squeeze Out Excess Water: Gently squeeze out any excess water from the turtle. Be careful not to wring or twist it, as this can distort the shape.
Shape the Turtle:
- Lay your turtle on the blocking mat or towel.
- Gently shape it to the desired dimensions and form.
- For a turtle, pay special attention to the roundness of the shell and the position of the limbs.
Pin It in Place (If Necessary): If your turtle has parts that need to stay in a specific shape or position, use rust-proof pins to hold them in place. Pin directly into the blocking mat. If you’re using a towel, be careful not to pin it too aggressively, as it might not hold the shape.
Let It Dry: Leave the turtle to air dry completely. It may take several hours or even a day, depending on the thickness of the yarn and the humidity in your environment.
Remove Pins and Fluff: Once the turtle is completely dry, gently remove any pins if used. Give your turtle a gentle fluff to bring out its texture and softness.
RELATED: How To Make Crossed Stitch In Crochet With Tips For Flawless Handiwork?
Suggestions To Add Style & Personal Touch
Adding style and personal touches to your crocheted turtle can transform it from a simple craft into a unique and charming piece. Here are various suggestions to infuse more personality and flair into your turtle:
- Choose Unique Color Combinations: Move beyond traditional green and experiment with unexpected color combinations for the shell and body. Pastels, neons, or even ombre yarns can create a unique look.
- Add Textural Yarns: Use textured yarns like boucle, eyelash, or fuzzy yarn for the shell to add a tactile element.
- Embroider Details: Simple embroidery can bring your turtle to life. Add a smile, eyelashes, or unique patterns on the shell with a contrasting yarn color.
- Incorporate Beads or Buttons: Sew on beads or buttons for eyes or decorative shell detailing, adding a bit of sparkle or whimsy.
- Create a Shell Pattern: Use different crochet stitches to create unique patterns on the shell, like stripes, spirals, or floral motifs.
- Add Accessories: Crochet a tiny hat, scarf, or bow tie for your turtle. These can be seasonal, like a Christmas Santa hat or a spring flower crown.
- Use Appliques: Attach small crochet appliques like flowers, stars, or hearts to the turtle’s shell for extra charm.
- Vary the Texture: Mix stitches within your project. For example, use bobble stitches to create a 3D effect on the shell.
- Adjust the Size: Experiment with different yarn weights and hook sizes to create a range of sizes, from mini turtles that could be keychains to large plush turtles for cuddling.
- Personalize with Initials or Dates: Embroider initials or a particular date on the bottom of the turtle, making it a perfect personalized gift.
- Interactive Elements: For children’s toys, consider adding elements like a rattle inside the turtle or make it a small pouch or container.
- Felt Features: Use felt to create eyes, a mouth, or other facial features, which can be glued or sewn on.
- Contrast with Linings: If your turtle has an opening (like a pouch), line it with fabric for a pop of color and a professional finish.
- Make a Themed Set: Create a family of turtles, each with a theme or color scheme, perfect for storytelling or display.
Wash & Care Instructions
Taking proper care of your crochet turtles ensures their longevity and durability. Here are the wash and care instructions to keep your turtles looking great for years to come:
- Check the Yarn Label: Always check the care instructions on your yarn label before washing. Different fibers have different care requirements.
- Hand Wash Preferred: Hand washing is recommended for most crochet turtles, especially those with delicate parts or stuffing. Use lukewarm water and a mild detergent. Gently agitate the water with your hand to clean it.
- Avoid Harsh Chemicals: Do not use bleach or harsh chemicals that might damage the yarn or affect the color.
- Gentle Squeeze: After washing, gently squeeze out excess water. Do not wring or twist the turtle, as this can distort its shape and damage the fibers.
- Dry Flat: Lay the turtle on a clean, dry towel, reshaping it as necessary. Allow it to air dry completely by laying it flat. It helps maintain its shape and prevents any stretching.
- Avoid Direct Heat and Sunlight: Do not dry your crochet turtle in a dryer or expose it to direct heat or sunlight, as this can cause shrinkage or fading, especially for synthetic fibers.
- Spot Cleaning: Spot cleaning with a damp cloth and mild detergent can be effective for small stains or spots. It is beneficial for turtles made with fiberfill stuffing.
- Fluff and Shape: Once dry, fluff the stuffing gently and reshape the turtle to its original form.
- Storage: Store the crochet turtle in a cool, dry place. Avoid storing in plastic bags for long periods as this can trap moisture and cause mildew. A cotton bag or breathable container is preferable.
- Regular Dusting: Regularly dust your crochet turtle with a soft brush or cloth to prevent dust accumulation.
- Repairing Loose Ends: If you notice any loose ends or unraveling, repair them promptly with a yarn needle to prevent further damage.

A Quick Recap
This article explored the delightful world of crocheting turtles, covering everything from choosing the suitable yarn and tools to detailed step-by-step instructions for creating your crochet turtle.
We discussed various stitches and sizes and provided essential tips and tricks to help you avoid common mistakes, ensuring your turtle turns out perfectly.
Additionally, we delved into creative ways to add style and personal touches, making each turtle uniquely yours. Finally, we provided crucial wash and care instructions to keep your turtle looking its best.
Ready to embark on this charming crochet journey? Grab your hooks and yarn, and create some adorable turtles together! Whether you’re a beginner or an experienced crocheter, these patterns will bring joy and a sense of accomplishment.
Frequently Asked Questions
How Do You Crochet A Turtle For Beginners?
If you’re a beginner and want to crochet a turtle, purchasing a simple pattern that you can follow is the easiest way. The pattern will give you step-by-step instructions on how to crochet the turtle in question, and there are plenty of different turtle designs to choose from!
Make sure to buy your yarn and have your crochet equipment, however, as the crochet pattern will usually only come with the instructions, nothing more!
Is It Easy To Crochet A Turtle?
Turtles are relatively easy to crochet, and most crochet turtle designs are perfectly suitable for beginner-level ones. It is because turtles are pretty easy shape to make!
Is It A Good Idea To Crochet A Turtle?
If you like turtles, or you know someone who might love to have a crochet turtle made by you, then it is a great idea to go ahead and make one! Crochet turtles are relatively easy to create and can have many different creative designs.
Can I Use Any Type Of Yarn To Crochet A Turtle?
While you can use various types of yarn, medium-weight yarn like worsted or DK is commonly recommended for its easy handling and suitable texture.
Are Crochet Turtle Patterns Suitable For Children’s Toys?
Yes, they can be great for children’s toys. Ensure you use safe, non-toxic materials and avoid small, detachable parts for young children.
How Do I Wash And Care For My Crochet Turtle?
Hand wash gently with mild detergent and lay flat to dry. Avoid using a dryer and direct heat or sunlight to prevent damage to the yarn.
Where Can I Find Crochet Turtle Patterns?
Crochet turtle patterns can be found in crochet books, online crafting websites, and digital platforms like Etsy or Ravelry. Many websites offer free patterns for beginners.

- 30 Polo Sweater Knitting Patterns To Keep You Stylish On Every Occasion - January 1, 2024
- 21 Baby Blanket Knitting Kits To Wrap Bundle Of Joy With Love - January 1, 2024
- 15 Cashmere Knitting Kits For Fashionable Knits To Embrace Comfort And Style - January 1, 2024
