

Dive into the enchanting world of crochet with our delightful mouse patterns. Craft whimsical amigurumi mice, perfect for cuddles and play. From tiny tails to whisker wonders, each pattern captures the essence of charm and creativity.

Unleash your crochet magic to stitch these adorable creatures, creating a world where cute meets cozy. Prepare to embark on a heartwarming journey of crafting joy with our irresistible mouse patterns!
Are you seeking a creative and enjoyable way to enhance your crochet skills? Consider the world of crochet mouse patterns, where endless possibilities await. Many crafters face the challenge of finding enjoyable and skill-enhancing patterns. Crochet mouse patterns offer an ideal solution, balancing simplicity and creativity. These patterns allow you to create adorable, homemade mice, perfect for gifts or personal collections.
Is It Worth To Crochet Mouse Pattern?
It is best to consider several factors to determine if crocheting mouse patterns is worth your time and effort. Here are some points to ponder:
- Skill Development: Crocheting mouse patterns can be one of the best ways to enhance your crocheting skills. These patterns often include a variety of stitches and techniques that can be great for both beginners and experienced crocheters.
- Personal Enjoyment: Engaging in mouse patterns can be one of the best options if you enjoy crafting and crochet. Crafting homemade items often brings a sense of accomplishment and relaxation.
- Gifts and Decor: Crochet mouse patterns are great for creating unique, homemade gifts or decorations. If you enjoy making functional and charming items, this could be one of the most straightforward yet rewarding projects.
- Cost-Effective Hobby: Crocheting is a relatively low-cost hobby. You may want a hobby that doesn’t require a significant financial investment, and crocheting mouse patterns can be an excellent option.
- Community and Sharing: Crochet communities are often very supportive, and sharing your creations can be rewarding. Be aware that engaging in these projects can connect you with like-minded individuals.
- Time Investment: Consider the amount of time you can dedicate to crocheting. Crochet mouse patterns, generally minor projects, can be a great option with limited time.
Popular Stitches To Crochet Mouse Pattern
Certain stitches are popular when creating crochet mouse patterns due to their versatility and effectiveness in achieving the desired look and texture. Here are some of the most commonly used stitches:
- Single crochet (sc): This is one of the simplest and most fundamental stitches in crocheting. It’s excellent for creating a tight, dense fabric, ideal for the main body of a mouse.
- Half Double crochet (hdc): This stitch balances double crochet height, providing a slightly looser texture, ideal for parts of the mouse like the ears or tail.
- Double Crochet (dc): Double crochet is used for a bit more texture and height in the pattern. It can be helpful in parts of the mouse where you want a looser, more flexible fabric.
- Slip stitch (sl st): Slip stitches are often used to join rounds or create small surface details. They are great for finishing touches or to define shapes like the mouse’s nose or eyes.
- Magic Circle: The magic circle technique is one of the best ways to start creating the mouse’s body or head. It lets you begin with a tightly closed round, ideal for amigurumi-style crochet.
- Increase (inc) and Decrease (dec): These techniques are essential for shaping the mouse, allowing you to create curves and contours. Increases add stitches to a round, while decreases remove them.
- Loop Stitch: This stitch can add a furry texture to the mouse, making it look more realistic. It’s especially effective for the tail or outer ears.
- Bobble Stitch: The bobble stitch creates a puffy, textured dot. It can be used to add interesting detail, such as for the cheeks or paws of the mouse.
How Long Should A Mouse pattern Be?
The length of a crochet mouse pattern can vary depending on several factors, including the complexity of the design, the size of the finished mouse, and the level of detail in the instructions. Here are some considerations:
- Size of the Mouse: If you’re creating a tiny, simple mouse, the pattern might be relatively brief, maybe a few pages long. The pattern could be extended for a larger, more detailed mouse, possibly extending to several pages.
- Complexity of Design: A pattern with intricate details, like elaborate facial features or a patterned coat, will require more extensive instructions. The best way to convey detailed designs is through a more extended, more detailed pattern.
- Skill Level: Patterns aimed at beginners are often more detailed and explanatory, taking time to guide the crafter through each step. This can make the pattern longer. Conversely, patterns for experienced crocheters might use shorthand or assume familiarity with specific techniques, making them shorter.
- Pattern Format: The format of the pattern also affects its length. Patterns with lots of pictures, diagrams, or tutorials tend to be longer, as these elements take up more space but can be great options for visual learners.
- Additional Information: Some patterns include extra sections, such as stitch guides, troubleshooting tips, or variations, which increase the length.
Essential Tools & Materials
The right tools and materials are essential when embarking on a crochet mouse project. This ensures the process is enjoyable and the finished product meets your expectations. Here are the essential tools and materials you’ll need:
- Yarn: Choose a yarn suitable for the mouse you wish to create. Consider the yarn’s weight, texture, and color. Acrylic yarn is an excellent option for durability and ease of care. In contrast, cotton yarn can be ideal for a softer, more natural feel.
- Crochet Hook: The hook size should match your yarn’s weight. For most amigurumi projects, such as crochet mice, smaller hooks (3.5mm to 5mm) often create tight stitches that don’t allow the stuffing to show through.
- Stuffing: Polyester fiberfill is commonly used for stuffing crochet toys. It’s lightweight, washable, and easy to work with.
- Stitch Markers are essential for keeping track of the beginning and end of rounds, primarily because amigurumi is often worked in a continuous spiral.
- Scissors: A good pair of scissors is essential for cutting yarn and trimming finished pieces.
- Safety Eyes: These are optional but can add much character to your crochet mouse. If the toy is for a young child, you may want a safer alternative, like embroidered eyes.
- Pattern: A clear, detailed crochet pattern is one of the best ways to ensure your project’s success. It guides you through each step of the process.
- Ruler or Measuring Tape: This is useful for measuring parts of your project to ensure consistency in size.
- Pins: Pins can help hold pieces together before you sew them, making assembly easier.
Abbreviations Of Common Crochet Stitches And Techniques
- Chain Stitch (ch): The foundation of most crochet projects, this stitch creates the initial row of loops on the hook.
- Slip stitch (sl st) is a method for joining stitches together or moving the yarn across a row without adding height.
- Single crochet (sc): A basic crochet stitch that is short and dense, ideal for various projects.
- Half Double crochet (hdc): A stitch taller than a single crochet but shorter than a double crochet. It offers a nice balance of tightness and flexibility.
- Double Crochet (dc): A fundamental stitch twice the height of a single crochet, creating a more open and airy fabric.
- Treble Crochet (tr): A tall stitch that creates a loose, drapey fabric. It’s three times the height of a single crochet.
- Magic Circle (Magic Ring): This technique is used to start rounds when working in the round, and it is ideal for amigurumi and hats.
- Increasing (inc) is a method of adding stitches to a row or round to create width or shape in a project.
- Decreasing (dec): Combining two or more stitches into one to narrow or shape the work.
- Front Loop and Back Loop Only (flo/blo): Crocheting into only the front or back loop of the stitch instead of both, creating ridges or a ribbed texture.
- Yarn Over (yo): Wrapping the yarn over the crochet hook is fundamental in creating stitches.
- Fasten Off (fo): Cutting the yarn and securing it after the final stitch to finish the project.
- Gauge: Refers to the number of stitches and rows per inch, which determines the size of the finished project.
- Bobble Stitch: A textured stitch made by working multiple double crochets into the same stitch and joining them together at the top, creating a puffy effect.
- Cluster Stitch: Similar to the bobble stitch but usually involves fewer stitches, used for adding texture.
- Popcorn Stitch: This stitch is made by creating several stitches in the same space and then joining them together. It is similar to the bobble stitch but with a more pronounced texture.
- Loop Stitch: Creates loops of yarn on the fabric’s surface, giving a furry texture.
RELATED: 49 Fun Unicorn Crochet Patterns For Whimsical Wonders
How To Understand Crochet Stitches & Techniques?
Understanding crochet stitches and techniques is critical to progressing in crochet. Here are some steps and tips to help you get a grasp of various crochet stitches and techniques:
- Start with Basic Stitches: Learn the fundamental stitches: chain (ch), single crochet (sc), double crochet (dc), and slip stitch (sl st). These form the basis for most crochet patterns.
- Practice Consistently: Regular practice is one of the best ways to improve. Start with simple projects like scarves or coasters to get comfortable with basic stitches.
- Use Instructional Resources: Numerous resources, including books, online tutorials, and video lessons, are available for learning crochet. Pay attention to step-by-step guides and visual demonstrations.
- Understand Crochet Patterns: Learn how to read crochet patterns. They use standard abbreviations and symbols to represent different stitches and techniques. Familiarize yourself with these abbreviations.
- Work on Gauge: Gauge refers to the number of stitches per inch. Practicing gauge swatches will help you understand how your stitching affects the size of the project. Remember that the same pattern can yield different results based on how tightly or loosely you crochet.
- Learn to Increase and Decrease: Increasing and decreasing stitches is crucial for shaping your work. These techniques are fundamental in making anything other than straight squares or rectangles.
- Explore Advanced Stitches and Techniques: Once you are comfortable with the basics, explore more advanced stitches like the treble crochet (tr), bobble, or cluster stitch. These will add texture and variety to your projects.
- Join a Crochet Community: Engaging with a community of crocheters can be incredibly helpful. You can find support, advice, and pattern recommendations. Online forums, local craft groups, or social media groups are great options.
- Practice Reading Charts: Some patterns are represented in chart form, using symbols to depict stitches. Learning to read these charts can open up a new world of patterns.
- Experiment with Different Yarns and Hooks: Different yarns and hook sizes can significantly affect your stitches and the overall look of your project. Experiment to find combinations that work best for you.
- Be Patient and Persistent: Crochet is a skill that improves over time. Be patient with yourself, and celebrate your progress, no matter how small.
Which Yarn Is Best For A Crochet Mouse Pattern?
Choosing the suitable yarn for a crochet mouse pattern is crucial for both the ease of crocheting and the final appearance and texture of the mouse. Here are some factors to consider when selecting yarn:
- Acrylic Yarn: Acrylic yarn is an excellent option for amigurumi and crochet toys like a mouse. It’s durable, easy to care for, and comes in various colors. It’s also generally affordable and widely available.
- Cotton Yarn: Cotton yarn is another popular choice for amigurumi. It’s soft and natural and provides a good stitch definition, essential for a mouse pattern’s intricate parts. However, it can be a bit heavier and less stretchy than acrylic.
- Wool Yarn: Wool yarn can be used for a warmer, fuzzier look. It’s elastic and durable. However, wool can be more expensive and requires more careful washing.
- Yarn Weight: The best way to choose yarn weight is to refer to your pattern. Most amigurumi patterns use light (DK) or medium-weight (worsted) yarns. These weights are ideal for creating a tight fabric that doesn’t let the stuffing show through.
- Texture: Smooth yarns are usually easier to work with and better for showing off the stitches in your pattern. However, textured yarns can add exciting effects to your mouse.
- Color: You may want a specific or multiple-color yarn, depending on your design. Variegated yarns can add an interesting pattern without the need for color changes.
- Safety: If the mouse is intended for young children, ensure the yarn is non-toxic and washable. Avoid yarns that shed quickly, as these can be a hazard for small children.
- Hook Compatibility: Ensure the yarn you choose works well with the crochet hook size recommended in your pattern. This affects the tightness of your stitches and the overall look of the mouse.
- Personal Preference and Project Needs: Ultimately, the best yarn suits your preference and the needs of your project. Consider the texture, the look you want to achieve, and who the mouse is for.
How Much Yarn Do I Need To Crochet A Mouse Pattern?
The amount of yarn needed to crochet a mouse pattern can vary widely depending on several factors. To estimate the quantity of yarn you’ll need, consider the following:
- Size of the Mouse: Larger mice will require more yarn. A tiny, simple mouse might only need a small amount, while a more extensive or detailed mouse will need more.
- Yarn Weight and Thickness: Thicker yarns (like bulky or super bulky) will use more material for the same number of stitches as thinner yarns (like DK or sport). However, thicker yarns can result in a more giant toy without necessarily increasing the number of stitches.
- Crochet Technique and Stitch Density: Tighter stitches and techniques that use more yarn (like bobble stitches) will increase the amount needed.
- Pattern Specifications: Always check the pattern you are using. Most patterns recommend the amount of yarn needed, often in yards or meters.
- Color Changes and Details: If your mouse pattern includes multiple colors or intricate details, the amount of yarn needed may increase.
- Safety Margins: It’s a good idea to have extra yarn than the pattern calls for, just in case. This helps avoid running out of yarn, especially if the yarn is dyed in lots, as color shades can vary between lots.
Is It Beginner Friendly?
Crocheting a mouse pattern can be beginner-friendly, depending on the complexity of the pattern and the basic skills required. Here are some factors that can make a crochet mouse pattern suitable for beginners:
- Simple Stitches: If the pattern primarily uses basic stitches like single crochet (sc), chain (ch), and slip stitch (sl st), it’s likely to be more accessible for beginners.
- Minimal Shaping: Patterns that require less shaping (increasing and decreasing) are more straightforward. A beginner-friendly pattern might start with basic shapes like spheres or cylinders.
- Clear Instructions: A pattern that offers detailed, step-by-step instructions, possibly with illustrations or photos, is an excellent option for beginners.
- Size: Smaller projects can be more manageable for beginners. A small mouse pattern might be a good start, requiring less time and yarn.
- Videos or Tutorials: For some beginners, following a video tutorial can be easier than reading a pattern. Look for patterns that have accompanying video guides.
- Support and Community: Access to a community, such as an online forum or a local crochet group, where you can ask questions or get help, can make the process easier for beginners.
- Practice: Even if a pattern seems challenging, it can be a good learning opportunity. Practice makes perfect in crochet.
How To Crochet A Basic Beginner-Friendly Mouse Pattern?
Crocheting a basic, beginner-friendly mouse can be a fun and rewarding project. Here’s a simplified guide to help you get started. Remember, this is a basic outline; for detailed instructions, you may want to find a specific pattern that suits your skill level.
Materials Needed
- Medium-weight yarn (like worsted weight)
- Crochet hook (size recommended for your yarn, usually around 4mm to 5mm)
- Stuffing material (like polyester fiberfill)
- Yarn needle
- Scissors
- Safety eyes (or black yarn for embroidered eyes)
Basic Steps
Head and Body
- Magic Circle: Start with a magic circle. This technique is excellent for amigurumi as it allows you to start with a tightly closed hole.
- Round 1: Work 6 single crochet (sc) stitches into the magic circle.
- Round 2: Increase (inc) each stitch around (12 sc).
- Round 3: Sc in the next stitch, inc in the next – repeat around (18 sc).
- Continue increasing rounds, adding one more sc between increases each round until you reach a size you like for the head.
- Then, work a few rounds without increasing to form the body.
- Start decreasing (dec) to close the body, mirroring your increases.
Ears (Make 2)
- Round 1: Start with a magic circle and 6 sc in the circle.
- Round 2: Sc in the next stitch, inc in the next – repeat.
- Flatten the circle and do not stuff. Leave a long tail for sewing.
Tail
- Chain a length proportional to your mouse and slip stitch back along the chain. If you know knitting, you can also make a simple i-cord.
Assembly
- Attach the Ears: Sew the ears to the top of the head.
- Attach the Tail: Sew the tail to the back end of the body.
- Add Eyes: Attach safety eyes or embroider eyes with black yarn.
- Use the yarn needle to sew any remaining openings and weave in loose ends.
Finishing Touches
- You might add a small nose or whiskers using embroidery or a contrasting yarn color.
Tips for Beginners
- Take Your Time: Don’t rush. Make sure you understand each step before moving on.
- Count Your Stitches: Keeping track of your stitch count is crucial in amigurumi.
- Stitch Marker: Use a stitch marker to mark the beginning of each round.
- Tension: Keep your stitches tight enough so the stuffing won’t show through.
- Ask for Help: If you’re stuck, ask for help from more experienced crocheters or look up tutorials online.
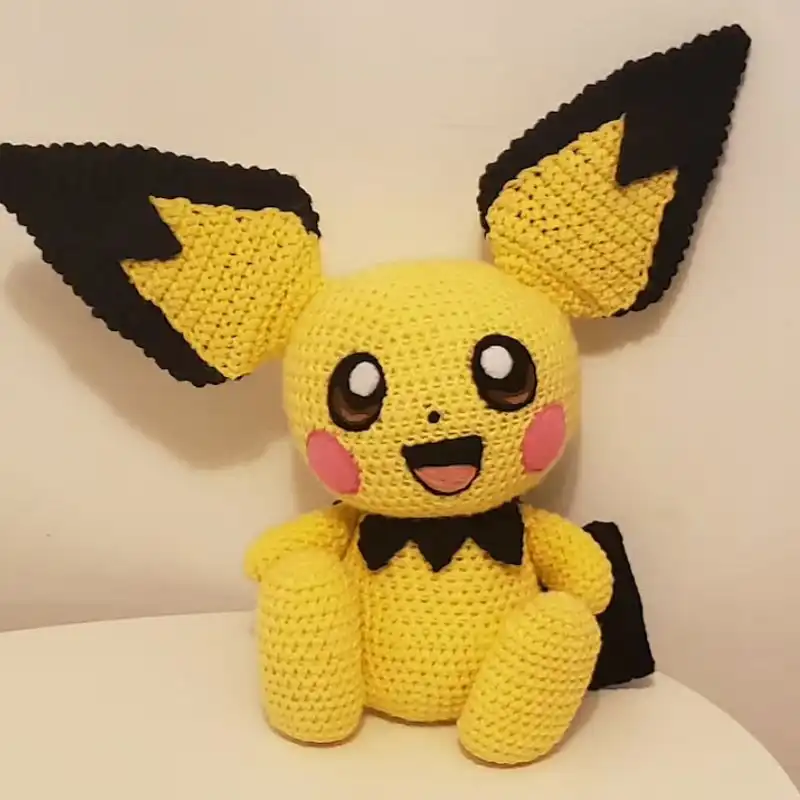
35 Different Types Of Mouse Patterns
1. Magic Cat Crochet Pattern
This pattern is an imaginative and fun project for cat lovers. You can create an adorable cat with a cute hat with this pattern. Whether creating a playful cat for a child or a decorative piece, this pattern allows you to work on your creativity. Whether you’re a crochet beginner or an experienced crafter, this pattern is perfect for all skill levels.
Suggested Yarn: Acrylic Sport Weight
Difficulty Level: Intermediate
Yarn Weight: Sport/Worsted
Crochet Hook Size: F/3.75mm
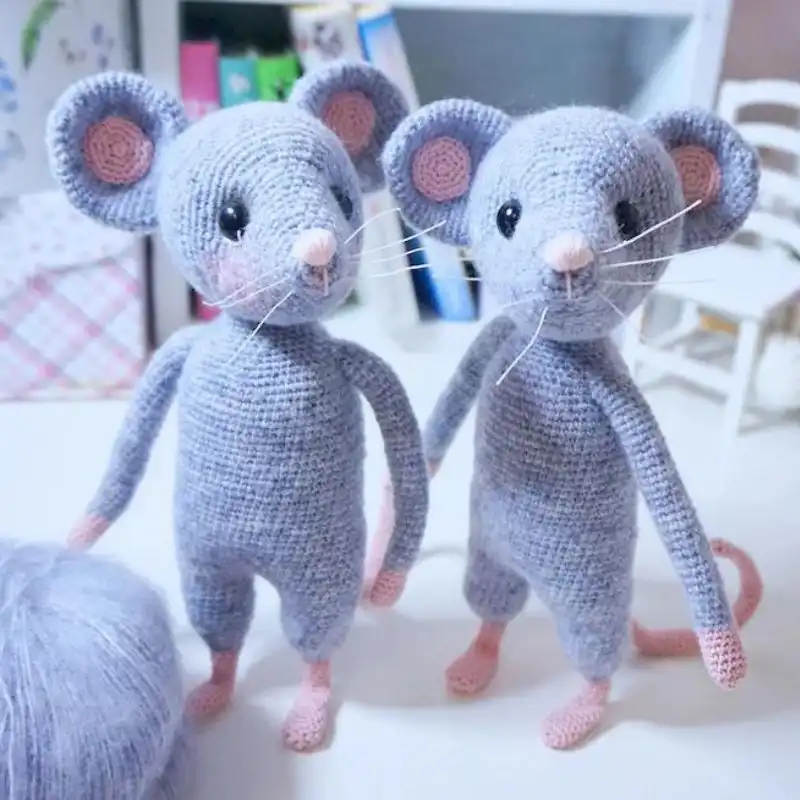
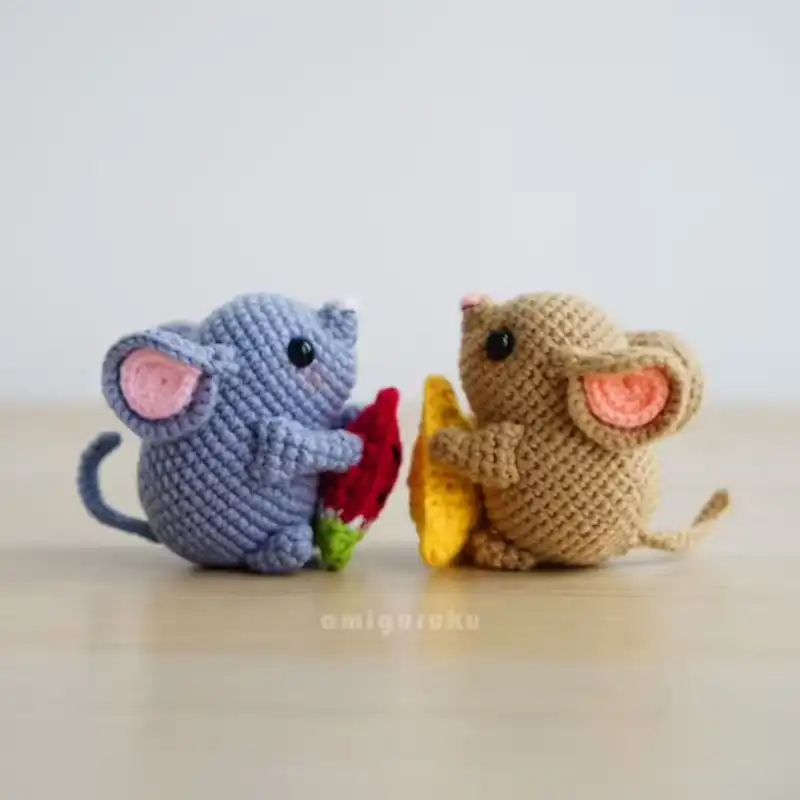
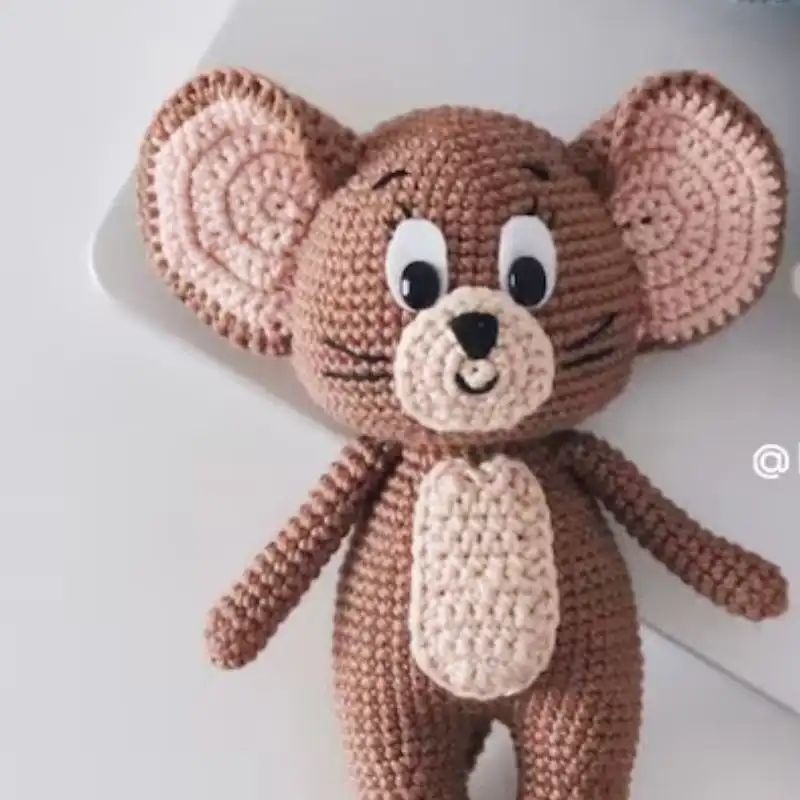
2. Mr. and Ms. Mouse Crochet Pattern
This pattern is suitable for intermediate-level crocheters. You can use different materials, like semi-cotton yarn in white, black, yellow, orange, blue, and beige shades. You’ll also require a 2 mm hook for precision. For added stability in the arms, consider using aluminum or copper wire, which can be secured with band-aids.

Suggested Yarn: Cotton Worsted Weight
Difficulty Level: Intermediate
Yarn Weight: Worsted
Crochet Hook Size: G/4.0mm
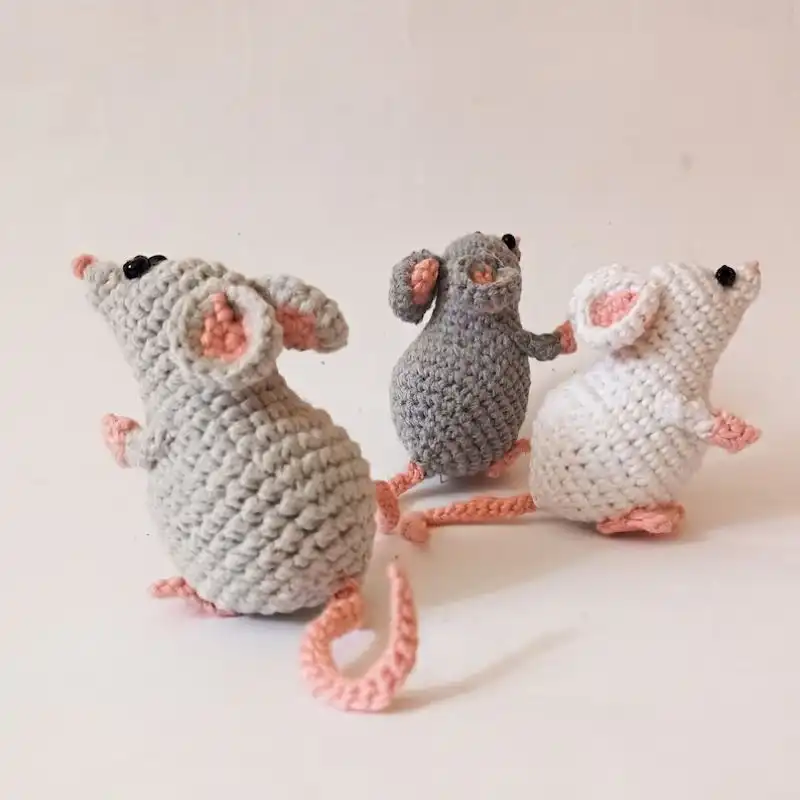
3. Small Mouse Crochet Pattern
Suppose you are looking for an adorable and easy crochet project. In that case, this pattern is perfect for beginners and advanced crocheters. This charming little mouse stands at just 6 cm in height. To make this pattern. You’ll need cotton yarn (55% cotton, 45% polyacrylic) and a steel crochet hook (US-6, 1.5 mm). Also, you will need some polyester fiberfill or wool on hand for stuffing and two tiny black beads (3-4 mm) for the eyes.
Suggested Yarn: Acrylic DK Weight
Difficulty Level: Intermediate
Yarn Weight: DK/Light Worsted
Crochet Hook: E/3.5mm
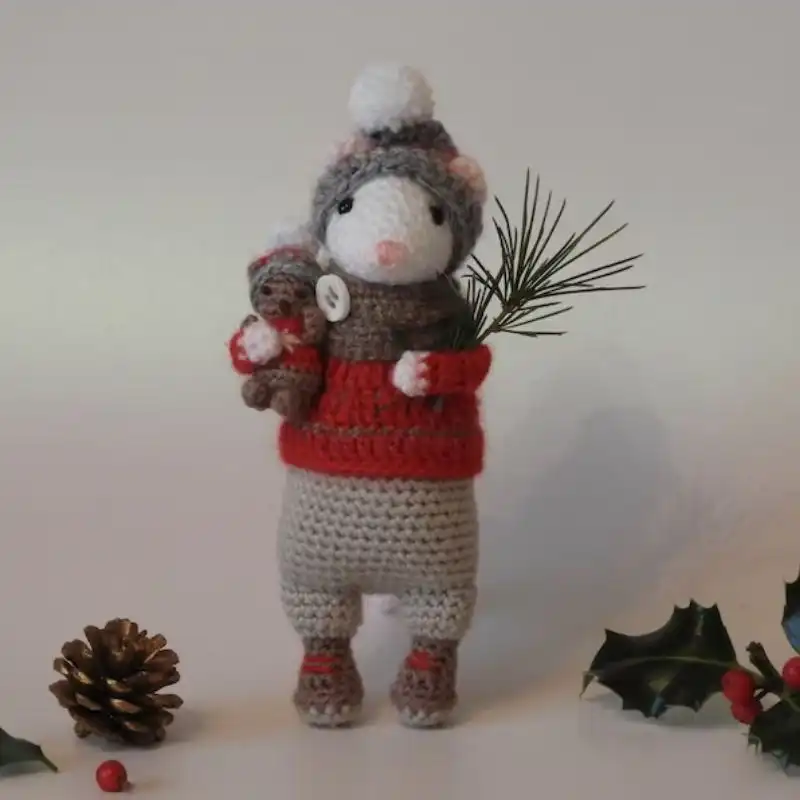
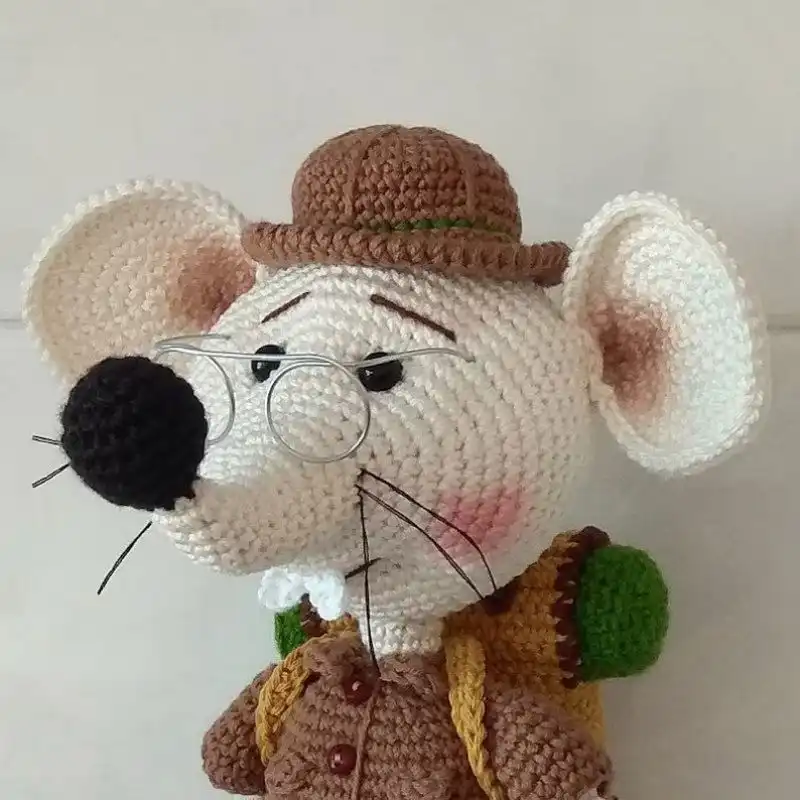
4. Pip The Winter Mouse And Teddy
This pattern is suitable for both beginners and experienced crocheters. It includes a list of materials you’ll need, such as yarn, crochet hooks, safety eyes, and more. The process is easy, enjoyable, and achievable for crocheters of all skill levels.
Suggested Yarn: Wool Bulky Weight
Difficulty Level: Intermediate
Yarn Weight: Bulky
Crochet Hook: H/5.0mm
5. Mouse Crochet Pattern With Clothing
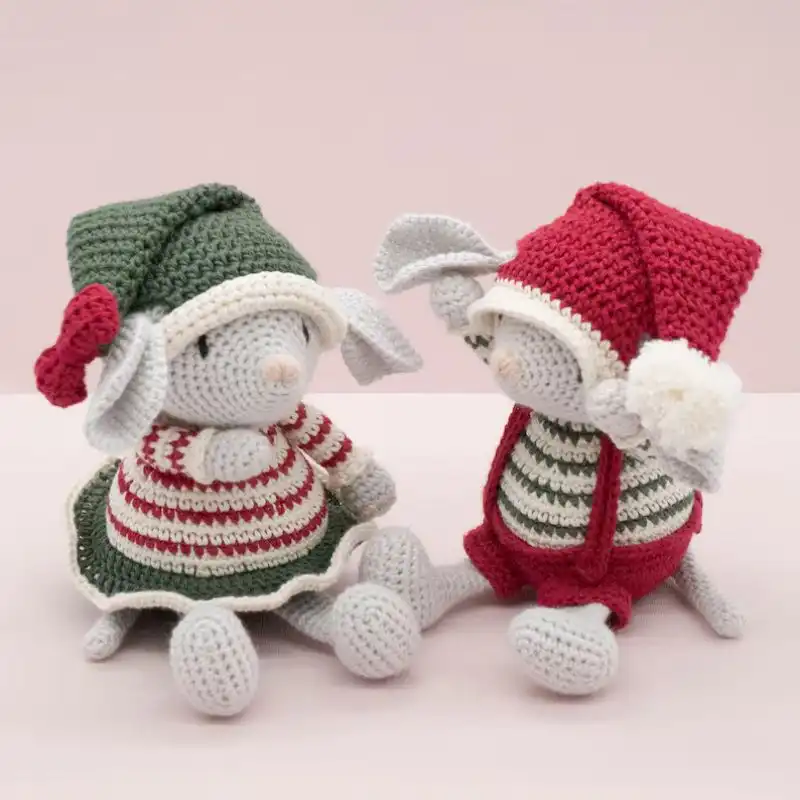
This adorable crochet pattern lets you create a charming little mouse with its wardrobe. You can make different outfits for your tiny mouse friend with step-by-step instructions. From cute dresses to tiny bonnets, this pattern offers endless creativity. It is perfect for both beginners and experienced crocheters.
Suggested Yarn: Acrylic Sport Weight
Difficulty Level: Intermediate
Yarn Weight: Sport/Worsted
Crochet Hook: F/3.75mm
6. Crochet Pattern Of Mochi The Mouse
This Crochet Pattern of Mochi is perfect for all skill levels. It guides you through every step to create this lovable character. Mochi’s soft curves and unique details make it a perfect gift or a charming addition to your collection. Mochi’s design is easy to follow, even for beginners.
Suggested Yarn: Cotton DK Weight
Difficulty Level: Intermediate
Yarn Weight: DK/Light Worsted
Crochet Hook: E/3.5mm
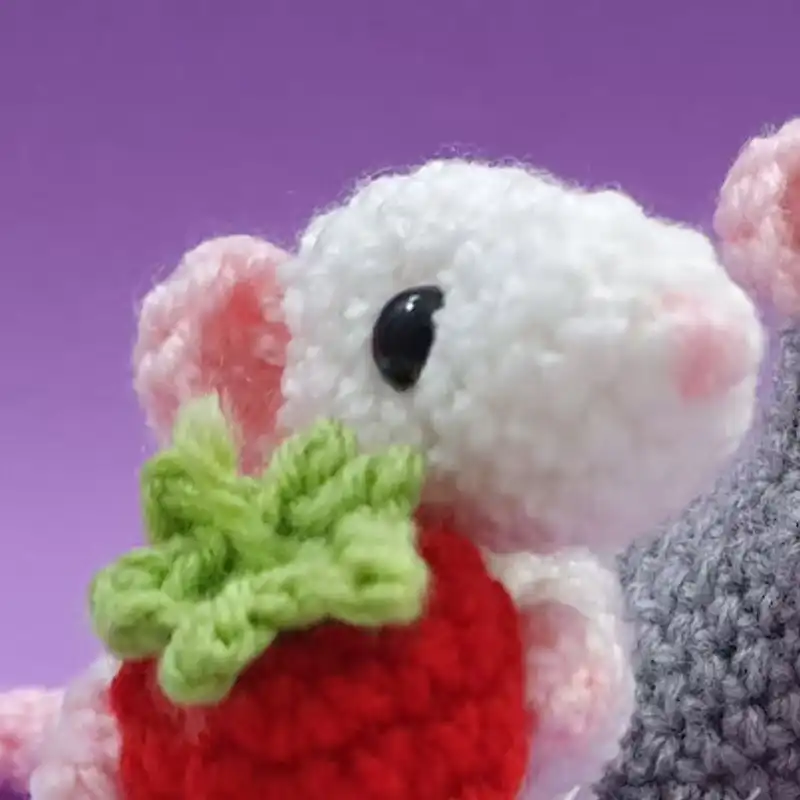
7. Crochet Pattern – Rat with Strawberry
This pattern lets you create a rat that’s as charming as it is unique. The adorable rat holding a strawberry is a fun twist on traditional amigurumi. Even if you’re new to crochet, the process is simple and enjoyable. This project is perfect for adding creativity to your crafting.
Suggested Yarn: Acrylic Worsted Weight
Difficulty Level: Intermediate
Yarn Weight: Worsted
Crochet Hook: G/4.0mm
8. The Little Mouse Crochet Pattern
This one is perfect if you’re looking for a quick and delightful crochet project. Craft an adorable tiny mouse that’s big on cuteness. This pattern lets you explore your creativity with different colors and yarn textures. Whether you’re crafting it as a gift or for your enjoyment, this pattern will surely bring a smile to your face.
Suggested Yarn: Cotton Worsted Weight
Difficulty Level: Intermediate
Yarn Weight: Worsted
Crochet Hook: H/5.0mm
9. Seaside Mouse Crochet Pattern
This pattern helps you create a cute mouse ready for the beach with beachwear and accessories. The pattern is clear and straightforward, making it an excellent choice for all skill levels.
Whether you love the beach or simply want a unique crochet project, this pattern is an excellent pick. Customize your seaside mouse with your favorite colors to make it your own.
Suggested Yarn: Acrylic Yarn
Difficulty Level: Intermediate
Yarn Weight: DK/Light Worsted
Crochet Hook: E/3.5mm
10. The Gray Cat And Brown Mouse Crochet Patterns
Create adorable amigurumi animals with The Gray Cat and Brown Mouse Crochet Patterns. These patterns are perfect for both beginners and experienced crocheters. Craft a cuddly cat and a cute mouse, each with a unique charm. These finished projects make for beautiful gifts or charming decorations, adding a touch of handmade warmth to any space.
Suggested Yarn: Acrylic Worsted Weight
Difficulty Level: Intermediate
Yarn Weight: Worsted
Crochet Hook: G/4.0mm
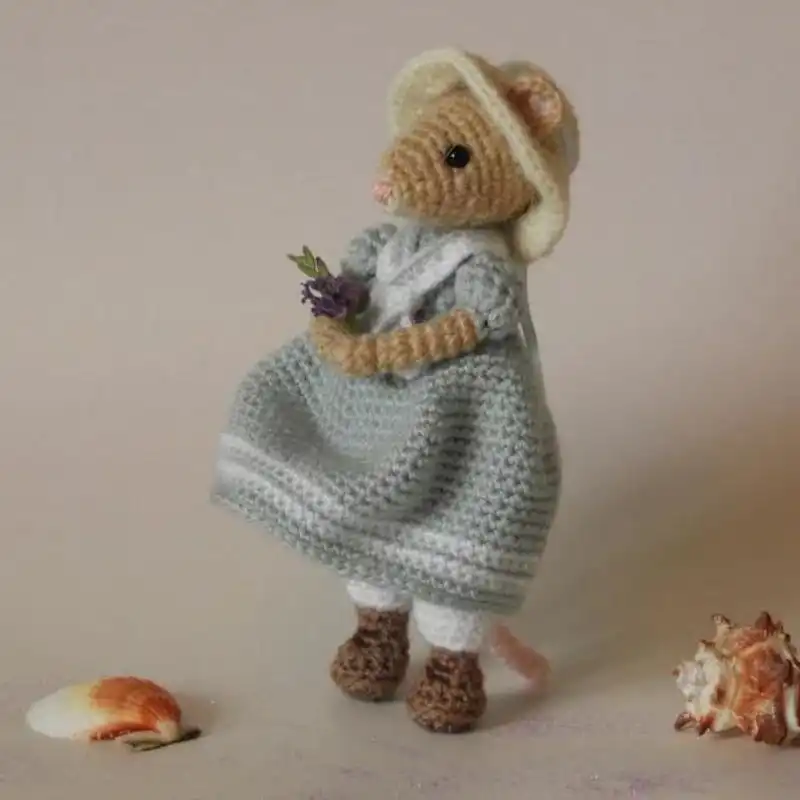
11. Cute Little Mouse With Dress Bonnet Pattern
This delightful pattern allows you to create a tiny mouse with an adorable dress and bonnet. Perfect for those looking for a quick and enjoyable project, this pattern will bring a smile to anyone’s face. Whether you’re a crochet novice or an expert, you’ll find joy in crafting this endearing mouse that is perfect for gifting or simply brightening up your own space.
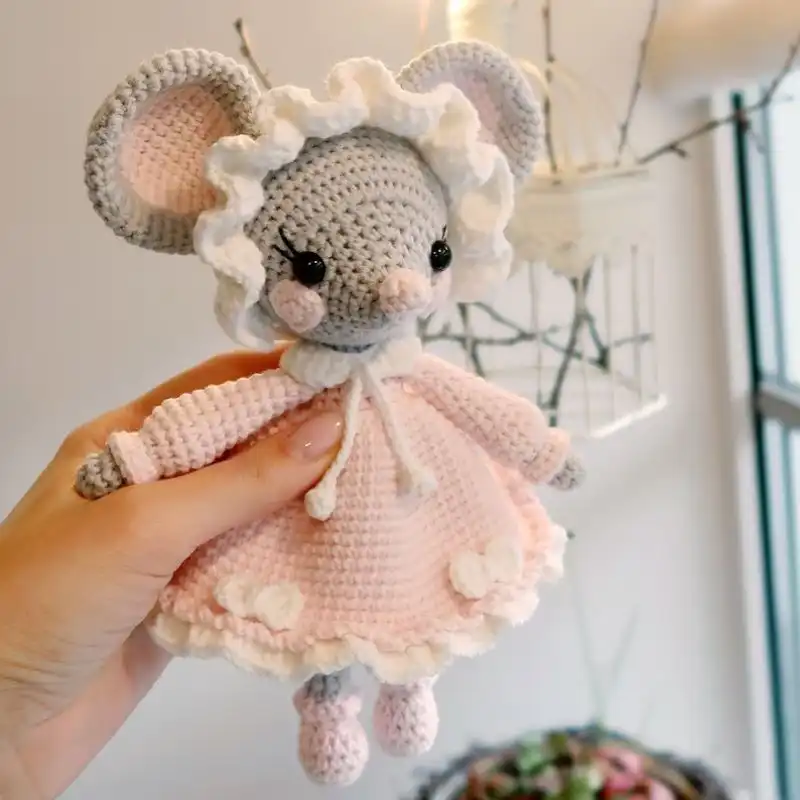
Suggested Yarn: Acrylic Sport Weight
Difficulty Level: Intermediate
Yarn Weight: Sport/Worsted
Crochet Hook: F/3.75mm
12. Crochet Rat Rony Pattern
This charming amigurumi creation will add character to your crochet collection. It guides you through crafting a lovable rat with intricate detailing. Whether you’re crafting for a child’s playtime companion or as a unique decoration, this pattern offers endless possibilities. It’s an engaging project for crochet enthusiasts of all levels, allowing you to explore your creativity while creating a cute and cuddly rat friend.
Suggested Yarn: Cotton Worsted Weight
Difficulty Level: Intermediate
Yarn Weight: Worsted
Crochet Hook: G/4.0mm
13. Easter Mouse Toy Clothes Crochet Pattern
Bring extra charm to your Easter celebration with this Crochet Pattern. The pattern includes step-by-step instructions, making it suitable for crocheters of all skill levels. This delightful pattern allows you to create adorable outfits for your amigurumi mice, adding a festive touch to your holiday décor. Make your Easter memorable and fun with these whimsical crochet creations.
Suggested Yarn: Cotton Worsted Weight
Difficulty Level: Intermediate
Yarn Weight: Worsted
Crochet Hook: G/4.0mm
14. Mouse In A Car Crochet Pattern
This pattern combines the charm of amigurumi with the thrill of driving. Craft an adorable mouse comfortably seated in its crochet car with wheels and a detailed interior. Whether you’re making it as a toy for a child or a playful décor piece, this pattern promises hours of creative enjoyment. This project perfectly adds a touch of whimsy to your crafting skills and makes something truly unique.
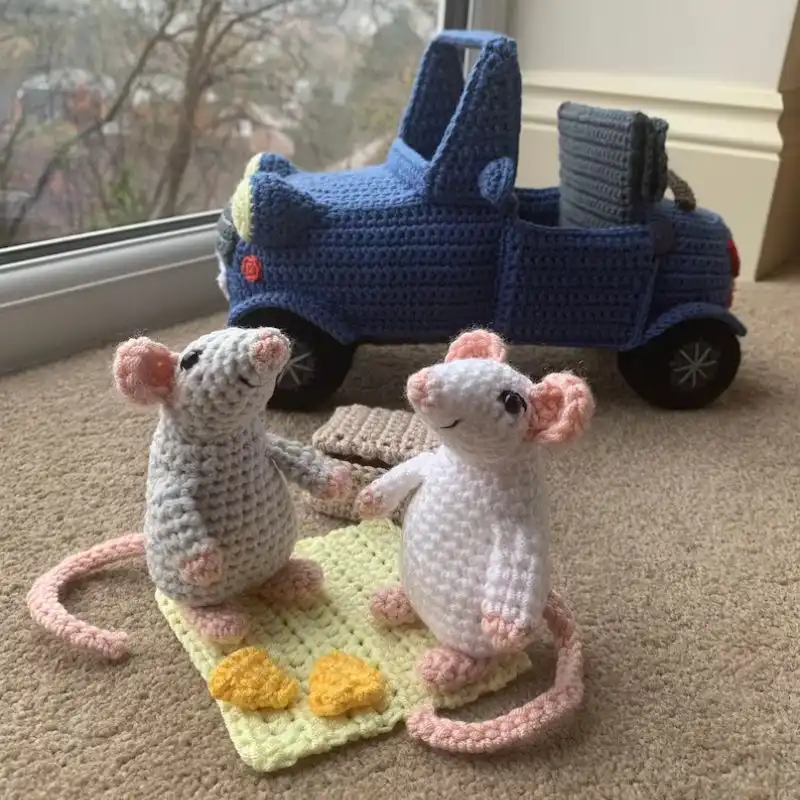
Suggested Yarn: Acrylic Worsted Weight
Difficulty Level: Intermediate
Yarn Weight: Worsted
Crochet Hook: G/4.0mm
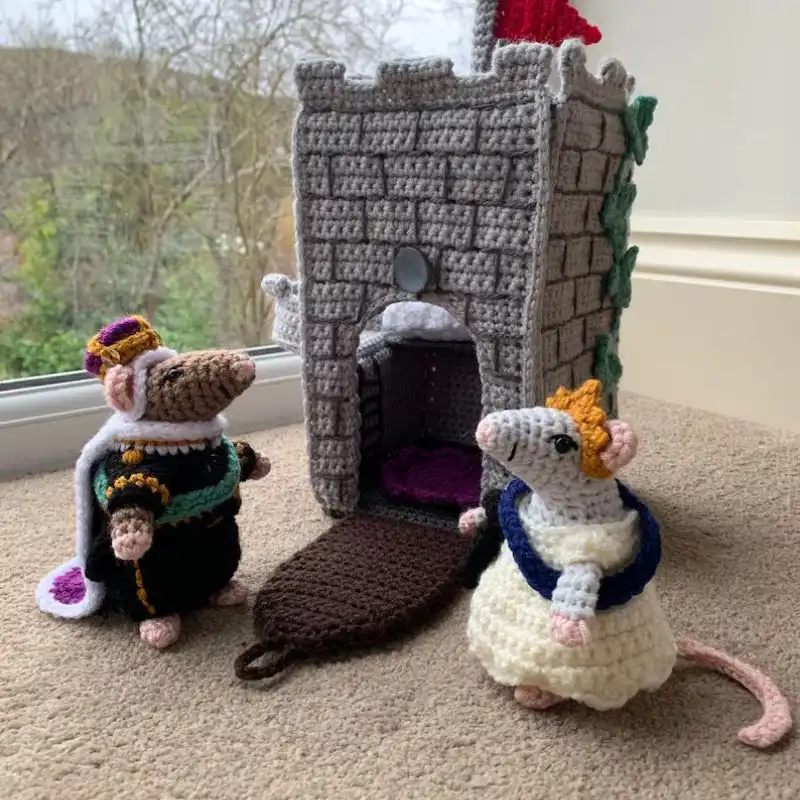
15. Royal Mice In A Castle Crochet Pattern
This pattern allows you to craft a miniature royal family of mice residing in their very own castle. Create tiny crowns, regal gowns, and majestic thrones for your amigurumi mice, and watch them come to life in a world of wonder and imagination. Each mouse character has a unique personality, and you can customize their attire to match their royal roles.
Suggested Yarn: Acrylic Worsted Weight
Difficulty Level: Intermediate
Yarn Weight: Worsted
Crochet Hook: G/4.0mm
16. Mouse Perez Patter Amigurumi Pattern
Craft this lovable little mouse with its endearing features and personality, perfect for cuddles or as a delightful gift. Mouse Perez’s pattern allows for customization in colors and outfits, giving you the creative freedom to make each mouse unique. Whether you’re a seasoned crocheter or just starting, this pattern will guide you through creating a charming amigurumi friend that will capture hearts and provide hours of joy.
Suggested Yarn: Cotton Worsted Weight
Difficulty Level: Intermediate
Yarn Weight: Worsted
Crochet Hook: H/5.0mm
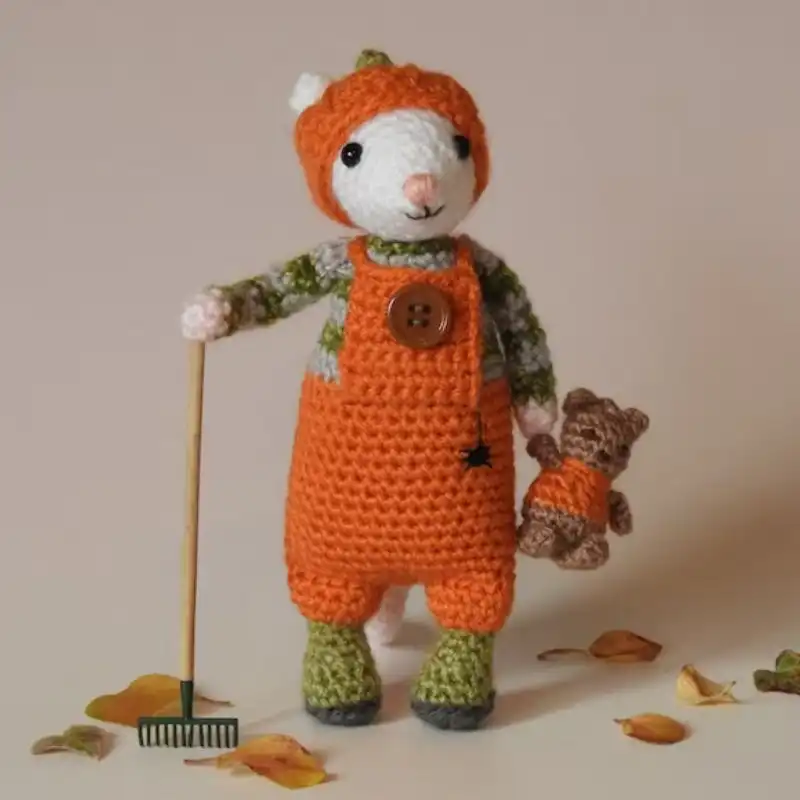
17. Knitted Pumpkin Mouse Pattern
Celebrate the harvest season with our Knitted Pumpkin Mouse Pattern. Craft a delightful mouse character adorned with a pumpkin-themed outfit perfect for adding a touch of fall to your décor. Even beginners can create this adorable mouse quickly. This pattern allows you to experiment with warm, earthy colors to capture the essence of autumn.
Suggested Yarn: Acrylic Worsted Weight
Difficulty Level: Intermediate
Yarn Weight: Worsted
Crochet Hook: US 4/3.5mm
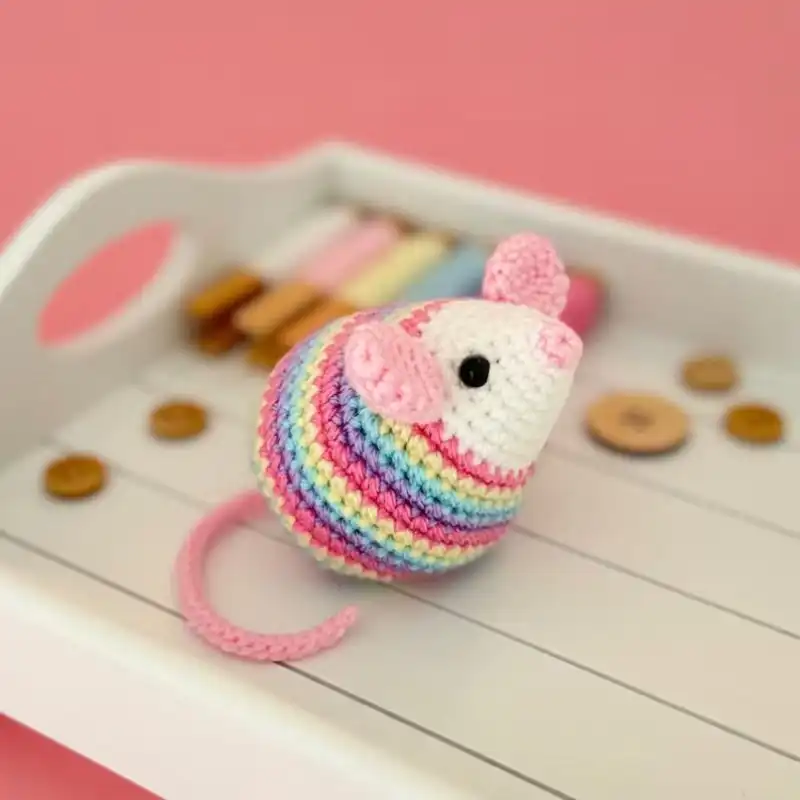
18. Rainbow Mouse Crochet Pattern
Add color and cheer to your creations with our Rainbow Mouse Crochet Pattern. This vibrant design lets you craft an amigurumi mouse adorned in a rainbow-striped outfit. Whether you want to brighten a child’s playtime or add color to your home decor, this pattern offers endless possibilities. You can easily create this cheerful mouse with detailed instructions and colorful yarn suggestions.

Suggested Yarn: Acrylic Yarn
Difficulty Level: Intermediate
Yarn Weight: DK/Light Worsted
Crochet Hook: E/3.5mm
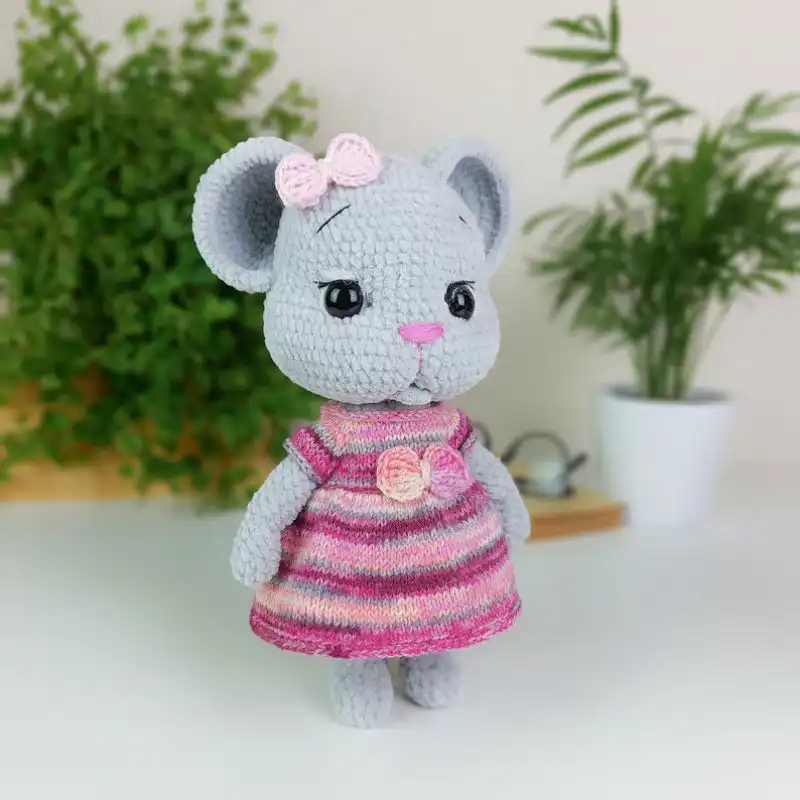
19. Crochet Lady Mouse Toy Pattern
This Crochet Lady Mouse Toy Pattern is designed for those who appreciate the finer details in their crochet creations. Craft a lady mouse with intricate clothing, complete with a fashionable dress, a dainty hat, and even delicate accessories. Even if you’re a beginner or an experienced crocheter, you’ll find this pattern easy to follow.
Suggested Yarn: Acrylic Sport Weight
Difficulty Level: Intermediate
Yarn Weight: Sport/Worsted
Crochet Hook: F/3.75mm
20. Edna The Yarn Shop Mouse
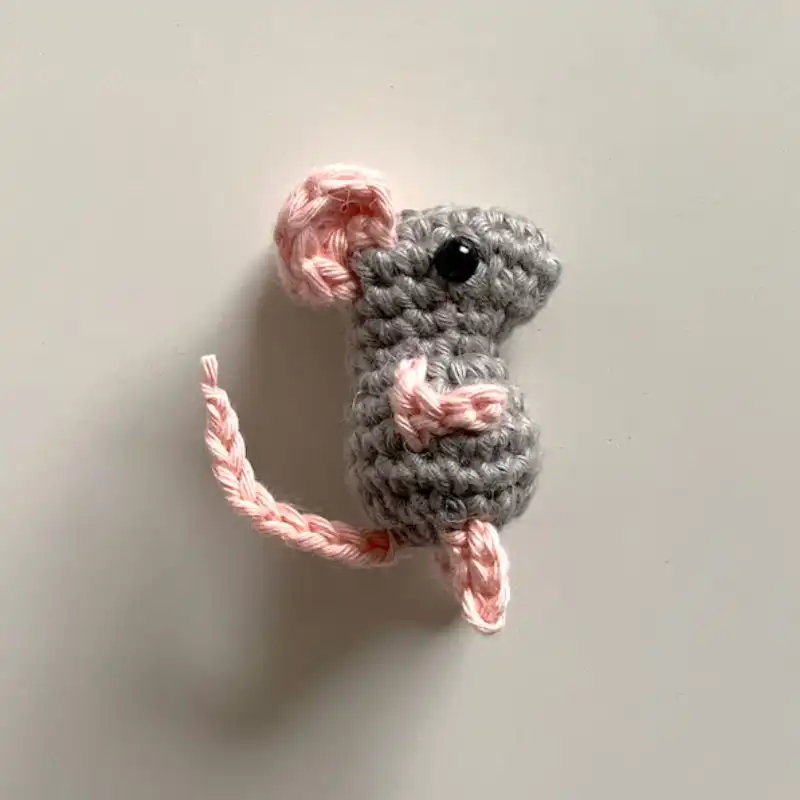
This adorable crochet pattern will steal your heart. Edna is a charming, pocket-sized amigurumi mouse, perfect for beginners and experienced crocheters. You’ll need just a few basic materials to bring Edna to life. Grab your favorite yarn in shades of gray and pink, along with a crochet hook, stuffing, and safety eyes.
Suggested Yarn: Cotton DK Weight
Difficulty Level: Intermediate
Yarn Weight: DK/Light Worsted
Crochet Hook: E/3.5
21. Mouse Crochet Pattern With A Dress
This delightful project combines amigurumi charm with a touch of fashion. This pattern allows you to create an adorable crochet mouse wearing a stylish dress. You’ll need yarn in your chosen mouse and dress colors, a crochet hook, stuffing for the mouse’s body, safety eyes, and a tapestry needle. Whether you’re new to crochet or an experienced hand, you’ll find this pattern a joy to work on.
Suggested Yarn: Acrylic Worsted Weight
Difficulty Level: Intermediate
Yarn Weight: Worsted
Crochet Hook: G/4.0mm
22. Chinese New Year Rat Crochet Pattern
This delightful project captures the spirit of the Year of the Rat in the Chinese zodiac. Perfect for crocheters of all levels, this pattern promises to be a rewarding and enjoyable experience. You’ll need yarn in colors that symbolize the Year of the Rat, such as gray and white. Additionally, you’ll require a crochet hook, stuffing for the rat’s body, safety eyes, and a tapestry needle.
Suggested Yarn: Acrylic Worsted Weight
Difficulty Level: Intermediate
Yarn Weight: Worsted
Crochet Hook: G/4.0mm
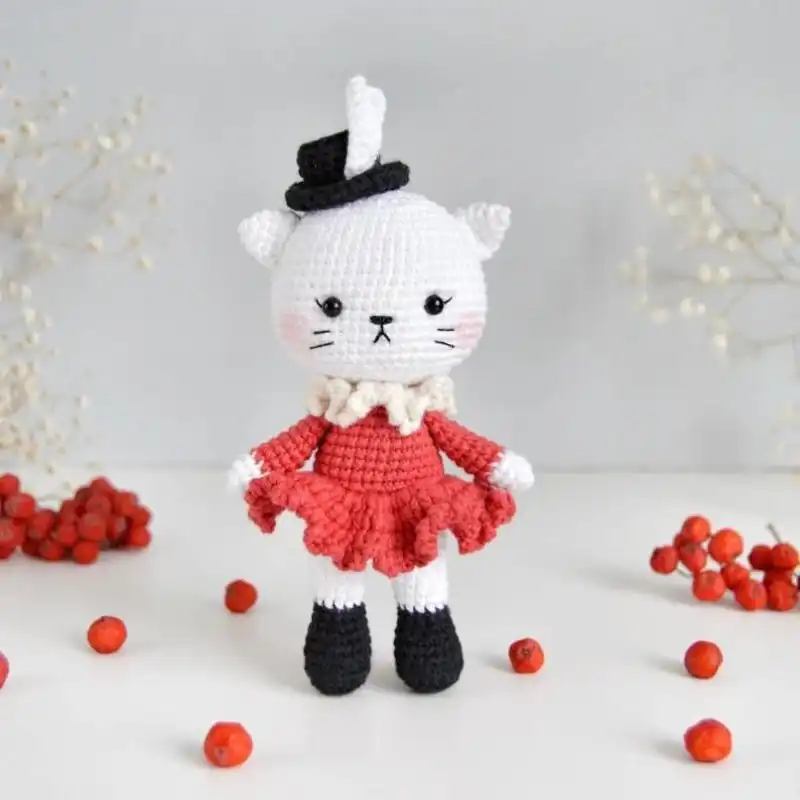
23. Circus Mouse Crochet Pattern
This delightful pattern allows you to create a charming circus-themed mouse with a tiny top hat, ruffled collar, and even a miniature hoop. Perfect for crochet enthusiasts of all levels. You’ll need yarn in various colors, a crochet hook, stuffing for the mouse’s body, safety eyes, and a tapestry needle.
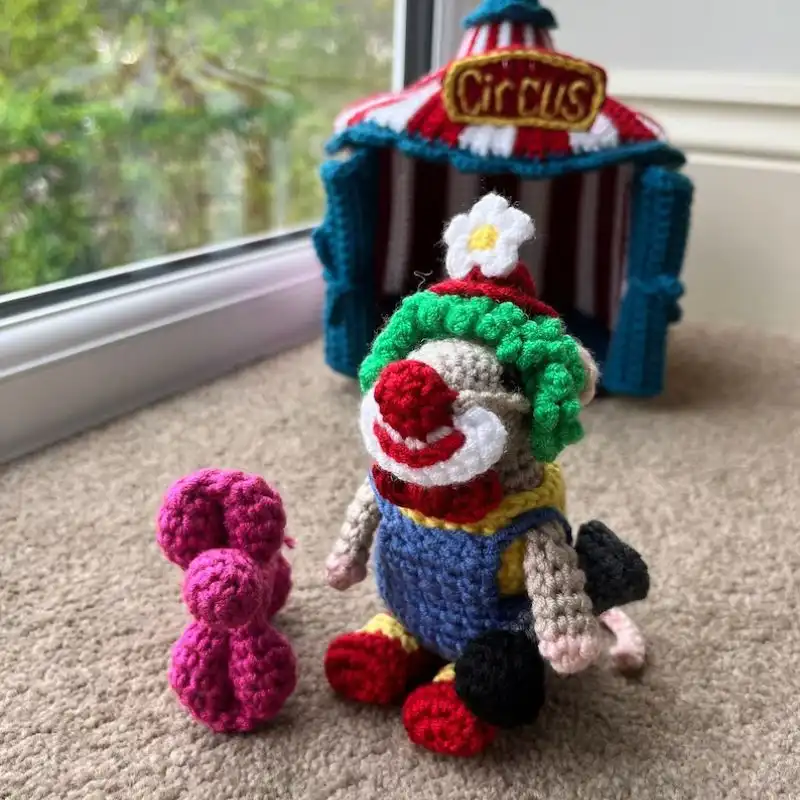
Suggested Yarn: Acrylic Sport Weight
Difficulty Level: Intermediate
Yarn Weight: Sport/Worsted
Crochet Hook: F/3.75mm
24. Mouse In A Leaf Sleeping Bag Crochet Pattern
This pattern lets you craft an adorable amigurumi mouse nestled snugly inside a miniature leaf-shaped sleeping bag. It’s a delightful project that combines creativity and charm, perfect for crocheters of all levels seeking a unique and heartwarming creation.
You’ll need yarn in various colors to create the mouse, the leaf sleeping bag, a crochet hook, stuffing for the mouse’s body, safety eyes, and a tapestry needle.
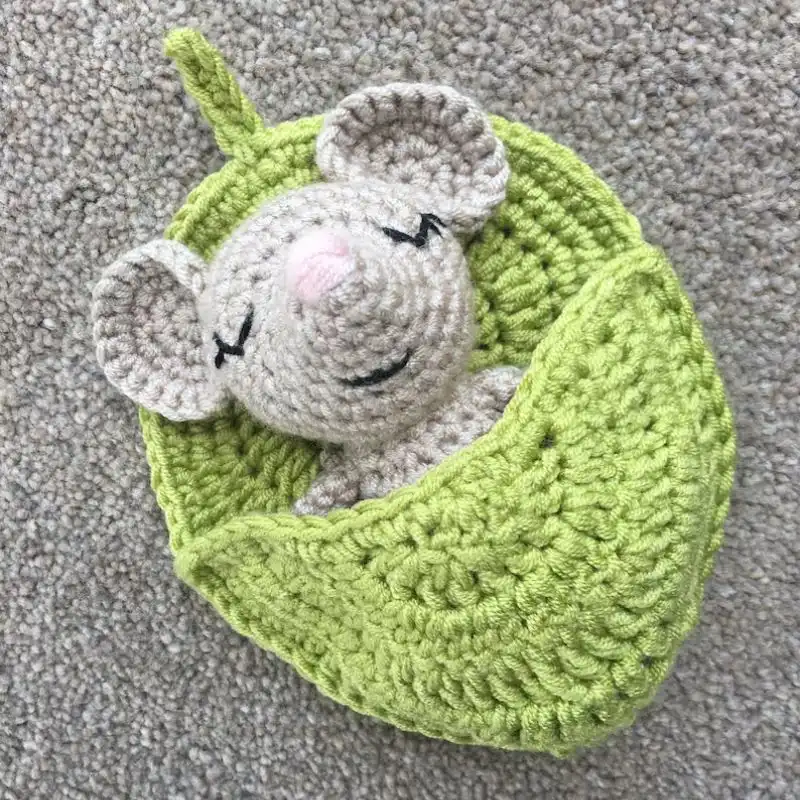
Suggested Yarn: Cotton DK Weight
Difficulty Level: Intermediate
Yarn Weight: DK/Light Worsted
Crochet Hook: E/3.5mm
25. Mouse Plushie Toys Amigurumi Crochet Pattern
This delightful pattern allows you to craft an adorable and huggable mouse. Whether you’re an experienced crocheter or a beginner, this project promises to bring cuteness and creativity to your crafting. This pattern needs soft and plush yarn for your preferred mouse colors, a crochet hook, stuffing for the plushies, safety eyes, and a tapestry needle.
Suggested Yarn: Acrylic Worsted Weight
Difficulty Level: Intermediate
Yarn Weight: Worsted/Aran/Bulky
Crochet Hook: G/4.0mm
26. Miguel The Mouse Crochet Pattern
This pattern is perfect for crocheters of all skill levels to create their very own Miguel, making for a charming addition to your collection or a delightful handmade gift. You’ll need yarn in Miguel’s chosen colors (typically shades of gray and white), a crochet hook, stuffing for his soft body, safety eyes, and a tapestry needle.
Suggested Yarn: Acrylic DK Weight
Difficulty Level: Intermediate
Yarn Weight: DK/Light Worsted
Crochet Hook: E/3.5mm
27. Sweet Mouse Crochet Pattern
This charming amigurumi pattern allows you to create an adorable mouse. This project promises to bring a touch of whimsy and sweetness to your crafting. You’ll need yarn in soft, pastel colors, a crochet hook, stuffing for the mouse’s cuddly body, safety eyes, and a tapestry needle to work on this pattern.
Suggested Yarn: Acrylic Sport Weight
Difficulty Level: Intermediate
Yarn Weight: Sport/Worsted
Crochet Hook: F/3.75mm
28. Birger And Freja Crochet Pattern
Birger and Freja are inseparable friends. This pattern is perfect for crocheters seeking a heartwarming project. It allows you to create two charming amigurumi characters, each with a unique personality. You’ll need yarn in various colors, a crochet hook, stuffing for their cuddly bodies, safety eyes, and a tapestry needle.
Suggested Yarn: Cotton Worsted Weight
Difficulty Level: Intermediate
Yarn Weight: Worsted/Aran/Bulky
Crochet Hook: H/5.0mm
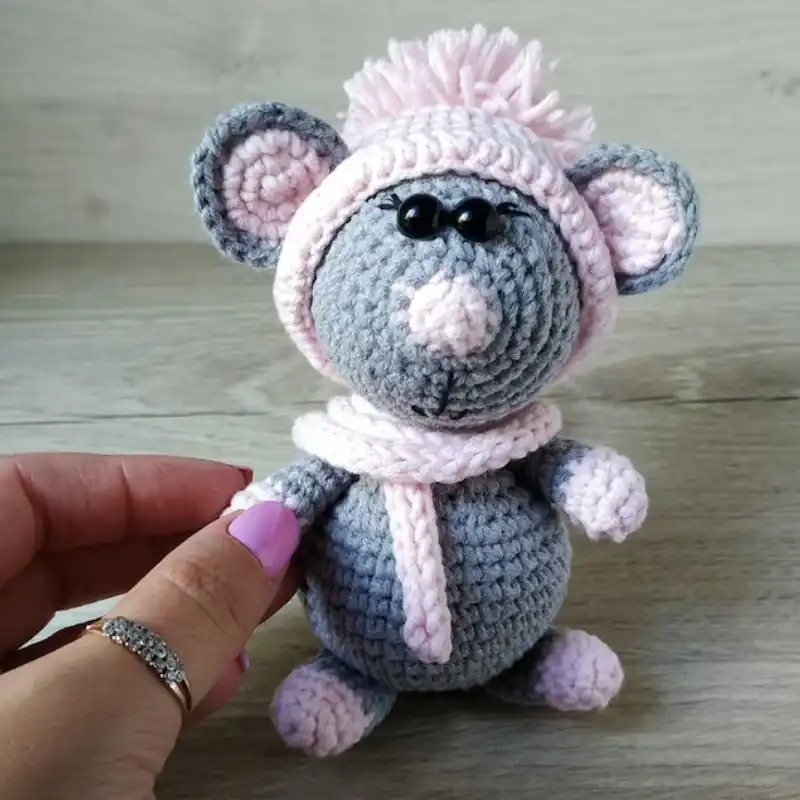
29. Bedtime Mouse Crochet Pattern
This pattern allows you to create an endearing mouse ready for a night of sweet dreams. It is perfect for crocheters of all skill levels. You’ll need yarn in soothing, bedtime-inspired colors, a crochet hook, stuffing for the mouse’s plush body, safety eyes, and a tapestry needle to make this pattern. Whether you place your bedtime mouse on your nightstand or share it with a little one, it will undoubtedly add comfort to any bedroom.
Suggested Yarn: Acrylic Worsted Weight
Difficulty Level: Intermediate
Yarn Weight: Worsted/Aran/Bulky
Crochet Hook: G/4.0mm
30. Pocket Mouse Crochet Pattern
This delightful pattern lets you craft an adorable, pint-sized, perfectly portable mouse. You’ll need yarn in your favorite colors, a crochet hook, stuffing for the mouse’s petite body, safety eyes, and a tapestry needle to make this pattern. Whether you keep your pocket mouse as a lucky charm or gift it to a friend, its cuteness and portability will brighten up any day.
Suggested Yarn: Cotton Sport Weight
Difficulty Level: Intermediate
Yarn Weight: Sport/Worsted
Crochet Hook: E/3.5mm
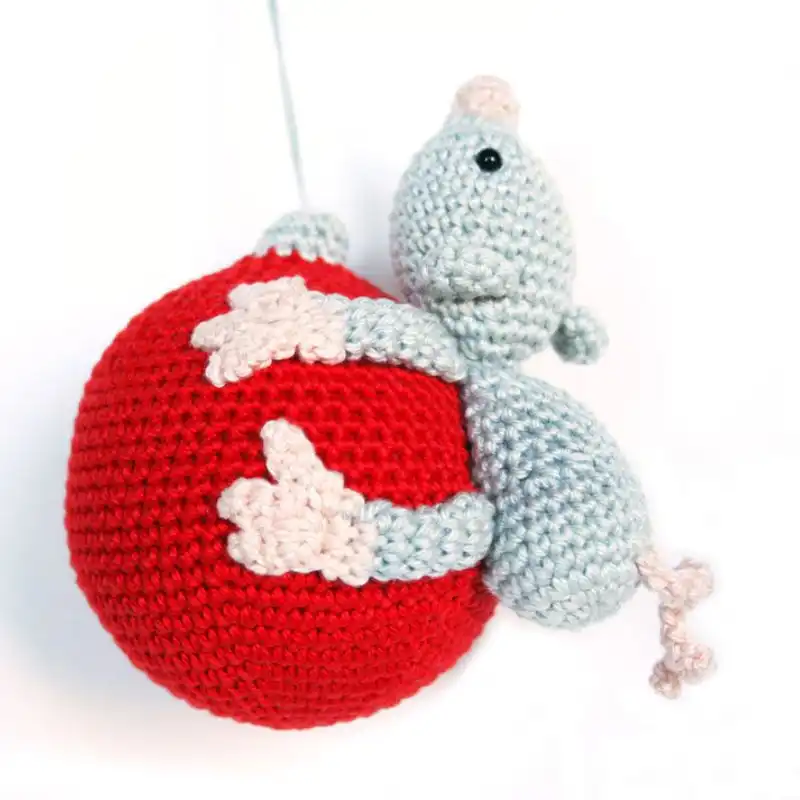
31. Christmas Ball With Mouse Crochet Pattern
This pattern combines a crochet mouse’s charm with a Christmas ornament’s festivity. Ideal for crocheters of all skill levels, this project promises to add a touch of handmade magic to your holiday decorations. You’ll need yarn in festive holiday colors, a crochet hook, stuffing for the mouse’s tiny body, safety eyes, a tapestry needle, and a Christmas ornament ball.
Suggested Yarn: Acrylic Worsted Weight
Difficulty Level: Intermediate
Yarn Weight: Worsted/Aran/Bulky
Crochet Hook: G/4.0mm
32. Bibbo Cute Mouse
Bibbo is a charming amigurumi mouse with a personality that’s impossible to resist. You’ll need yarn in Bibbo’s chosen colors (typically shades of gray and pink), a crochet hook, stuffing for the mouse’s soft body, safety eyes, and a tapestry needle to work on this pattern. Whether you keep Bibbo for yourself or gift it to someone special, its cuteness and charm will brighten up any day.

Suggested Yarn: Acrylic DK Weight
Difficulty Level: Intermediate
Yarn Weight: DK/Light Worsted
Crochet Hook: E/3.5mm
33. Yellow Mouse Crochet Pattern
This delightful amigurumi pattern lets you craft an adorable yellow mouse full of charm and personality. This pattern is perfect for crocheters of all skill levels. You’ll need yellow yarn for the mouse, a crochet hook, stuffing for the mouse’s soft body, safety eyes, and a tapestry needle.
Suggested Yarn: Cotton Sport Weight
Difficulty Level: Intermediate
Yarn Weight: Sport/Worsted
Crochet Hook: E/3.5mm
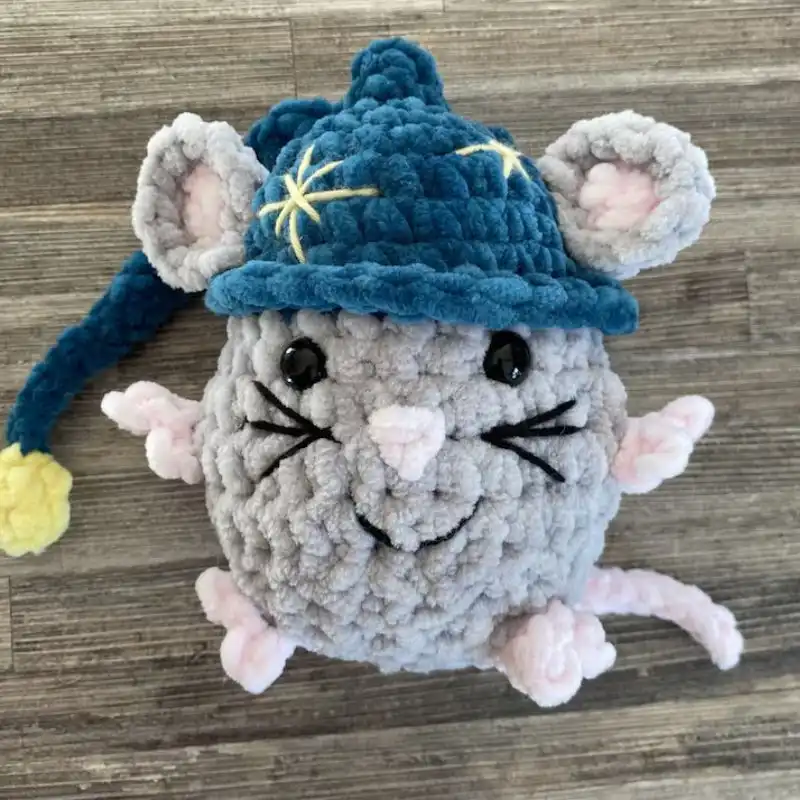
34. Mix & Match Hamster Crochet Pattern
This unique pattern allows you to design your custom hamster by mixing and matching various colors and patterns. Whether you prefer a classic look or a quirky design, this project is perfect for crocheters seeking endless possibilities and cute companions. To start this pattern, you’ll need an array of yarn colors and patterns to create your custom hamster, a crochet hook, stuffing for the hamster’s plush body, safety eyes, and a tapestry needle.
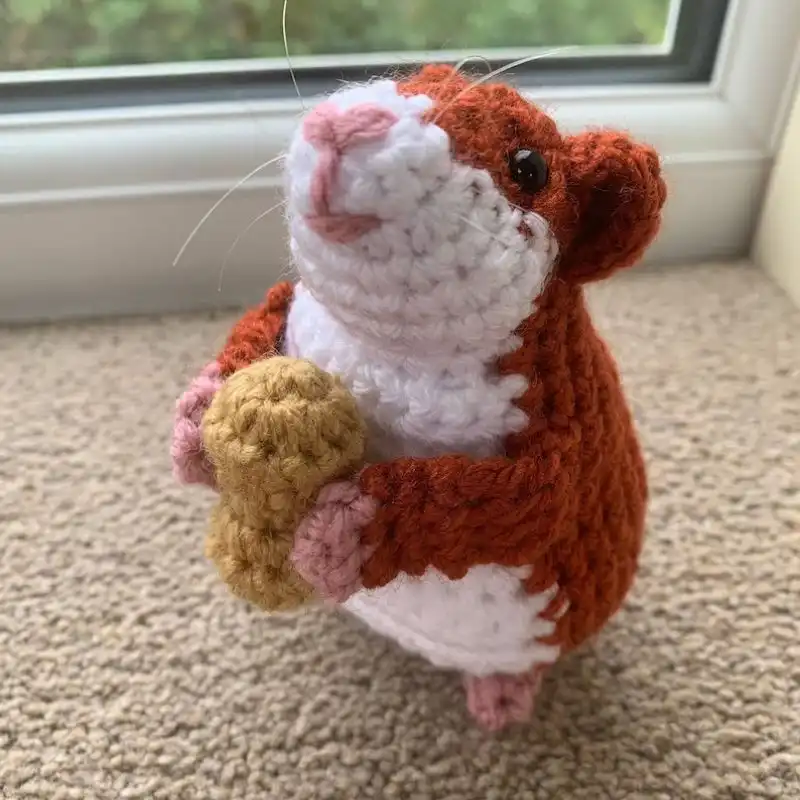
Suggested Yarn: Acrylic DK Weight
Difficulty Level: Intermediate
Yarn Weight: DK/Light Worsted
Crochet Hook: E/3.5mm
35. Wee Mouse Lovey Crochet Pattern
This pattern combines the cuddliness of a security blanket with the charm of an amigurumi mouse. This pattern offers a delightful way to create a comforting and lovable companion for babies and young children. To begin this crochet journey, gather your materials. You’ll need soft yarn in your chosen colors for the mouse and lovey blanket, a crochet hook, stuffing for the mouse, safety eyes, and a tapestry needle.
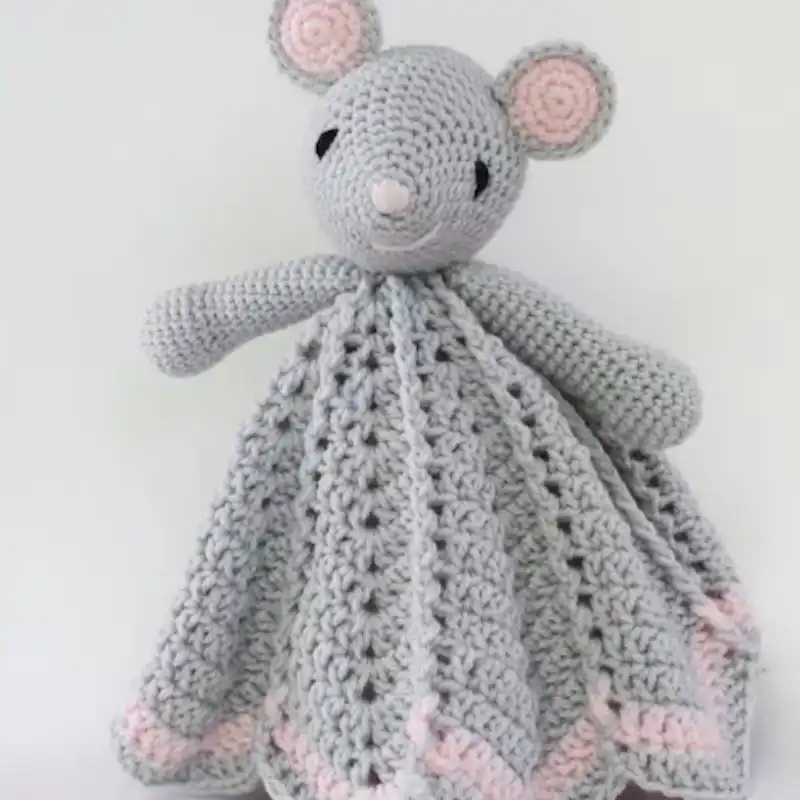
Suggested Yarn: Acrylic Worsted Weight
Difficulty Level: Intermediate
Yarn Weight: Worsted/Aran/Bulky
Crochet Hook: G/4.0mm
Do’s & Don’ts For A Safe Mouse Pattern
Creating a safe crochet mouse pattern, primarily if it’s intended for children or pets, requires careful consideration. Here are some dos and don’ts to ensure your crochet mouse is safe and enjoyable.
Do’s
- Use Safe Materials: Choose yarn and stuffing that are non-toxic and hypoallergenic. If the mouse is for a baby or pet, ensure the materials are washable and durable.
- Secure Attachments: Ensure that all mouse parts, like ears, tails, and eyes, are securely attached. Sew on these parts tightly to prevent them from being pulled off.
- Embroider Facial Features: For the safest option, especially for babies or pets, embroider the eyes, nose, and other facial features instead of using plastic or button eyes.
- Avoid Small Parts: Avoid adding small parts like beads or buttons that could be choking hazards.
- Check for Loose Yarn: Inspect the toy for any loose yarn or seams that could unravel.
- Use a Tight Stitch: A tight stitch ensures that the stuffing stays inside and the toy retains shape.
- Washable Yarn: Use yarn that can be washed and dried quickly, as toys are prone to getting dirty.
Don’ts
- Don’t Use Plastic Eyes for Babies: Safety eyes are often not recommended for toys intended for children under three years old due to choking hazards.
- Don’t Leave Long Strands of Yarn: After finishing your project, ensure all yarn ends are trimmed and woven securely to prevent unraveling.
- Don’t Use Heavy Yarns for Baby Toys: Heavy or bulky yarns can be too harsh for babies. It’s better to use soft, lightweight yarns.
- Don’t Use Toxic Materials: Avoid yarns treated with chemicals or materials that could cause allergic reactions.
- Don’t Make the Toy Too Small: Tiny toys can be a choking hazard. Ensure the toy is an appropriate size for its intended user.
- Don’t Forget Regular Maintenance: If the toy is a favorite, it will need regular maintenance to keep it safe and intact.
- Remember the Pattern Guidelines: If you’re using a pattern, consider the recommended materials and instructions, mainly if safety guidelines are provided.
Tips To Avoid Crochet Mistakes
Avoiding crochet mistakes is crucial for a smooth and enjoyable crafting experience. Here are some tips to help you minimize errors and improve the quality of your crochet work:
- Read the pattern Thoroughly: Before starting, read the entire crochet pattern. This will help you understand the project’s flow and any special techniques or stitches.
- Check Your Gauge: Always make a gauge swatch, especially for projects where size is essential. This ensures that your stitches match the pattern’s specified gauge and that the final product is the correct size.
- Use Stitch Markers: In projects worked in the round, like amigurumi, it’s easy to lose track of the beginning of a round. Use stitch markers to mark the start of each round.
- Keep an Even Tension: Consistent tension is vital for even stitches. Practice maintaining the same yarn tension throughout your project.
- Count Your Stitches: Regularly counting stitches can prevent many mistakes. It’s imperative in patterns with increases or decreases.
- Take Notes: Write down if you modify or find a helpful rhythm. This can be a lifesaver if you have to put your project down and come back to it later.
- Practice New Stitches First: If your pattern includes unfamiliar stitches, practice them with scrap yarn before starting the project.
- Avoid Rushing: Crochet requires patience. Rushing through a project can lead to mistakes, so take your time.
- Use the Right Hook and Yarn: Use the appropriate hook size for your yarn. Using the wrong size can result in stitches that are too tight or loose.
- Regularly Review Your Work: Periodically check your work against the pattern. Catching mistakes early can save a lot of time and frustration.
- Don’t Ignore Mistakes: If you spot a mistake, it’s best to fix it immediately. It may be tempting to leave a minor error, but it can throw off the rest of your project.
- Learn to Fix Mistakes: Understanding how to correct common mistakes like missed stitches or extra stitches can be invaluable.
- Stay Organized: Keep your work area and materials organized. This helps avoid losing hooks, misplacing patterns, or using the wrong yarn.
- Take Breaks: If you’re feeling tired or frustrated, step away for a bit. Returning with fresh eyes can help you spot and avoid mistakes.
- Seek Help When Needed: Don’t hesitate to ask for help from more experienced crocheters or look up tutorials online.
How To Block The Crochet Mouse Pattern?
Blocking your crochet mouse pattern can significantly improve its appearance, giving it a more professional and finished look. Blocking helps to even out stitches, shape the project, and can make assembling pieces easier. Here’s how to block your crochet mouse:
Materials Needed
- Blocking board or any flat, pin-able surface (like a foam mat or a thick towel)
- Rust-proof pins
- Spray bottle with water or steam iron (for steam blocking)
- Measuring tape (optional for precision)
Steps for Blocking
Preparation
- Complete all crocheting and weave in all ends before blocking.
- If your mouse is made of multiple pieces, block the pieces before assembling.
Washing (Optional): Some crocheters prefer gently washing their project before blocking, especially if it’s made of natural fibers. This can help relax the fibers. Use a mild detergent and cool water, then gently squeeze out excess water (do not wring).
Lay Out the Pieces: Pin each piece of your mouse to the blocking board. Shape each piece as desired, using the pattern’s measurements as a guide. Be careful not to overstretch the yarn.
Wet or Steam Block
- Wet Blocking: Use a spray bottle to lightly mist each piece with water until damp but not soaking. Let it air dry completely.
- Steam Blocking: Hold a steam iron a few inches above the work and gently steam. Do not let the iron touch the crochet piece, especially if using acrylic yarn, as it can melt or deform.
Drying: Allow the pieces to dry completely. This could take several hours to a day, depending on the humidity and yarn type.
Remove Pins and Assemble
- Once dry, carefully remove the pins. Your pieces should now hold their blocked shape.
- Proceed with assembling your mouse as per the pattern instructions.
Tips for Blocking
- Know Your Yarn: Some yarns, like acrylic, respond better to steam blocking, while natural fibers like wool and cotton can be wet blocked.
- Avoid Overstretching: Be gentle when pinning to maintain the integrity of the stitches and avoid distorting the fabric.
- Temperature Matters: If using steam, be cautious with the temperature, especially with synthetic fibers.
- Patience is Key: Allow the pieces to dry completely for the best results.
- Repeat if Necessary: You may need to re-block your project after washing it in the future.
Suggestions To Add Style & Personal Touch
Adding style and personal touches to your crochet mouse can transform it from a simple project into a unique and charming creation. Here are some suggestions to infuse your crochet mouse with personality and flair:
- Choose Unique Yarn Colors: Experiment with different colors or variegated yarns. This can give your mouse a distinctive look.
- Add Textural Stitches: Incorporate stitches like the bobble, popcorn, or loop stitch for texture. These can create a furry effect or add details like cheeks or paws.
- Embroidery Details: Use embroidery to add facial features, like whiskers, eyebrows, or a cute smile. This adds character and expression.
- Accessorize: Create tiny accessories like a scarf, hat, bow, or miniature sweater. These can be quickly crocheted and add a lot of personality.
- Play with the Ears and Tail: Alter the shape or size of the ears and tail. For instance, long, floppy ears or a curly tail can give a completely different character.
- Use Safety Eyes or Buttons: While safety eyes are standard, you can also use buttons or beads for a different look (note: avoid these for toys intended for young children).
- Change the Size: You can adjust the size of your mouse by using thicker or thinner yarn and a corresponding hook size. This can make your mouse more unique.
- Felted Features: Try felting parts of your mouse, like the nose or ears, for a different texture. This works best with wool yarn.
- Create a Story: Design your mouse with a theme or story. For example, a mouse with a little backpack could be an adventurer, or a mouse in a tutu could be a ballerina.
- Use Different Materials: Experiment with different materials for the whiskers, like fishing lines or thin wire, for a more realistic effect.
- Add a Scent: For a sensory touch, add lavender or other herbs inside the stuffing to give your mouse a pleasant scent.
- Vary the Texture of Yarn: Mixing yarn types, like combining a standard yarn with a fluffy or sparkly yarn, can add interesting texture contrasts.
- Personalize with Initials: Stitch the recipient’s initials onto the mouse, making it a personalized gift.
- Interactive Elements: Include squeakers, crinkly material, or rattles inside the mouse, mainly if it’s intended as a pet toy or for a baby.
- Contrasting Underbelly: Crochet the belly of the mouse in a contrasting color or pattern for an adorable effect.
RELATED: 54 Lovely Crochet Afghan Patterns For Cozy Creations
Wash & Care Instructions
Proper wash and care instructions are essential to maintain the quality and longevity of your crocheted mouse. Here are guidelines to ensure your crochet creation stays in great condition:
Washing Instructions
- Check Yarn Label: Before washing, always refer to the yarn label for specific washing instructions. Different yarns have different care requirements.
- Hand Wash for Safety: Handwashing crocheted items, especially delicate ones like amigurumi toys, is generally best. Use lukewarm water and a mild detergent.
- Gentle Agitation: Gently swish the item in the water to clean it. Avoid rubbing or twisting, which can stretch or misshape the item.
- Rinse Thoroughly: Rinse the mouse in clean, cool water until all soap is removed.
- Squeeze Out Water: Gently squeeze out the excess water. Avoid wringing, as this can distort the shape.
- Dry Flat: Lay the item flat on a clean towel in its natural shape and let it air dry. Avoid hanging, as this can stretch the fabric.
Special Care Tips
- Avoid Direct Sunlight: When drying, keep the item away from direct sunlight to prevent fading.
- Spot Clean for Small Stains: Spot cleaning with a damp cloth and mild detergent can be effective for minor stains.
- Fluff and Reshape: After washing and drying, you may need to fluff and reshape the item, especially if it has stuffing.
- Beware of Bleach and Harsh Chemicals: Avoid using bleach or harsh chemicals, as they can damage the yarn.
- Use a Lingerie Bag for Machine washing: If the yarn is machine washable and the item is sturdy, you can wash it in a machine inside a lingerie bag on a gentle cycle. However, handwashing is safer for most crocheted items.
- Professional Cleaning for Valuable Items: Consider professional cleaning if the item is particularly valuable or delicate.
Storage
- Store in a Cool, Dry Place: Store the crocheted mouse in a cool, dry place away from direct sunlight and moisture to prevent damage or mold.
- Avoid Compression: Store in a way that doesn’t compress the item excessively to maintain its shape.
- Moth Prevention: If you use wool or other animal fibers, consider storing them with natural moth repellents, such as cedar blocks or lavender sachets.
Regular Maintenance
- Regular Dusting: To keep the item clean, gently dust it or use a vacuum with a brush attachment.
- Check for Damage: Periodically check for any loose threads or damage, mainly if the item is used as a toy.

Frequently Asked Questions
Can I Use Any Type Of Yarn For A Crochet Mouse?
While you can use various yarn types, medium-weight yarns like acrylic or cotton are ideal for durability and ease of handling. Thicker yarns create a giant toy, while thinner yarns are suitable for smaller, more detailed mice.
How Long Does It Take To Crochet A Mouse?
The time can vary widely depending on the complexity of the pattern and your skill level. A simple mouse might take a few hours, while a more detailed one could take several days.
Is Crocheting A Mouse Difficult For Beginners?
A primary mouse pattern can be beginner-friendly, using simple stitches and minimal shaping. Choose patterns labeled for beginners and take your time to learn new techniques.
How Do I Make My Crochet Mouse Safe For Young Children?
Use safe, non-toxic materials, avoid small parts like buttons, and securely sew all parts. For babies, embroider facial features instead of using plastic eyes.
Can I Machine Wash A Crochet Mouse?
Check the yarn label for washing instructions. Use a gentle cycle and a lingerie bag for safety if it’s machine washable. However, hand washing is often safer for maintaining shape and integrity.
How Can I Add A Personal Touch To My Crochet Mouse?
Personalize your mouse with unique yarn colors, textured stitches, embroidered details, or accessories like a tiny scarf. Altering the size of the ears or tail can even add character.
Do I Need Special Tools To Crochet A Mouse?
Essential tools include:
- The appropriate size crochet hook.
- Yarn.
- A yarn needle for sewing parts together.
- Stuffing material.
- Possibly safety eyes.
A stitch marker and scissors are also helpful.

- 25 Delightful Crochet Jellyfish Patterns For Sea Lovers - April 17, 2024
- 75 Free Lovely Crochet Sweater Patterns (With Pictures) - February 9, 2024
- 50 Free Crochet Blanket Patterns For A Cozy Home - January 22, 2024
