

As summer turns to autumn, and the nights begin to get colder, there is one item of clothing that you can always rely on to keep you warm. That is, of course, the neck warmer. When the winter months come and the snow begins to fall, a good neck warmer will ensure you stay toasty. No matter how cold it gets.

Of course, you can buy a neck warmer, but the best neck warmers are homemade. There is just something special about neck warmers that are made specially for you. But knowing where to start is often difficult. That is why it is so great that there is a seemingly endless number of neck warmer patterns available to you.
In this guide, we’ve compiled a list of the 25 best neck warmer patterns currently available on Etsy. So, if you are on the search for the perfect neck warmer for you, keep on reading.
Is It Worth To Crochet A Neck Warmer?
Creating a neck warmer, whether through crochet or knitting, is undoubtedly rewarding, especially for those who value handmade accessories. It provides a creative outlet and a sense of accomplishment and results in a functional and stylish item ideal for colder weather.
The process offers ample opportunities for customization in terms of color, texture, and design, allowing for a unique expression of personal style. Moreover, crocheting and knitting are relaxing and therapeutic activities that can reduce stress.
Whether for personal use or as a thoughtful gift, a crocheted or knitted neck warmer is a charming and practical project that beautifully showcases the joys of crafting.
Various Stitches To Crochet Or Knit A Neckwarmer
Creating a neck warmer through crochet or knitting can be a delightful project, especially for those starting or looking to practice basic stitches. Here are some foundational stitches commonly used in both crafts, each with a brief explanation:
For Crochet
- Chain Stitch (ch): The foundation of almost all crochet projects, this stitch involves creating a series of loops on your hook. It’s often used to begin projects and to create the base row upon which other stitches are built.
- Single crochet (sc): This is one of the simplest and most frequently used stitches. It creates a tight, dense fabric, making it great for warm neck warmers. You insert the hook into a stitch, yarn over, pull through, yarn over again, and pull through both loops on the hook.
- Double Crochet (dc): A taller stitch than the single crochet, the double crochet is created by yarning over before inserting the hook into the stitch, yarning over again to pull through, yarning over once more and pulling through two loops, then yarning over again and pulling through the remaining two loops. It works up faster and creates a more open, airy fabric.
- Half Double crochet (hdc): This stitch is halfway between a single crochet and a double crochet in height. You yarn over, insert the hook, yarn over, and pull through, then yarn over and pull through all three loops on the hook. It’s great for adding a bit of texture.
- Slip stitch (sl st): Often used for joining rounds or creating small surface details, the slip stitch is made by inserting the hook into a stitch, yarning over, and pulling the yarn through both the stitch and the loop on the hook in one motion.
- Treble Crochet (tr): A longer stitch that creates a more open weave. You yarn over twice before inserting the hook, then yarn over and pull through, yarn over again, and pull through two loops twice.
For Knitting
- Knit Stitch (k): The most fundamental knitting stitch. Insert the needle into the stitch, loop the yarn around, and pull it through to create a new stitch.
- Purl Stitch (p): The knit stitch’s reverse creates a bumpy texture on the fabric. Insert the needle into the stitch from back to front, loop the yarn around, and pull it through to create a new stitch.
- Rib Stitch: Alternating knit and purl stitches in a row create a textured pattern. Common variations include 1×1 rib (k1, p1) or 2×2 rib (k2, p2).
- Seed Stitch: Alternating between knit and purl stitches within the same row and between rows, creating a bumpy texture.
- Garter Stitch: Knitting every row, creating a fabric with a consistent texture on both sides.
- Cable Stitch: Involves crossing stitches over each other to create intricate cable patterns, adding a decorative touch to the neck warmer.
The Ideal Size Of A Neck Warmer
The ideal size of a neck warmer can vary depending on personal preference, style, and purpose. However, there are some general guidelines to consider when determining the size. Here’s a breakdown of various sizes and their considerations:
Snug Fit
Length: Typically 20-22 inches.
Width: Around 6-8 inches.
This size is great for a neck warmer that sits close to the neck, offering maximum warmth. It’s often preferred for outdoor activities in colder climates, ensuring minimal exposure to the elements.
Loose Fit
Length: About 24-26 inches or more.
Width: 8-10 inches or wider.
A looser fit is ideal for those who want a neck warmer that’s easy to put on and take off or layering over other clothing. It’s more about style and comfort than snug warmth.
Infinity Scarf Style
Length: Typically 40-60 inches when laid flat (before joining ends).
Width: Varies widely, but usually around 8-12 inches.
This style is looped around the neck once or twice, offering versatility in styling. It’s both a fashion accessory and a functional piece.
Child Sizes
Length: Approximately 15-18 inches for younger children, slightly more for older kids.
Width: Around 5-6 inches.
For children, it’s vital to ensure the neck warmer is not too tight or loose to prevent discomfort and safety issues.
Custom Sizes:
Custom sizing is based on the specific needs and preferences of the individual. For instance, someone with a larger neck may prefer a longer, broader neck warmer for comfort.
When determining the ideal size, it’s essential to consider the yarn’s stretchiness and the stitch pattern used, as these factors can significantly affect the finished size and fit of the neck warmer. Personal preference plays a huge role; some people prefer a tighter, more insulated feel, while others might opt for a looser, more decorative look.
Essential Tools And Materials
Creating a neck warmer is a fun and rewarding project; having the right tools and materials is essential for a successful outcome. Here’s a list of what you’ll need. Embarking on a neck warmer project through crochet or knitting is a delightful endeavor. Ensuring the right tools and materials is crucial for a successful outcome. Here’s a comprehensive list to guide you:
- Yarn: The type and weight of yarn significantly impact the texture, warmth, and overall appearance of your neck. Choose materials like wool, alpaca, or acrylic blends based on your preferences. Pay attention to the yarn weight (worsted, bulky, super bulky) for the desired effect.
- Crochet Hook or Knitting Needles: Select the size based on the yarn weight. Crocheters commonly use hooks from 4mm to 6mm, while knitters should choose needles that match their yarn weight.
- Scissors: A sharp pair of scissors is essential for cutting yarn when finishing your project or changing colors.
- Yarn Needle: A yarn or tapestry needle is necessary for weaving in ends once your project is complete. Ensure the needle has a large eye for your yarn to pass through easily.
- Measuring Tape: Use a measuring tape to ensure your neck warmer is the correct size. It is vital if you are following a specific pattern or aiming for a particular size.
- Stitch Markers: Useful for crochet and knitting, stitch markers are handy when dealing with complex stitch patterns or marking the beginning of a round.
- Pattern or Instructions: Whether it’s a printed pattern, a digital version, or instructions from a book or online resource, having your pattern easily accessible is vital to a smooth crafting experience.
Glossary Of Crochet Stitches And Techniques
Here’s a standard glossary of crochet and knitting stitches and techniques that are frequently used in various projects, including neck warmers:
Common Crochet Stitches
- Knit Stitch (k): The fundamental knitting stitch, creating a neat and flat “V” pattern on the fabric.
- Purl Stitch (p): The knit stitch’s reverse creates a bumpy texture on the fabric.
- Rib Stitch: Alternating knit and purl stitches in a row create a textured pattern. Common variations include 1×1 rib (k1, p1) or 2×2 rib (k2, p2).
- Seed Stitch: Alternating between knit and purl stitches within the same row and between rows, creating a bumpy texture.
- Garter Stitch: Knitting every row, creating a fabric with a consistent texture on both sides.
- Cable Stitch: Involves crossing stitches over each other to create intricate cable patterns, adding a decorative touch to the neck warmer.
- Yarn Over (yo): Wrapping the yarn over the needle, creating an extra stitch and an eyelet.
- Increase: Adding stitches in a row or round to widen the work, often done with yarn overs or knitting into the front and back of a stitch.
- Decrease: Combining stitches in a row or round to narrow the work, achieved through methods like knitting two stitches together (k2tog) or slip, knit, pass (sl, k, psso).
- Slip stitch (sl st): Used in knitting to move a stitch from one needle to the other without knitting it.
- Binding Off (BO): The final step in finishing a knitted piece, securing the stitches and creating a neat edge.
- Gauge: The number of stitches and rows per inch, essential for achieving the correct size in a knitted project.
- Casting On: The initial process of creating stitches on the needle before starting a knitting project.
- Stockinette Stitch: Alternating between knit and purl rows creates a smooth and flat fabric.
- Double Pointed Needles (DPN): Used for knitting in the round, especially for smaller projects like socks or sleeves.
- Circular Needles: Two knitting needles connected by a flexible cord, ideal for larger projects worked in the round.
- Colorwork: Incorporating multiple colors of yarn into a project to create patterns or designs.
- Fair Isle: A colorwork technique involving two or more colors per row, often associated with traditional Scottish patterns.
- Intarsia: Another colorwork technique where blocks of color are worked separately and joined together, creating intricate designs.
- Lace Knitting: Incorporating yarn over and decreases to create open and delicate patterns in the fabric.
- Blocking: The process of wetting or steaming a finished knitted piece and pinning it into shape until it dries.
- Join As You Go (JAYGO): A technique used to join knitted pieces while working the last row of each piece, eliminating the need for sewing afterward.
Understanding Crochet And Knitting Stitches & Techniques
Embarking on the crochet and knitting journey, I find understanding stitches and techniques akin to a dance of hook and yarn. Following written patterns, I hone my skills with basic stitches, progressing to intricate ones like trebles or cable patterns.
Consistent tension is vital, ensuring a seamless, polished finish. Tutorial videos complement written instructions, enriching my learning experience. Engaging in craft communities provides valuable support and inspiration.
Patience and regular practice are my steadfast allies in mastering these art forms. Each project is a canvas for refining skills and embracing the evolving tapestry of crochet and knitting, a source of joy and creative fulfillment.
Which Yarn Is Best For Crochet And Knit Neckwarmers?
As an enthusiast of crochet and knitting, I’ve found that selecting the ideal yarn for neck warmers depends on desired warmth, texture, and ease of care. Here’s my take on various yarns suitable for both crafts:
- Wool: Whether crocheting or knitting, wool is my go-to for optimal warmth. Its insulating properties create a soft and cozy neck warmer. Merino wool, incredibly gentle against the skin, works wonderfully for both crafts.
- Acrylic is a fantastic budget-friendly option, Perfect for both crocheting and knitting. It’s easy to care for, durable, and comes in a wide range of colors, making it suitable for those allergic to animal fibers.
- Cotton: While not as warm as wool, cotton is versatile for both crafts. It’s soft, breathable, and ideal for creating lighter neck warmers for more excellent spring or autumn days.
- Alpaca: Luxuriously soft and warmer than wool, alpaca yarn creates an incredibly cozy and plush neck warmer, perfect for crochet and knitting projects. Keep in mind that it can be a bit pricier.
- Cashmere: Cashmere offers a wonderfully soft and warm option for a touch of luxury in both crochet and knitting. However, it comes at a higher cost and requires careful maintenance.
- Bamboo: A soft, eco-friendly option with a lovely drape, bamboo yarn is suitable for crocheting and knitting. It’s hypoallergenic and cool, making it perfect for transitional weather.
- Blends: Yarn blends, whether combining wool with acrylic or cotton with bamboo, offer versatility for both crochet and knitting. They provide the warmth of wool coupled with the durability and ease of care found in acrylic, catering to the preferences of both crafting styles.
How Much Yarn Do I Need To Crochet Or Knit A Neck Warmer?
Determining the yarn needed for a crochet or knit neck warmer hinges on factors like yarn weight, stitch pattern, and size preferences. Typically, I estimate using 100 to 200 yards of yarn for an adult-sized neck warmer.
Thicker yarns, such as bulky or super bulky, require about 100 to 150 yards, while lighter worsted or DK weight may necessitate 150 to 200 yards.
The stitch pattern also plays a role; denser stitches consume more yarn than lacier ones. If opting for a larger or more intricate design, or incorporating fringes, I account for extra yarn.
I recommend purchasing slightly more than estimated to accommodate potential variations in dye lots and prevent running out mid-project.
Is It Beginner Friendly?
Crafting a neck warmer through both crochet and knitting is beginner-friendly! While learning these crafts, I found neck warmers an ideal starting project.
They typically involve basic stitches such as single or double crochet for crochet, or knit stitches for knitting—these fundamental stitches are among the first learned by beginners.
The project size is manageable, not too large or overwhelming, providing a perfect canvas for practicing consistent stitch tension and gaining confidence.
Moreover, neck warmers often don’t require complex shaping or sizing, simplifying the process for both crafts. Creating a neck warmer can be a rewarding and encouraging experience for anyone just starting in crochet or knitting, offering a taste of the joy of crafting something functional and stylish.
How To Crochet A Beginner-Friendly Neck Warmer?
Skill Level: Beginner
Materials
- Yarn: Medium-weight (worsted) yarn, approximately 150-200 yards.
- Crochet Hook: Size H/8 (5mm).
- Scissors.
- Yarn needle.
- Stitch markers (optional).
- Gauge: Not crucial for this project, but around 13-15 single crochets = 4 inches is a good guideline.
Finished Size: Approximately 20-22 inches in circumference and 8 inches in width.
Instructions
Start with a Foundation Chain
- Make a slip knot.
- Chain 60 (or a number that reaches comfortably around your neck, checking that the chain isn’t twisted).
Joining the Chain: Slip stitch to the first chain to form a circle. Ensure the chain isn’t twisted.
Row 1 (Single Crochet Row)
- Chain 1 (counts as your first single crochet).
- Single crochet in each chain around.
- Join with a slip stitch to the top of the first chain 1.
Row 2 and Beyond
- Chain 1 at the beginning of each row.
- Continue single crocheting in each stitch around.
- Slip stitch to the top of the first chain 1 at the end of each row.
- Repeat this row to build up the height of your neck warmer. For a standard size, 20-25 rows are sufficient.
Finishing the Neck Warmer
- Once you’ve reached the desired height, cut the yarn, leaving a small tail.
- Pull this tail through the last loop on your hook to secure it.
- Weave in any loose ends with your yarn needle.
Optional Customizations
- Add decorative borders or edging in a contrasting color.
- Embellish with buttons or appliqués.
25 Neck Warmer Patterns To Save You From Cold
1. Diagonal Woven Cable Neck Warmer Knitting Pattern
Elevate your winter wardrobe with this sophisticated knitting pattern. The diagonal woven cables add a touch of elegance to your neck warmer, making it both functional and stylish.
Suggested Yarn: Worsted Weight Yarn
Difficulty Level: Intermediate
Yarn Weight: Worsted
Crochet Hook Size: 5mm
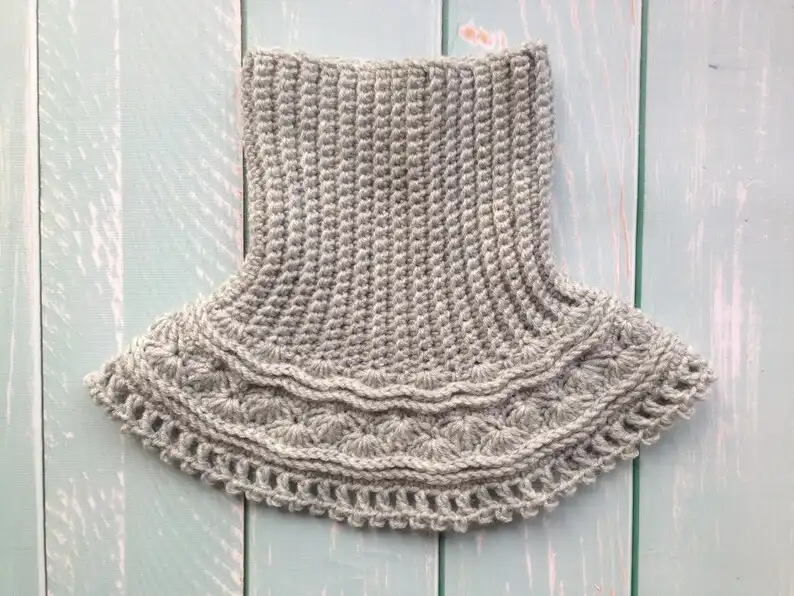
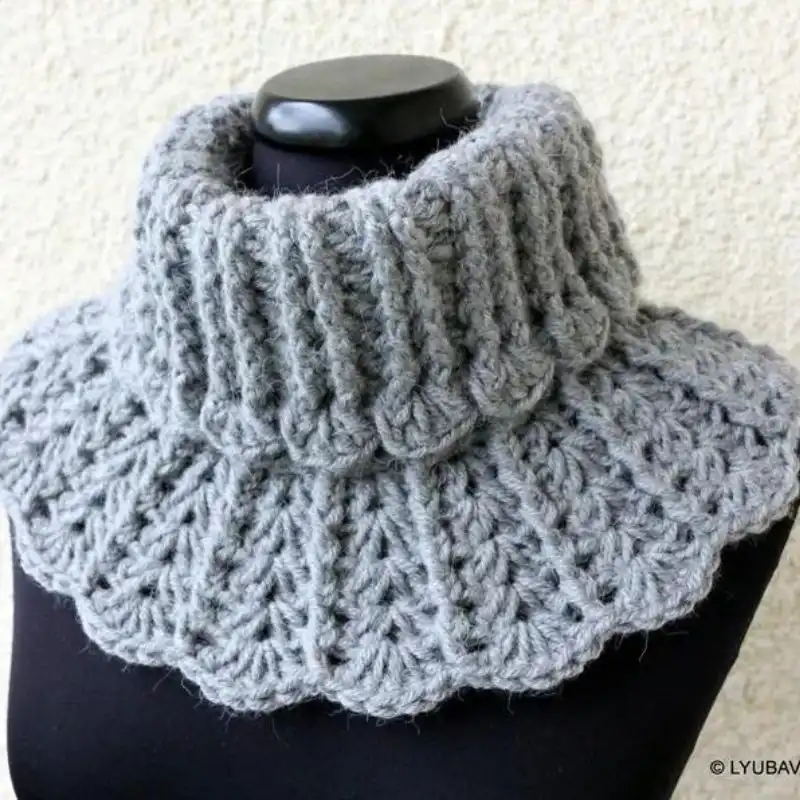
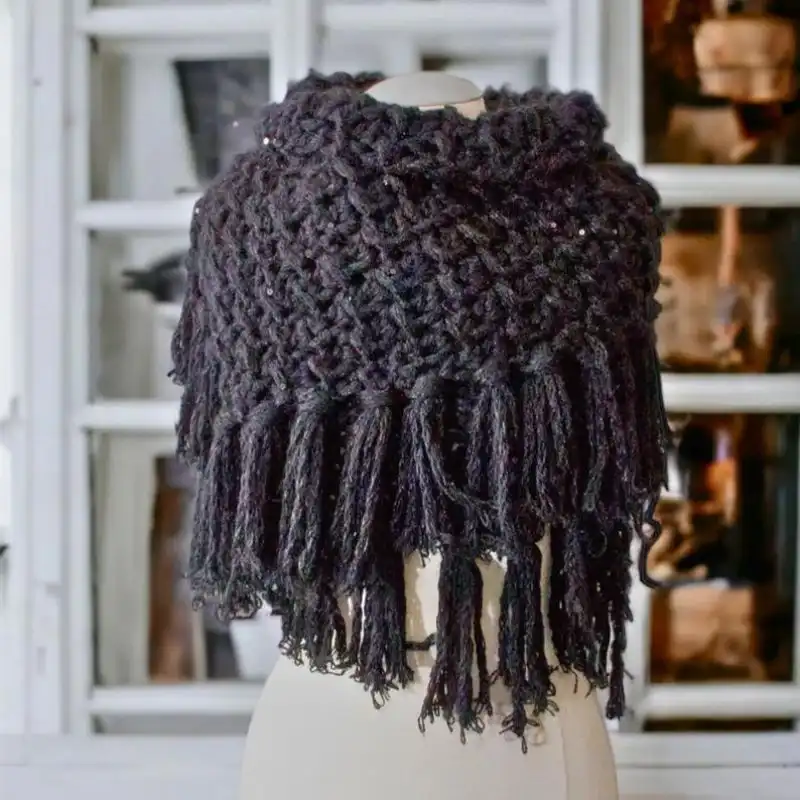
2. Grey Sea Waves Crochet Neck Warmer Pattern
Dive into the beauty of the ocean with this sea-inspired crochet neck warmer pattern. The soothing grey tones and wave-like stitches create a cozy accessory that complements any winter outfit.
3. Neck Warmer Knitting Pattern
A classic in simplicity and versatility, this knitting pattern offers a timeless neck warmer. Perfect for beginners and seasoned knitters, it’s an essential accessory for chilly days.
4. Black & White Granny Square Crochet Neck Warmer Pattern
Embrace retro-chic with this crochet pattern featuring black and white granny squares. The geometric design adds a playful touch to a cozy neck warmer, blending warmth with a vintage vibe.
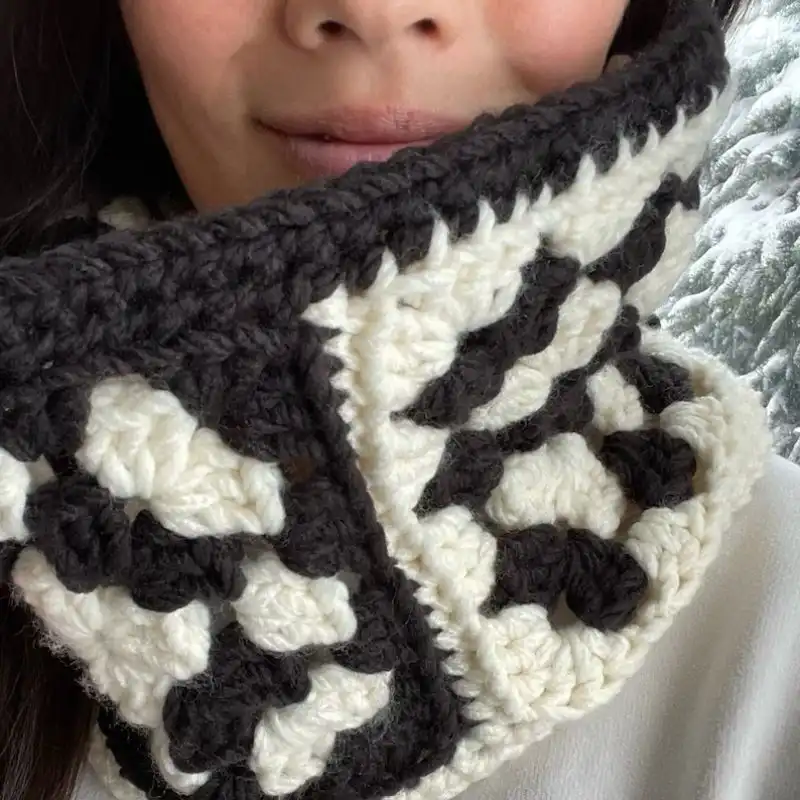
Suggested Yarn: Aran Weight Yarn
Difficulty Level: Intermediate
Yarn Weight: Aran
Crochet Hook Size: 5mm
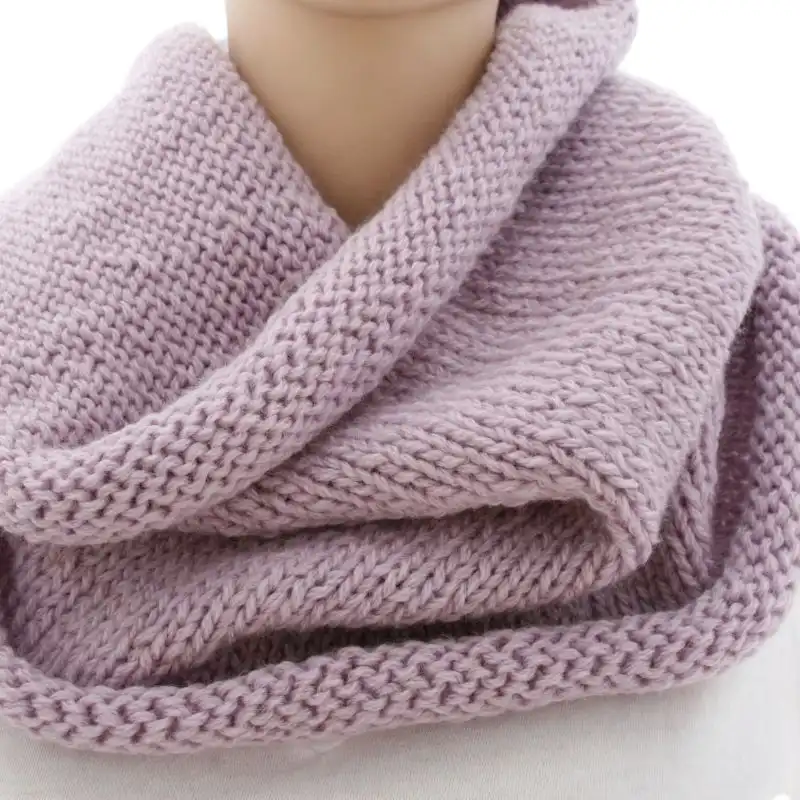
5. Largo Neck Warmer Knitting Pattern
The Largo Neck Warmer knitting pattern boasts a blend of simplicity and sophistication. Knit up this piece to stay warm and stylish, whether you’re heading to the office or a weekend stroll.
Suggested Yarn: Super Bulky Weight Yarn
Difficulty Level: Advanced
Yarn Weight: Super Bulky
Crochet Hook Size: 10mm
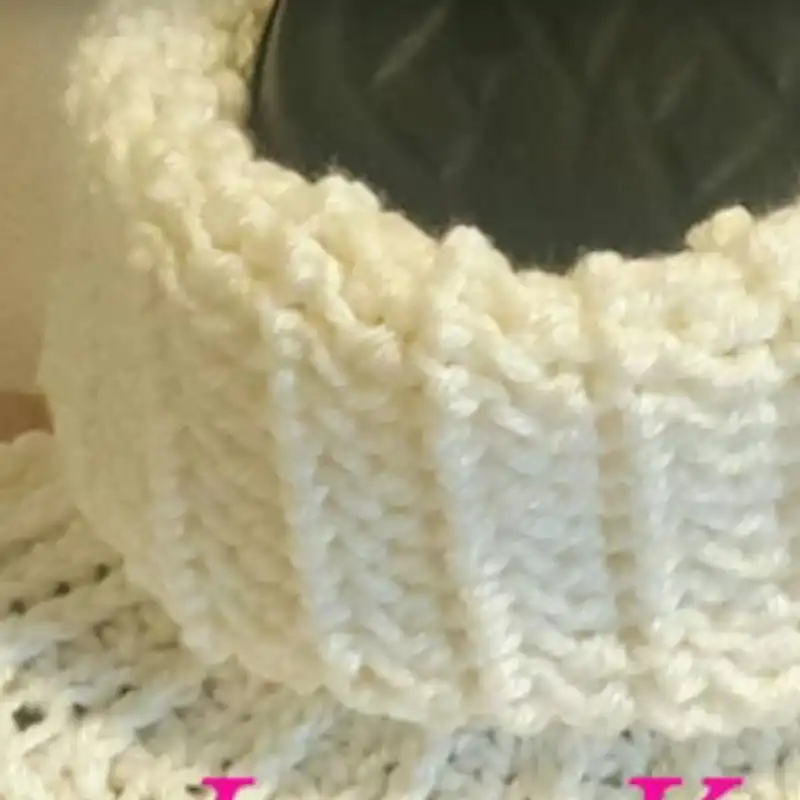
6. Keep Me Warm Neck Warmer Crochet Pattern
Stay snug and stylish with the “Keep Me Warm” crochet neck warmer pattern. This design combines functionality and flair, ensuring you’re cozy while making a fashion statement.
Suggested Yarn: Worsted Weight Yarn
Difficulty Level: Beginner
Yarn Weight: Worsted
Crochet Hook Size: 5mm
7. Ladies’ Neck Warmer Knitting Pattern
Specifically designed for the modern woman, this ladies’ neck warmer knitting pattern exudes elegance. Craft a sophisticated accessory that seamlessly combines warmth with a touch of glamour.
Suggested Yarn: Sport Weight Yarn
Difficulty Level: Intermediate
Yarn Weight: Sport
Crochet Hook Size: 4mm
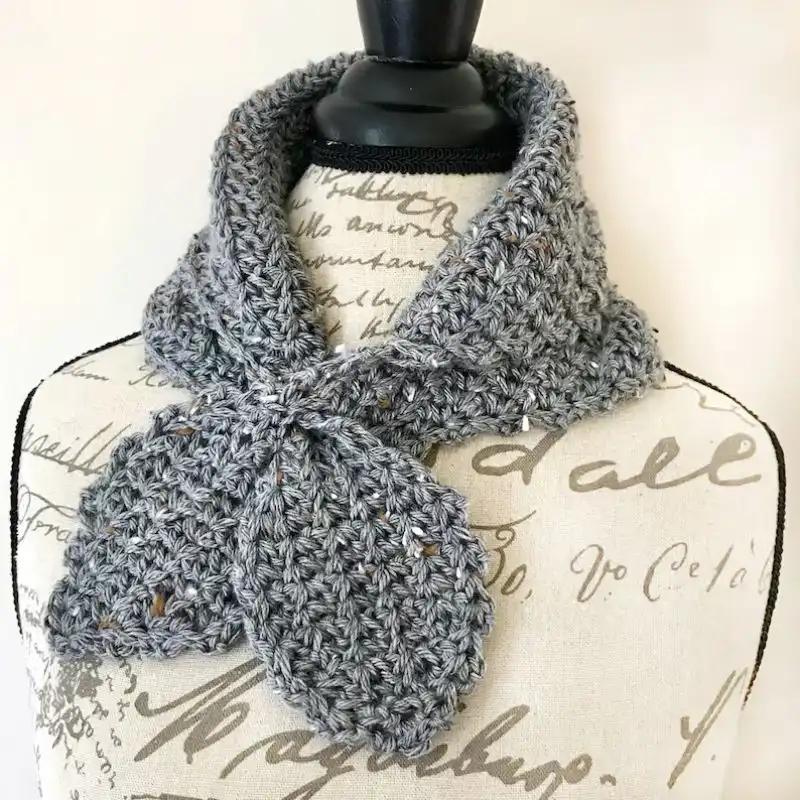
8. Keyhole Crochet Neck Warmer Pattern
Add a trendy twist to your winter ensemble with the keyhole crochet neck warmer pattern. This unique design offers versatility and a contemporary edge to keep you fashion-forward in the cold.
9. Neck Warmer Crochet Pattern
This crochet neck warmer pattern is perfect for all skill levels and is a go-to pattern for simplicity and charm. Create a cozy accessory that effortlessly complements your winter wardrobe.
RELATED: Easy Crochet Bookmark: Perfect Project for Beginners
10. Split Shell Crochet Neck Warmer Pattern
Dive into the world of texture with the split shell crochet neck warmer pattern. The intricate stitchwork creates a visually appealing accessory, ensuring you stay warm in style.
Suggested Yarn: Worsted Weight Yarn
Difficulty Level: Beginner
Yarn Weight: Worsted
Crochet Hook Size: 5mm
11. Chunky Knit Neck Warmer Pattern
Wrap yourself in warmth with the chunky knit neck warmer pattern. The oversized stitches make for a quick and satisfying project, creating a bold and cozy accessory.
Suggested Yarn: Chunky Weight Yarn
Difficulty Level: Intermediate
Yarn Weight: Chunky
Crochet Hook Size: 8mm
12. Chloe Neck Warmer Crochet Pattern
Infuse a touch of sophistication into your winter look with the Chloe Neck Warmer crochet pattern. This design combines intricate stitches to create an eye-catching chic and warm accessory.
Suggested Yarn: Aran Weight Yarn
Difficulty Level: Intermediate
Yarn Weight: Aran
Crochet Hook Size: 5mm
13. Dragon Neck Warmer Crochet Pattern
Unleash your creativity with the Dragon Neck Warmer crochet pattern. This unique design features dragon-scale-like stitches, adding a mythical and cozy touch to your winter wardrobe.
Suggested Yarn: Worsted Weight Yarn
Difficulty Level: Advanced
Yarn Weight: Worsted
Crochet Hook Size: 5mm
14. Braids Crochet Neck Warmer Pattern
Elevate your winter style with the Braids Crochet Neck Warmer Pattern. The intricate braided design adds a touch of sophistication to this cozy accessory, making it perfect for chilly days.
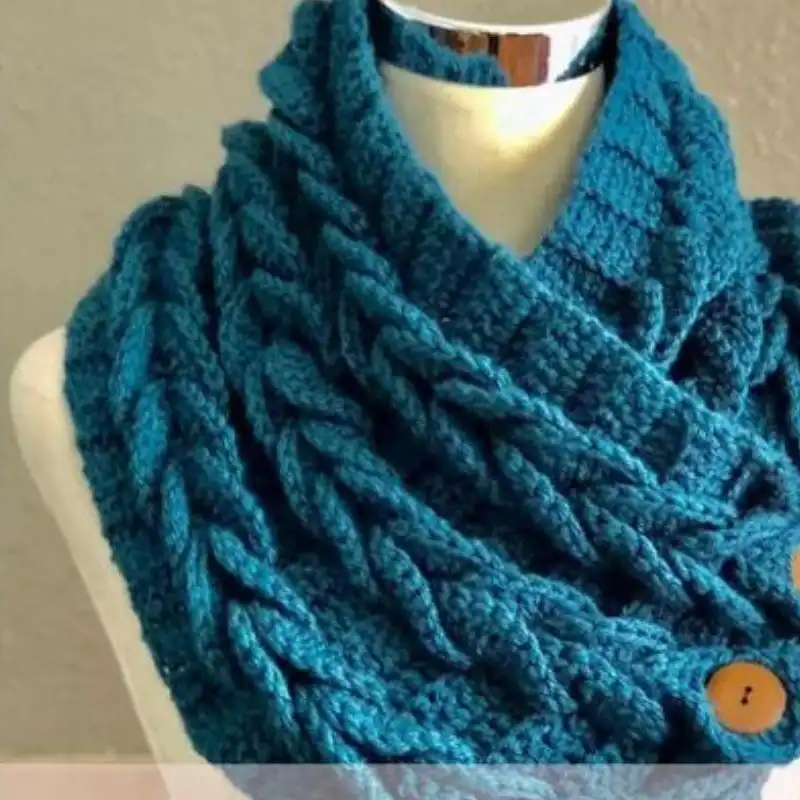
Suggested Yarn: Aran Weight Yarn
Difficulty Level: Intermediate
Yarn Weight: Aran
Crochet Hook Size: 5mm
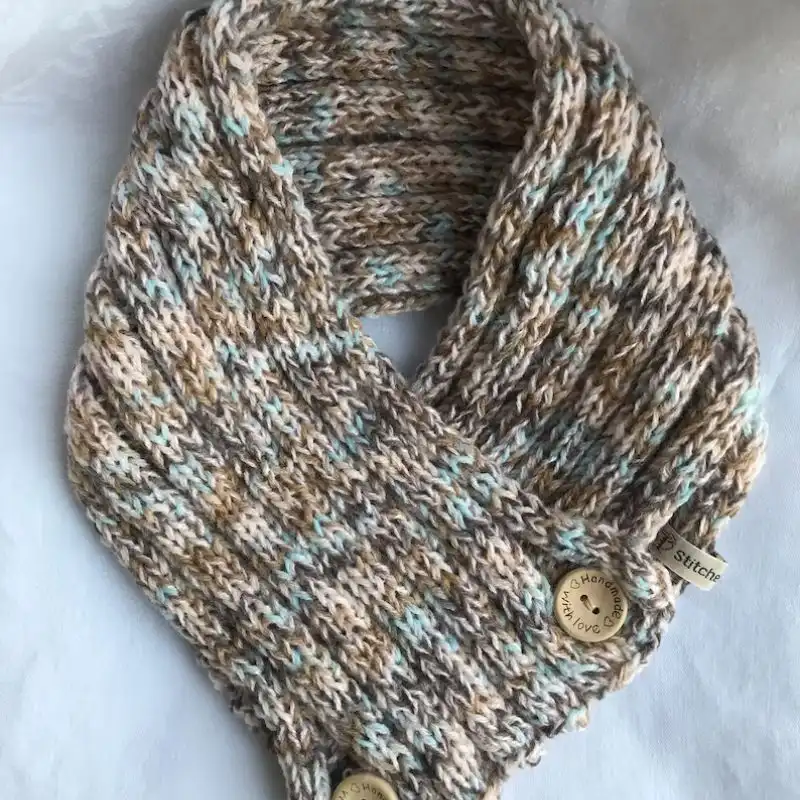
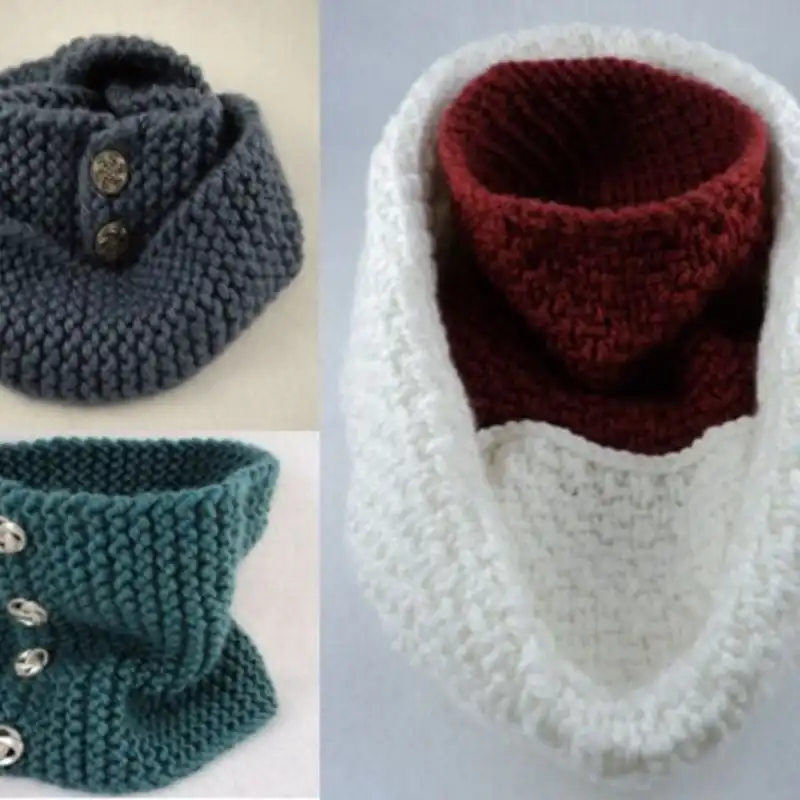
15. Buttoned Neck Warmer Knitting Pattern
Stay warm and stylish with the Buttoned Neck Warmer Knitting Pattern. This design features a chic button closure, offering functionality and a trendy twist to your winter wardrobe.
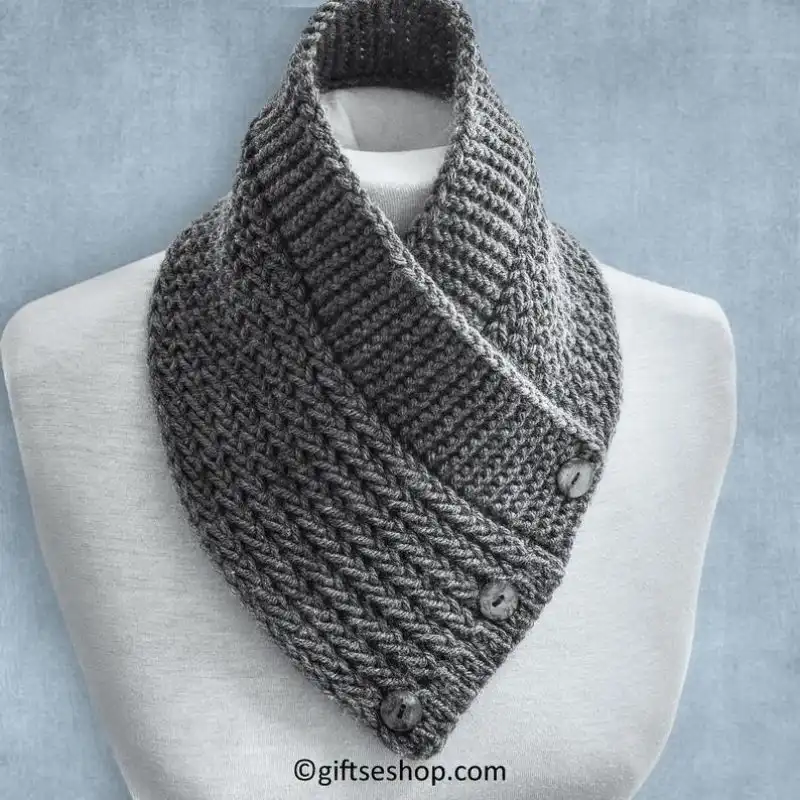
Suggested Yarn: Worsted Weight Yarn
Difficulty Level: Intermediate
Yarn Weight: Worsted
Crochet Hook Size: 5mm
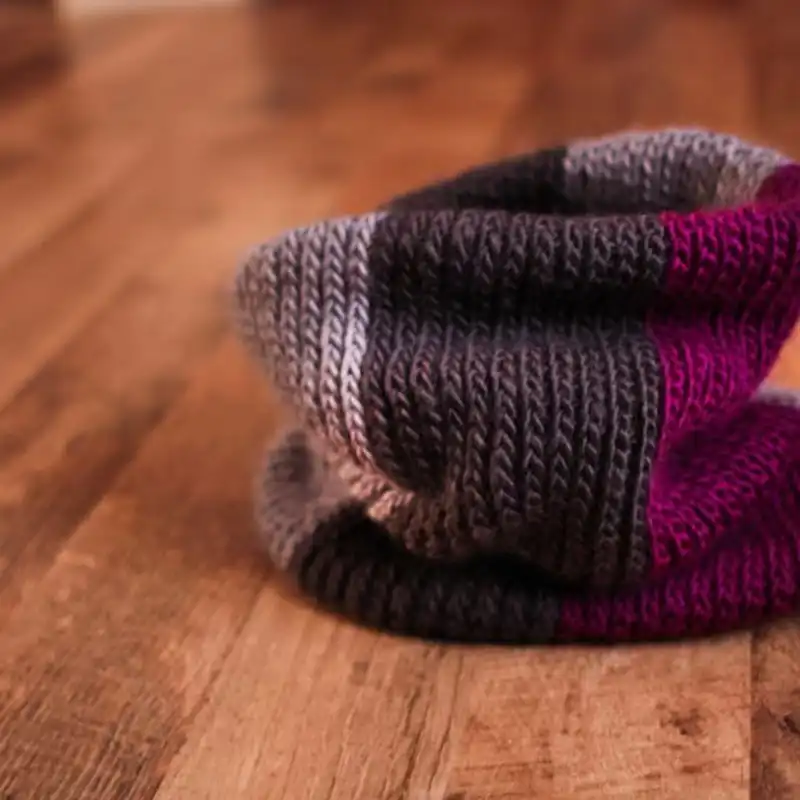
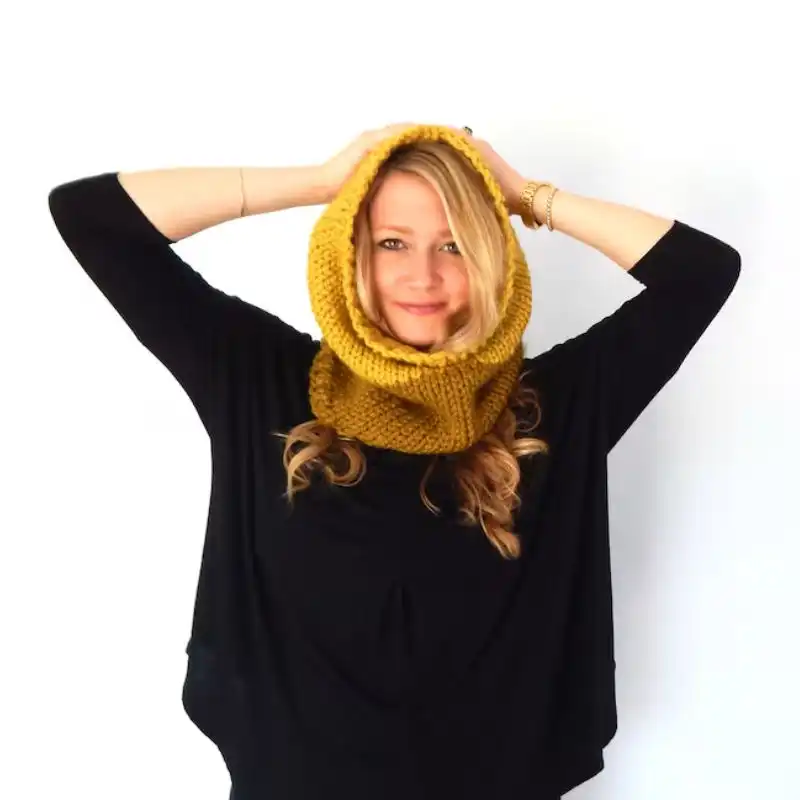
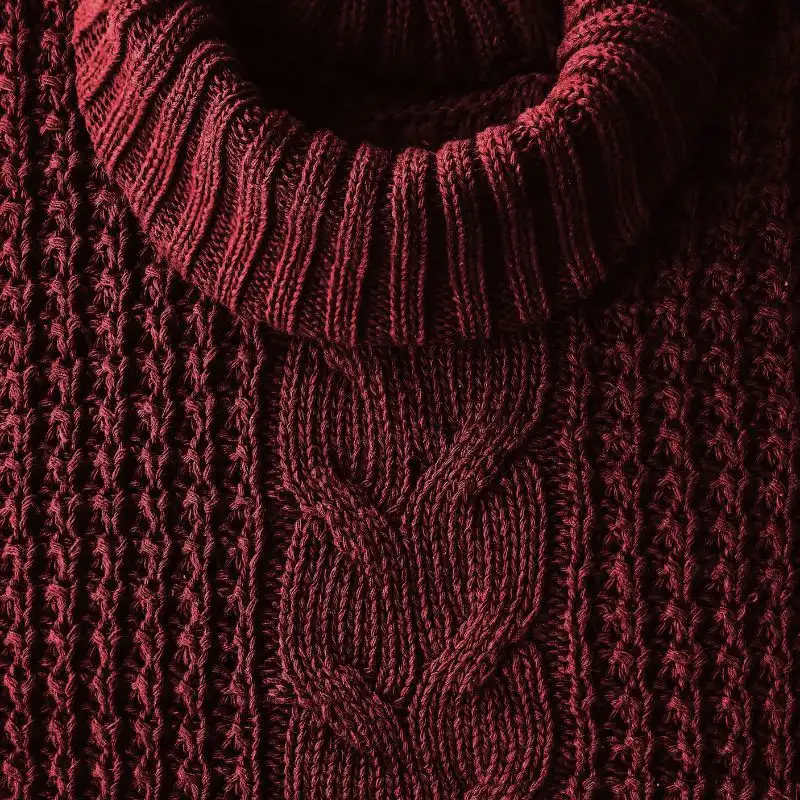
16. 80s Vintage Neck Warmer Knit Pattern
Transport yourself to the 80s with this Vintage Neck Warmer Knit Pattern. Channel retro vibes with this cozy accessory that blends nostalgia with modern comfort.
RELATED: Crochet The Amigurumi TikTok Bee
17. Leaves And Bobbles Knit Neck Warmer Pattern
Embrace nature-inspired textures with the Leaves and Bobbles Knit Neck Warmer Pattern. Combining leaf motifs and bobbles creates an eye-catching accessory for nature lovers.
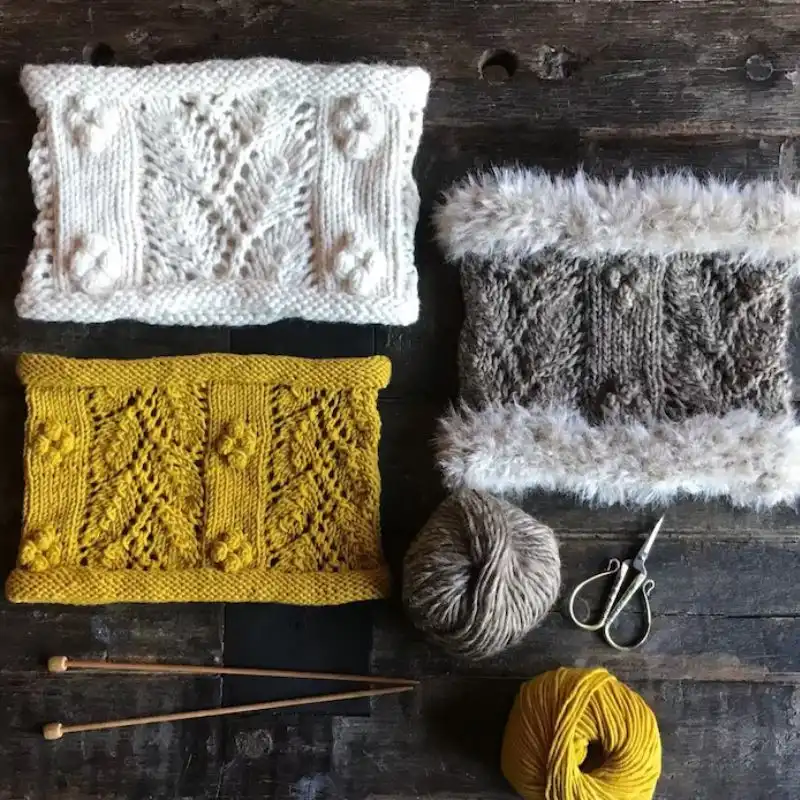
Suggested Yarn: Worsted Weight Yarn
Difficulty Level: Intermediate
Yarn Weight: Worsted
Crochet Hook Size: 5mm
18. Maria Crochet Neck Warmer Pattern
Infuse a touch of timeless elegance with the Maria Crochet Neck Warmer Pattern. This design combines classic stitches to create a sophisticated accessory that enhances any winter ensemble.
Suggested Yarn: Bulky Weight Yarn
Difficulty Level: Intermediate
Yarn Weight: Bulky
Crochet Hook Size: 6mm
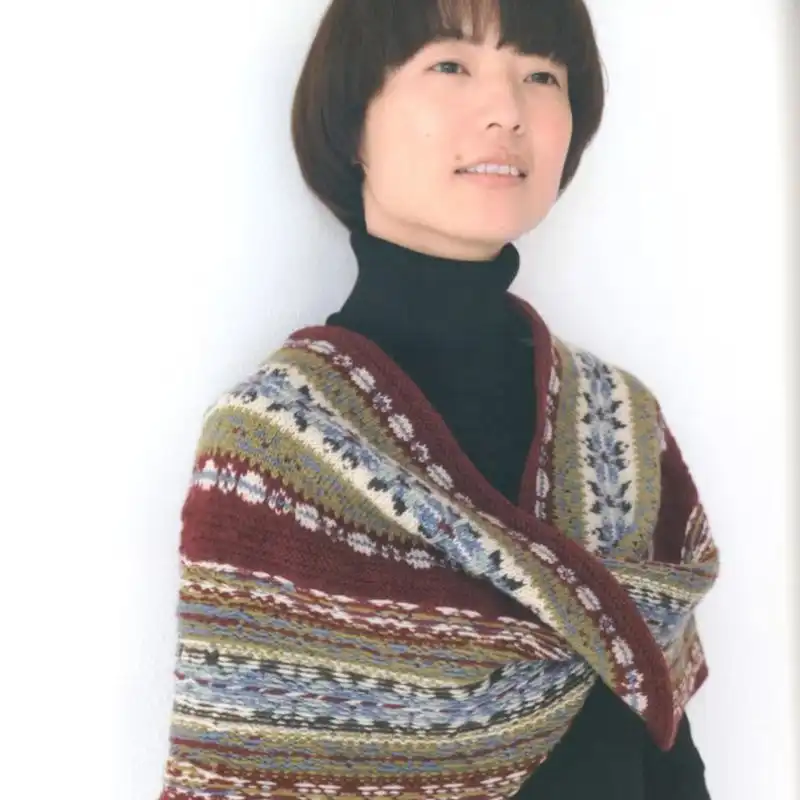
19. Waterfall Wrap Scarf Crochet Pattern
Make a statement with the Waterfall Wrap Scarf Crochet Pattern. The flowing design and textured stitches mimic a cascading waterfall, adding flair and warmth to your cold-weather wardrobe.
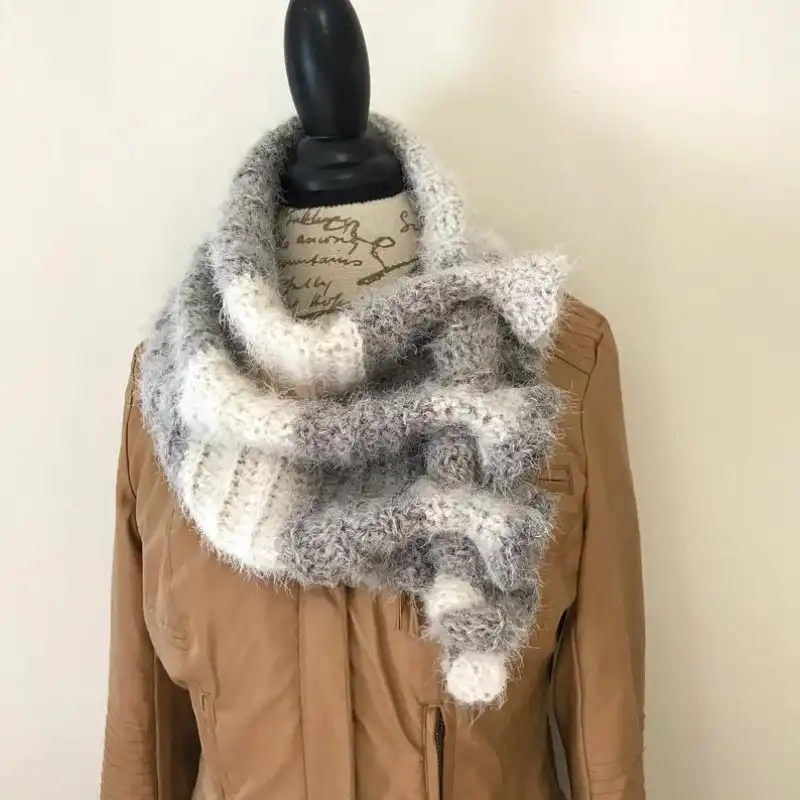
Suggested Yarn: Fingering Weight Yarn
Difficulty Level: Intermediate
Yarn Weight: Fingering
Crochet Hook Size: 3.5mm
RELATED: A Guide To Making The Famous TikTok Bumblebee – 3 Different Sized Crochet Patterns
20. Linda Crochet Neck Warmer Pattern
The Linda Crochet Neck Warmer Pattern exudes simplicity and charm. Create a timeless accessory with classic stitches, perfect for beginners and seasoned crocheters.
Suggested Yarn: Worsted Weight Yarn
Difficulty Level: Beginner
Yarn Weight: Worsted
Crochet Hook Size: 5mm
21. Mens Crochet Neck Warmer Pattern
The Men’s Crochet Neck Warmer Pattern is tailored for men and combines style and warmth. Craft a handsome accessory with a masculine touch to keep cozy during colder seasons.

Suggested Yarn: Aran Weight Yarn
Difficulty Level: Intermediate
Yarn Weight: Aran
Crochet Hook Size: 5mm
22. Crochet Woodland Neck Warmer Pattern
Bring the charm of the woodland into your wardrobe with the Crochet Woodland Neck Warmer Pattern. Nature-inspired stitches create a cozy accessory that adds a rustic touch to your look.
23. Chunky Neck Warmers Knit Pattern
Stay cozy in style with the Chunky Neck Warmer Knit Pattern. The oversized and plush stitches make for a quick and satisfying project, ensuring you stay warm in colder temperatures.
Suggested Yarn: Super Bulky Weight Yarn
Difficulty Level: Beginner
Yarn Weight: Super Bulky
Crochet Hook Size: 10mm
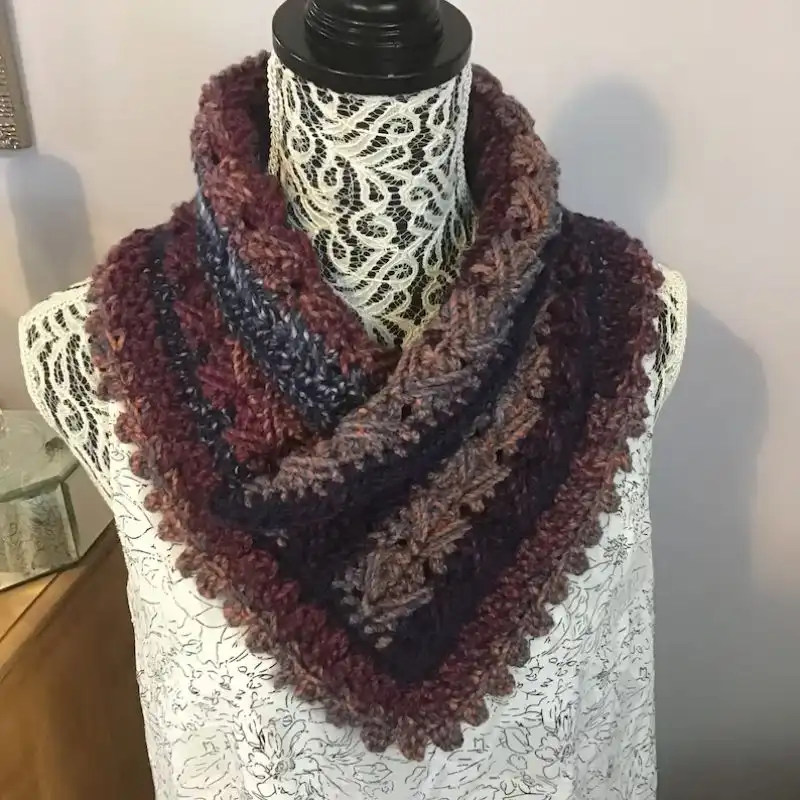
24. Mystery Cowl Neck Warmer Crochet Pattern
Add an element of intrigue with the Mystery Cowl Neck Warmer Crochet Pattern. This design features captivating stitches, creating a unique and cozy accessory that sparks curiosity.
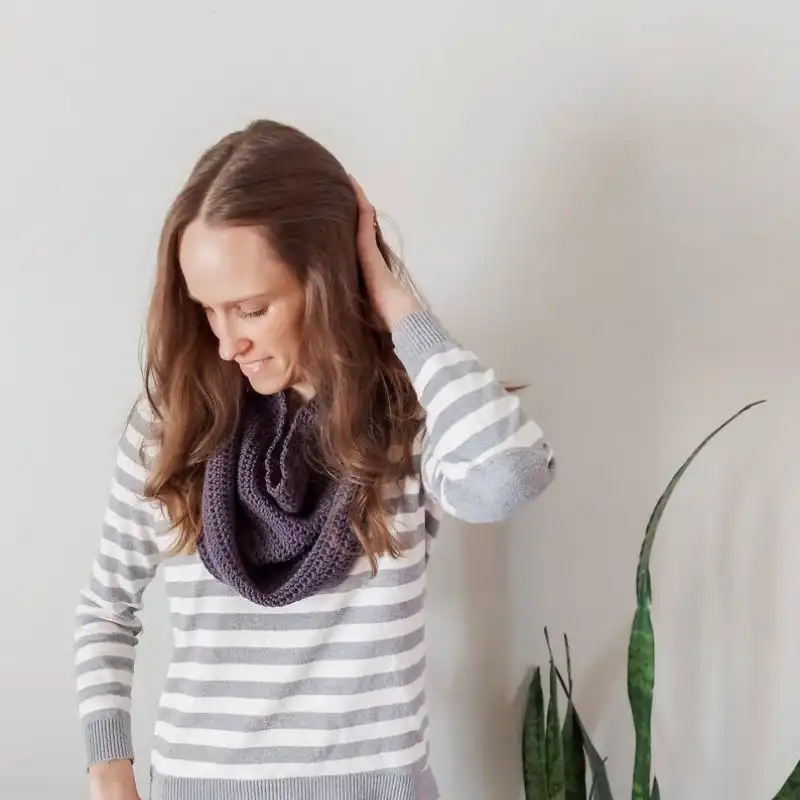
Suggested Yarn: Worsted Weight Yarn
Difficulty Level: Intermediate
Yarn Weight: Worsted
Crochet Hook Size: 5mm
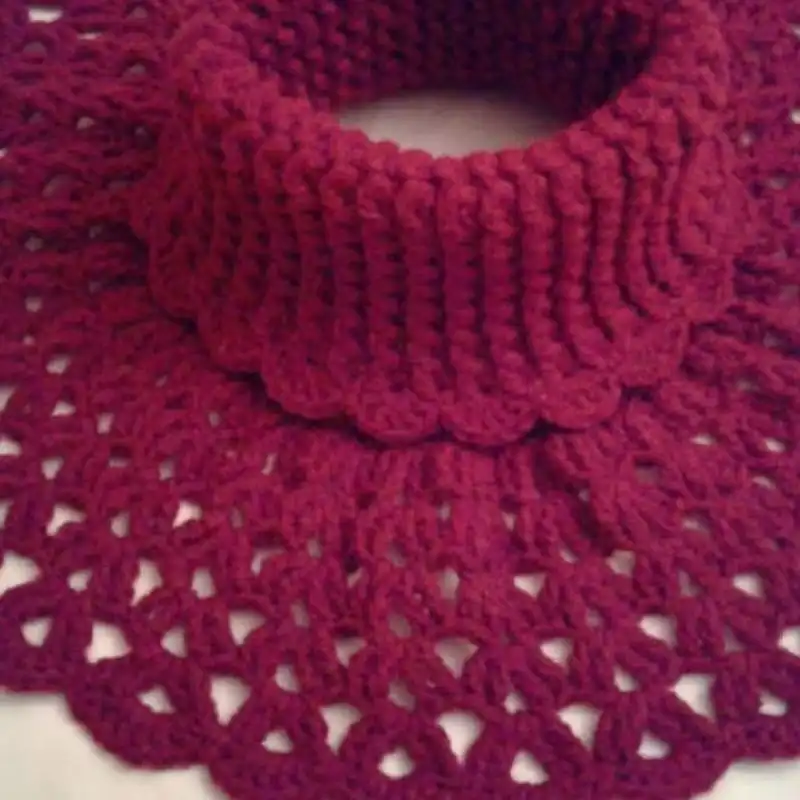
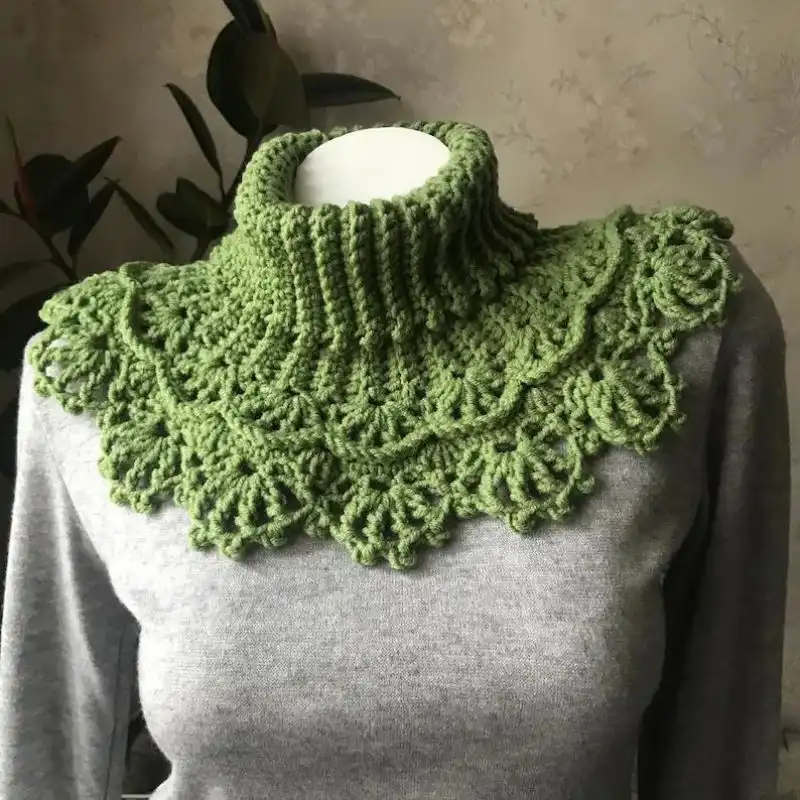
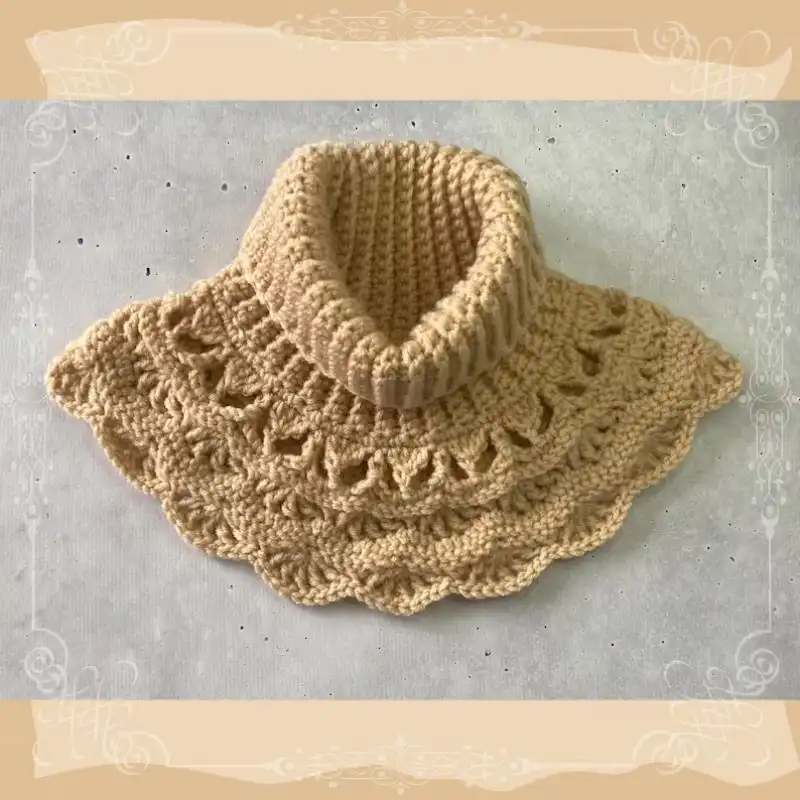
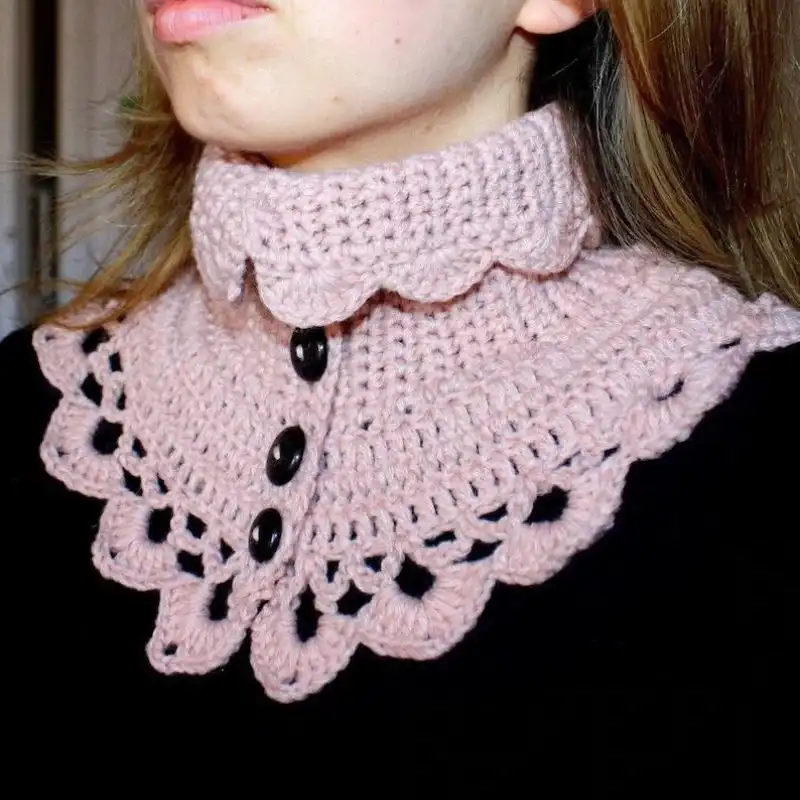
25. Victorian Neck Warmer Crochet Pattern
Transport yourself to the Victorian era with the Victorian Neck Warmer Crochet Pattern. Elegant stitches and a timeless design make this accessory perfect for adding a touch of vintage charm to your winter attire.
Tips & Tricks To Avoid Crochet Mistakes
Creating a flawless neck warmer in both crochet and knitting can be an enjoyable journey with these critical tips and tricks to avoid common mistakes:
- Check Your Gauge: Always create a gauge swatch, ensuring the correct size and having enough yarn, especially if following a specific pattern.
- Maintain Even Tension: Consistent tension is vital for uniform stitches. Practice keeping a steady grip on your yarn to achieve the desired shape and drape.
- Count Your Stitches: Accidentally losing or adding stitches can occur, especially in rounds. Count your stitches at the end of each round to ensure accuracy.
- Use Stitch Markers: When working in the round, stitch markers help track the beginning and end of rounds, which is particularly useful for beginners.
- Read Patterns Thoroughly: Before starting, thoroughly read through the entire pattern to prevent confusion and mistakes in understanding the instructions and flow.
- Don’t Rush: Crochet and knitting are relaxing crafts, so take your time to avoid errors and uneven stitches.
- Take Breaks: Regular breaks prevent hand fatigue and maintain consistent tension, which is crucial for projects like neck warmers requiring uniformity.
- Correct Mistakes Early: If a mistake is spotted, return to that point and fix it for a neater finish.
- Keep Yarn and Hook Compatible: Use the appropriate hook size for your yarn; an incorrect size can result in overly loose or tight stitches.
- Blocking: After completion, block your neck warmer to shape the item and set the stitches for a polished look.
- Practice New Stitches First: If the pattern introduces unfamiliar stitches, practice them separately before incorporating them into your project.
How To Block The Neck Warmer?
Blocking your neck warmer is an essential finishing step that can significantly enhance the look and fit of your project. Here’s how to do blocking step by step:
Prepare Your Blocking Space
- Choose a flat, waterproof surface like a blocking mat, foam tiles, or clean towel.
- Make sure the space is large enough to accommodate your neck warmer laid out flat.
Wet Your Neck Warmer
- Gently hand wash your neck warmer in lukewarm water with a mild detergent, or simply soak it if it’s already clean.
- Avoid wringing or twisting the fabric; this can distort the stitches.
Remove Excess Water
- Carefully squeeze out excess water. For delicate yarn, wrap the neck warmer in a towel and press down to absorb water without wringing.
- The neck warmer should be damp but not soaking wet.
Lay Out the Neck Warmer
- Spread your neck warmer on the blocking surface.
- Shape it to the desired dimensions, paying attention to the pattern and ensuring it’s symmetrical.
Pin It Down
- Use rust-proof pins to secure the neck warmer to the blocking surface.
- Pin along the edges, stretching the fabric slightly if necessary to align with your pattern’s dimensions or to straighten the edges.
Let It Dry
- Leave the neck warmer pinned in place until it’s scorched. Depending on the yarn and environmental conditions, this could take several hours to a full day.
Unpin and Store
- Once dry, carefully remove the pins.
- Your neck warmer is now blocked and ready to wear or store.
Here are a few additional tips
- Steam blocking is also an option if you’re using wool or another natural fiber. Use a steam iron without touching the fabric, hovering over it, and allowing the steam to penetrate.
- Be cautious with heat for acrylic yarns, as it can permanently set the fibers. Wet blocking is usually safer.
- Always check the yarn label for any specific care instructions.
Suggestions To Add Style And Personal Touch
Adding style and a personal touch to your neck warmer can transform it from a simple accessory to a standout piece in your wardrobe. Here are some suggestions to infuse creativity and individuality into your neck warmer:
Color Choices
- Play with colors! Use variegated yarns for a multicolored effect, or try color blocking or stripes for a bold look.
- Ombre yarns create a gradual color change and can add a sophisticated touch.
Stitch Variation
- Experiment with different stitch patterns. Lace stitches add delicacy, while cable or bobble stitches offer texture and depth.
- Mixing simple and complex stitches in the same project can create exciting designs.
Embellishments
- Add beads, sequins, or embroidery to your neck warmer for sparkle or intricate detail.
- Consider crochet appliqués like flowers, leaves, or geometric shapes.
Edging and Borders
- A decorative edge can completely change the look of your neck warmer. Try scalloped, picot, or shell borders for a unique finish.
- Contrasting color borders can also make your design pop.
Functional Add-Ons
- Incorporate buttons, clasps, or ties for a practical yet stylish element. They not only add to the design but can also adjust how the neck warmer fits.
- Loops, buttonholes, or even a slit in the design can add versatility to how it can be worn.
Texture Play
- Use yarns with different textures – like a mix of smooth and fluffy yarns – to create tactile interest.
- Ribbing, puff stitches, and other 3D stitches add a cozy, touchable quality.
Layering
- Create a neck warmer with layers or ruffles for a fuller, more voluminous accessory.
Yarn Blending
- Holding two strands of different yarns together while crocheting can create a unique texture and color blend.
Fringe or Tassels
- Adding a fringe or tassels at the ends can give a bohemian or playful vibe.
Personal Motifs
- Incorporate motifs or patterns with personal significance, like initials, favorite animals, or symbolic patterns.
Upcycling
- Add fabric patches or upcycle old jewelry pieces for an eco-friendly and creative twist.
Wash & Care Instructions
Proper care of your crochet or knit neck warmer will ensure longevity and durability. Here are some wash and care instructions to keep it looking its best:
Check the Yarn Label: Before washing, always refer to the yarn label for specific care instructions. Different fibers have different care requirements.
Hand Washing
- For most hand-crocheted items, gentle hand washing is recommended. Use lukewarm water and a mild detergent. Avoid using bleach or harsh chemicals.
- Soak the neck warmer in the water, gently swishing it around without stretching or scrubbing the fabric.
- Rinse thoroughly in clean, lukewarm water until all soap is removed.
Machine Washing (If Applicable)
- If the yarn label indicates that machine washing is safe, use a gentle cycle with cold water and a mild detergent.
- It’s best to place the neck warmer in a mesh laundry bag to prevent snagging and tangling.
Drying
- Gently squeeze out excess water without wringing or twisting, which can distort the shape.
- Lay the neck warmer flat on a clean, dry towel, reshaping it as necessary. Allow it to air dry completely. Avoid hanging, as it can stretch the fabric.
- Avoid using a tumble dryer unless the yarn label says it’s safe.
Ironing and Steaming
- Check the yarn label for heat tolerance if the neck warmer needs ironing or steaming.
- Use a low-heat setting on your iron, and preferably place a cloth between the iron and the neck warmer. Never iron directly on synthetic fibers like acrylic, as they can melt.
Pilling Maintenance: Over time, some yarns may pill. Gently remove pills with a fabric shaver or by hand, being careful not to damage the fabric.
Storing
- Store the neck warmer in a cool, dry place. Avoid storing in direct sunlight or damp areas, as this can cause fading or mildew.
- Fold it instead of hanging it to maintain its shape.
Dealing with Stains: If stained, treat the area with a mild stain remover suitable for the yarn type. It’s advisable to spot-test in an inconspicuous area first.
Refreshing: Occasionally airing out the neck warmer can help refresh it without washing.
A Quick Recap
Crafting a flawless neck warmer in crochet and knitting is smooth with crucial tips. Check your gauge, maintain even tension, and count stitches regularly. Use stitch markers for rounds, read patterns thoroughly, and avoid rushing.
Take breaks to prevent fatigue and correct mistakes promptly. Ensure yarn and hook compatibility, and block your finished piece for a polished look. Practice unfamiliar stitches beforehand for a successful project.
These insights ensure an enjoyable crafting experience, especially for beginners, resulting in a functional and stylish neck warmer.
Frequently Asked Questions
What’s The Importance Of Checking Gauge In My Project?
Checking the gauge ensures your neck warmer matches the pattern’s size. It helps achieve the correct fit and prevents running out of yarn.
Can I Use The Same Hook For Different Yarn Weights In Crochet?
It’s best to match the hook size to the recommended size on your yarn label. Using the correct hook ensures proper tension and stitch definition.
How Do I Choose Between Crochet And Knitting For My Neck Warmer?
Consider your preferred craft and the desired texture. Crochet often yields a thicker, more textured fabric, while knitting creates a smoother, draper result.
Can I Resize A Pattern Meant For Adults To Fit A Child?
Yes, you can adjust the pattern for a child by using a smaller hook or needles and reducing the number of stitches or rows accordingly.
What’s The Significance Of Practicing New Stitches Before Incorporating Them Into My Project?
Practicing new stitches helps familiarize you with the technique, ensuring smoother execution when integrated into your neck warmer. It boosts confidence and accuracy.

- 30 Polo Sweater Knitting Patterns To Keep You Stylish On Every Occasion - January 1, 2024
- 21 Baby Blanket Knitting Kits To Wrap Bundle Of Joy With Love - January 1, 2024
- 15 Cashmere Knitting Kits For Fashionable Knits To Embrace Comfort And Style - January 1, 2024
