

Amigurumi is a practice that has made its way all across the world. The cute little animals that countless people have designed and made fill up many of our social media feeds, and almost make us jealous and want to start making them for ourselves.

Well, with this list of adorable turtle amigurumi patterns, we can turn that want to craft, into crafting itself!
Turtles are so lovable and fun to make, they would be perfect additions to any collection. So here’s hoping you find one or more of these free turtle patterns just as much fun to crochet as it was to design.
Is It Worth To Crochet A Turtle?
Crocheting a turtle offers a unique blend of creativity, relaxation, and satisfaction. Beyond crafting a tactile, tangible product, it taps into the therapeutic benefits of crafting, improving mental well-being, and reducing stress.
Additionally, a crocheted turtle can serve as a personalized gift, a testament to the time, effort, and affection invested. It’s an environmentally friendly alternative to mass-produced toys, supporting the slow crafting movement.
While it might not appeal to everyone, those who value handcrafted items or want a hobby that provides a sense of accomplishment may find crocheting a turtle worth every stitch.
Popular Stitches To Crochet Turtle
- Sc (Single Crochet): A foundational stitch that creates a dense fabric, perfect for the turtle’s shell to maintain shape.
- Hdc (Half Double Crochet): It is taller from the single crochet, it adds texture and flexibility, suitable for the turtle’s limbs.
- Dc (Double Crochet): A taller stitch providing more space between rows, great for a faster build or a looser turtle shell pattern.
- Slip Stitch (sl st): Often used to join rounds or create smooth edges, it’s essential for seamless transitions on the turtle’s body.
- Bobble Stitch: This textured stitch can create raised designs, adding dimension to the turtle’s shell for a more detailed appearance.
- Magic Ring (or Magic Circle): A technique to start crocheting in the round, ideal for the base of the turtle’s shell or its head, ensuring a tight center.
What Is An Ideal Size To Crochet Turtles?
The ideal size for a crocheted turtle largely depends on its intended purpose and the crafter’s or recipient’s preferences. Here are some typical sizes and their common applications:
- Tiny (1-2 inches): These miniature turtles can be used as charms, keychains, or ornaments. Due to their small size, they are quick to make and can be a cute addition to accessories or décor.
- Small (3-5 inches): Suitable for amigurumi or stuffed toy collections. They are manageable in size, making them great as gifts or for those new to crochet.
- Medium (6-12 inches): Ideal for children’s toys or decorative pieces. They offer more detail and texture and are a popular size for handcrafted toys.
- Large (13-24 inches): These make great cuddly toys, especially for children. The larger size allows for intricate detailing and can be stuffed to be particularly plush and huggable.
- Jumbo (25 inches and above): These giant turtles can serve as floor cushions, decorative bed pillows, or standout display pieces. The larger size requires more yarn and time but makes a significant impact.
Essential Crochet Material & Tools
You’ll need a few basic crochet materials and tools to create your adorable amigurumi turtle. First and foremost, you’ll need yarn. We recommend using worsted-weight yarn as it’s easy to work with and perfect for beginners. You can choose from a variety of colors to customize your turtle.
Next, a crochet hook is a must-have for your project. A 3.5mm hook is generally the go-to size for amigurumi. If your pattern calls for a different size, use the specified hook to maintain the pattern’s proportions.
In addition to yarn and a crochet hook, you’ll want a pair of scissors and a yarn needle for finishing your project. These tools will help you snip your yarn and weave in loose ends, ensuring a polished and professional look.
Also, grab a stitch marker to keep track of your progress, making it easier to identify the start of each row.
Lastly, remember polyester fiberfill stuffing to give your turtle a cuddly and squishy feel. You’ll use this to fill the turtle’s body, making it huggable and perfect for all ages.
Glossary Of Common Crochet Stitches
- Chain (ch): This is the foundation of most crochet projects. To make a chain stitch, wrap the yarn around your hook and pull through the loop on your hook. It’s the starting point where you’ll create other stitches. Keep practicing, and you’ll master chains in no time!
- Single crochet (sc): Single crochets are one of the essential stitches in amigurumi. Insert your hook into a chain stitch, yarn over, and pull through. Yarn over again and pull through both loops on your hook. Voilà, you’ve made a single crochet!
- Double Crochet (dc): Double crochet stitches add height to your work. Yarn over, insert your hook, yarn over again, and pull through. Yarn over once more, pull through two loops, yarn over, and pull through the remaining two loops. Keep practicing, and you’ll get the hang of it!
- Slip stitch (sl st): Slip stitches join rounds or finish edges. Insert your hook into the stitch, yarn over, and pull the yarn through both the stitch and the loop on your hook. Simple.
- Increase (inc): To shape your amigurumi, you’ll often need to increase the number of stitches. It is typically done by working two stitches into one. For example, work two single crochets in the same stitch to create an increase.
- Decrease (dec): On the flip side, you should decrease the number of stitches. For amigurumi, this is usually done by working two stitches together (e.g., single crochet two together (sc2tog)). Don’t worry; with some practice, you’ll master these increases and decreases!
Understanding Crochet Stitches & Patterns
Welcome to the enchanting world of amigurumi turtle patterns! In this section, you will learn the basics of crochet stitches and designs to help you create adorable turtle companions for yourself or loved ones.
It’s essential to familiarize yourself with basic crochet stitches like single crochet (sc), double crochet (dc), and slip stitch (sl st) before you begin. These foundational stitches form the basis for most amigurumi patterns.
As you gain experience, you’ll start recognizing various stitch combinations, making reading and following patterns easier.
Once you have a solid foundation in basic stitches, you can explore amigurumi turtle patterns suitable for your skill level. Beginners can start with simpler patterns, while experienced crocheters can tackle intricate and detailed designs.
You’ll find that many patterns offer step-by-step guidance, making them easy to follow and enjoyable to create.
Sometimes, patterns may also include unique stitches or techniques, further adding to your repertoire. Remember to keep an open mind, and don’t be afraid to learn something new! Moreover, experiment with different yarn types and colors to give your amigurumi turtles a personal touch.
Understanding crochet stitches and patterns is the key to creating lovely amigurumi turtles. As you grow more comfortable with basic stitches, expand your skills by exploring diverse designs, and above all, have fun!
Which Yarn Is Best For Amigurumi Turtle Patterns?
When crocheting amigurumi turtles, selecting the right yarn is essential. It impacts your crocheted turtle’s overall appearance, durability, and feel.
Cotton yarn is popular for amigurumi because it holds its shape well and provides a smooth and clean stitch appearance. For example, Timmy the Turtle uses a 55% cotton and 45% acrylic blend for added sturdiness.
However, acrylic yarns are also a great option. They come in various vibrant colors, are more affordable than cotton, and are easier to maintain. Plus, they are lightweight, perfect for creating an amigurumi turtle you can cuddle!
Feel free to get creative and mix fiber types! Combining different yarns can lead to some fantastic and unique amigurumi turtles. The most important thing to remember is to choose a yarn that allows for clear stitches, holds its shape, and feels comfortable in your hands as you work.
How Much Yarn Do I Need For An Amigurumi Turtle Pattern?
When creating an amigurumi turtle, it’s essential to know the amount of yarn you’ll need. Of course, this can vary depending on the specific pattern and size of the turtle you’re crafting.
For most designs, you can expect to use around 50-150 yards of yarn. Remember, the type of yarn plays a crucial role in the final outcome. It is generally recommended to use medium-weight cotton yarn and a 3.5mm crochet hook. This combination allows for a soft and cuddly finish, perfect for your adorable amigurumi buddy.
It’s also important to consider the colors you’ll need for your turtle. Some turtle patterns require just one color, while others might have a more colorful design using two or even three shades. In multi-colored patterns, make sure you have enough yarn in each color to complete the project.
For example, this Plush Turtle Free Crochet Pattern suggests using Chenille Chunky Yarn in three different colors.
Is It Beginner Friendly?
Yes, amigurumi turtle patterns can be beginner-friendly! By starting with a simple and easy design, like this Easy Crochet Turtle tutorial, you’ll find the process enjoyable and rewarding.
Many amigurumi turtle patterns cater to different skill levels, so you can find one that suits your experience. For instance, our list of Amigurumi Turtle Patterns includes options for various skills, from small pocket turtles to larger, cuddly ones.
Don’t be afraid to challenge yourself as you gain confidence in your crochet abilities. As you progress, you can try more intricate patterns, such as the Teenage Mutant Ninja Turtle Crochet Pattern. Before you know it, your collection of crocheted turtles will be something to show off with pride.
How To Crochet A Turtle? – Free Pattern
Creating a crochet turtle is a fun project, and it’s excellent for beginners to practice basic crochet stitches. Here’s a step-by-step guide to crocheting a simple turtle.
Materials Needed
- Worsted weight yarn (green for the turtle body, additional colors for the features)
- Appropriate crochet hook size for your yarn
- Safety eyes or black yarn for the eyes
- Fiberfill stuffing
- Yarn needle for weaving in ends
Abbreviations
- chain (ch)
- single crochet (sc)
- half double crochet (hdc)
- double crochet (dc)
- increase (work 2 stitches in the same stitch) (inc)
- decrease (work 2 stitches together) (dec)
Instructions
Step 1: Turtle Shell
Start with the turtle’s shell (upper part of the body)
- Magic ring (or ch 2 and work the following stitches into the first chain).
- Work 6 sc into the magic ring (or 2nd chain).
- Join with a slip stitch to the first sc.
- Ch 2 (these count as the first hdc), then work 1 hdc in the same stitch, 2 hdc in each of the next 5 stitches. (12 hdc total)
- Join with a slip stitch to the top of the initial ch 2.
- Ch 2, hdc in the next stitch, 2 hdc in the following stitch – repeat this around. (18 hdc total)
- Join with a slip stitch to the top of the initial ch 2.
- Ch 2, hdc in the next 2 stitches, 2 hdc in the following stitch – repeat this around. (24 hdc total)
- Join with a slip stitch to the top of the initial ch 2.
- Fasten off and weave in the end.
Step 2: Turtle Body
Continue with the turtle’s body
- Attach the green yarn to any stitch on the last round of the shell.
- Ch 1 (does not count as a stitch), sc in the same stitch as the ch 1, sc in each stitch around.
- Join with a slip stitch to the first sc.
- Ch 1, sc in each stitch around.
- Join with a slip stitch to the first sc.
- Repeat step 4 until the body is about 1.5 inches (4 cm) tall or your desired length.
- Begin stuffing the body with fiberfill.
Step 3: Turtle Head
- Ch 1, sc in the next 5 stitches, dec in the next stitch. (6 sc, 1 dec)
- Ch 1, turn, sc in the next 3 stitches, dec in the next stitch. (4 sc, 1 dec)
- Ch 1, turn, sc in each stitch across. (4 sc)
- Ch 1, turn, sc in each stitch across. (4 sc)
- Ch 1, turn, dec in the first 2 stitches. (2 dec)
- Fasten off, leaving a tail for sewing.
Step 4: Turtle Legs (Make 4)
- Magic ring, ch 1 (does not count as a stitch), work 6 sc into the magic ring.
- Join with a slip stitch to the first sc.
- Fasten off, leaving a tail for sewing.
Step 5: Turtle Tail
- Ch 7.
- Starting from the 2nd chain from the hook, sc in each chain across.
- Fasten off, leaving a tail for sewing.
Step 6: Assemble the Turtle
- Sew the turtle’s head to the front of the body.
- Attach safety eyes or sew small black yarn pieces for the eyes above the head.
- Sew the tail to the back of the body.
- Sew the legs to the bottom of the body, evenly spaced on each side.
- Use a yarn needle to weave in all loose ends.
25 Various Turtle Crochet Pattern
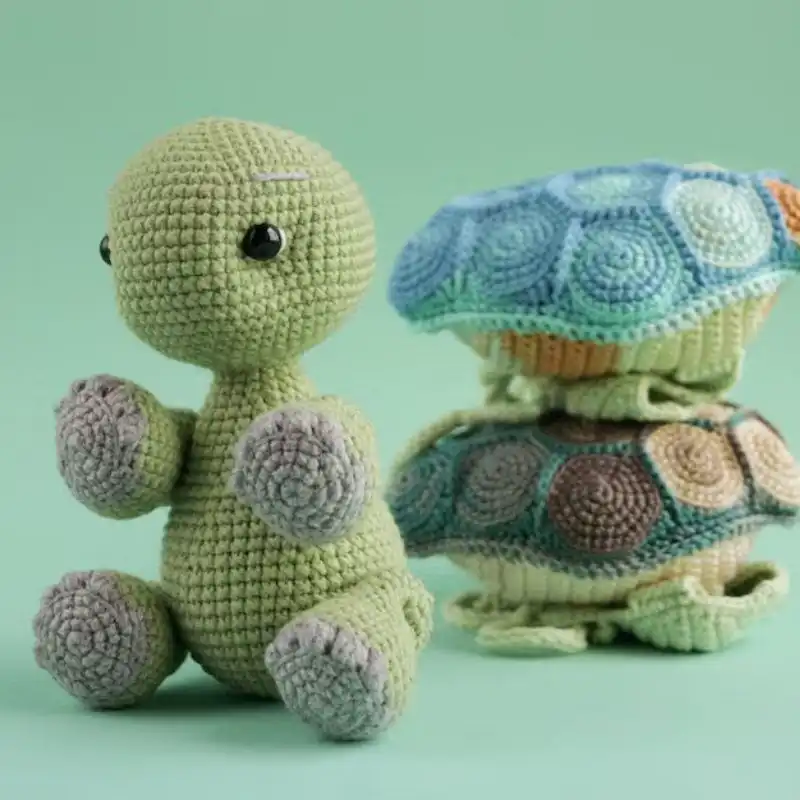
1. Crochet Turtle
If you’re looking to make a turtle Amigurumi that you know will become a favorite of anybody you gift it to, then you need to check out this turtle toy pattern. With a removable shell, this design stands out from many of the other patterns on this list.
It’s simple enough that anyone can easily pick it up and start playing around with it, It’s also very simple to make, too, so if you’ve never tried crafting before, this is a great place to start.
Suggested Yarn: Drops Alaska - Aran Weight Yarn
Difficulty Level: Beginner
Yarn Weight: Medium (4)
Crochet Hook Size: G/6 (4.0 mm)
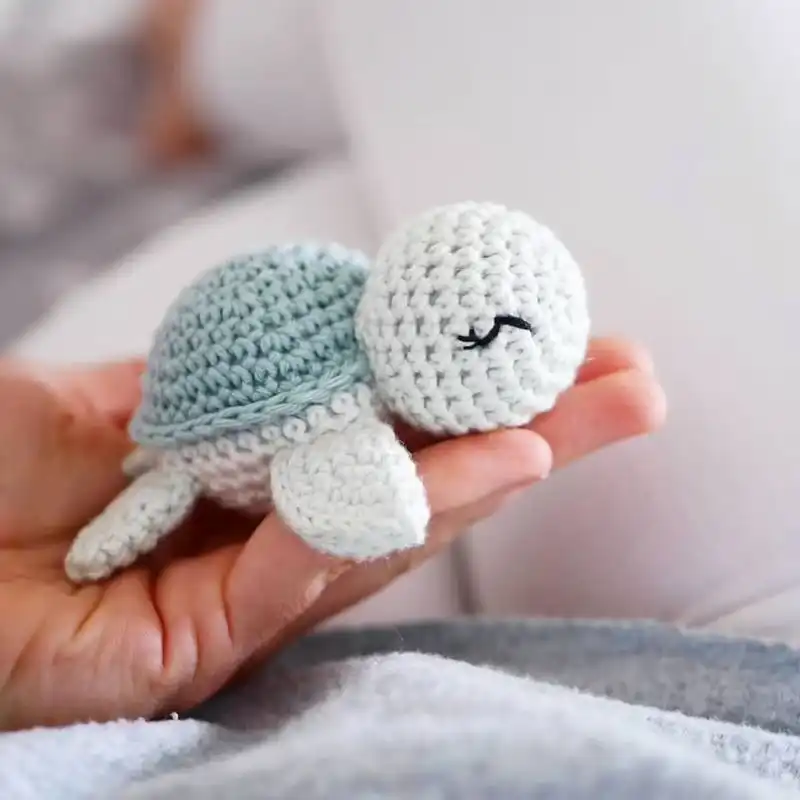
2. Baby Sea Turtle
If you love turtles, then you must love baby turtles even more! Because let’s face it, who doesn’t love baby turtles? This amigurumi pattern only solidifies this love, with a design that is great for younger and older kids to play with!
There are two different designs available here, each featuring a completely different style of turtle. Both feature a similar construction method, though, meaning you shouldn’t find it difficult to figure out how to work with both.
Suggested Yarn: YarnArt Jeans - Sport Weight Yarn
Difficulty Level: Beginner
Yarn Weight: Light (3)
Crochet Hook Size: E/4 (3.5 mm)
3. Shark Turtle
This turtle Amigurumi pattern is perfect for those who enjoy working with their hands and can’t wait to create something cute. It features one of our most popular designs, the classic turtle, as well as a few other variations on the theme.
If you’re not familiar with the turtle Amigurumi trend, there are plenty of reasons why you might want to give this a try. For starters, they’re extremely versatile, allowing you to add lots of personality to any space in your house. They’re also incredibly easy to make, making them ideal for beginners.
Suggested Yarn: Red Heart Roll with It Melange - Worsted Weight Yarn
Difficulty Level: Intermediate
Yarn Weight: Medium (4)
Crochet Hook Size: H/8 (5.0 mm)
4. Turtle Bob
We’ve got another great sea turtle design for you animal lovers! While this particular turtle pattern may seem a little basic, it’s quite intricate when you take into account all the details involved. Bob is the perfect little companion for someone who enjoys spending time outdoors.
He has an adorable expression on his face, as well as some precious beady little eyes, so he’s sure to steal hearts wherever he goes. The pattern itself was created by avid crocheter Amicidicotone.
You can use this crocheted turtle as a decorative object in your home or give it as a present to someone special. We think it would make a fantastic birthday or Christmas gift for any friend or family member.
Suggested Yarn: Drops Alaska - Aran Weight Yarn
Difficulty Level: Intermediate
Yarn Weight: Medium (4)
Crochet Hook Size: H/8 (5.0 mm)
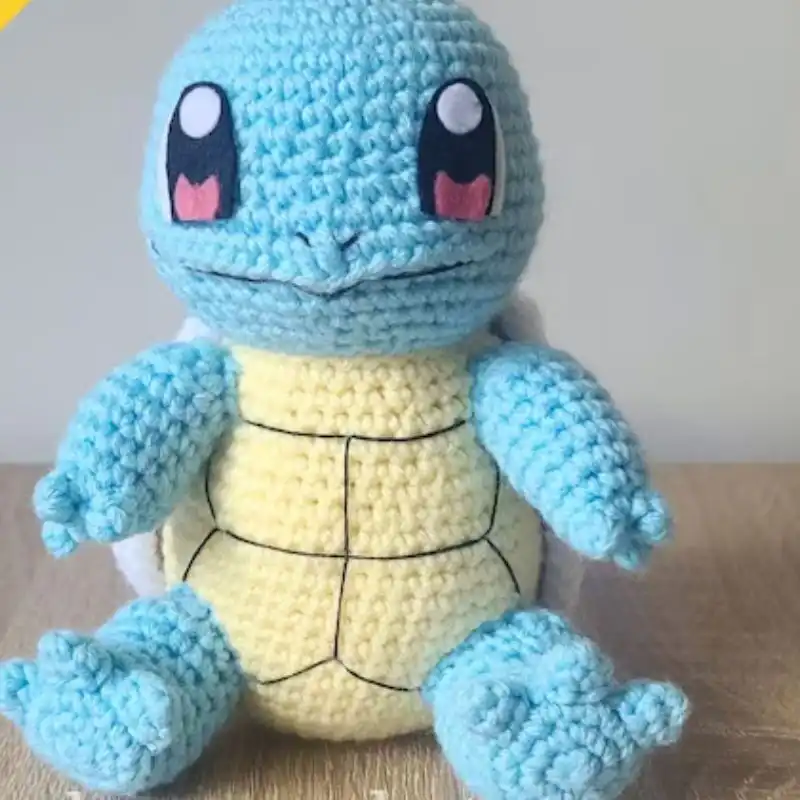
5. Adorable Baby Squirtle
This adorable Squirtle is the perfect project for yourself, or another gamer who you know will love this piece of Pokémon craftwork. It’s going to end up being one of the most treasured items in your collection, so why not start it off now?
The instructions are very simple, with just a handful of steps required to get started. Once completed, you’ll end up with a beautiful, soft toy that would look great hanging around your child’s bedroom.
Suggested Yarn: Knit Picks Brava - Worsted Weight Yarn
Difficulty Level: Intermediate
Yarn Weight: Medium (4)
Crochet Hook Size: G/6 (4.0 mm)
6. Sheldon Turtle
Sheldon is made to such a beautifully high standard, he looks like a pro was responsible for crafting him into life. Sheldon is still a beginner at the game of crochet. He’s designed using only a few rows of chain stitches, which is perfect for someone who wants to learn how to crochet.
This adorable turtle is a great beginner project. If you do decide to keep Sheldon around, we highly recommend keeping him out of reach of small children.
Suggested Yarn: Hayfield Spirit - DK Weight Yarn
Difficulty Level: Advanced
Yarn Weight: Light (3)
Crochet Hook Size: E/4 (3.5 mm)
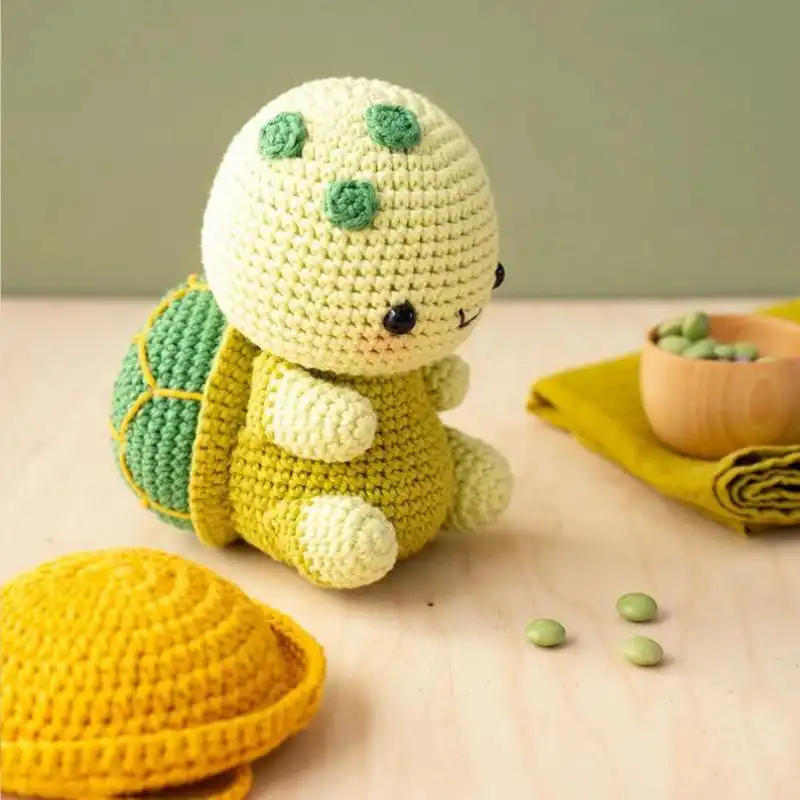
7. Succulent Plant Turtle
Embrace the charm of nature’s elegance with the Succulent Plant Turtle. This captivating turtle pattern beautifully captures the essence of a turtle’s shell adorned with intricate succulent plants.
The design harmoniously blends the sturdy and protective nature of a turtle with the delicate yet resilient allure of succulents. Each succulent is meticulously illustrated, showcasing the unique shapes and hues that make these plants so captivating.

Suggested Yarn: Knitpal Woolen Delights - Aran Weight Yarn
Difficulty Level: Intermediate
Yarn Weight: Medium (4)
Crochet Hook Size: G/6 (4.0 mm)
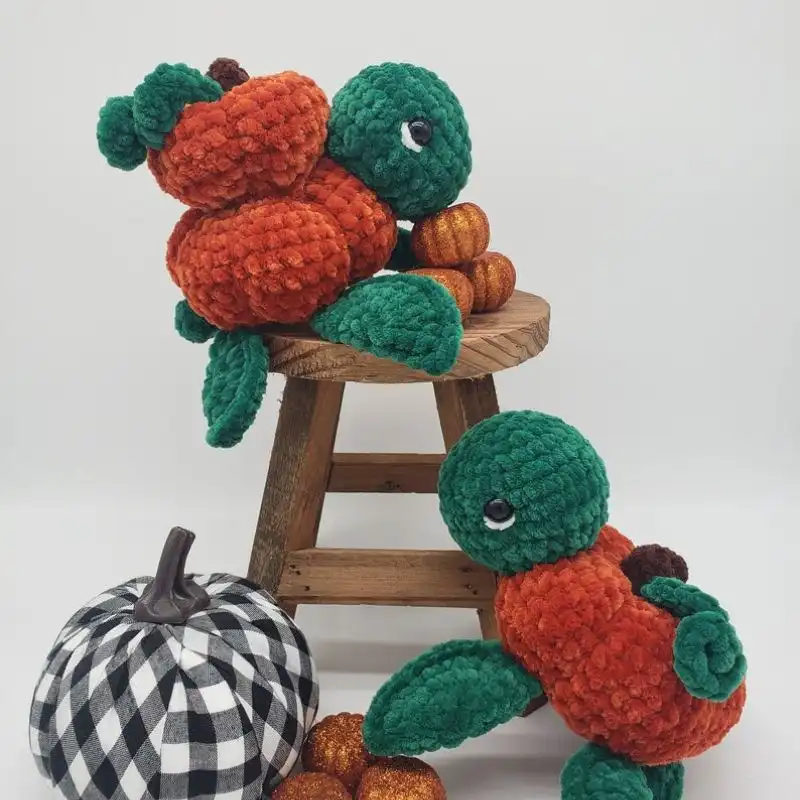
8. 2 In 1 Pumpkin Turtle
Step into a world of whimsy and creativity with the 2-in-1 Pumpkin Turtle pattern. This enchanting design reimagines the classic appearance of a turtle and infuses it with the spirit of autumn. The pattern ingeniously combines the endearing qualities of a turtle with the iconic symbolism of pumpkins during the fall season.
Suggested Yarn: DROPS Muskat - Worsted Weight Yarn
Difficulty Level: Intermediate
Yarn Weight: Medium (4)
Crochet Hook Size: H/8 (5.0 mm)
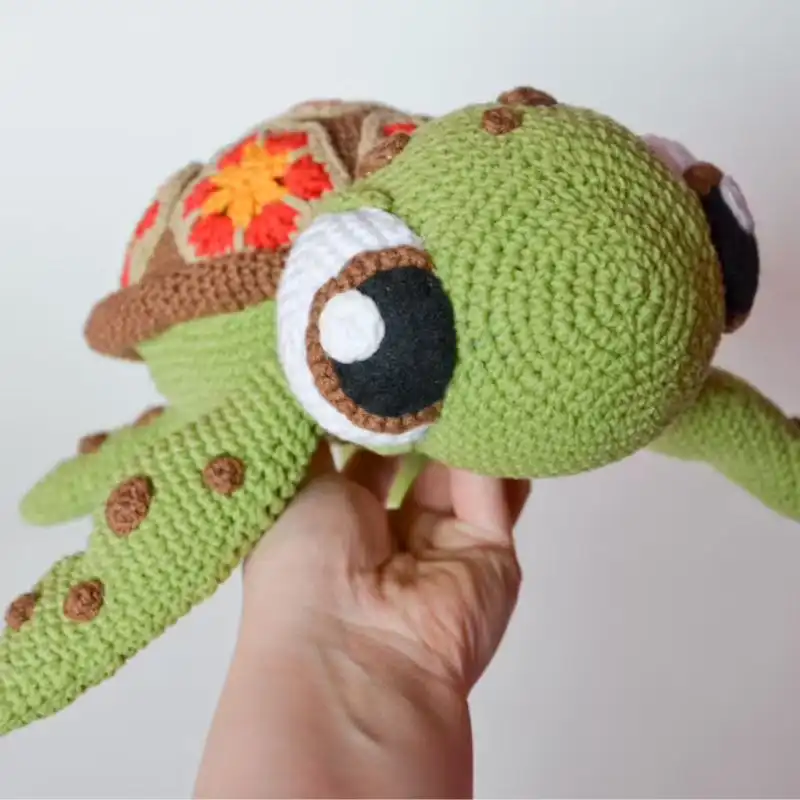
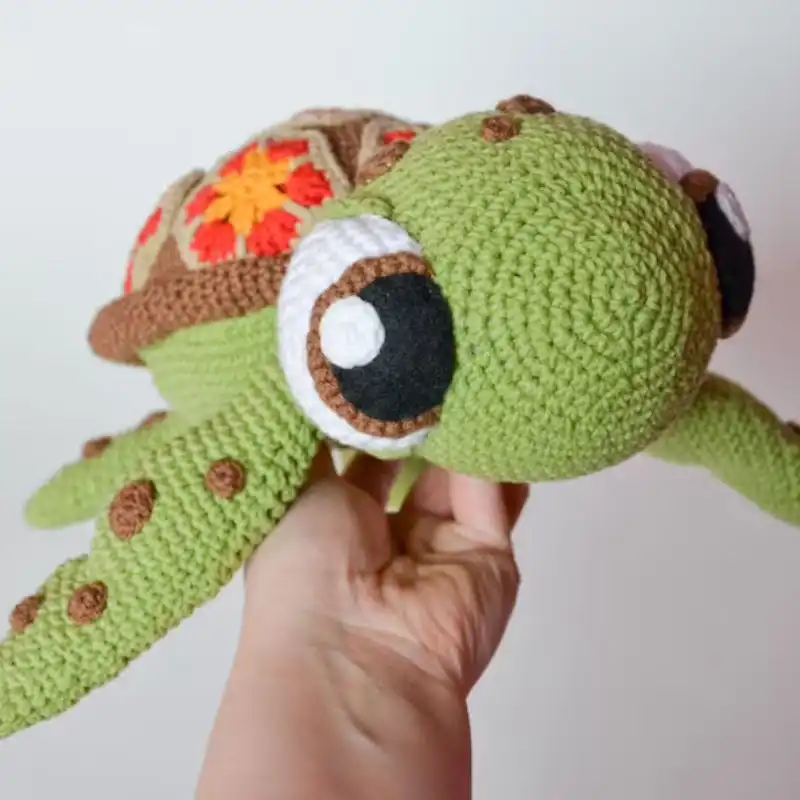
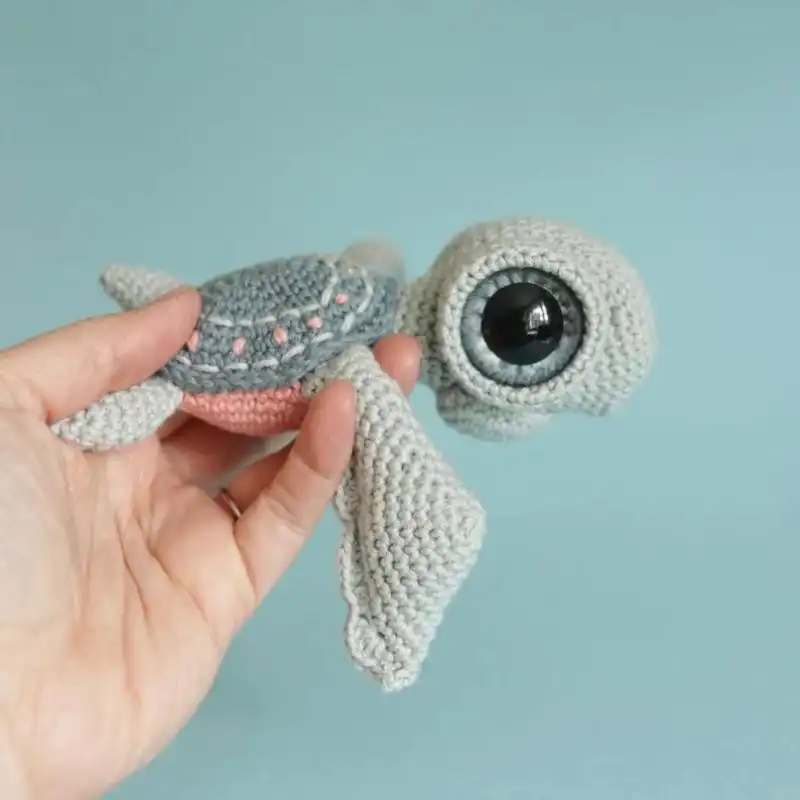
9. Turtle
The giant googly eyes set this pattern apart from the others we have covered so far. While most of our crochet turtle patterns use smaller eyes, this one takes things to a whole new level.
If you like the idea of having a fun activity for kids to play with, then this free crochet pattern for a turtle with big eyes is perfect for you. We think everyone will enjoy crafting this adorable creature, no matter what age they are!
Suggested Yarn: Acrylic Worsted
Difficulty Level: Intermediate
Yarn Weight: Medium (4)
Crochet Hook: 4.0 mm
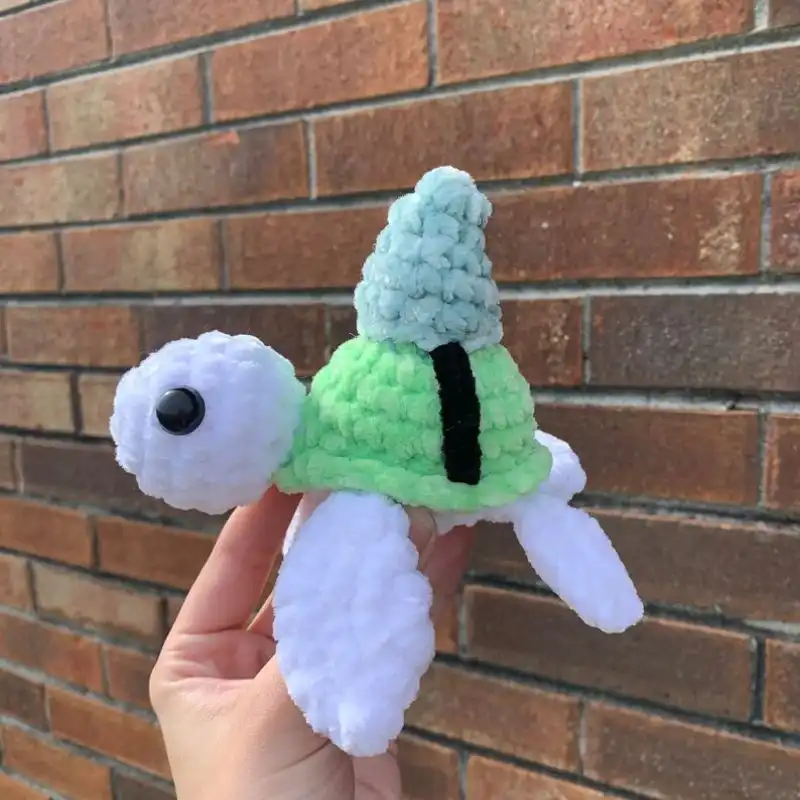
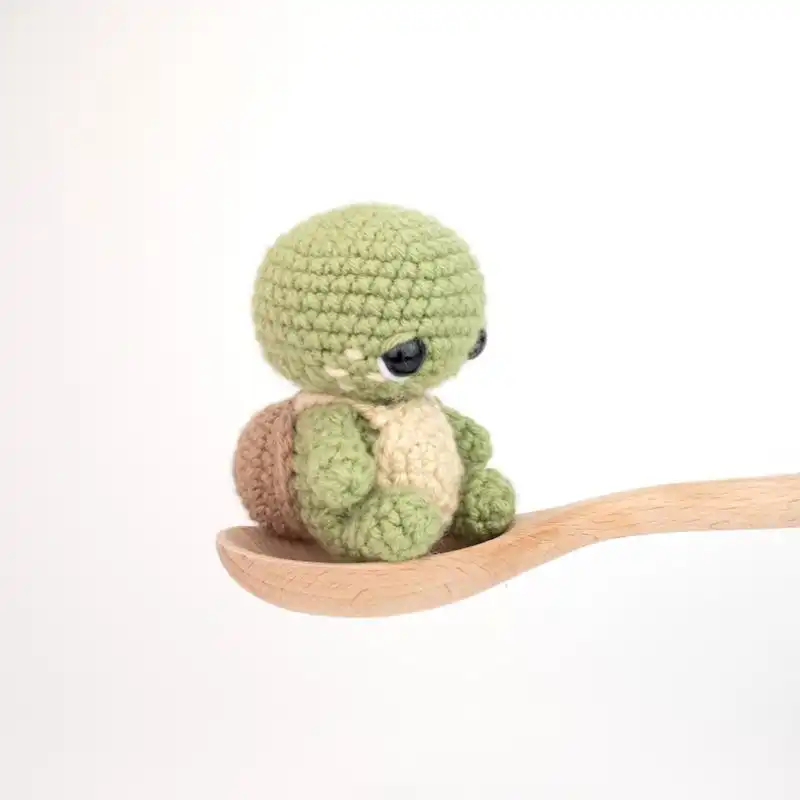
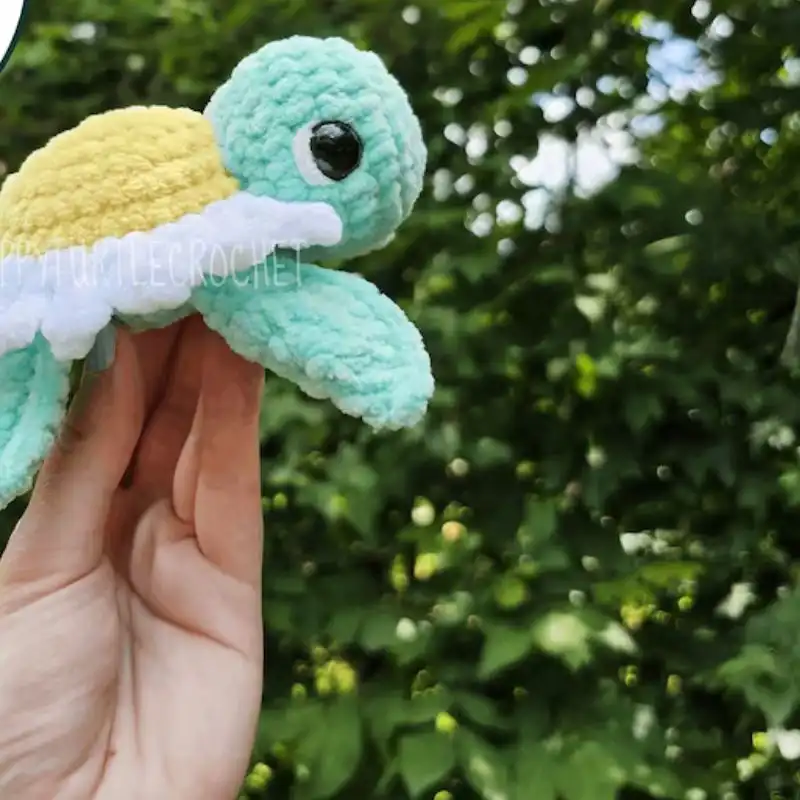
10. Timmy The Turtle
This one is so cute, it even has its name already! If you want to recreate little Timmy for your own home, then this pattern and its instruction will help guide you. His body also features some cool details.
We love the fact that he has little flippers sticking out of his bottom half, and they look like little lime slices too! These look amazing when attached to his body, and they add a nice bit of detail to the overall design. This is such a cute little turtle pattern, and we hope you get to craft one for yourself very soon!
Suggested Yarn: Queensland Kathmandu - Aran Weight Yarn
Difficulty Level: Beginner
Yarn Weight: Medium (4)
Crochet Hook Size: G/6 (4.0 mm)
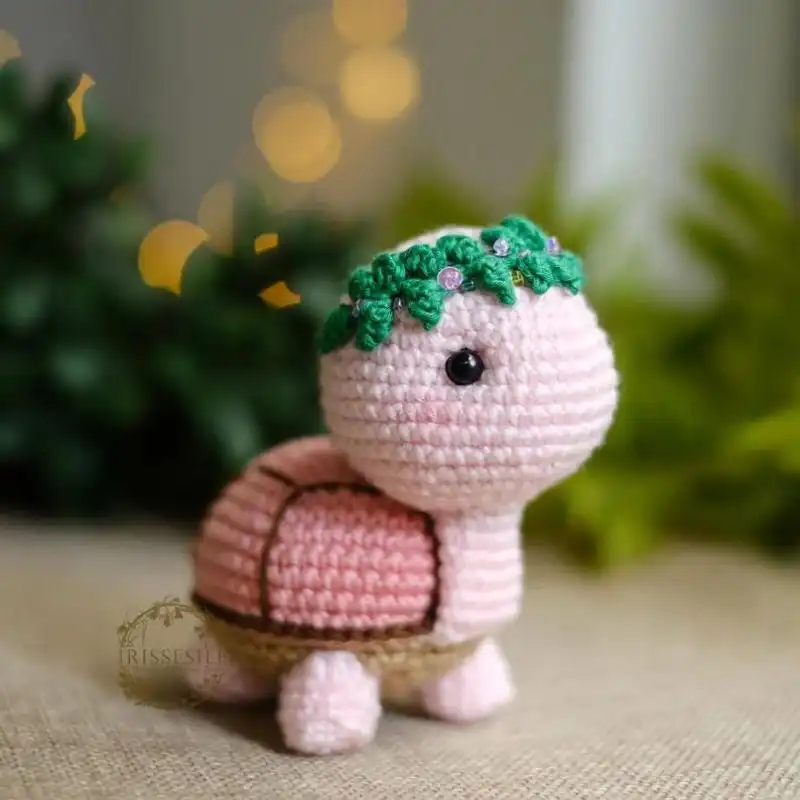
11. Cute Little Turtle
This crochet turtle pattern is a very straightforward design, so you shouldn’t have any problems getting started. Each piece has been designed to be as easy to work with as possible, so there aren’t any complex techniques or tricky stitch counts involved.
All of the pieces are fairly small, so you don’t have to worry about making your finished product overly large. The best part of this pattern is that it comes with two different sizes to choose from. You can easily adjust them to suit your needs by simply changing the number of stitches used.
Suggested Yarn: CAVAYOMA Baby Alpaca - Sport Weight Yarn
Difficulty Level: Beginner
Yarn Weight: Light (3)
Crochet Hook Size: E/4 (3.5 mm)
12. Tina The Turtle
Little Tina here is just begging to be made for your home! And with just the cutest little box-shaped body, they make the most adorable little throw pillow too!
There’s nothing complicated about this crochet pattern, but if you’re looking to learn more about crocheting, we’ve included a few helpful links below.Once you’ve mastered these four simple steps, you’ll be ready to start designing your original designs!
Suggested Yarn: Patons Classic - Worsted Weight Yarn
Difficulty Level: Intermediate
Yarn Weight: Medium (4)
Crochet Hook Size: H/8 (5.0 mm)
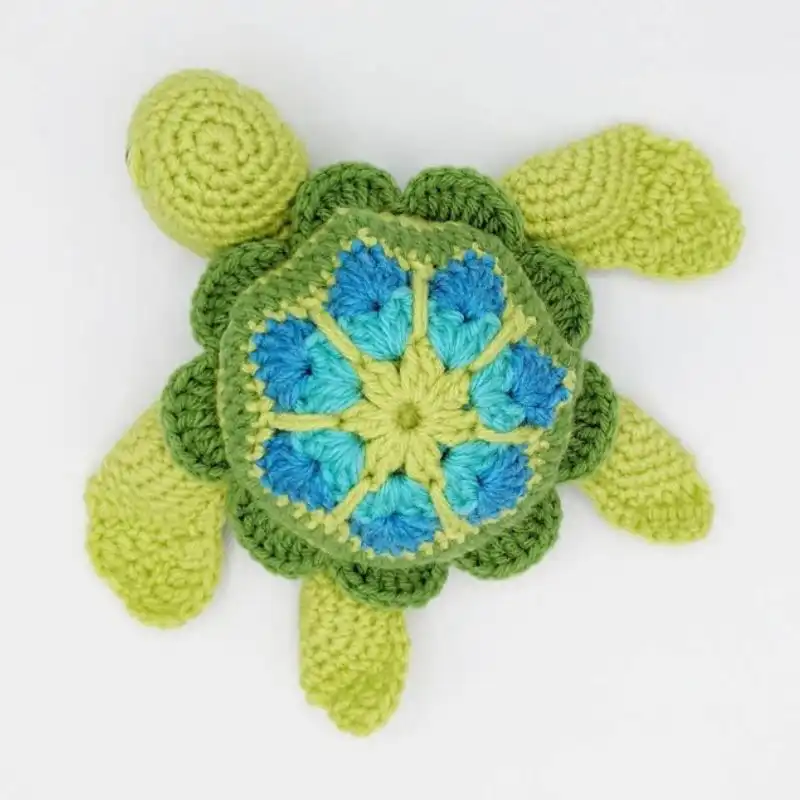
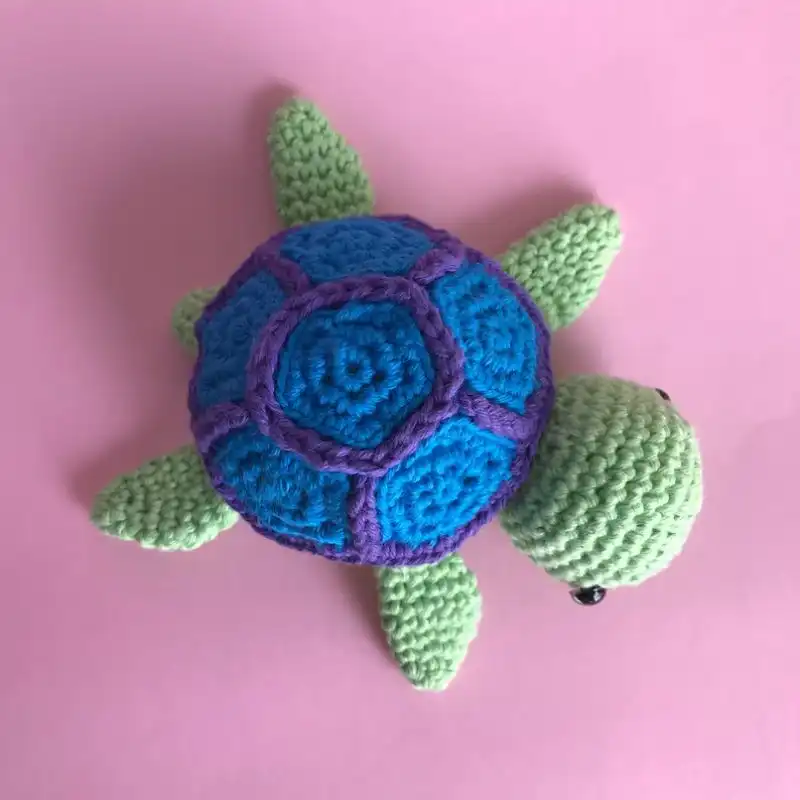
13. Turtle Flower
This pattern stands out from the rest! Whilst every amigurumi cushion has been adorable on this list, how many have flowers on them!?
But this one takes things to another level, as it’s made entirely out of crochet flowers. The result is a beautiful flowery effect, which gives the entire project an incredible appearance. We love the way this pattern has been designed, so you should give this crochet flower pattern a try!
Suggested Yarn: Drops Nepal - Aran Weight Yarn
Difficulty Level: Beginner
Yarn Weight: Medium (4)
Crochet Hook Size: G/6 (4.0 mm)
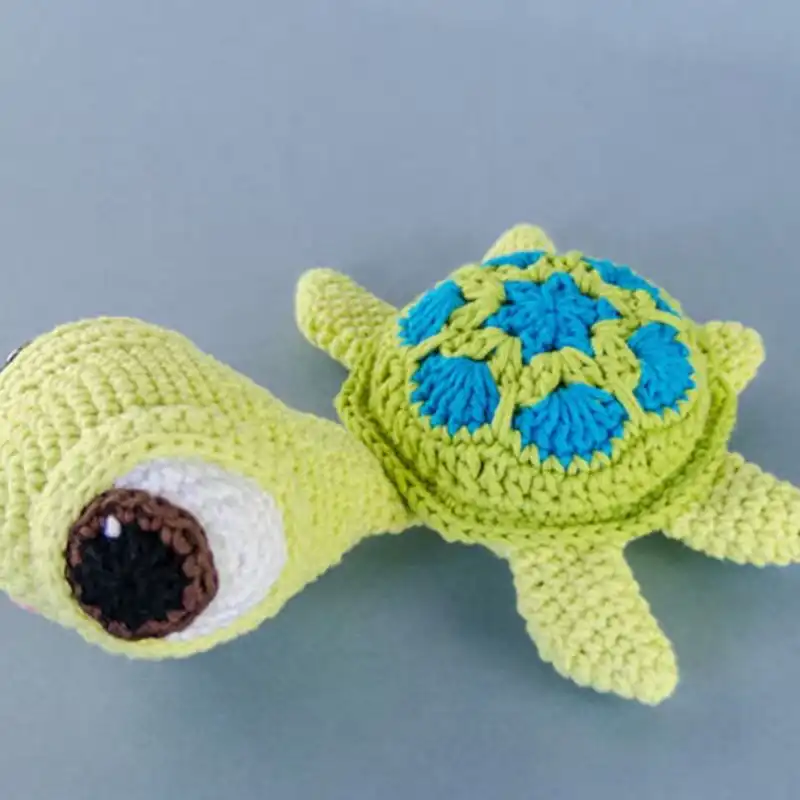
14. Squirt (From Finding Nemo) Turtle Crochet
This one is a must-have for the Disney Pixar kids (and adults) in your home! This crochet design perfectly replicates the adorable baby sea turtle from the hit animated film, for your home and hugging pleasure!
There’s no limit to what you can create using this free crochet pattern! What’s more, this cute little crochet turtle will look great sitting proudly on your sofa!
Suggested Yarn: JubileeYarn Snow Blossom - DK Weight Yarn
Difficulty Level: Intermediate
Yarn Weight: Light (3)
Crochet Hook Size: E/4 (3.5 mm)
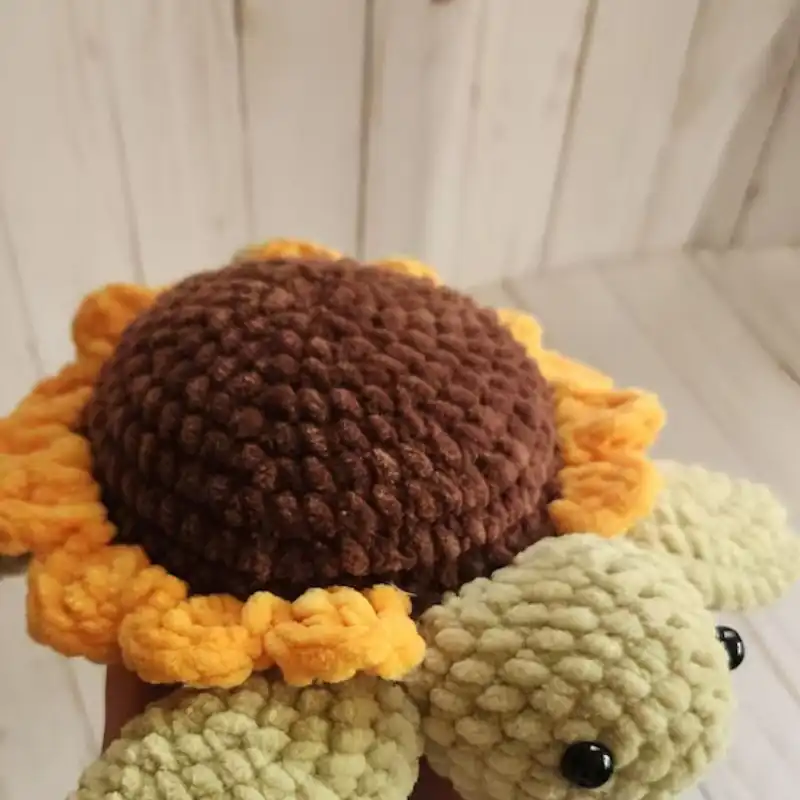
15. Sunflower Turtle
The Sunflower Turtle pattern combines the adorable charm of a turtle with the vibrant beauty of a sunflower. This cute amigurumi turtle features a rounded shell adorned with a crocheted sunflower design.
The turtle’s body is made up of soft yarn and has a friendly expression on its face. This pattern is perfect for nature lovers and those looking for a unique twist on the classic turtle amigurumi.
Suggested Yarn: DROPS Alpaca - Worsted Weight Yarn
Difficulty Level: Intermediate
Yarn Weight: Medium (4)
Crochet Hook Size: H/8 (5.0 mm)
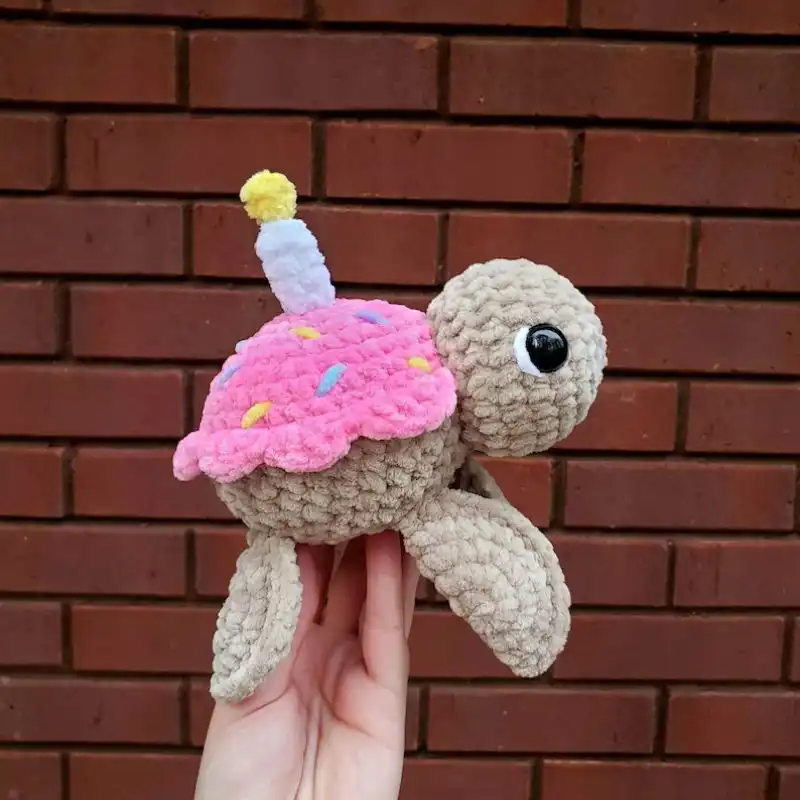
16. Cupcake Turtle
If you have a sweet tooth and love turtles, the Cupcake Turtle pattern is perfect for you! This delightful amigurumi turtle resembles a cute little cupcake with shell-shaped frosting on its back.
The turtle’s body is crafted with colorful yarn, and the cupcake shell is adorned with sprinkles and a cherry. This pattern is a delightful combination of cuteness and confectionery.
Suggested Yarn: Bernat Softee Baby - DK Weight Yarn
Difficulty Level: Intermediate
Yarn Weight: Light (3)
Crochet Hook Size: E/4 (3.5 mm)
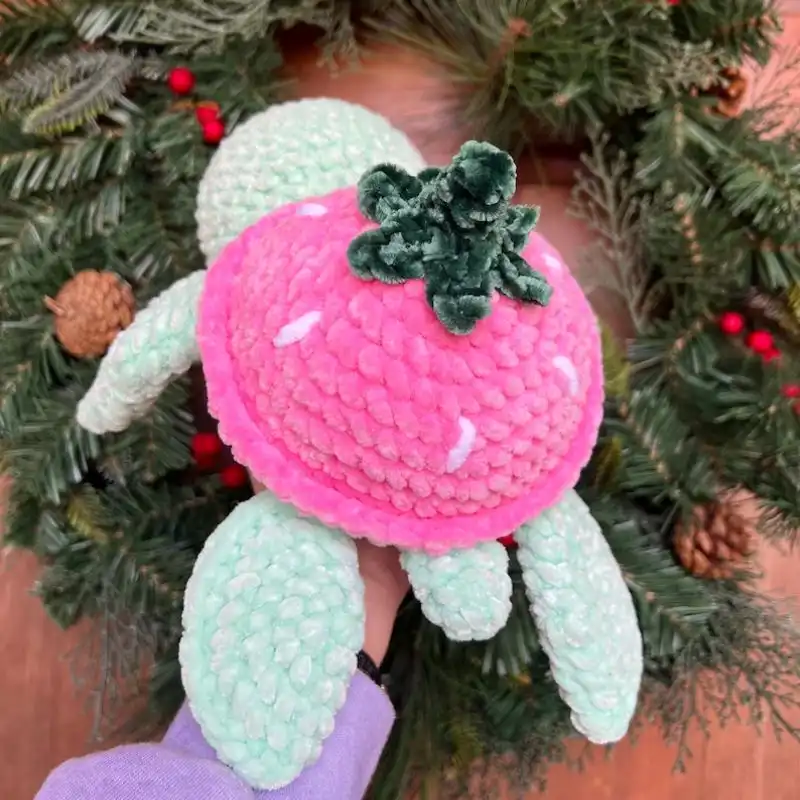
17. Strawberry Turtle
The Strawberry Turtle pattern brings together the sweetness of strawberries and the charm of a turtle. This adorable amigurumi turtle features a strawberry-shaped shell with vibrant red and green leaf details.
The turtle’s body is made with soft yarn, with a friendly face, small black eyes, and a smiling mouth. Crocheting this pattern will result in a delightful turtle that will make anyone smile.
Suggested Yarn: PATONS Canadiana - Aran Weight Yarn
Difficulty Level: Beginner
Yarn Weight: Medium (4)
Crochet Hook Size: G/6 (4.0 mm)
18. Daisy Turtle
The Daisy Turtle pattern is a lovely amigurumi design that captures the beauty of daisies in a turtle form. The turtle’s shell is shaped like a daisy flower with white petals and a yellow center.
The turtle’s body is made with plush yarn and has a cute expression on its face. This pattern is perfect for nature enthusiasts or anyone who loves the charm of daisies and turtles.
Suggested Yarn: YarnArt Jeans - Sport Weight Yarn
Difficulty Level: Beginner
Yarn Weight: Light (3)
Crochet Hook Size: E/4 (3.5 mm)
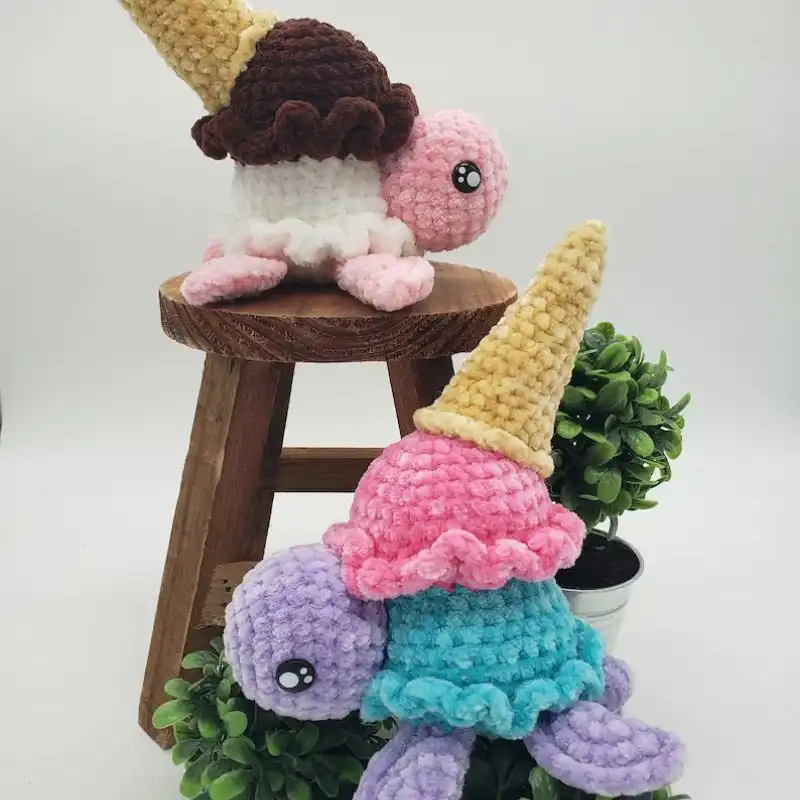
19. Scoops the Ice Cream Turtle
Scoops the Ice Cream Turtle is an adorable amigurumi pattern that combines the cuteness of a turtle with the deliciousness of ice cream.
This turtle features a rounded shell resembling a scooped ice cream cone with colorful swirls and a cherry on top. The turtle’s body is crafted with soft yarn and has a friendly face, embroidered eyes, and a smile. Crocheting this pattern will result in a delightful and sweet turtle companion.
Suggested Yarn: Patons Classic - Worsted Weight Yarn
Difficulty Level: Intermediate
Yarn Weight: Medium (4)
Crochet Hook Size: H/8 (5.0 mm)
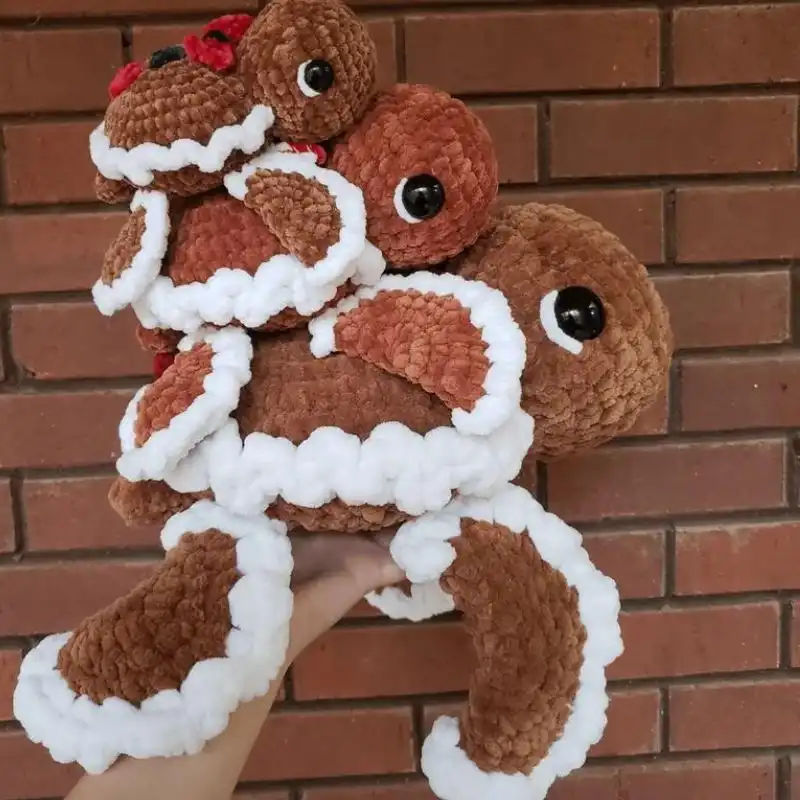
20. Gingerbread Turtle
The Gingerbread Turtle pattern is a delightful twist on the classic turtle design, inspired by the warmth and coziness of gingerbread cookies. This amigurumi turtle features a shell with a gingerbread cookie texture and design, complete with icing details.
The turtle’s body is made with soft brown yarn and has a cute expression on its face. This pattern is perfect for the holiday season or anyone who loves gingerbread’s comforting scent and taste.
Suggested Yarn: Fingering Weight Yarn
Difficulty Level: Beginner
Yarn Weight: Fingering
Crochet Hook Size: 3.5mm
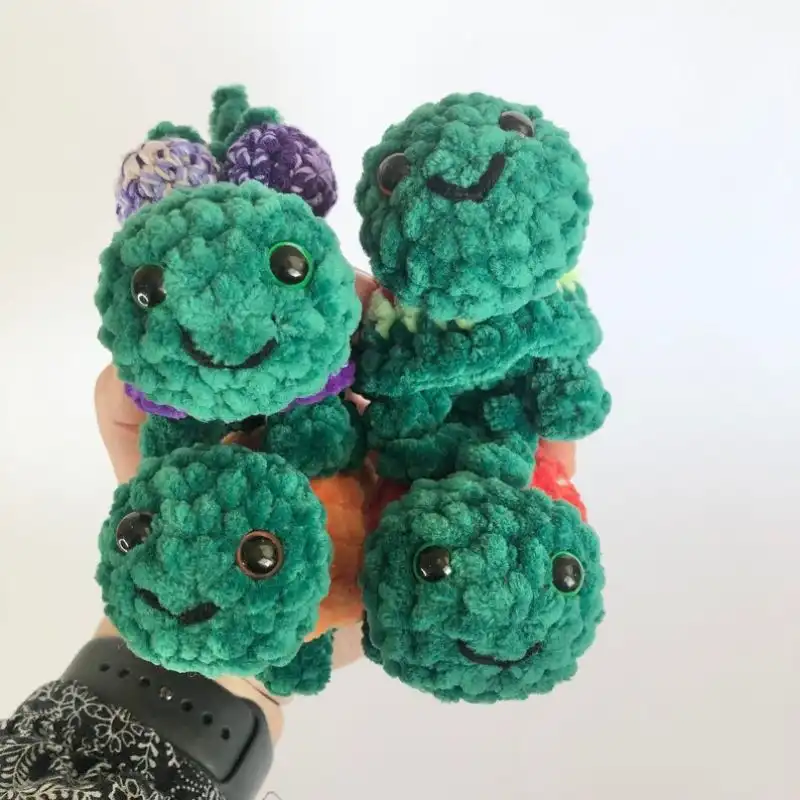
21. Myrtle the turtle
Myrtle the Turtle is a charming amigurumi pattern that creates a lovable turtle companion. This turtle has a rounded shell with a textured pattern and comes in various color options. The body is made with soft yarn and has endearing embroidered eyes and a smile. Myrtle is a great gift or a cute addition to any amigurumi collection.
Suggested Yarn: Drops Alaska - Aran Weight Yarn
Difficulty Level: Intermediate
Yarn Weight: Medium (4)
Crochet Hook Size: G/6 (4.0 mm)
22. Theo the turtle
Theo the Turtle is an adorable amigurumi pattern that brings to life the lovable nature of turtles. This turtle features a shell with a unique design and is made with soft and cuddly yarn. Theo has a friendly expression with embroidered eyes and a cute smile. Crocheting this pattern will create a charming turtle buddy perfect for snuggles and playtime.
Suggested Yarn: JubileeYarn - Sport Weight Yarn
Difficulty Level: Beginner
Yarn Weight: Light (3)
Crochet Hook Size: E/4 (3.5 mm)
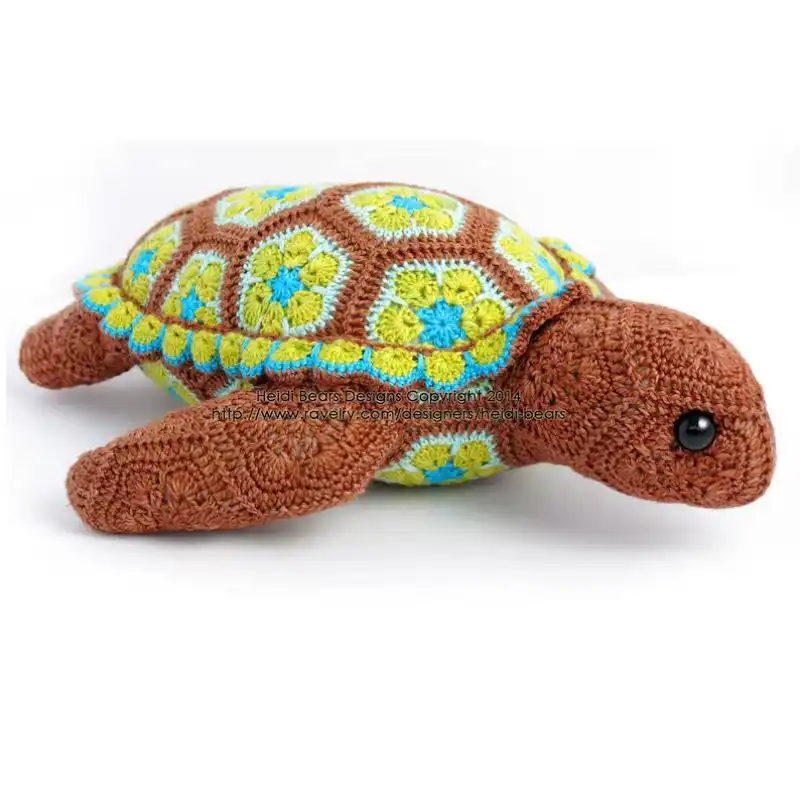
23. Seymour The Sea Turtle
Seymour, the Sea Turtle, is a beautiful amigurumi pattern that captures the beauty and grace of sea turtles. This turtle is designed with attention to detail, featuring a shell with intricate patterns and lifelike colors.
The body is made with soft yarn and has a gentle expression with embroidered eyes. Seymour is a wonderful addition to any ocean-themed collection or a special gift for turtle lovers.
Suggested Yarn: Red Heart Super Saver - Worsted Weight Yarn
Difficulty Level: Intermediate
Yarn Weight: Medium (4)
Crochet Hook Size: H/8 (5.0 mm)
Do’s & Don’ts For A Safe Turtle
Safety is paramount when crocheting a turtle, primarily if it’s intended for young children or babies. Here are some do’s and don’ts to ensure that your crocheted turtle is safe:
Do’s
- Use Hypoallergenic Yarn: Opt for materials less likely to cause allergic reactions, especially if the turtle is for a child or someone with known sensitivities.
- Secure All Parts Firmly: Ensure limbs, head, and other parts are attached securely to prevent them from detaching and posing a choking hazard.
- Use Safety Eyes (or stitch eyes): If you’re adding eyes, use safety eyes designed for toys that are harder for children to pull out. Alternatively, stitch the eyes using yarn for added security.
- Choose Non-Toxic Stuffing: Ensure the stuffing material is non-toxic, especially if there’s a chance the turtle could be chewed on or ingested.
- Check the Turtle Regularly: If it is frequently used or played with, regularly inspect it for signs of wear and tear that could make it unsafe.
Don’ts
- Don’t Use Small, Detachable Parts: Avoid beads, buttons, or small parts that can easily be torn off and swallowed.
- Don’t Use Long Fibers or Fringe: This can be a strangulation hazard or can be pulled off and ingested.
- Don’t Use Heirloom or Delicate Yarns: These might not withstand regular use or washing, leading to faster wear and potential hazards.
- Don’t Leave Long Loose Ends: After finishing your work, trim and securely weave in all loose ends to ensure they don’t unravel or pose a danger.
- Don’t Give a Damaged Turtle to a Child: If the turtle shows signs of damage, repair it immediately or keep it away from children until it’s fixed.
Tips To Avoid Crochet Mistakes
Creating a perfect crocheted turtle requires attention to detail and practice. Here are some tips and tricks to help avoid common crochet mistakes:
- Consistent Tension: Keeping your yarn tension consistent ensures even stitches, making your turtle look uniform and polished.
- Count Stitches: Especially in patterns where the stitch count is crucial, like in the round for a turtle’s shell, make sure to count your stitches at the end of each round to avoid increases or decreases.
- Use Stitch Markers: When working in the round, place a stitch marker in the first stitch of each new round to keep track of your starting point.
- Read Through the Pattern: Before starting, read through the entire pattern to familiarize yourself with the steps and ensure you understand all instructions.
- Choose the Right Hook Size: If your stitches are too tight or loose, it might be due to the hook size. Adjust accordingly to achieve the desired gauge.
- Practice New Stitches: Before incorporating a new stitch into your turtle, practice it on a swatch to get the hang of it.
- Check Gauge: If the pattern provides a gauge, take the time to create a gauge swatch. It ensures that your turtle turns out the intended size and shape.
- Avoid Overstuffing: Stuff the turtle just enough that it holds shape but doesn’t stretch the stitches, creating gaps and distorting the design.
- Join Yarn Properly: If you need to add new yarn, use “invisible join” techniques to ensure seamless transitions.
- Keep Notes: As you work through the pattern, jot down any changes or adaptations you make. It will be helpful to recreate or adjust the design later.
- Regularly Review Your Work: Pause and inspect your work every few rows or rounds. It’s easier to catch and correct mistakes early on.
- Use Good Lighting: Working in well-lit conditions can help you see stitches clearly, reducing the likelihood of errors.
- Take Breaks: If you’re fatigued, leave your work and return to it later. Crocheting while tired can lead to mistakes.
- Ask for Feedback: Sharing your work with fellow crocheters or in crafting groups can provide valuable insights and catch mistakes you might have overlooked.
How To Block Amigurumi Turtle Project?
Blocking your Amigurumi Turtle project is important to achieving the perfect shape and neat appearance. Here’s a quick guide for you to follow!
First, gather your supplies: a spray bottle with water, rustproof pins, and a foam board or blocking mat. Gently mist your finished turtle with water until damp but not soaking wet.
Next, spread your turtle on the mat and use the pins to shape the different parts. You should focus on the shell, legs, and head for a perfect turtle outline. Remember, be gentle! You don’t want to damage your creation.
Lastly, let your Amigurumi Turtle dry completely before removing the pins. It may take a few hours, so give it some time. Patience is key when waiting for your turtle to dry and set into its final shape.
How To Add A Personal Touch To Amigurumi Turtle?
Adding a personal touch to your amigurumi turtle can make it even more special and one-of-a-kind. To do this, you can play with colors, textures, and details that reflect your personality or the personality of the person you’re making it for.
When choosing your yarn, consider using shades of green, blue, or bright colors for the shell and body. Mixing and matching these them can create a unique crochet project.
Aside from colors, texture can bring your turtle to life. Experiment with different yarn materials, like cotton, wool, or even velvet yarn. Varying the stitch patterns for the shell can also achieve a unique texture. Remember to consult crochet turtle tutorials if you need some guidance.
Finally, feel free to accessorize. Add cute eyes, buttons, or even a tiny scarf for your turtle. Hand-stitch a name or a meaningful date onto the turtle’s belly as a personal touch.
Wash & Care Instructions For Amigurumi Turtle
Caring for your amigurumi turtle is easy and simple. To keep your turtle looking its best, follow these friendly tips.
First, gently hand-wash your amigurumi turtle with cold or lukewarm water. Use a mild detergent, such as baby shampoo or a delicate fabric detergent, which will be gentle on the fibers. Be careful not to wring or twist your turtle, as it may cause it to become misshapen.
Next, press out the excess water by placing the turtle between two dry towels and gently pressing down. It’s important to avoid twisting or wringing, as it may cause the stuffing to become lumpy.
Lay your amigurumi turtle on a flat, clean surface to air dry. Make sure to reshape your turtle while it is still damp to maintain its original shape. If you’re in a hurry, use a hairdryer on the lowest heat setting; keep it at a safe distance to avoid scorching the fibers.

Conclusion
As you can see, there are plenty of turtle designs to go around for any crocheting and knitting enthusiast. Whether you want to make your original designs, or simply copy off someone else’s work, we’ve got everything you need here.
We hope you enjoy our collection of free crochet turtle patterns just as much as we enjoyed creating it for you.
Frequently Asked Questions
What Are Amigurumi?
You may be wondering what exactly an Amigurumi is, after seeing it used so much in this list. Well, it’s a type of crochet doll that looks very similar to traditional plush toys.
However, instead of being filled with stuffing, they are typically made from fabric, yarn, or thread. They’re then given their unique personality through various embellishments, which makes them all the more special.
What Is The Difference Between Amigurumi Turtles Made By Sewing Or Crocheting?
Throughout this list, you may have noticed that both knitting and crocheting patterns have been listed, which might be a little confusing to those who don’t quite know the difference.
So, it’s important to understand the differences before you decide whether to purchase or download either sewing or crochet patterns.
Crocheting is a type of needlecraft, which means that it involves working fabric into three-dimensional objects. This technique uses a single hook to make loops that you feed your yarn through to build larger shapes and designs.
Sewing is a form of needlecraft as well, however, it is usually done with a single needle and thread in order to fix fabrics together.
How Can I Make My Crocheted Turtle Child-Safe?
Avoid small, detachable parts; use stitched eyes instead of plastic ones, and always use non-toxic, hypoallergenic materials.
How Long Does It Take To Crochet A Turtle?
It depends on the turtle’s size, the pattern’s complexity, and your skill level. A tiny turtle might take a few hours, while a large one could take days.
My Turtle’s Shape Is Distorted. How Can I Fix It?
Ensure you’ve stuffed it evenly. If the shape is still off, it might be due to inconsistent tension or miscounted stitches. Review your work and adjust as necessary.
Can I Sell Turtles I’ve Crocheted Using Someone Else’s Pattern?
Check the pattern’s copyright information. Many designers allow the selling of finished products but ask for credit. Always respect the designer’s wishes.

- 25 Delightful Crochet Jellyfish Patterns For Sea Lovers - April 17, 2024
- 75 Free Lovely Crochet Sweater Patterns (With Pictures) - February 9, 2024
- 50 Free Crochet Blanket Patterns For A Cozy Home - January 22, 2024
