

Welcome to the whimsical world of crochet! As an expert crocheter, I’ve often encountered a common problem: finding that perfect pattern that’s both challenging and rewarding. With its delightful texture and visual appeal, the Alpine Stitch Blanket is a great solution, but where do you start? Well, that’s where I come in!

I’ve compiled a list of 22 Crochet Alpine Stitch Blanket Patterns, each offering its unique twist on this classic design. It is an excellent resource for crocheters of all skill levels. Whether you’re a beginner or a seasoned pro, you’ll find patterns here that are both engaging and doable. Crocheting, typically seen as just a hobby, can be incredibly rewarding, and the Alpine Stitch is one of the best ways to experience this.
With these patterns, you’ll find it easy to create stunning blankets that will surely be conversation starters. Each pattern in this collection has been carefully selected for its beauty, ease, and effectiveness in teaching you the Alpine Stitch.
Popularity Of Alpine Stitch For Blanket
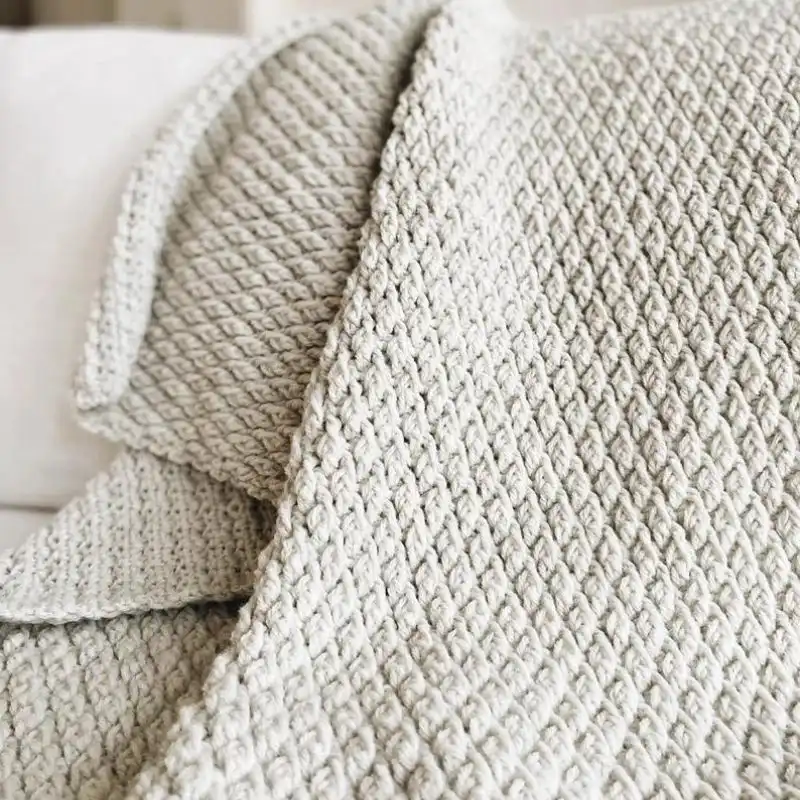
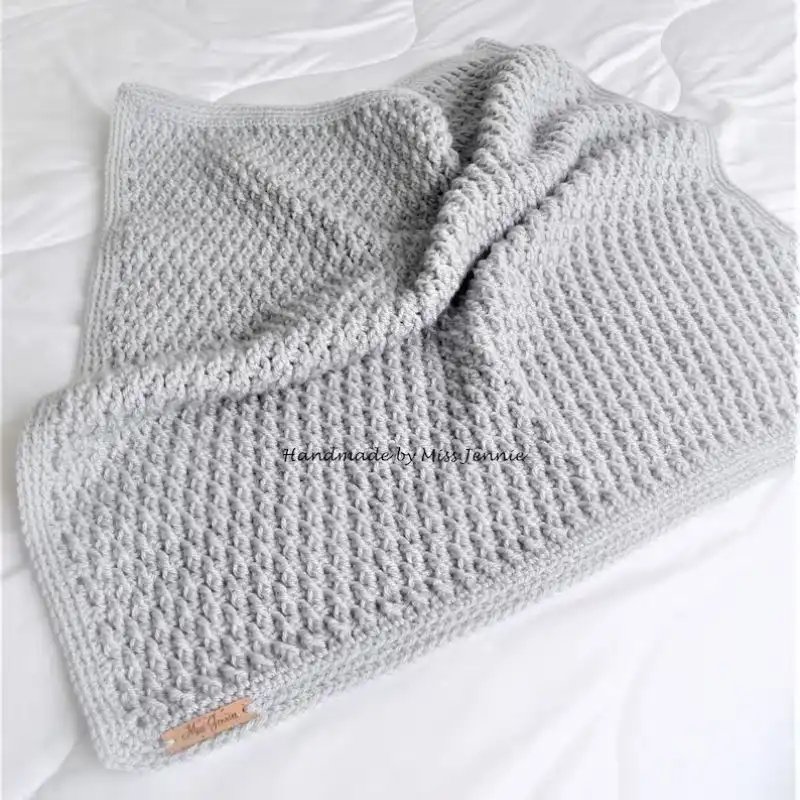
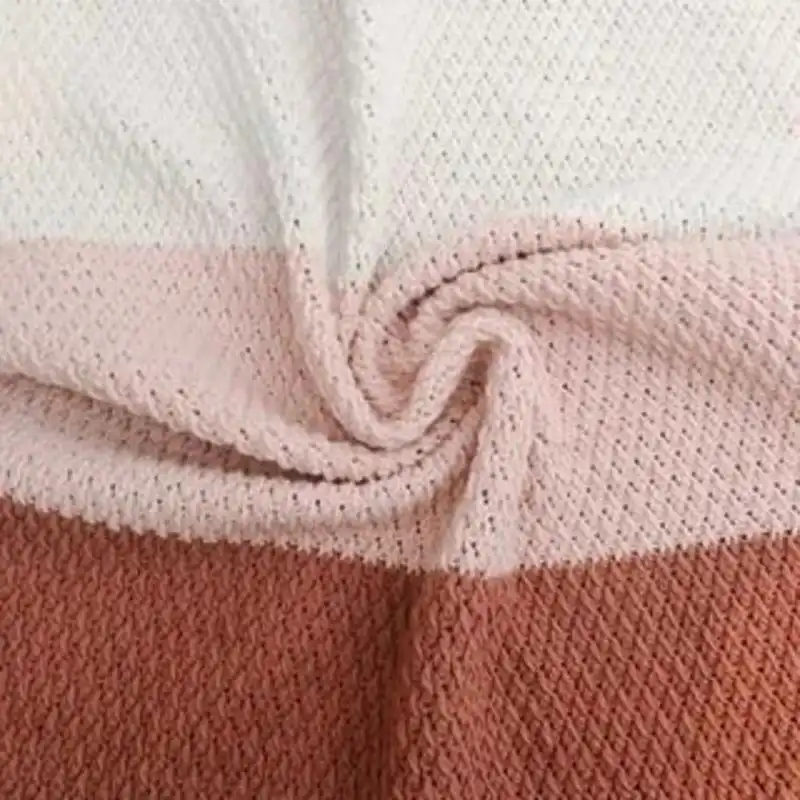
The Alpine Stitch has rapidly gained popularity among crochet enthusiasts for blanket making due to its unique, textured appearance that adds a touch of elegance and warmth to any project.
This stitch is known for its versatility, allowing creators to experiment with various color schemes and yarn types, making each blanket a personalized masterpiece.
Its intricate yet approachable pattern is excellent for beginners and advanced crocheters, offering a satisfying challenge while ensuring a beautiful outcome.
The resulting blankets, often characterized by their comforting thickness and eye-catching design, have become a favorite in homes, making the Alpine Stitch a go-to choice for cozy, handmade creations.
Various Stitches To Crochet A Blanket
Crocheting a blanket offers a beautiful opportunity to explore a variety of stitches, each bringing its unique texture and style to the finished product. Here’s a list of popular stitches with explanations:
- Single Crochet Stitch: This is one of the simplest and most basic crochet stitches. It creates a tight, dense fabric, making it great for warm, sturdy blankets.
- Double Crochet Stitch: A classic crochet stitch slightly taller than a single crochet. It works faster and creates a lighter, airier fabric for medium-weight blankets.
- Half Double Crochet Stitch: This stitch is a middle ground between single and double crochet, offering a balance of tightness and loft. It’s perfect for those who want a bit of texture without too much bulk.
- Treble Crochet Stitch: Also known as triple crochet, this stitch is taller and creates a more open, lacy fabric. It’s great for decorative, lightweight blankets.
- Granny Square Stitch: A traditional crochet pattern often used in blankets. It involves crocheting squares with chains and double-crochet stitches and then joining them together. It’s great for using up scrap yarn and for colorwork.
- Shell Stitch: This decorative stitch creates a fan-like or shell pattern. It typically adds a decorative border or creates a lacy, textured blanket.
- Bobble Stitch: This stitch creates a textured, 3D effect, making it perfect for tactile, cozy blankets. It involves making several double crochets into the same stitch and then joining them at the top.
- Chevron Stitch: The chevron stitch is a dynamic and visually striking choice for blankets, Known for its zigzag pattern. It’s a bit more advanced but offers a stunning result.
- Basketweave Stitch: This stitch mimics the weave of a basket, creating a textured fabric that looks intricate but is relatively easy to achieve. It’s great for a blanket with a rich, cozy feel.
- C2C (Corner-to-Corner) Stitch: This technique involves diagonally cropping small squares or tiles from one corner of the blanket to the other. It’s often used for graphghan designs, pixelating images, or patterns in the blanket.
Variations Of Alpine Stitch
The Alpine Stitch is beautifully textured, and there are several variations and related stitches that you can explore to add diversity to your crochet projects. Here are some of the notable variations:
- Extended Alpine Stitch: This variation involves extending the height of the front post double crochets (fpdc) to create a more pronounced ridged texture. It gives the blanket a more dramatic 3D effect.
- Alpine Stitch with Different Heights: By alternating the height of the stitches, such as using a combination of double crochets and treble crochets, you can add a unique rhythm to the texture of the stitch.
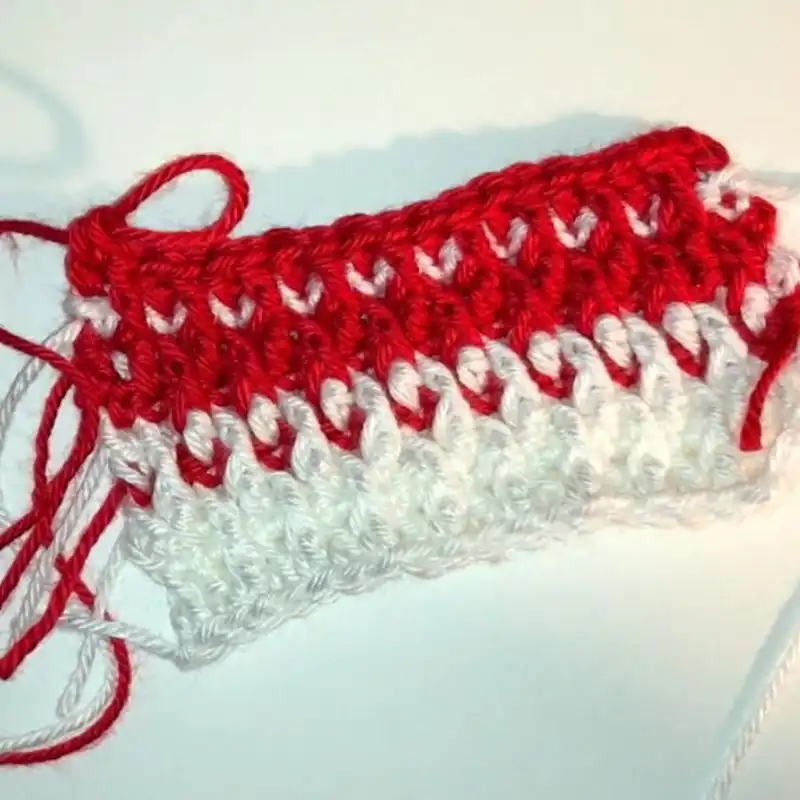
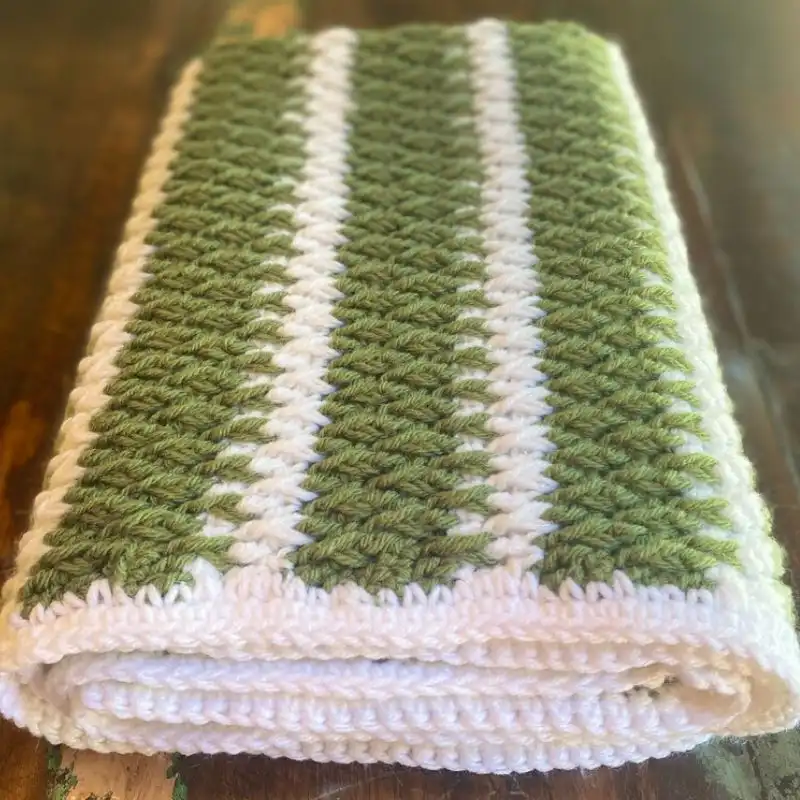
- Two-Color Alpine Stitch: Working each row in a different color adds a striking visual effect to the Alpine Stitch, highlighting the texture with contrasting hues.
- Alpine Stitch in the Round: Adapting the Alpine Stitch for projects worked in the round, like hats or cowls, can give a different perspective to the stitch pattern.
- Alpine Stitch with Variegated Yarn: Using variegated yarn can add a kaleidoscopic effect to the Alpine Stitch, with the textured ridges accentuating the color changes.
- Alpine Stitch with Bobbles or Puffs: Integrating bobbles or puff stitches at certain intervals can enhance the texture and add a playful touch to the Alpine Stitch pattern.
- Lacy Alpine Stitch: By incorporating more chains and open spaces between the stitches, you can create a lacy, airy version of the Alpine Stitch, suitable for lighter projects like shawls or summer blankets.
- Alpine Stitch Chevron: Adapting the Alpine Stitch into a chevron or ripple pattern can add waves of texture, making it great for Afghans or throws.
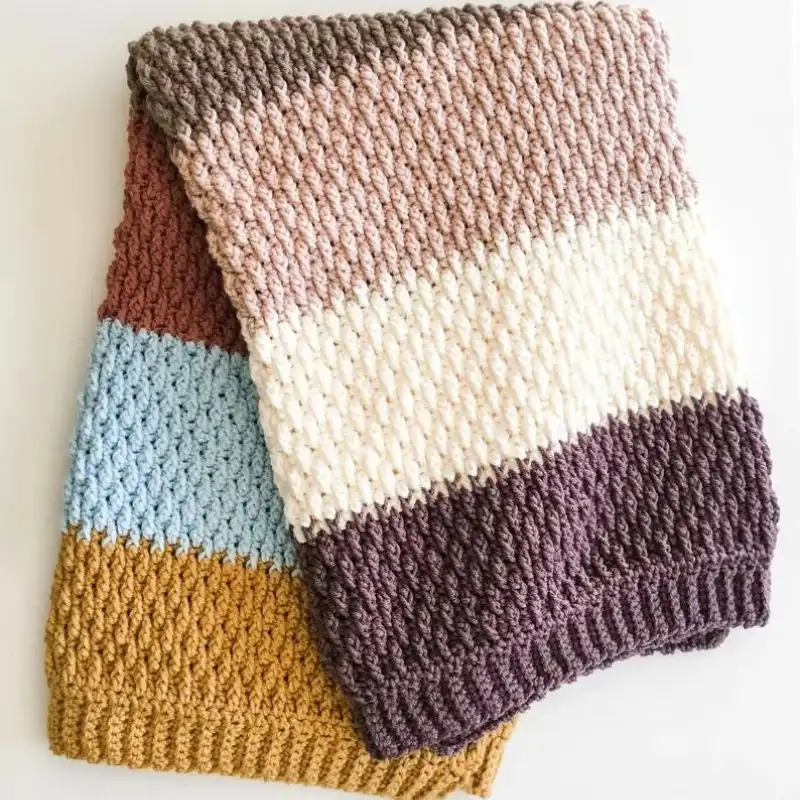
- Alpine Stitch Stripes: Creating stripes with the Alpine Stitch by switching stitches or colors after a set number of rows can give the blanket a modern, structured look.
- Alpine Stitch with Alternate Stitch Patterns: Mixing sections of Alpine Stitch with other stitch patterns (like granny squares or ripple stitches) in the same project can create a patchwork or sampler effect.
Do Alpine Stitch Blankets Use More Yarn Than Usual?
As an experienced crocheter, I can share that making an Alpine Stitch blanket generally uses more yarn than other stitches. The Alpine Stitch is known for its rich texture and depth, created through a combination of front post double crochet and standard double crochet stitches. This technique, which creates the beautiful, raised design that the Alpine Stitch is famous for, also means that more yarn is consumed to achieve that texture.
The amount of extra yarn needed can vary depending on a few factors:
- The size of the blanket
- The type of yarn used
- The individual’s crochet tension
Typically, textured stitches like the Alpine Stitch are more yarn-intensive than simpler ones like single or double crochet. The denser fabric created by the Alpine Stitch adds to the visual appeal and contributes to a heavier, warmer blanket.
How To Count The Alpine Stitch?
Counting stitches in the Alpine Stitch while crocheting a blanket is crucial for maintaining pattern consistency and achieving the desired size. The Alpine Stitch pattern typically involves a two-row repeat, creating its signature textured look. Here’s a guide on how to count your stitches effectively:
- Understand the Stitch Pattern: The Alpine Stitch is created by alternating single crochet (sc) and double crochet (dc) stitches. Often, a row of sc is followed by a row where dc stitches are worked into the stitches of the previous row, alternating with front post double crochet (fpdc) stitches worked around the dc stitches from the row below the last sc row.
- Counting the Foundation Chain: Count the number of chains in your foundation row. The Alpine Stitch generally requires an even number of chains.
- First Row (Single Crochet Row): The first row is usually a simple sc row. Count each sc as you work the row. The total number of sc stitches should match your foundation chain count (minus any turning chains, if applicable).
- Second Row (Alpine Stitch Row): You alternate between fpdc and dc in this row. Count each stitch carefully. The number of stitches in this row should be the same as in your sc row.
- Maintaining Stitch Count: As you continue, each sc row should have the same number of sc as the first row, and each Alpine Stitch row should maintain the alternating pattern without increasing or decreasing stitches.
- Edge Stitches: Pay attention to each row’s first and last stitches. These edge stitches are critical to keeping your edges straight and maintaining the correct stitch count.
- Using Stitch Markers: If you find it challenging to keep count, especially in large projects like blankets, use stitch markers. Place a marker at the beginning and end of each row or at regular intervals to make it easier to keep track.
- Checking Your Work: Periodically, lay your work flat and count the stitches in several rows to ensure consistency. Correcting a mistake after it’s made is easier than several rows later.
RELATED: 37 Brilliant Crochet Baby Yoda Patterns For Star Wars Fans Pattern
The Ideal Size For Alpine Stitch Blanket
When crocheting an Alpine Stitch blanket, you can create it in various sizes to suit different needs and preferences. Here’s a rundown of standard blanket sizes and considerations for each when using the Alpine Stitch:
- Baby Blanket: Typically measures around 28″ x 34″. This size is perfect for a crib or to swaddle a newborn. You’d want to ensure the stitch pattern is proportional to the smaller size, possibly using a lighter-weight yarn for the Alpine Stitch.
- Lapghan: Lapghans are slightly larger, usually around 36″ x 48″. Ideal for draping over the lap and legs when sitting, this size is excellent for a cozy, textural experience with the Alpine Stitch.
- Throw Blanket: A standard size for throw blankets is about 50″ x 60″. Throws are versatile and suitable for curling up on the sofa or adding an extra layer to a bed. The Alpine Stitch works wonderfully in this size, offering ample opportunity to display its texture.
- Twin Bed Blanket: Measuring roughly 66″ x 90″, this size fits a standard twin bed. It’s a significant project where the Alpine Stitch can shine, creating a stunning and warm bedspread.
- Full/Double Bed Blanket: Typically, these are around 80″ x 90″. A blanket of this size in the Alpine Stitch would be pretty luxurious and warm, ideal for colder climates or as a decorative bedspread.
- Queen Bed Blanket: These are often around 90″ x 100″. A queen-size Alpine Stitch blanket would be a substantial undertaking but a beautiful addition to any bedroom.
- King Bed Blanket: Measuring about 108″ x 100″, king-size blankets are the largest standard size. An Alpine Stitch blanket for a king bed would be a grand and impressive project, offering maximal warmth and style.
Essential Tools And Materials
To embark on the journey of creating an Alpine Stitch blanket, you’ll need a selection of tools and materials that are essential for ensuring a smooth and enjoyable crocheting experience. Here’s a list of what you’ll typically require:
- Yarn: The type of yarn you choose will significantly affect the texture and drape of your blanket. For the Alpine Stitch, a medium-weight yarn (like worsted or aran) is commonly used as it highlights the texture well. However, you can choose any yarn weight depending on the desired thickness and warmth of the blanket.
- Crochet Hook: The hook size should correspond with the yarn weight. For worsted-weight yarn, a hook size of 5.5mm (I-9) to 6.5mm (K-10.5) is usually suitable. Always check your gauge to ensure the correct hook size for your tension.
- Scissors: A sharp pair of scissors is essential for cutting the yarn when you finish a color or complete the project.
- Yarn Needle: A yarn or tapestry needle is necessary for weaving in ends once your blanket is completed. It gives your blanket a neat finish.
- Stitch Markers: These help mark the beginning of a row or certain stitches, especially if you are new to the Alpine Stitch or working on a large project.
- Measuring Tape: To measure the dimensions of your blanket as you go, ensuring you’re on track to achieve your desired size.
- Pattern or Instructions: Having a reliable pattern or set of instructions for the Alpine Stitch is crucial, especially if it’s your first attempt.
- Gauge Swatch Materials: Before starting your blanket, it’s wise to make a gauge swatch with your chosen yarn and hook to ensure that the size of your stitches matches what the pattern expects. This step is essential to ensure your blanket ends up the correct size.
- Blocking Tools (optional): Depending on the yarn you choose and your desired finish, you may need blocking mats and pins to shape and set your finished blanket.
- Comfortable Seating and Good Lighting: While not traditional tools, having a comfortable place to sit and good lighting can significantly enhance your crocheting experience, especially for a project as large as a blanket.
Glossary Of Crochet Alpine Stitches And Techniques
Creating an Alpine Stitch blanket involves a range of crochet stitches and techniques. Here’s a standard glossary that you’ll find helpful while working on this project:
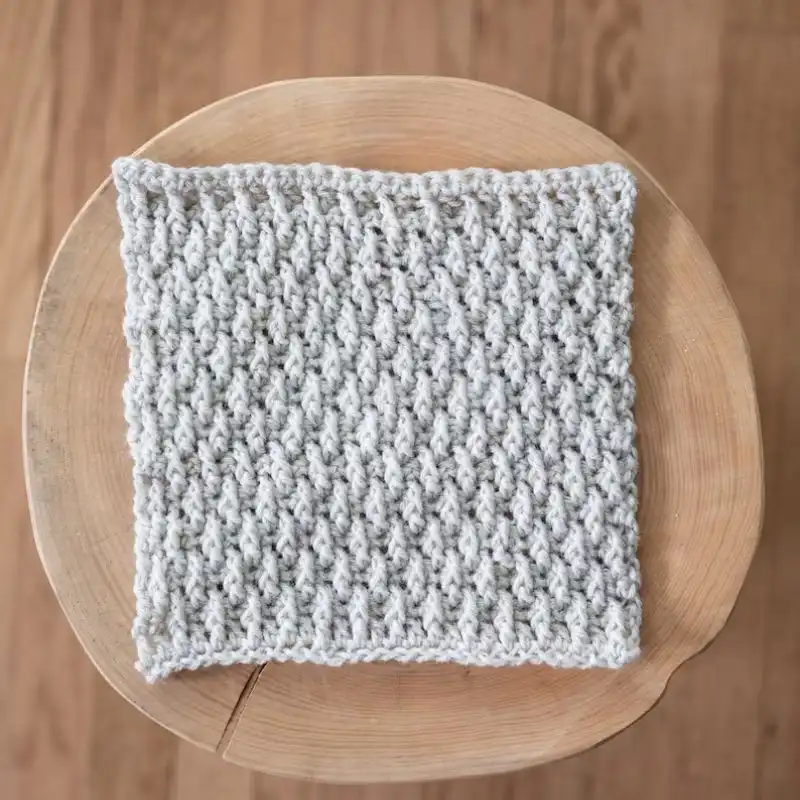
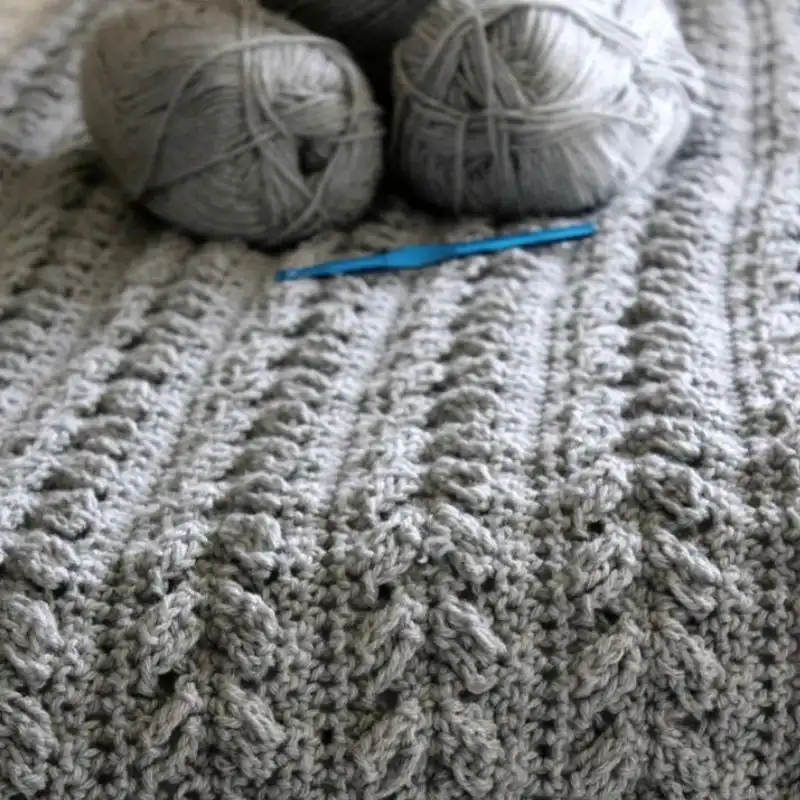
- Alpine Stitch: A textured crochet stitch created by alternating single crochet (sc) and double crochet (dc) rows, with front post double crochet (fpdc) stitches worked into the stitches of the previous double crochet row.
- Chain Stitch (ch): The most basic crochet stitches used to begin projects and create space within patterns.
- Single crochet (sc): A basic stitch that forms a tight, dense fabric. Insert hook, yarn over, pull up a loop, yarn over, and pull through both loops on the hook.
- Double Crochet (DC): A taller stitch than SC, creating a looser fabric. Yarn over, insert hook, yarn over, pull up a loop, yarn over, pull through two loops, yarn over, pull through remaining two loops.
- Front Post Double Crochet (fpdc): A dc worked around the post of the stitch below instead of into the top of the stitch, creating a raised effect. Yarn over, insert hook from front to back to front around the post of the stitch below, complete as a regular DC.
- Turning chain (tch): Chains made at the end of a row before turning your work. The number of chains depends on the height of the next row’s stitches.
- Slip stitch (sl st): Used to join stitches, finish off projects, or move the yarn without adding height. Insert hook, yarn over, pull through the stitch, and loop on the hook.
- Gauge: The number of stitches and rows per inch/cm. It is essential to ensure that the size of your finished project matches the pattern.
- Yarn Over (yo): Wrapping the yarn over the crochet hook to create stitches.
- Skip: A direction to miss one or more stitches or spaces, often used in pattern repeats.
- Back Loop Only (BLO): Crocheting into only the back loop of the stitch on the row below creates a ribbed texture.
- Front Loop Only (FLO): Similar to BLO, crocheting into only the front loop creates a ribbed texture.
- Stitch Marker: A tool used to mark certain stitches or places in your project, helpful in keeping track of stitch counts and pattern repeats.
- Weaving in Ends: Using a yarn needle to hide yarn tails in the completed work for a neat finish.
- Blocking: The process of wetting or steaming a finished crochet project and pinning it into shape until dry, used to even out stitches and improve the overall look.
Understand Crochet Stitches & Techniques
As a seasoned crocheter, I’ve learned that understanding crochet stitches and techniques begins with mastering the basics. Start by familiarizing yourself with the foundational stitches like the chain, single crochet, and double crochet. Practice these repeatedly until they feel natural. Reading patterns and watching tutorial videos can be immensely helpful. Pay attention to stitch anatomy; knowing where to insert your hook is crucial. Experiment with different yarns and hooks to understand tension. Remember, crochet is like a language; the more you practice and immerse yourself, the more fluent you become. Mistakes are part of learning, so be patient and enjoy the process!
Which Yarn Is Best For the Alpine Stitch Crochet Blanket?
As a crocheter who has worked extensively with the Alpine Stitch, I’ve found that the choice of yarn can significantly impact the texture and appearance of the finished blanket. Here are some yarn types that work well with the Alpine Stitch:
- Worsted Weight Yarn: This is my go-to for Alpine Stitch blankets. It’s thick enough to highlight the stitch’s texture yet not too bulky, making it ideal for a comfortable, medium-weight blanket. Acrylic, wool, or a blend are excellent choices in this category.
- Cotton Yarn: For a lighter blanket, especially good for warmer climates or as a summer throw, cotton yarn is excellent. It gives the stitches a crisp definition, which makes the Alpine pattern pop.
- Chunky Yarn: Chunky yarn is fantastic if you’re aiming for a cozy, plush blanket. It works quickly and beautifully, emphasizing the Alpine Stitch’s textured effect. However, it will make a heavier blanket.
- Merino Wool: For a luxurious, soft feel, merino wool is a fantastic option. It’s warm and comfortable, and the stitches look gorgeous in this high-quality yarn. It’s perfect for a unique, heirloom-quality blanket.
- Blended Yarns: Blends like wool-acrylic or cotton-bamboo can offer the best of both worlds – durability and ease of care with a touch of natural fiber, softness, and warmth.
- Variegated Yarns: These can create fascinating color effects in your blanket. However, be cautious, as highly variegated yarn might obscure the Alpine Stitch pattern. Subtle color changes are usually more effective.
How Much Yarn Do I Need To Crochet An Alpine Stitch Blanket?
Determining how much yarn you need for an Alpine Stitch blanket depends on several factors: the size of the blanket, the yarn weight, and your crochet tension.
From my experience, the Alpine Stitch, with its textured design, tends to use more yarn than simpler stitches. For a medium-sized throw blanket (about 50″ x 60″), I usually start with around 1,500 to 2,000 yards of medium-weight yarn, like worsted or aran.
If you’re using a lighter yarn, like DK or sport, you might need more yards, while a chunky yarn would require less. It’s always wise to check the yarn label for the recommended yardage for a blanket and then add a bit extra, considering the Alpine Stitch’s density.
Additionally, your tension plays a role. If you crochet tightly, you might need more yarn; if your stitches are looser, you could use less. I always buy an extra skein or two, just to be safe, as running out of yarn mid-project is a hassle, especially if dye lots are involved.
Is Alpine Stitch Blanket Beginner Friendly?
As an experienced crocheter, I believe the Alpine Stitch blanket can be tackled by beginners ready to step up their game. While the stitch involves more complexity than basic stitches like single or double crochet, it’s a beautiful learning opportunity.
The repetitive nature of the stitch pattern helps in building skill and confidence. An Alpine Stitch blanket can be a rewarding project for a beginner eager to learn and patient with their progress.
It’s about taking it one stitch at a time, and before you know it, you’ll have a beautiful, textured blanket to show for your efforts.
How To Crochet An Alpine Stitch Blanket?
Skill Level: Intermediate
Materials Needed
- Medium-weight (worsted or aran) yarn
- Crochet Hook 5.5mm (I-9) to 6.5mm (K-10.5)
- Scissors
- Yarn Needle
- Stitch Markers (optional)
Instructions
Foundation Chain: Make a foundation chain. The number of chains should be an even number that achieves your desired width.
Row 1 (Single Crochet Row): Start with a single crochet (sc) in the second chain from the hook and sc across each chain. Turn your work.
Row 2 (Alpine Stitch Start):
- Chain 2 (counts as your first double crochet, DC).
- Skip the next stitch, make a front post double crochet (fpdc) around the next stitch (from the row below the sc row), dc in the next stitch; repeat from * to * across, ending with a dc in the last stitch.
- Turn your work.
Row 3: Chain 1 (does not count as a stitch), sc in each stitch across the row. Turn your work.
Row 4: Chain 2 (counts as first dc), fpdc around the next dc from two rows below, dc in next stitch; repeat from * to * across, ending with a dc in the last stitch. Turn your work.
Repeat Rows 3 and 4: Continue repeating these two rows. The fpdc stitches should always be worked around the dc stitches from two rows below, creating the alpine “peaks.”
Continue to Desired Length: Repeat these rows until your blanket reaches the desired length.
Final Row: Finish with a sc row to mirror the beginning of the blanket.
Weaving in Ends: Use a yarn needle to weave in all loose ends for a neat finish.
Blocking (Optional): Depending on your yarn and desired finish, you might block your blanket to even out stitches and give it a professional look.
Tips
- Always count your stitches at the end of each row to ensure consistency.
- Use stitch markers if you find it helpful to mark the start and end of your rows.
- Make a gauge swatch first to ensure your hook size and yarn choice achieve the desired look and dimensions.
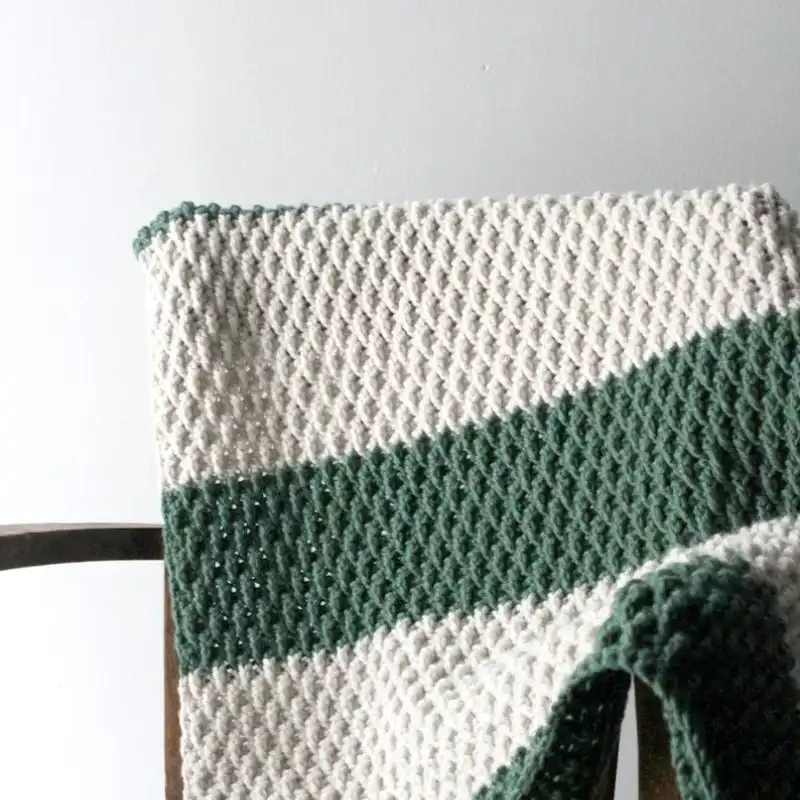
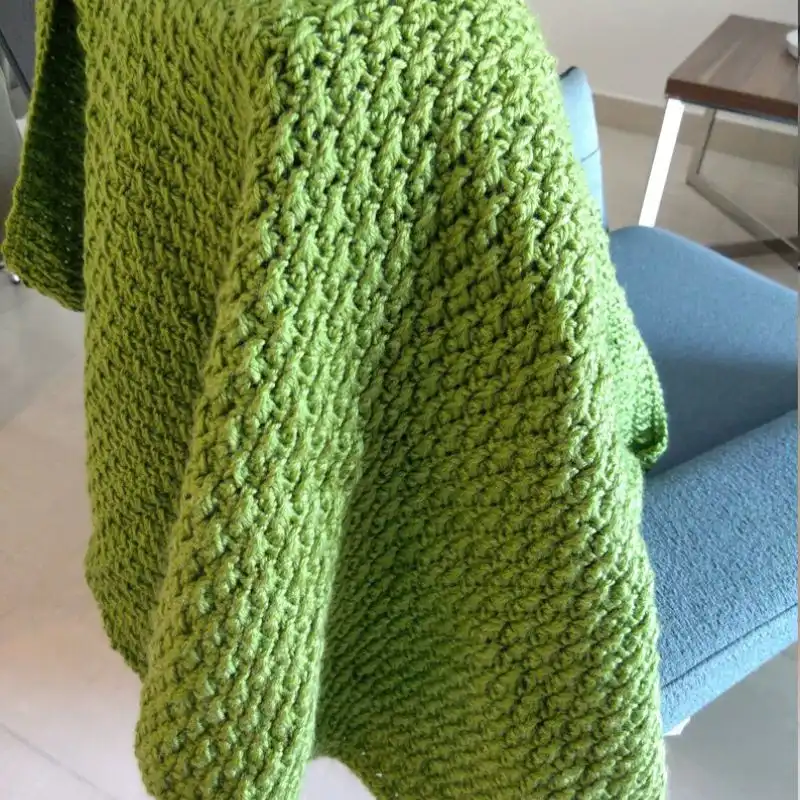
22 Alpine Stitch Blanket Crochet Patterns
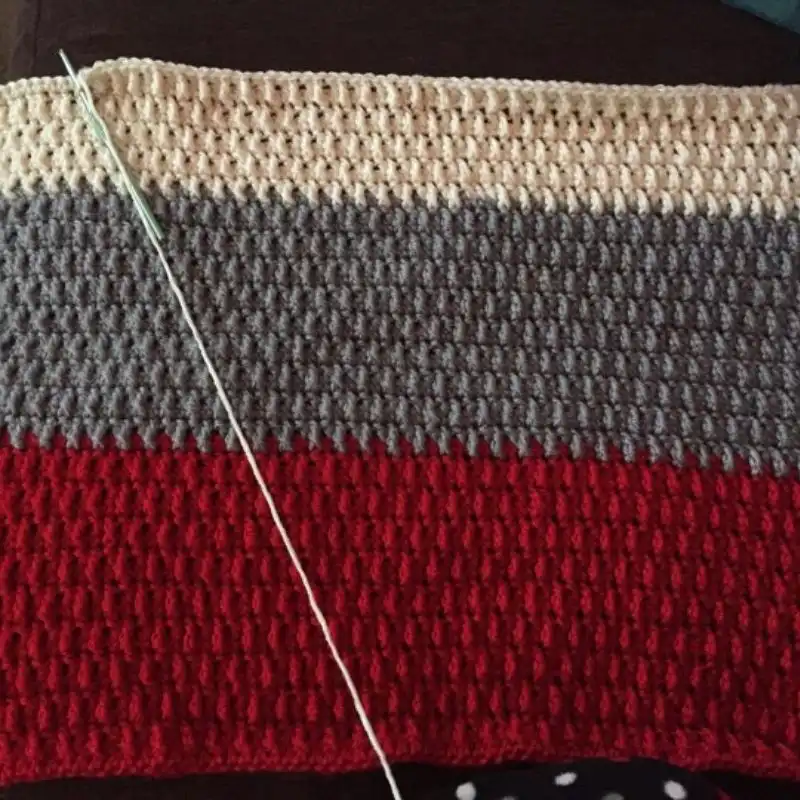
1. Autumn Alpine Throw
Embrace the warmth and beauty of autumn with the Autumn Alpine Throw crochet pattern. This cozy blanket features the intricate Alpine stitch, capturing the season’s essence with its textured design. The rich colors and soft yarn make it a perfect companion for chilly evenings, adding a touch of comfort and style to your living space.
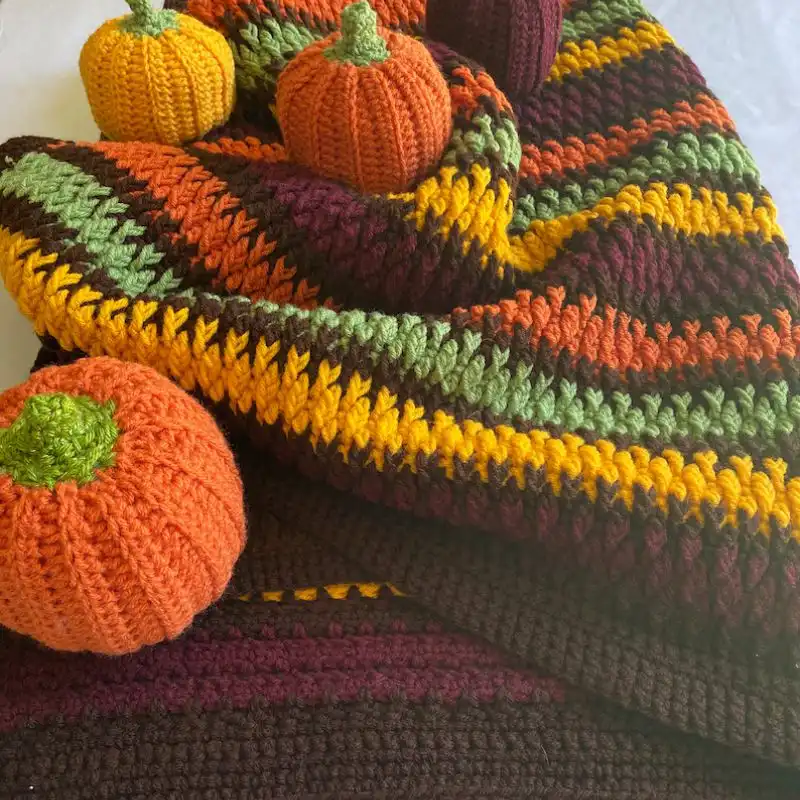
Suggested Yarn: Red Heart Super Saver
Difficulty Level: Intermediate
Yarn Weight: Worsted
Crochet Hook: 5.5 mm (I-9)
2. Alpine Stitch Blanket Pattern
Indulge in the soothing hues of a latte with the Latte Delight Crochet Blanket pattern. This delightful blanket showcases the Alpine stitch in a palette inspired by comforting coffee tones. The stitch’s texture and warm colors create a cozy and inviting atmosphere, making it an ideal piece to snuggle up with on lazy afternoons.
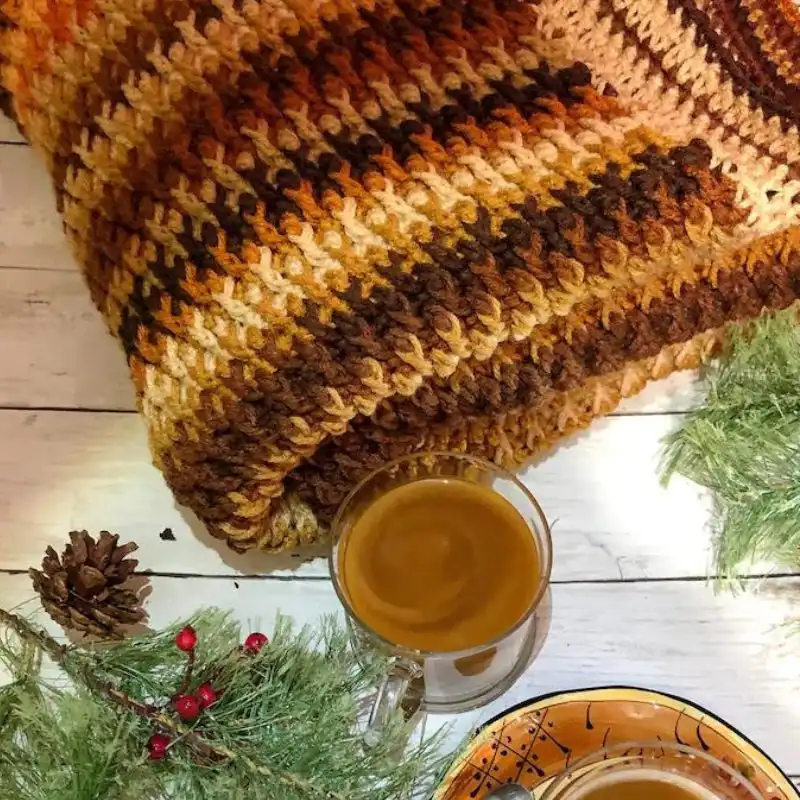
Suggested Yarn: Alize sekerim - Acrylic yarn
Difficulty Level: Intermediate
Yarn Weight: Aran
Crochet Hook Size: 6.0 mm (J-10)
3. Gradient Alpine Stitch Blanket
Experience the mesmerizing transition of colors with the Gradient Alpine Stitch Blanket crochet pattern. This eye-catching blanket uses the Alpine stitch to create a beautiful gradient effect, making it a standout piece in any room. Dive into the world of color and texture with this unique and visually striking crochet project.
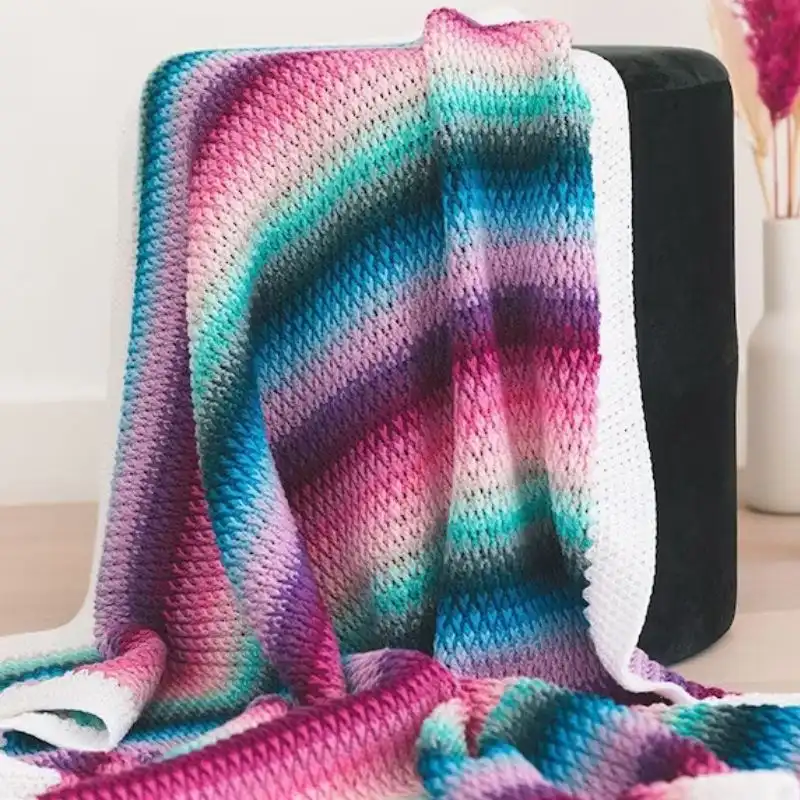
Suggested Yarn: Lion Brand Mandala
Difficulty Level: Intermediate
Yarn Weight: Light (3)
Crochet Hook: 4.0 mm (G)
4. Easy Alpine Stitch Blanket
Perfect for beginners and experienced crocheters, the Easy Alpine Stitch Blanket pattern offers a simplified approach to the beloved Alpine stitch. This blanket is an excellent introduction to the technique, providing a relaxing and enjoyable project that results in a textured and visually appealing finished piece.
Suggested Yarn: Caron Simply Soft
Difficulty Level: Beginner
Yarn Weight: Medium (4)
Crochet Hook: 5.0 mm (H)
5. Revised & Tested Alpine Blanket
Trust in the reliability of the Revised and tested Alpine Blanket crochet pattern. This meticulously crafted design ensures a smooth and enjoyable crocheting experience. With revisions and thorough testing, this blanket promises the satisfaction of creating a beautiful Alpine stitch piece and the confidence that comes with a well-crafted pattern.
Suggested Yarn: Stylecraft Special DK
Difficulty Level: Advanced
Yarn Weight: Light (3)
Crochet Hook: 3.5 mm (E)
6. Traveling Crochet Afghan Square
Take your crochet journey to new heights with the Traveling Crochet Afghan Square pattern. This square features the Alpine stitch and adds texture and charm to your Afghan project. The versatile design allows you to create a stunning and cohesive blanket while enjoying the process of crafting individual squares on the go.
Suggested Yarn: Red Heart With Love
Difficulty Level: Intermediate
Yarn Weight: Aran (4)
Crochet Hook: 5.5 mm (I-9)
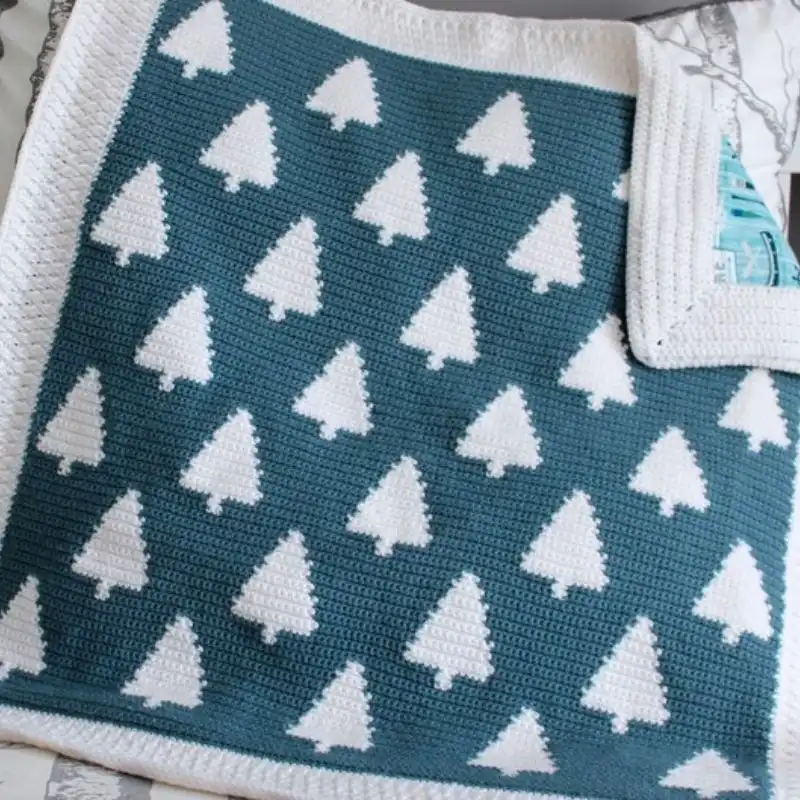
7. The Alpine Stitch Baby Blanket
Welcome the little ones with The Alpine Stitch Baby Blanket crochet pattern. Soft, textured, and made with love, this blanket is perfect for warmly wrapping newborns. The Alpine stitch adds a gentle touch, making it a delightful and practical gift for baby showers or celebrating a new family addition.
Suggested Yarn: Baby Bee Sweet Delight
Difficulty Level: Beginner
Yarn Weight: Light (3)
Crochet Hook: 4.0 mm (G)
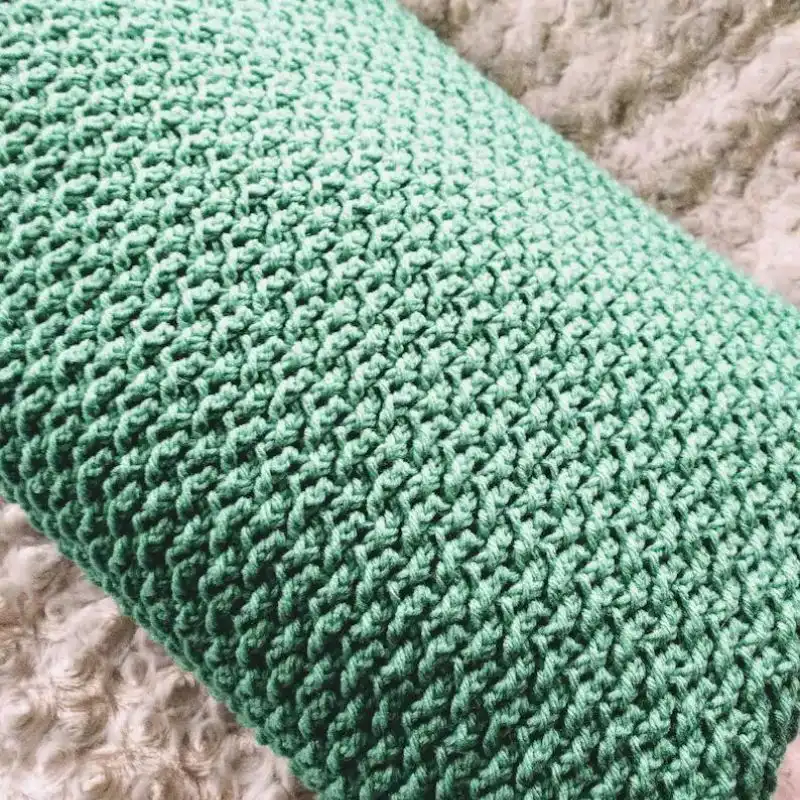
8. Textured Alpine Stitch Blanket
Elevate your crochet creations with the Textured Alpine Stitch Blanket pattern. The Alpine stitch, known for its intricate texture, takes center stage in this cozy and visually appealing blanket. Wrap yourself in comfort and style as you showcase the beauty of textured stitches in your home decor.
Suggested Yarn: Lion Brand Wool-Ease Thick & Quick
Difficulty Level: Intermediate
Yarn Weight: Super Bulky
Crochet Hook: 9.0 mm (M/N)
9. Colorful Alpine Blanket
Infuse your space with vibrant hues and textured beauty using the Colorful Alpine Blanket crochet pattern. This cheerful blanket celebrates the Alpine stitch in a palette of lively colors, creating a visually stunning and lively addition to any room. This colorful and inviting crochet project brings joy and warmth to your surroundings.
Suggested Yarn: Scheepjes Colour Crafter
Difficulty Level: Advanced
Yarn Weight: Aran (4)
Crochet Hook: 5.0 mm (H)
10. Alpina Knit-Look Cabled Blanket
Enjoy the classic look of cables with a crochet twist in the Alpina Knit-Look Cabled Blanket pattern. This unique design combines the Alpine stitch with the appearance of knit cables, resulting in a sophisticated and visually exciting blanket. Elevate your home decor with the timeless charm of this crochet project.
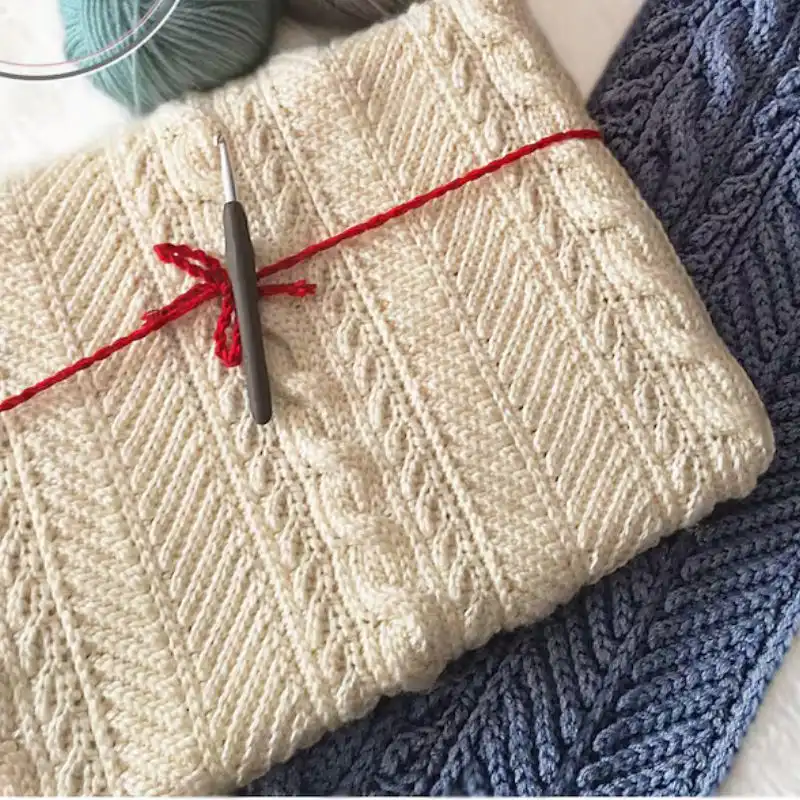
Suggested Yarn: Lion Brand Vanna's Choice
Difficulty Level: Intermediate
Yarn Weight: Medium (4)
Crochet Hook: 6.0 mm (J)
11. Alternate Alpine Stitch Afghan
Explore a new twist on tradition with the Alternate Alpine Stitch Afghan crochet pattern. This innovative design brings a fresh perspective to the classic Alpine stitch, offering a unique and engaging project for crocheters looking to add a touch of creativity to their afghan collection.
Suggested Yarn: Bernat Premium
Difficulty Level: Intermediate
Yarn Weight: Worsted
Crochet Hook: 5.5 mm (I-9)
12. Alpine Forest Blanket
Immerse yourself in the serene beauty of nature with the Alpine Forest Blanket crochet pattern. This cozy and textured blanket, featuring the Alpine stitch, evokes the tranquility of a forest, making it a perfect addition to your home decor. Bring the outdoors in with this inviting and nature-inspired crochet project.
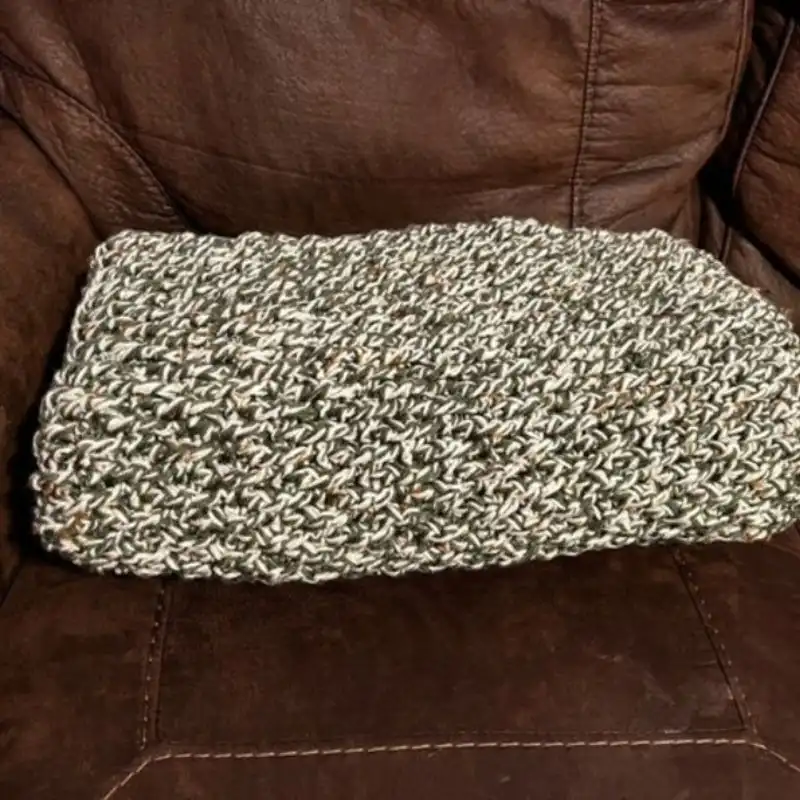
Suggested Yarn: Yarn Bee Sugarwheel
Difficulty Level: Beginner
Yarn Weight: Medium (4)
Crochet Hook: 6.0 mm (J)
13. Alpine Forest Baby Blanket
Wrap your little one in the comfort of nature with the Alpine Forest Baby Blanket crochet pattern. The softness of the Alpine stitch, combined with gentle hues, creates a soothing and delightful blanket for the family’s newest member. This baby blanket is both practical and visually enchanting.
Suggested Yarn: Bernat Softee Baby
Difficulty Level: Beginner
Yarn Weight: Light (3)
Crochet Hook: 4.0 mm (G)
14. Alpine Afghan Throw
Elevate your lounging experience with the Alpine Afghan Throw crochet pattern. The Alpine stitch takes center stage in this versatile throw, adding texture and warmth. This afghan throw is a stylish and functional addition to your living space, perfect for draping over your sofa or as an extra layer on chilly evenings.
Suggested Yarn: Red Heart Soft
Difficulty Level: Intermediate
Yarn Weight: Aran (4)
Crochet Hook: 5.5 mm (I-9)
15. Mandala Alpine Stitch Blanket
Combine the beauty of mandalas with the elegance of the Alpine stitch in the Mandala Alpine Stitch Blanket crochet pattern. This visually stunning blanket showcases the intricate detail of the Alpine stitch within a mandala framework, creating a captivating and artistic piece for your home.

Suggested Yarn: Lion Brand Mandala
Difficulty Level: Intermediate
Yarn Weight: Light (3)
Crochet Hook: 4.0 mm (G)
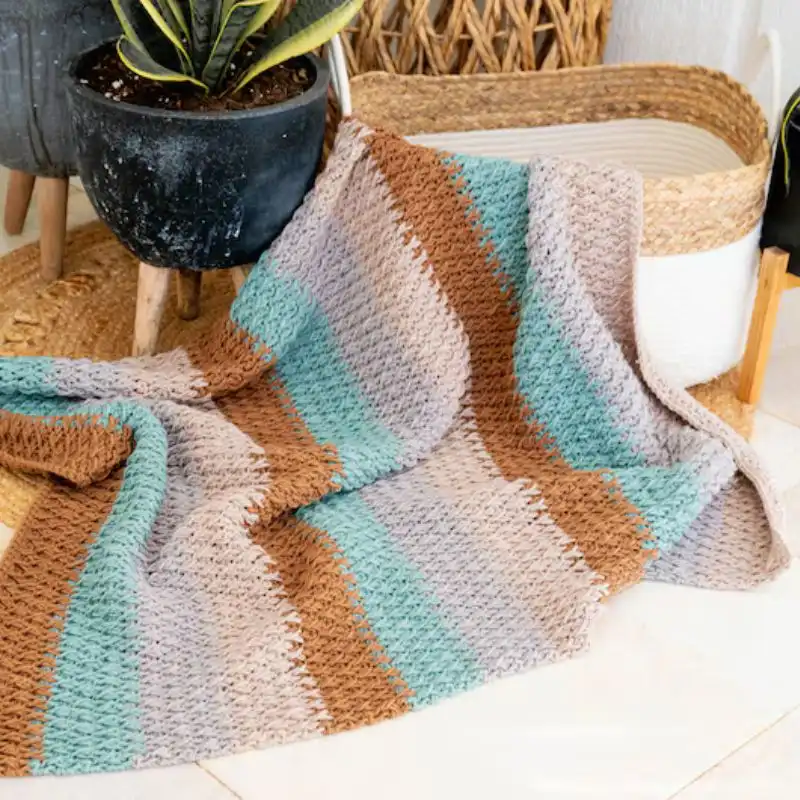
16. Stripe Crochet Blanket
Embrace the simplicity and charm of stripes with the Stripe Crochet Blanket pattern. Featuring the Alpine stitch, this blanket combines the timeless appeal of stripes with the textured beauty of the stitch, resulting in a classic and stylish addition to your home decor.
Suggested Yarn: Stylecraft Special DK
Difficulty Level: Intermediate
Yarn Weight: Light (3)
Crochet Hook: 4.5 mm (7)
17. Impressive Alpine Stitch Blanket
Make a statement with the Impressive Alpine Stitch Blanket crochet pattern. This eye-catching design showcases the Alpine stitch in all its intricate glory, creating a visually stunning and impressive blanket. Elevate your crochet skills while adding a touch of sophistication to your home.
Suggested Yarn: Caron Cakes
Difficulty Level: Advanced
Yarn Weight: Medium (4)
Crochet Hook: 5.0 mm (H)
18. Waterfall Alpine Blanket
Capture the fluidity and grace of a waterfall with the Waterfall Alpine Blanket crochet pattern. The Alpine stitch creates a cascading texture reminiscent of flowing water, making this blanket a serene and elegant addition to your home decor. This captivating crochet project brings a touch of nature’s beauty into your space.
Suggested Yarn: Bernat Blanket Yarn
Difficulty Level: Intermediate
Yarn Weight: Super Bulky
Crochet Hook: 9.0 mm (M/N)
19. Alpine Cable Blanket
Combine the timeless appeal of cables with the textured charm of the Alpine stitch in the Alpine Cable Blanket crochet pattern. This sophisticated design brings a knit-inspired look to your crochet creations, adding a touch of classic elegance to your home.
20. Snow Topped Alpine Sofa Throw
Bring the coziness of winter into your living room with the snow-topped Alpine Sofa Throw crochet pattern. The Alpine stitch creates a textured landscape reminiscent of a snow-capped alpine setting. This throw is warm and inviting and adds a touch of seasonal charm to your home.
Suggested Yarn: Red Heart With Love
Difficulty Level: Beginner
Yarn Weight: Aran (4)
Crochet Hook: 5.5 mm (I-9)
21. Larkin Baby Blanket
Welcome the newest addition to the family with the Larkin Baby Blanket crochet pattern. This soft and delicate blanket, featuring the Alpine stitch, is perfect for wrapping little ones in warmth and comfort. The gentle texture and soothing colors make it an ideal gift for baby showers or welcoming a newborn.
Suggested Yarn: Bernat Baby Sport
Difficulty Level: Beginner
Yarn Weight: Sport (2)
Crochet Hook: 4.0 mm (G)
22. Rosie Alpine Blanket
Infuse a touch of romance into your home with the Rosie Alpine Blanket crochet pattern. This elegant design showcases the Alpine stitch in a palette of soft and feminine hues, creating a visually charming and cozy blanket. Add a touch of romance to your decor with this lovely crochet project.
Suggested Yarn: Paintbox Yarns Simply Aran
Difficulty Level: Intermediate
Yarn Weight: Aran (4)
Crochet Hook: 5.0 mm (H)
Tips & Tricks To Avoid Crochet Mistakes
Crocheting an Alpine Stitch blanket is a delightful project, but it can be prone to mistakes like any intricate work. Here are some tips and tricks to help you avoid common errors:
- Gauge Check: Before starting your blanket, make a gauge swatch. It ensures your stitches are the correct size and your blanket will be the dimensions you want.
- Count Your Stitches: At the end of each row, count your stitches. Consistent stitch counts are crucial for maintaining the pattern integrity.
- Use Stitch Markers: Place stitch markers at the beginning and end of your rows, especially in the Alpine Stitch pattern rows. It helps in keeping track of where each row starts and ends.
- Keep tension Consistent: Work on maintaining an even tension throughout your project. Inconsistent tension can lead to uneven stitches and a wobbly edge.
- Read the pattern Thoroughly: Before starting, read through the entire pattern. Understanding the pattern flow can help prevent mistakes.
- Use Lifelines: If you’re worried about making a mistake, thread a contrasting piece of yarn through a row of stitches. If you make a mistake, you can easily return to the lifeline without losing all your work.
- Avoid Rushing: Take your time with each stitch, especially the front post double crochets (fpdc), which are vital in Alpine Stitch. Rushing can lead to missing or adding stitches.
- Regular Breaks: Taking breaks can help reduce fatigue, often leading to mistakes.
- Check Your Work Regularly: Lay your work flat every few rows to check for any noticeable errors or inconsistencies in your stitching.
- Practice New Stitches Separately: If you’re new to any of the stitches used in the Alpine Stitch, practice them separately before starting your blanket.
- Maintain Good Lighting: Crochet in a well-lit area to see your stitches and catch any errors early on.
- Stay Organized: Keep your work area and materials organized to avoid losing crochet hooks, stitch markers, or pattern instructions.
- Seek Help If Needed: Don’t hesitate to look up tutorials or ask for help in crocheting communities if you are stuck.
- Enjoy the Process: Remember, crocheting should be enjoyable. Don’t stress over mistakes; they are a part of the learning process.
How Do You Block The Alpine Stitch Crochet Blanket?
Blocking your Alpine Stitch Crochet Blanket can significantly enhance its appearance, making the stitches more even and defining the texture. Here’s a step-by-step guide to blocking your blanket:
Gather Materials
- Blocking mats or a clean, soft surface like a mattress or layered towels.
- Rust-proof pins.
- A measuring tape or ruler.
- A spray bottle with water or a basin for soaking, depending on the method you choose.
Choose Your Blocking Method
- Wet Blocking: Soak the blanket in lukewarm water, gently squeeze out excess water (don’t wring), then proceed to pin.
- Steam Blocking: Pin the blanket first, then use a steam iron or a steamer, hovering over the fabric without touching it.
Lay Out the Blanket
- Spread your blanket on the blocking mats or prepared surface. Gently stretch it out to its desired dimensions.
Measuring and Pinning
- Use the measuring tape to ensure the blanket is the correct size and shape.
- Start pinning at the corners and then along the edges, maintaining even tension. For the Alpine Stitch, be careful not to overstretch the textured stitches.
Dampening the blanket (for wet blocking)
- If you haven’t soaked the blanket, use a spray bottle to dampen it evenly.
Steam the blanket (for steam blocking)
- Carefully hover a steam iron or steamer over the blanket if using steam blocking. The steam will relax the fibers and set the stitches. Avoid pressing down on the textured stitches.
Let It Dry
- Leave the blanket pinned in place until it is scorched. Depending on the environment and yarn type, it can take several hours to a day.
Remove the Pins
- Once the blanket is dry, carefully remove the pins.
Final Touches
- Gently pat the blanket into shape if needed. If any edges curl or stitches look uneven, light hand smoothing can help.
Suggestions To Add Style & Personal Touch
Adding style and personal touches to your Alpine Stitch blanket can transform it into a unique and cherished item. Here are several suggestions to infuse your blanket with individuality and flair:
- Color Choices: Select colors that reflect your style or match the décor of the room where the blanket will be used. Consider ombre effects, gradient color schemes, or bold, contrasting colors to make the texture pop.
- Yarn Texture: Play with different yarn textures. A silky, shiny yarn can give a luxurious feel, while a woolly, rustic yarn might suit a more traditional look.
- Border Details: Add a decorative border to your blanket. Simple scallops, intricate lace patterns, or a contrasting color block border can dramatically change the look.
- Appliques and Embellishments: Sew on appliques like flowers, stars, or hearts. Add tassels, pom-poms, or fringe along the edges for a playful touch.
- Varying Stitch Heights: For an adventurous twist, incorporate rows of varying stitch heights (like tall treble crochets or tiny slip stitches) between the standard Alpine Stitch pattern for a unique texture.
- Integrate Different Stitches: Mix in other stitch patterns at the beginning, end, or even in the middle of your blanket for a patchwork effect.
- Personalized Tags: Add a custom tag with your name, a special message, or the recipient’s name. It can be exceptional if the blanket is a gift.
- Heirloom Quality Finishes: Use high-quality, durable yarn to create a blanket that can be passed down through generations.
- Themed Designs: If the blanket is for a special occasion or specific individual, incorporate elements that reflect the theme, such as sports team colors, baby-friendly colors, or holiday themes.
- Experiment with Size and Shape: Instead of a traditional rectangular shape, try a square, circular, or hexagonal blanket.
- Joining Techniques: If your blanket is made of motifs (like granny squares), the technique you use to join them can add style. Experiment with a flat join, whipstitch, or a decorative crochet join.
- Photo or Memory Blanket: Convert a memorable photo into a pixelated design and recreate it within your blanket using the C2C (corner-to-corner) technique.
RELATED: 36 Stylish Cat Collar And Accessory Designs For Crocheting Cat Patterns
Wash & Care Instructions
Taking proper care of your crochet blanket ensures its longevity and durability. Here are the wash and care instructions you should follow:
Check the Yarn Label: Always check the care instructions on your yarn label before washing. Different fibers have different care requirements.
Pre-Wash Care: If your blanket has loose ends, weave them securely. Check for any damage or loose stitches and repair them to prevent further unraveling during washing.
Machine Washing (If Applicable): Use a gentle cycle with cold water if your blanket is made from machine-washable yarn. Placing the blanket in a laundry bag or pillowcase is best to prevent snagging. Use a mild detergent and avoid bleach.
Hand Washing:
- For yarns that require hand washing, fill a basin with cold water and add a gentle wool wash.
- Submerge the blanket and gently agitate it with your hands.
- Let it soak for 15 minutes, then rinse thoroughly with cold water.
Drying: Never wring out a crochet blanket, as this can distort the stitches. Instead, gently squeeze out the excess water. Lay the blanket flat on a clean, dry towel for best results. Roll up the towel with the blanket inside to absorb more water, then unroll and reshape the blanket. Dry it flat on a fresh towel or a drying rack, away from direct sunlight and heat. It helps maintain the shape and prevents shrinking.
Avoiding the Dryer: Unless the yarn label says explicitly it’s dryer-safe, avoid using a dryer, as the heat can damage the fibers, cause shrinking, or affect the blanket’s shape.
Regular Maintenance: You can keep your blanket fresh between washes by airing it out occasionally. If it’s not heavily soiled, a good airing is often sufficient.
Storage: Store the blanket in a cool, dry place. Avoid plastic bags; use a cotton bag wrapped in acid-free tissue in a storage box. It allows the fibers to breathe and prevents moisture build-up, which can lead to mildew.
Dealing with Pilling: If your blanket starts to pill, use a fabric shaver or a razor gently to remove the pills. Be careful not to catch the yarn with sharp edges.
Repairs: If your blanket becomes damaged, repair it promptly to prevent further unraveling or damage.

A Quick Recap
This article delved into the Alpine Stitch, a popular crochet technique ideal for blankets due to its unique texture and warmth.
We covered essential aspects such as the materials and tools needed, step-by-step instructions for creating an Alpine Stitch blanket, and tips for avoiding common crochet mistakes.
Additionally, we explored various ways to personalize your blanket, including color choice and embellishments, and provided detailed wash and care instructions to ensure longevity.
Finally, we looked at several Alpine Stitch variations, offering opportunities to experiment and add creativity to your crochet projects, making each piece uniquely yours.
Frequently Asked Questions
What Kind Of Stitches Are Used In An Alpine Stitch?
The alpine stitch comprises chain stitches, single crochets, and double crochet stitches.
Make a slipknot and plenty of 2 and 1 chain stitches to start an alpine stitch. The first row is comprised of single crochets. Once you have your basis, the alpine stitch will require all kinds of double crochet stitches, mainly front post double crochet.
How Do You Make The Twisted Points Of The Alpine Stitch?
To make the twisted points of the alpine stitch, you will need front post stitches. These are very similar to regular stitches, but you go around instead of going through the top of the previous stitches.
What To Do If Your Crochet Blanket Is Curling?
You can do a few things if you notice your crochet blanket is curling. You can adjust your tension by using a bigger hook or replacing a front post double crochet with a front post treble crochet. Alternatively, you can finish the blanket and block it once it’s complete.
How Do I Start An Alpine Stitch Blanket?
Begin with a foundation chain of an even number, then follow with a row of single crochet. The Alpine Stitch pattern starts from the second row and involves alternating rows of single crochet and a combination of double crochet and front post double crochet.
What Crochet Hook Size Should I Use For An Alpine Stitch Blanket?
The hook size depends on the yarn weight. A 5.5mm (I-9) to 6.5mm (K-10.5) hook is typically suitable for medium-weight yarns. Always check your gauge to ensure the correct size.
Can I Make An Alpine Stitch Blanket With Chunky Yarn?
Yes, chunky yarn can be used for an Alpine Stitch blanket. It will create a thicker, cozier texture but may require fewer stitches and rows due to the larger yarn size.
How Do I Keep The Edges Of My Alpine Stitch Blanket Straight?
Ensure you’re counting your stitches accurately in each row and not accidentally adding or skipping stitches. Also, using a border can help to straighten and stabilize the edges.
Is Blocking Necessary For An Alpine Stitch Blanket?
Blocking isn’t always necessary but can enhance the appearance of your blanket, especially if it’s made of natural fibers. It helps to align your stitches, making the texture more pronounced.
How Long Does It Take To Crochet An Alpine Stitch Blanket?
The time it takes can vary widely based on the blanket’s size, the pattern’s complexity, the yarn weight, and individual crochet speed. A medium-sized blanket can take several weeks to a few months.
Can I Modify The Alpine Stitch Pattern To Make A Baby Blanket?
Absolutely! To make a baby blanket, you can simply adjust the starting chain number for a smaller size and choose a softer, baby-friendly yarn. Remember the texture and choose a gentle, gentle yarn for sensitive skin.

- 25 Delightful Crochet Jellyfish Patterns For Sea Lovers - April 17, 2024
- 75 Free Lovely Crochet Sweater Patterns (With Pictures) - February 9, 2024
- 50 Free Crochet Blanket Patterns For A Cozy Home - January 22, 2024